Introduction
I try to use Sharperlight XERO datamodel to sync data from XERO Accounting Software.

What I need are;
- XERO Developer Account
- XERO App (Client ID, Client Secret and Redirect URI)
- Sharperlight
- Sharperlight XERO Datamodel
- Micorosoft SQL Database (SQL Express is also ok)
- Setup Guide
I think that's all so let's start setting up one by one.
Setup
XERO Developer Account
Start from here
I sign up as I don’t have a developer account. If you have the one, please just login with your account.

XERO App
When I login to my account, I am taken to this page. I click New app button to start creating my own XERO application.

The page shown below is displayed.

I set App name, Company or application URL and Redirect URI.
Redirect URI I entered is used when accessing to XERO API later so take a memo of it.
Click Create app button to create it.
I am taken to this page.
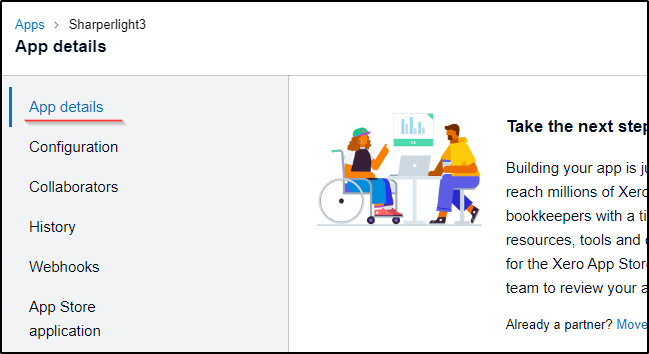
I can see what I entered when I created this App with App details from the menu on the left.

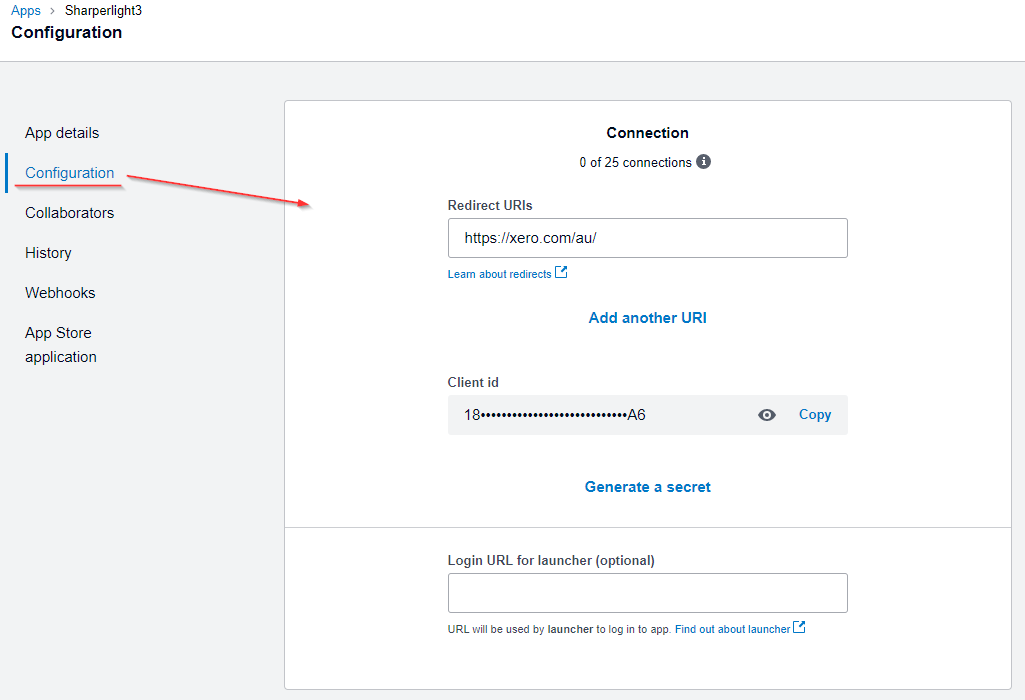
I move to Configuration I can get all information for accessing to the API from here.
They are Redirect URI, Client ID and Client Secret you can generate.
We need to keep those 3 items in a safe place for further use.
Sharperlight
I have Sharperlight installed on my PC so skip it.
FYI: Installation – Quick Guide
Sharperlight XERO Datamodel
This is the core object required I need to pull data from XERO API with Sharperlight.
I can download SLXERO.meta from here
Installation of the datamodel
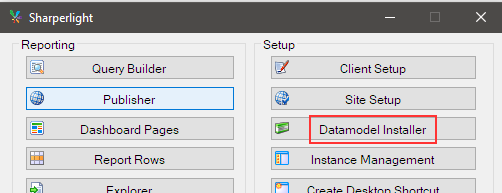
Go for Sharperlight Application Menu, and select Datamodel Installer.
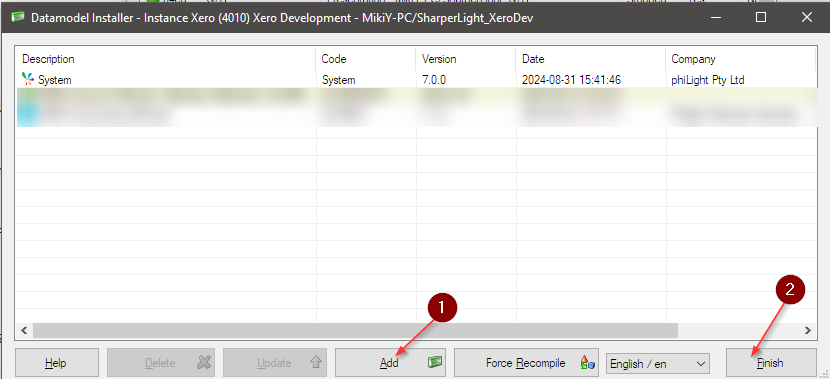
Once it is started, use Add button and browse the downloaded datamodel meta file to import it.
Click Finish button to close. It kicks in for compiling the datamodel.
Microsoft SQL Database
Sharperlight System database has to be in Microsoft SQL Server so it should be already there as I have Sharperlight installed already.
Let's open SQL Management Studio and go for the database server.
Create an empty database for XERO like this. The database name is whatever you want.

Making the connection between Sharperlight and the local XERO database
Sharperlight will communicate with the local XERO database via the XERO datamodel.
Open Sharperlight Client Setup.
Configure the database connection details for XERO datamodel.
Make sure the details are right with Test button.

Making the connection between Sharperlight and XERO API
Sharperlight will also communicate with the XERO API via the XERO datamodel.
When you have e.g. 5 organisations, you have to repeat the following steps in this section 5 times to register all 5 organisations to your XERO App.
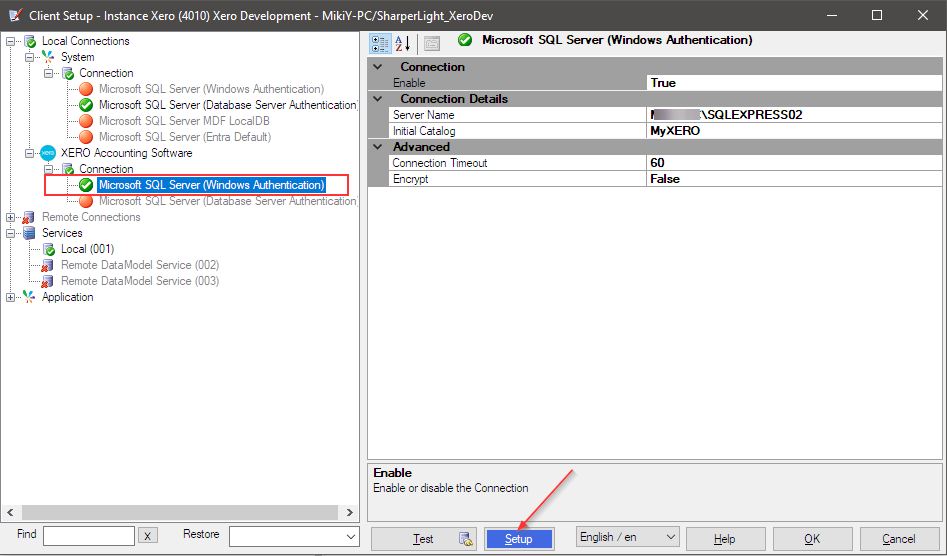
Open Sharperlight Client Setup.
Choose the database connection for XERO Accounting Software.
Click Setup button.
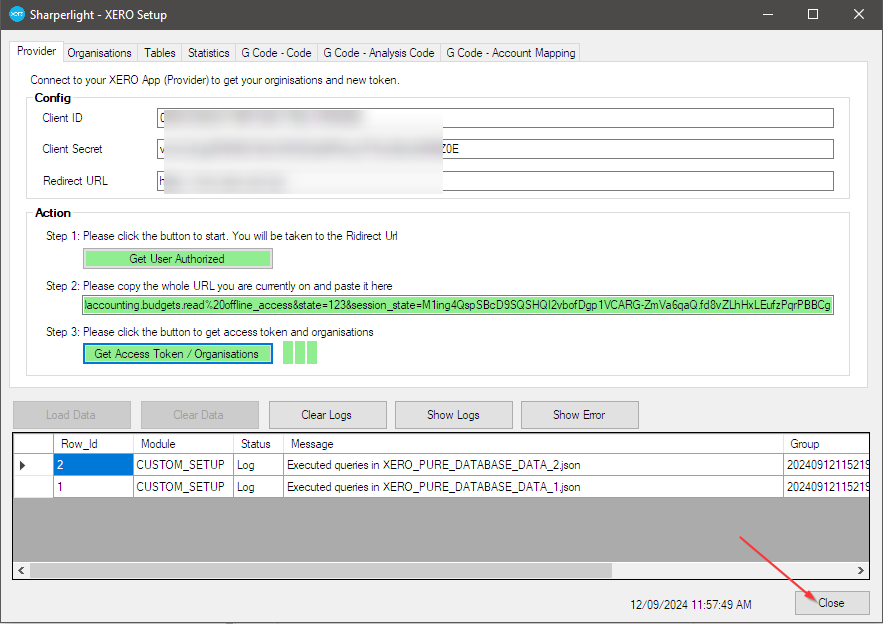
The Setup application UI is opened like this.

Set Client ID, Client Secret and Redirect URI to their textboxes. When those three textboxes are filled in, Get User Authorized button gets enabled.

Click Get User Authorized button and I will be taken to the XERO login page.
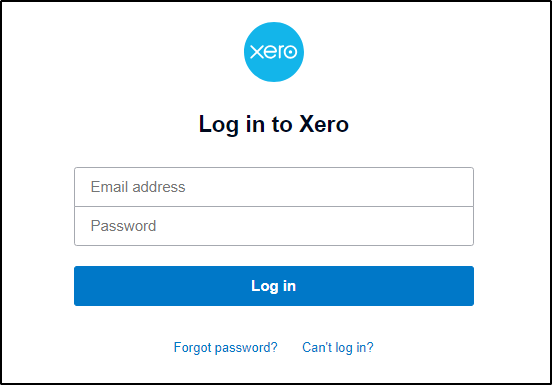
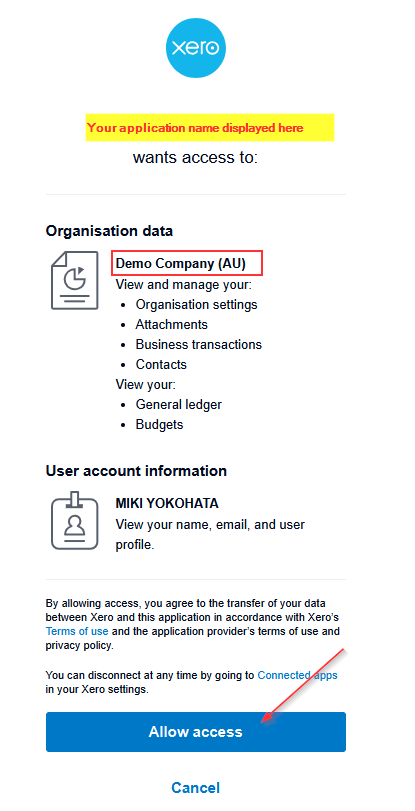
Once I am authorized to login, I am taken to this page where I can choose which organisation I can add to my app.
I have only one (Demp Organisation) at this time, so it is already selected so click Allow access button.
I am taken to this page next. Copy the whole URL address to the clipboard.

Go back to XERO Setup UI and paste the URL address to the box at Step 2.
Then click Get Access Token / Organisations.
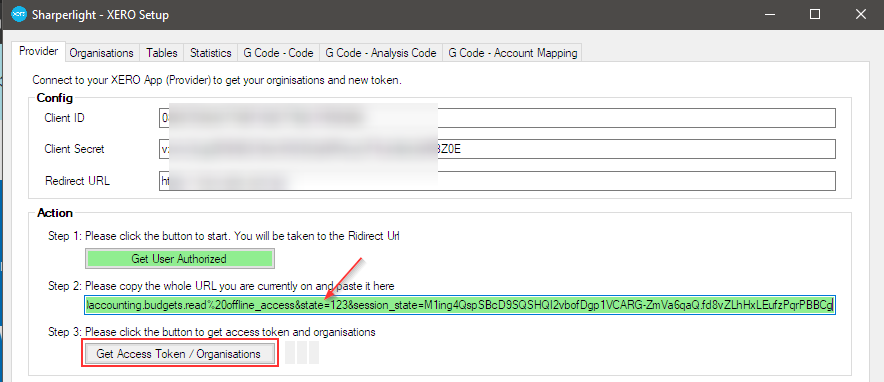

Click Close to finish, and also click OK to close Client Setup.
I think the setup has all done here.
Synchronisation
Let's try to sync data with XERO API.
Sharperlight Service
Open Windows Service Manager.
Choose Sharperlight Service, and click Restart or Start.

Sharperlight XERO Management Dashpage
Open Sharperlight Solutions from the Sharperlight Application Menu.
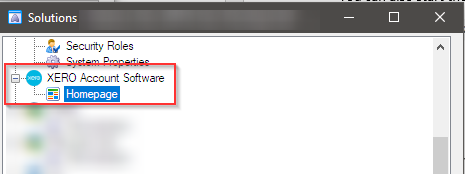
Right-click on Homepage under XERO Account Software, and click Execute.
Then I am taken to the homepage.

There are some restrictions to execute some menu items on this page without Sharperlight license.
Syncing Data
Click Synchronisation on Demand button.

I am taken to this page.
Click Sync button of Sync All though there is only one organisation.

Click OK on the confirmation dialog.

Then the Sync process is kicked in.

When the process is finished, I can see the its finish time and duration.
Click the left-arrow icon to go back to the home page.

I can see the total record number for each table on the home page.
I am also noticed that there is no error as Error count shows 0.

I can now make a query to see the data.
Open Query Bulder from the Sharperlight Application Menu.
Create the following query.

Preview it, I can see data which is sysnced with XERO API.

Conclusion
It is interesting solution with the cloud accounting software. We can make a local copy of data set and can create any types of reports over it.
It supports Delta Updates so once all data synced initially, it syncs just new or updated data only from then.
By using Sharperlight Scheduler, we can sync data every day at the time we decide.