Introduction
I will customise the standard Sharperlight web report.
The report will have two buttons and a check box on each row of a table.

I use HTML, CSS and JavaScript to make it.
Backend Code
The backend code is written as a HTML file and it has the button elements and JavaScript code.
This code will be rendered as a part of the web report generated by Sharperlight engine so the page has a reference to JQuery library. This is the reason why this $("input[name*='selectedDocuments']") can be used.
This code creates two buttons at the top of report contents, and when they are clicked, the checkbox on each row is ticked or unticked.
The checkbox is created with a sharperlight expression.
<script>
    function btApprSelectAll_click(source) {
        try{
            _toggle_Selection(true);
        }catch (err){
            throw 'Error on btApprSelectAll_click(): ' + err.message;
        }
    };

    function btApprDeselectAll_click(source) {
        try{
            _toggle_Selection(false);
        }catch (err){
            throw 'Error on btApprDeselectAll_click(): ' + err.message;
        }
    };

    function _toggle_Selection(state){
        try{
            // When buttons are outside of the iframe where the table is in.
            $("input[name*='selectedDocuments']").prop("checked", state);
        }catch (err){
            throw 'Error on _toggle_Selection(): ' + err.message;
        }
    };

</script>

<div id='buttonBox'>
    <div><input class='button buttonHeaderC1R1 button1' id='btApprSelectAll' type='button' value='Select All' onClick='btApprSelectAll_click(this)' /></div>
    <div><input class='button buttonHeaderC2R1 button2' id='btApprDeselectAll' type='button' value='Deselect All' onClick='btApprDeselectAll_click(this)' /></div>
</div>
As I said, this code is a HTML file so it has to be imported to a published report.


The reference code is set here.

It is like this.

<!--ReportContentSectionBegin-->
<ResourceImport=RS10130806/>
<!--ReportContentSectionEnd-->
The Sharperlight specific control tag <!--ReportContentSectionBegin--> means Please render the content of the imported HTML code into the report content section.
This is the Report Content Section.

The CheckBoxes
The checkboxes are created in the query of the report.
The web report must have a query definition so it can be defined with the Query Builder.
Let's open it with this button.

I defined this query and it uses SAP Business One datamodel(Product).

Notice the first output item, which creates a checkbox.
It is Sharperlight Expression, and it is an HTML input element definition.

"<input type='checkbox' id='" +  "docNumber" + {%DocNum}
+ "' data-docNumber='" + {%DocNum}
+ "' name='selectedDocuments' value='" + {@Company}
+ "' style='width:20px;height:20px'>"
As you can see, there are some Control Tags such as {%DocSum} and {@Company}.
They are reference code to the other output item and the filter item, and they are replaced with their value at runtime.

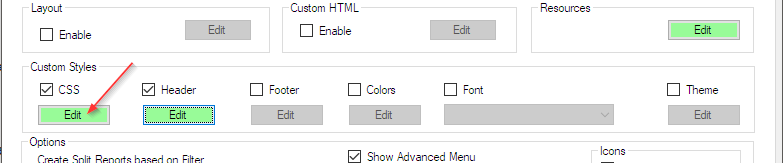
CSS
The buttons defined in the HTML code imported need the class definition.

It can be done here.
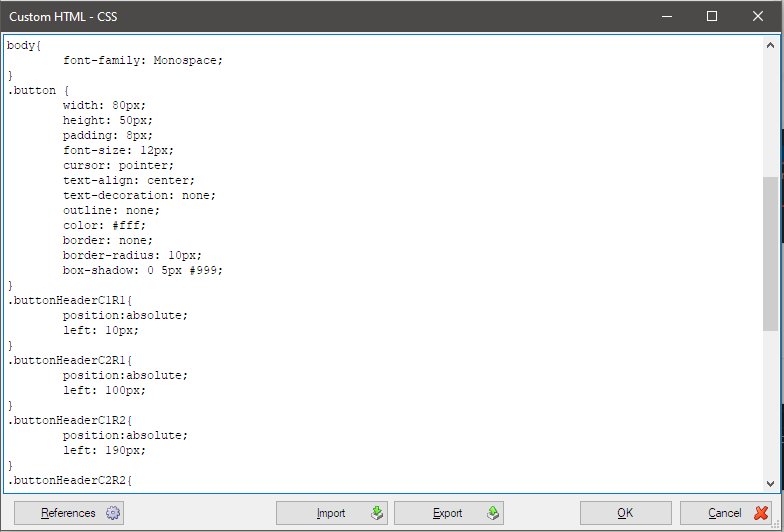
<style type="text/css">
#slBody{
	margin-left: 10px;
}
#sectionHeader{
	display: block;
}
#contentAlignLeft{
	margin-top:65px;
}
#buttonBox{
	position:absolute;
	left: 0px;
	top: 2px;
}


/* This is required when the fucntion buttons are displayed on Safari */
input[type="button"] {
     -webkit-appearance: none;
}
/* This is required when the fucntion buttons are displayed on Safari */

body{
	font-family: Monospace;
}
.button {
	width: 80px;
    	height: 50px;
    	padding: 8px;
  	font-size: 12px;
  	cursor: pointer;
  	text-align: center;
  	text-decoration: none;
  	outline: none;
  	color: #fff;
  	border: none;
  	border-radius: 10px;
  	box-shadow: 0 5px #999;
}
.buttonHeaderC1R1{
	position:absolute;
    	left: 10px;
}
.buttonHeaderC2R1{
	position:absolute;
	left: 100px;
}
.buttonHeaderC1R2{
	position:absolute;
	left: 190px;
}
.buttonHeaderC2R2{
	position:absolute;
	left: 280px;
}

.button1{
	background-color: #ED4C32;
}
.button1:hover {
	background-color: #bc2710;
}
.button1:active {
	background-color: #bc2710;
	box-shadow: 0 5px #666;
	transform: translateY(4px);
}

.button2{
	background-color: #ED4C32;
}
.button2:hover {
	background-color: #bc2710;
}
.button2:active {
	background-color: #bc2710;
	box-shadow: 0 5px #666;
	transform: translateY(4px);
}
</style>
Afterword
Those configuration mentioned above work together when the report is shown via the Sharperlight service.
Clicking the "Select All" button will tick all the checkboxes displayed on the page, and clicking "Deselect All" will untick all the checkboxes.
Although this is a simple code, we can further extend the standard web report that Sharperlight creates by using JavaScript, such as sending only the selected items to the next process. Sharperlight provides various endpoints in the Sharperlight RESTful service, so it seems that we can develop web applications quickly.