やりたいこと
- AzureADの認証基盤を使って汎用アプリのシングルサインオン(SSO認証)を実現する
- シングルサインアウトボタンの実装
- localhostから認証ページに飛ぶ
環境
- Windows 11
- node v16.17.0
手順
- AzureADへのアプリケーション登録
- アプリの作成
- 実装
1. AzureADへのアプリケーション登録
-
AzureADのホームページにサインインして、トップメニューの設定よりアプリケーションを登録するテナント/ディレクトリに切り替える
-
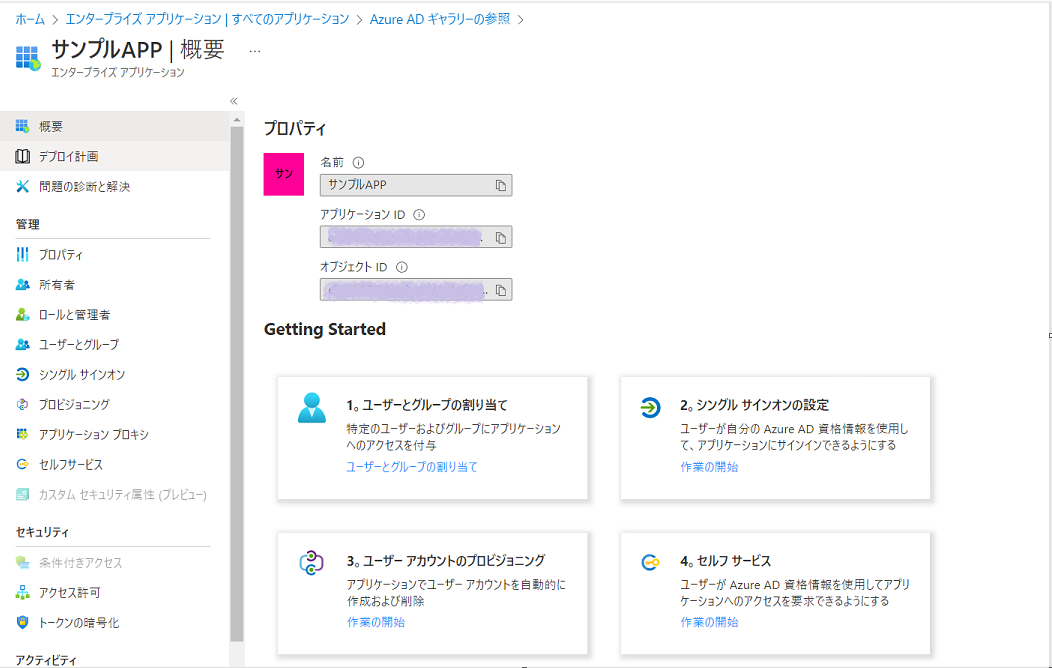
新しいアプリケーション > 独自のアプリケーションの作成 > アプリケーションの 名前 を入力 > 作成の順に作成する。

-
SSO認証の設定
-
シークレートの作成&必要な情報をメモする
-
プロパティ > アプリケーション登録 > 概要の順に選択する。後で使う
アプリケーション (クライアント) ID、ディレクトリ (テナント) IDをメモする。 -
証明書とシークレット > 新しいクライアントシークレートの順にシークレートを作成し、
シークレート値をメモする。シークレート値は作成時のみ表示される。
-
プロパティ > アプリケーション登録 > 概要の順に選択する。後で使う
2. アプリの作成
- Expressでテンプレートエンジンを生成する
npm install express-generator -g
express --view=ejs sampleApp

#npmパッケージのインストール
npm install @azure/msal-node
npm install express express-ejs-layouts ejs cookie-parser
生成されたアプリケーションには、以下のディレクトリー構造になります。
.
├── app.js
├── bin
│   └── www
├── package.json
├── public
│   ├── images
│   ├── javascripts
│   └── stylesheets
│       └── style.css
├── routes
│   ├── index.js
│   └── users.js
└── views
    ├── error.ejs
    ├── index.ejs
    └── layout.ejs

7 directories, 9 files
- viewsフォルダー下のページ作成
- user.ejsを作成する
- layout.ejsを作成する
<!DOCTYPE html>
<html lang="en">
<head>
    <meta charset="UTF-8">
    <meta http-equiv="X-UA-Compatible" content="IE=edge">
    <meta name="viewport" content="width=device-width, initial-scale=1.0">
    <title>Azure AD認証テスト</title>
</head>
<body>
    <h1>認証成功!</h1>

    <!-- サインアウトボタンの実装 -->
    <button class="signoutBtn" onclick="location.href = 'https://login.microsoftonline.com/common/oauth2/v2.0/logout?post_logout_redirect_uri=http://localhost:3000'" id ="signout">signout</button>

</body>
</html>
- サーバー側のコード (詳細はこちらを参照)
require('dotenv').config();

// msalの設定
const msal = require('@azure/msal-node')
const express = require('express'),
    expressEjsLayouts = require('express-ejs-layouts'),
    cookieParser = require('cookie-parser')

const SERVER_PORT = process.env.PORT
const REDIRECT_URI = process.env.REDIRECT_URI

const config = {
    auth: {
        clientId: process.env.CLIENT_ID,
        authority: process.env.CLOUD_INSTANCE + process.env.TENANT_ID,
        clientSecret: process.env.CLIENT_SECRET
    },
    system: {
        loggerOptions: {
            loggerCallback(loglevel, message, containsPii) {
                console.log(message)
            },
            piiLoggingEnabled: false,
            logLevel: msal.LogLevel.Verbose
        }
    }
}

// Create msal application object
const cca = new msal.ConfidentialClientApplication(config)

// view engine setup
const app = express()
app.set('view engine', 'ejs')
//cookieの設定
app.use(cookieParser())
app.use(expressEjsLayouts)
app.use(express.static('public'))
const cookieSettings = {
    cookie:{
        maxAge: 3600    //秒
    },
    resave: false,
    saveUninitialized: false
}

// AzureADの認証画面をユーザに表示
app.get('/', (req, res) => {
    const authCodeUrlParameters = {
        scopes: ['user.read'],
        redirectUri: REDIRECT_URI
    }

    // get url to sign user in and consent to scopes needed for application
    cca.getAuthCodeUrl(authCodeUrlParameters).then((response) => {
        console.log(`\nResponse:\n${response}\n`)
        res.redirect(response)
    }).catch((error) => console.log(JSON.stringify(error)))
})

// アカウント情報を取得し、クッキーに保存する
app.get('/redirect', (req, res) => {
    const tokenRequest = {
        code: req.query.code,
        scopes: ['user.read'],
        redirectUri: REDIRECT_URI,
    }
    console.log(`\nCode:\n${tokenRequest.code}\n`)

    // アカウント情報からaccount.usernameとaccount.nameを取得してres.cookieでレスポンスにcookieを設定し、/userへリダイレクトする。
    cca.acquireTokenByCode(tokenRequest).then((response) => {
        console.log("\nResponse: \n:", response)
        const userName = response.account.username
        const name = response.account.name
        res.cookie('username', userName, cookieSettings)
        res.cookie('name', name, cookieSettings)
        res.redirect('/user')
    }).catch((error) => {
        console.log(error)
        res.status(500).send(error)
    })
})

//cookieからアカウント情報を取得
app.get('/user', (req, res) => {
    const data = req.cookies
    console.log(data)
    res.render('user', {title: 'User Info', userName: data.username, name: data.name})
})

app.listen(SERVER_PORT, () => console.log(`Msal Node Auth Code Sample app listening on port ${SERVER_PORT}!`))
- .envに認証情報を記載する
PORT=3000
CLOUD_INSTANCE="https://login.microsoftonline.com/" # cloud instance string should end with a trailing slash
TENANT_ID="テナントID"
CLIENT_ID="クライアントID"
CLIENT_SECRET="シークレート値"
REDIRECT_URI="http://localhost:3000/redirect"
3. 実行
node app.js
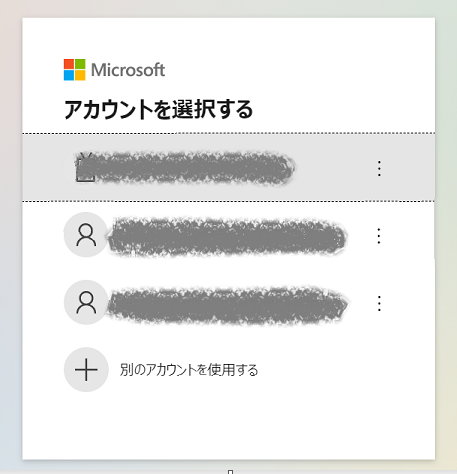
http://localhost:3000にアクセスすると、リダイレクト先としてAzureADの認証画面が表示されます。
既にブラウザでAzureADにサインインしている場合は、認証画面は表示されず自動的に次のステップに進みます。

認証後、layout.ejsのページにリダイレクトされ、ターミナルにアカウント情報が表示されます。
signoutボタンを押下してサインアウトできます。

AzureADについて
「エンタープライズアプリケーション」と「アプリの登録」の違い
Azure AD でアプリケーションを設定する場合、「エンタープライズアプリケーション」と「アプリの登録」2種類の設定方法があります。どちらを利用するかは目的によって異なります。
公式記事によると、
- 「エンタープライズアプリケーション」:既存の SaaS アプリケーション (オンプレミスの環境で提供しているアプリを含む) をテナントに統合する場合に用いる。(ここで、統合が指す意味は、SaaS アプリケーションに対するシングルサインオン (SSO) の構成や、ユーザーのプロビジョニング構成を行うことなどを指します。)
- 「アプリの登録」:ユーザーやテナントの情報にアクセスして動作するために開発したアプリケーションを公開、もしくは利用するために用いる。
結論として、
-
組織のユーザーに対してアプリを利用させたい場合は 「エンタープライズアプリケーション」の設定をする。
- 例えば、“Azure ADの条件つきアクセスを使ってユーザーにアクセスをさせたい” 、シングルサインオンを使ってアプリを利用したい”、“オンプレミスのアプリケーションを Azure ADと統合させたい(アプリケーションプロキシの利用)” 。
-
アプリに対して権限を付与させたい場合は「アプリの登録」を利用する。
- 「アプリの登録」を設定すると自動で「エンタープライズアプリケーション」にも登録される(これが混乱する要因だと思います…)
今回はシングルサインオンを利用したいので、「エンタープライズアプリケーション」から登録を行いました。
SAML認証とOAuthの違い
SAML (Security Assertion Markup Language) と OAuth (Open Authorization) は、Web アプリケーションの認証方法として広く使われている。
-
SAML: SAML は、Web アプリケーション間のシングルサインオン (SSO) を実現するために使用されます。SAML は、ユーザが一度認証された後、アクセスを許可する情報を含む断片 (アサーション) を提供することで、他のアプリケーションに自動的にアクセスすることができる。
-
OAuth: OAuth は、ユーザのアカウント情報を利用するために、アプリケーションが他のアプリケーションまたはサービスにアクセスするための権限を与えるために使用されます。OAuth では、ユーザがアクセスを許可する前に、アプリケーションに対して認証が必要です。
結論として、SAML は Web アプリケーション間の SSO を実現するために使用され、OAuth はユーザのアカウント情報を利用するためにアプリケーションが他のアプリケーションまたはサービスにアクセスするための権限を与えるために使用される。
参考
node.jsでAzureADを認証基盤として利用する
「エンタープライズアプリケーション」と「アプリの登録」の違いについて

