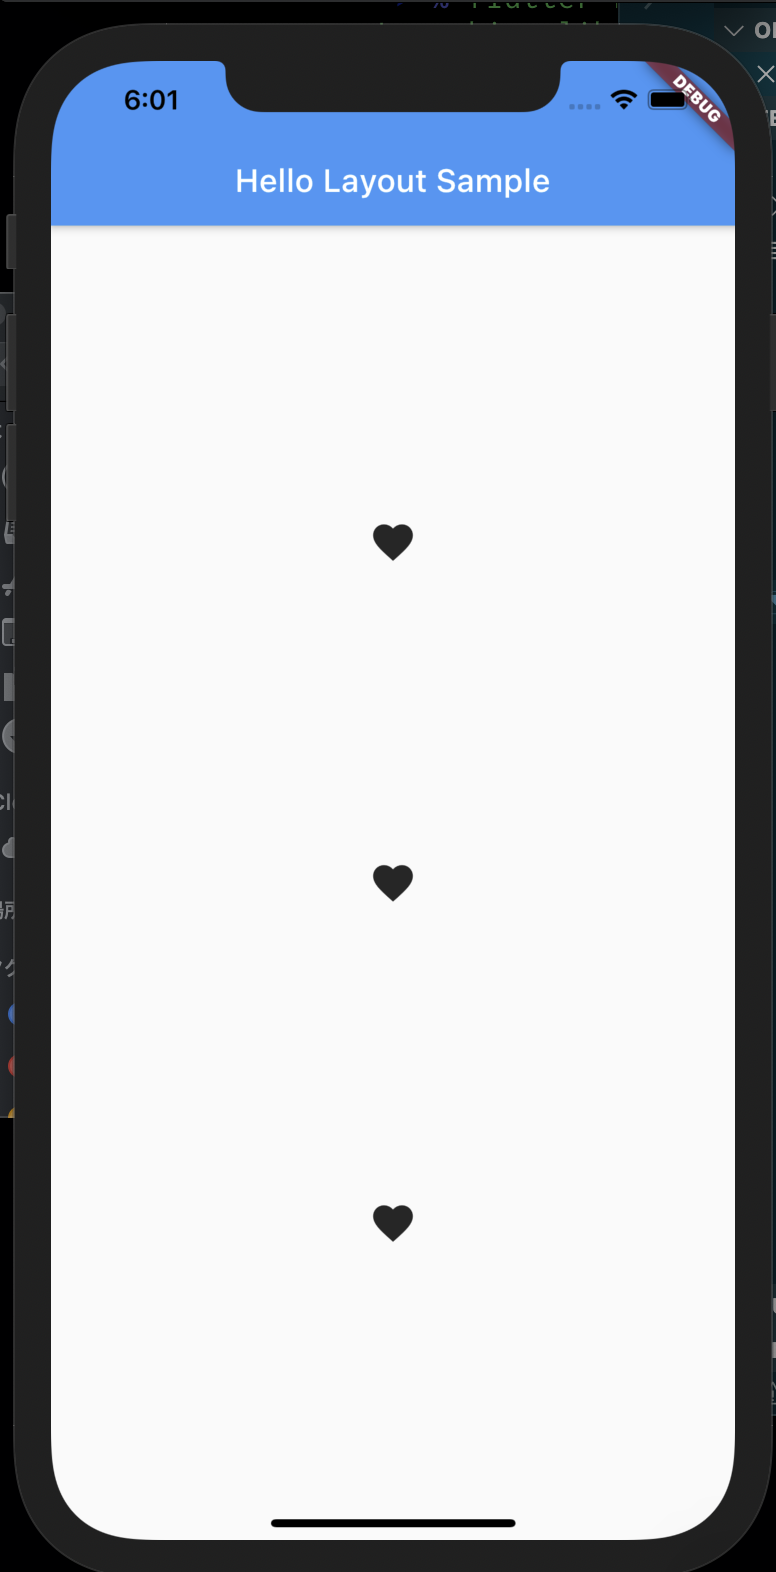
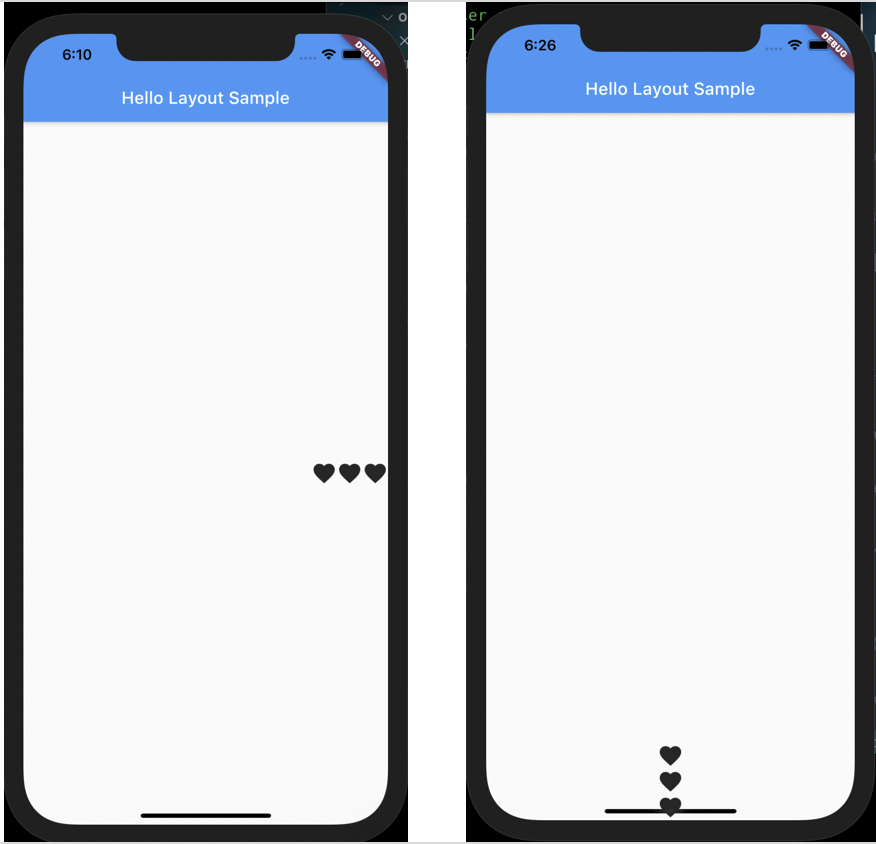
flutterのレイアウト(layout)の中でも基本的なRowとColumnについて
(...flutterでアプリを作成しているときに、忘れてしまうので...対象:
・初めてflutterの人![]()
・少し慣れたけどレイアウト気になる人初めての人![]()
・アプリの見た目を整えたい人![]()
==環境==
・PC:Macbook Pro (Retina)
・macOS Catalina
・Flutter 2.0.4
・Dart 2.12.2
・iOSのシュミレータ
==目次==
1.flutterの新規作成と起動
2.アプリのベース作成
3.Row and Column のレイアウト
1.flutterの新規作成と起動
・flutterで新プロジェクト作成(my_appの部分が自分のアプリ名)flutter create my_app
cd my_app
・iOSのシュミレータ起動
open -a Simulator
・flutterの起動
flutter run
2.アプリのベース作成
libの中にある、main.dartの中身を以下に変更import 'package:flutter/material.dart';
void main() => runApp(MyApp());
class MyApp extends StatelessWidget {
@override
Widget build(BuildContext context) {
return MaterialApp(
title: 'Hi Layout Sample',
home: Scaffold(
appBar: AppBar(
title: Text('Hello Layout Sample'),
),
body: Center(
child: Text('Hello Flutter'),
),
),
);
}
}
ベース完成⭐️
(後は、いろいろ試してみる)
3.Row and Column のレイアウト
Rowのケース例 ) main.dartを以下に変更するとimport 'package:flutter/material.dart';
void main() => runApp(MyApp());
class MyApp extends StatelessWidget {
@override
Widget build(BuildContext context) {
return MaterialApp(
title: 'Hi Layout Sample',
home: Scaffold(
appBar: AppBar(
title: Text('Hello Layout Sample'),
),
body: Center(
child: Row(
mainAxisAlignment: MainAxisAlignment.spaceEvenly,
children: [
Icon(Icons.favorite, size: 30),
Icon(Icons.favorite, size: 30),
Icon(Icons.favorite, size: 30),
],
),
),
),
);
}
}
ちょっと説明:
child: 以降を Text から Row に変更し、
children: 以降で、アイコンの ♡ を設定(ここは画像でもなんでも)
さらに、Row 部分を Column に変えると、♡の並びも変わる。
Columnのケース例 )
import 'package:flutter/material.dart';

void main() => runApp(MyApp());

class MyApp extends StatelessWidget {
  @override
  Widget build(BuildContext context) {
    return MaterialApp(
      title: 'Hi Layout Sample',
      home: Scaffold(
        appBar: AppBar(
          title: Text('Hello Layout Sample'),
        ),
        body: Center(
          child: Column(
            mainAxisAlignment: MainAxisAlignment.spaceEvenly,
            children: [
              Icon(Icons.favorite, size: 30),
              Icon(Icons.favorite, size: 30),
              Icon(Icons.favorite, size: 30),
            ],
          ),
        ),
      ),
    );
  }
}
mainAxisAlignment部分について
mainAxisAlignment: MainAxisAlignment.xxx 部分を変化させる・mainAxisAlignment: MainAxisAlignment.start:画面のはじめ
child: Column(
            mainAxisAlignment: MainAxisAlignment.start,
            children: [
              Icon(Icons.favorite, size: 30),
              Icon(Icons.favorite, size: 30),
              Icon(Icons.favorite, size: 30),
            ],
          ),
・mainAxisAlignment: MainAxisAlignment.center:真ん中
child: Column(
            mainAxisAlignment: MainAxisAlignment.center,
            children: [
              Icon(Icons.favorite, size: 30),
              Icon(Icons.favorite, size: 30),
              Icon(Icons.favorite, size: 30),
            ],
          ),
・mainAxisAlignment: MainAxisAlignment.end:画面の終わり
child: Column(
            mainAxisAlignment: MainAxisAlignment.end,
            children: [
              Icon(Icons.favorite, size: 30),
              Icon(Icons.favorite, size: 30),
              Icon(Icons.favorite, size: 30),
            ],
          ),
・mainAxisAlignment: MainAxisAlignment.spaceBetween:子たちの間のスペース均等
child: Column(
            mainAxisAlignment: MainAxisAlignment.spaceBetween,
            children: [
              Icon(Icons.favorite, size: 30),
              Icon(Icons.favorite, size: 30),
              Icon(Icons.favorite, size: 30),
            ],
          ),
・mainAxisAlignment: MainAxisAlignment.spaceEvenly:はじめ・おわり・子の間のスペース均等
child: Column(
            mainAxisAlignment: MainAxisAlignment.spaceEvenly,
            children: [
              Icon(Icons.favorite, size: 30),
              Icon(Icons.favorite, size: 30),
              Icon(Icons.favorite, size: 30),
            ],
          ),

・mainAxisAlignment: MainAxisAlignment.spaceAround:並べた子の間のスペース均等
child: Column(
            mainAxisAlignment: MainAxisAlignment.spaceAround,
            children: [
              Icon(Icons.favorite, size: 30),
              Icon(Icons.favorite, size: 30),
              Icon(Icons.favorite, size: 30),
            ],
          ),
RowとColumnの基本的な部分は、以上を組み合わせて。
もっと興味ある方は、参考資料からどうぞ:)
==参考==
・Flutterの公式 https://flutter.dev/docs
・Dartで使えるiconの種類 https://api.flutter.dev/flutter/material/Icons-class.html
・レイアウト類ですごくおすすめ(英語表記)https://medium.com/flutter-community/flutter-layout-cheat-sheet-5363348d037e


