はじめに
2023年の12月からCursorのProプランを利用開始し、
半年以上使い続けた私の普段の使い方をお伝えしたいと思います。
目次
- 私にとってのCursor(ChatGPT)
- Cursorの概要
- 使用例
私にとってのCursor(ChatGPT)
Cursor(ChatGPT)は、
いつでも疲れず怒らず相談に乗ってくれる幅広い知識を持った
ペアプログラミングの相手です。
もちろん、AIは変な回答をすることもありますが、
より良い質問方法を考えながら楽しんでAIとプログラミングをしています。
そんな中、CursorはAIとのペアプログラミングを行う上で
最も使いやすいエディタだと考えています。
Cursorの概要
概要については下記記事にまとめてありますので、
使用されたことのない方はこちらでインストールや操作方法に慣れていただけると幸いです。
Cursor_AIとのペアプログラミング
使用例
私が普段使用している内容を3つにまとめました。
| 用途 | 詳細 |
|---|---|
| コード解説 |
1.他の人が実装したコードの読み解き 2.久しぶりに触るコードやプロジェクトの読み解き |
| コード追加 |
1.フォームの作成 2.スタイリングの変更 3.モーダル出力 |
| コード修正 |
1.リファクタリング 2.再度リファクタリング |
コード解説
1. 他の人が実装したコードの読み解き
他の人が実装したコードやOSSのソースコードの読み解きは時間がかかりますが、
初めにChatGPTに概要をまとめてもらうことで読み解きやすくなります。
今回はnext.jsのexampleのroute.tsコードを読み解いてもらいました。
このように長文のコードを読む前に頭に入れておくことでコードを読みやすくなります。
下記よりコードやChatGPT回答の長文は折り畳みにしています。
質問対象のコード
import {GeocodeResponse, WeatherResponse} from '@/lib/types'

export const runtime = 'edge'

/**
 * The weather (client) API route handler.
 *
 * @usage https://example.com/api/?location=Enterprise,AL
 *
 * @see https://nextjs.org/docs/app/building-your-application/routing/router-handlers
 */
export async function GET(request: Request) {
  // Get query params from request.
  const {searchParams} = new URL(request.url)

  // Parse params.
  const unsanitizedLocation = searchParams.get('location') || ''

  // Sanitize the location.
  const location = encodeURI(unsanitizedLocation)

  // No location? Bail...
  if (!location) {
    return new Response(JSON.stringify({error: 'No location provided.'}), {
      status: 400,
      statusText: 'Bad Request'
    })
  }

  // Set default coordinates as fallback.
  let lat = 28.3886186
  let lng = -81.5659069

  try {
    // First, try to geocode the address.
    const geocode = await fetch(
      `https://maps.googleapis.com/maps/api/geocode/json?address=${location}&key=${process.env.GOOGLE_MAPS_API_KEY}`
    )

    // Issue with the geocode request? Bail...
    if (geocode.status !== 200) {
      return new Response(
        JSON.stringify({
          error: `${geocode.statusText}`
        }),
        {
          status: geocode.status,
          statusText: geocode.statusText
        }
      )
    }

    // Parse the response.
    const coordinates = (await geocode.json()) as GeocodeResponse

    // Issue with the response? Bail...
    if (coordinates.status != 'OK' || !coordinates.results.length) {
      return new Response(
        JSON.stringify({
          error: `${coordinates.status}`
        }),
        {
          status: 400,
          statusText: 'Bad Request'
        }
      )
    }

    // Pluck out and set the coordinates.
    lat = coordinates?.results[0]?.geometry?.location?.lat
    lng = coordinates?.results[0]?.geometry?.location?.lng
  } catch (error) {
    console.error(error)
    return new Response(JSON.stringify({error: `${error}`}), {
      status: 500,
      statusText: 'Internal Server Error'
    })
  }

  try {
    // Now, fetch the weather data.
    const weather = await fetch(
      `https://api.weatherapi.com/v1/forecast.json?key=${process.env.WEATHERAPI_KEY}&q=${lat},${lng}`
    )

    // Issue with the weather response? Bail...
    if (weather.status != 200) {
      return new Response(
        JSON.stringify({
          error: `${weather.statusText}`
        }),
        {
          status: weather.status,
          statusText: weather.statusText
        }
      )
    }

    // Parse the response.
    const forecast = (await weather.json()) as WeatherResponse

    // Issue with the forecast? Bail...
    if (!forecast.location) {
      return new Response(
        JSON.stringify({
          error: 'No forecast data.'
        }),
        {
          status: 400,
          statusText: 'Bad Request'
        }
      )
    }

    // Return the weather data.
    return new Response(JSON.stringify(forecast), {
      headers: {
        'Content-Type': 'application/json',
        'Cache-Control': 's-maxage=300, stale-while-revalidate'
      },
      status: 200,
      statusText: 'OK'
    })
  } catch (error) {
    console.error(error)
    return new Response(JSON.stringify({error: `${error}`}), {
      status: 500,
      statusText: 'Internal Server Error'
    })
  }
}
回答
このファイルは、Next.jsフレームワークを使用したサーバーレス関数(APIルート)の実装です。
app/api/weather/route.tsというパスに配置されており、クライアントからの天気情報に関する
リクエストを処理するためのものです。
概要

- runtime変数には'edge'が設定されており、このAPIルートがEdge Functionsとして動作することを示しています。
- GET関数は、HTTP GETリクエストを処理する非同期関数です。
処理の流れ

1. クエリパラメータの取得: リクエストURLからlocationクエリパラメータを取得し、サニタイズ(安全な形式に変換)します。
2. 位置情報の検証: locationが空の場合、400ステータス(Bad Request)でエラーレスポンスを返します。
3. ジオコーディング: Google Maps APIを使用して、提供された住所から緯度と経度を取得します。
4. エラーハンドリング: ジオコーディングのリクエストが失敗した場合、適切なHTTPステータスコードでエラーレスポンスを返します。
5. 天気情報の取得: Weather APIを使用して、取得した緯度と経度に基づいて天気予報を取得します。
6. エラーハンドリング: 天気情報の取得に失敗した場合、適切なHTTPステータスコードでエラーレスポンスを返します。
7. レスポンスの返却: 天気予報データをJSON形式でクライアントに返却します。キャッシュ制御ヘッダーも設定されています。
エラーハンドリング

- ジオコーディングまたは天気情報取得中にエラーが発生した場合、500ステータス(Internal Server Error)でエラーレスポンスを返します。
- エラーはコンソールにも出力されます。
環境変数

- process.env.GOOGLE_MAPS_API_KEYとprocess.env.WEATHERAPI_KEYは、それぞれGoogle Maps APIキーとWeather APIキーを環境変数から取得しています。
型定義

- GeocodeResponseとWeatherResponseは、それぞれジオコーディングAPIと天気APIからのレスポンスの型を定義しています。

このAPIルートは、クライアントからのリクエストに基づいて、特定の場所の天気予報を取得し、それをレスポンスとして返す役割を果たします。

また、こちらの解説で分からない点があれば追加で質問することができます。
質問:process.env.GOOGLE_MAPS_API_KEYとprocess.env.WEATHERAPI_KEYはどのように用意すれば良いですか
回答
process.env.GOOGLE_MAPS_API_KEYとprocess.env.WEATHERAPI_KEYは、それぞれGoogle Maps APIとWeather APIのための環境変数です。これらのキーを用意するには以下の手順を踏む必要があります。
Google Maps APIキーの取得

1. Google Cloud Platform (GCP) のコンソールにアクセスします。
2. プロジェクトを作成または選択します。
3. 「APIとサービス」ダッシュボードで「認証情報」を選択します。
4. 「認証情報を作成」ボタンからAPIキーを作成します。
5. ジオコーディングAPIを有効にします。
6. 必要に応じて、APIキーのHTTPリファラー制限を設定します。
Weather APIキーの取得

1. Weather APIの提供元のウェブサイトにアクセスします(例: WeatherAPI.com)。
2. アカウントを作成し、ログインします。
3. APIキーを生成するための指示に従います。
環境変数の設定

取得したAPIキーを環境変数として設定するには、開発環境やデプロイ環境に応じた方法を選択します。
開発環境

- プロジェクトのルートに.env.localファイルを作成し、以下のようにキーを追加します。
あなたのWeatherAPIキー
デプロイ環境

- VercelやNetlifyなどのプラットフォームを使用している場合、それらのダッシュボードで環境変数を設定します。
- サーバーに直接デプロイする場合は、サーバーの環境設定ファイルやシェルの設定ファイルにキーを追加します。

環境変数を設定した後、アプリケーションを再起動することで、新しい環境変数が読み込まれます。これにより、アプリケーションはこれらのキーを使用してAPIリクエストを行うことができるようになります。

上記のようにGOOGLE_MAPS_API_KEYとWEATHERAPI_KEYの取得方法および、デプロイする際の設定方法についても教えてくれました。
2. 久しぶりに触るコードやプロジェクトの読み解き
何ヶ月、何年ぶりに触るコードやプロジェクトにおいて、自分が書いたコードなのに難しく感じたりすることはありませんか。
そんな時は上記のようにコード解説をしてもらったり、プロジェクト全体で質問することも読み解く上での手助けになります。
下記はCodebase Answer(cmd + enter)を使用しています。
質問:ログインしていない時にログインページにリダイレクトする処理はどこに書いてありますか

質問:excelのアップロードはどこで行っていますか

質問:サイトマップを作成してください。(その他制約条件追加)

質問:こちらは何を行っていますか(ぱっと見では分からない何ヶ月も前に作ったプロジェクトのドラッグ&ドロップの処理解説)

コード追加
一度に完成度の高いコードをChatGPTに作成して貰うことは難しいですが、
質問を細分化することで精度の高い回答を得ることができます。
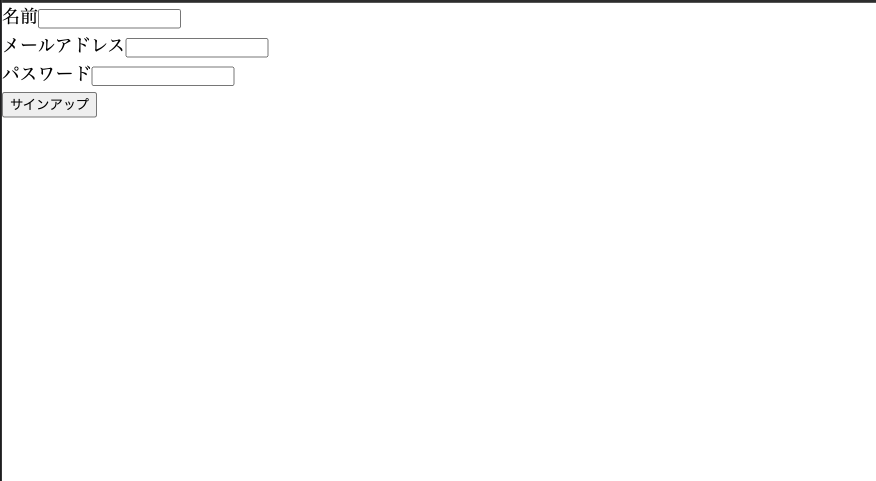
1. フォームの作成
質問:name, email, passwordを設定するsignupコンポーネントを作成してください。react-hook-formを使用してください。
回答
// 結果
import React from 'react';
import { useForm, SubmitHandler } from 'react-hook-form';

type Inputs = {
  name: string;
  email: string;
  password: string;
};

export const SignUp: React.FC = () => {
  const { register, handleSubmit, formState: { errors } } = useForm<Inputs>();

  const onSubmit: SubmitHandler<Inputs> = data => {
    // サインアップ処理をここに書く
    console.log(data);
  };

  return (
    <form onSubmit={handleSubmit(onSubmit)}>
      <div>
        <label htmlFor="name">名前</label>
        <input id="name" {...register('name', { required: true })} />
        {errors.name && <p>名前を入力してください。</p>}
      </div>
      <div>
        <label htmlFor="email">メールアドレス</label>
        <input id="email" type="email" {...register('email', { required: true })} />
        {errors.email && <p>メールアドレスを入力してください。</p>}
      </div>
      <div>
        <label htmlFor="password">パスワード</label>
        <input id="password" type="password" {...register('password', { required: true })} />
        {errors.password && <p>パスワードを入力してください。</p>}
      </div>
      <button type="submit">サインアップ</button>
    </form>
  );
};

2. スタイリングの変更
質問:styled-componentsを用いてこちらのフォームを画面中央に配置してください
回答
import React from 'react';
import styled from 'styled-components';
import { useForm, SubmitHandler } from 'react-hook-form';

type Inputs = {
  name: string;
  email: string;
  password: string;
};

const CenteredForm = styled.div`
  display: flex;
  justify-content: center;
  align-items: center;
  height: 100vh;
`;

const Form = styled.form`
  display: flex;
  flex-direction: column;
  width: 100%;
  max-width: 400px;
`;

export const SignUp = () => {
  const { register, handleSubmit, formState: { errors } } = useForm<Inputs>();

  const onSubmit: SubmitHandler<Inputs> = data => {
    // サインアップ処理をここに書く
    console.log(data);
  };

  return (
    <CenteredForm>
      <Form onSubmit={handleSubmit(onSubmit)}>
        <div>
          <label htmlFor="name">名前</label>
          <input id="name" {...register('name', { required: true })} />
          {errors.name && <p>名前を入力してください。</p>}
        </div>
        <div>
          <label htmlFor="email">メールアドレス</label>
          <input id="email" type="email" {...register('email', { required: true })} />
          {errors.email && <p>メールアドレスを入力してください。</p>}
        </div>
        <div>
          <label htmlFor="password">パスワード</label>
          <input id="password" type="password" {...register('password', { required: true })} />
          {errors.password && <p>パスワードを入力してください。</p>}
        </div>
        <button type="submit">サインアップ</button>
      </Form>
    </CenteredForm>
  );
};


質問:material-uiを用いてこちらのフォームをかっこよくしてください(styled-componentsの利用をやめていますが許容することにします。)
回答
import React from 'react';
import { useForm, SubmitHandler } from 'react-hook-form';
import { TextField, Button, Box } from '@mui/material';

type Inputs = {
  name: string;
  email: string;
  password: string;
};

export const SignUp = () => {
  const { register, handleSubmit, formState: { errors } } = useForm<Inputs>();

  const onSubmit: SubmitHandler<Inputs> = data => {
    // サインアップ処理をここに書く
    console.log(data);
  };

  return (
    <Box display="flex" justifyContent="center" alignItems="center" height="100vh">
      <Box component="form" onSubmit={handleSubmit(onSubmit)} sx={{ display: 'flex', flexDirection: 'column', width: '100%', maxWidth: '400px' }}>
        <TextField
          label="名前"
          variant="outlined"
          margin="normal"
          {...register('name', { required: '名前を入力してください。' })}
          error={!!errors.name}
          helperText={errors.name?.message}
        />
        <TextField
          label="メールアドレス"
          variant="outlined"
          margin="normal"
          type="email"
          {...register('email', { required: 'メールアドレスを入力してください。' })}
          error={!!errors.email}
          helperText={errors.email?.message}
        />
        <TextField
          label="パスワード"
          variant="outlined"
          margin="normal"
          type="password"
          {...register('password', { required: 'パスワードを入力してください。' })}
          error={!!errors.password}
          helperText={errors.password?.message}
        />
        <Button type="submit" variant="contained" color="primary" sx={{ mt: 2 }}>
          サインアップ
        </Button>
      </Box>
    </Box>
  );
};

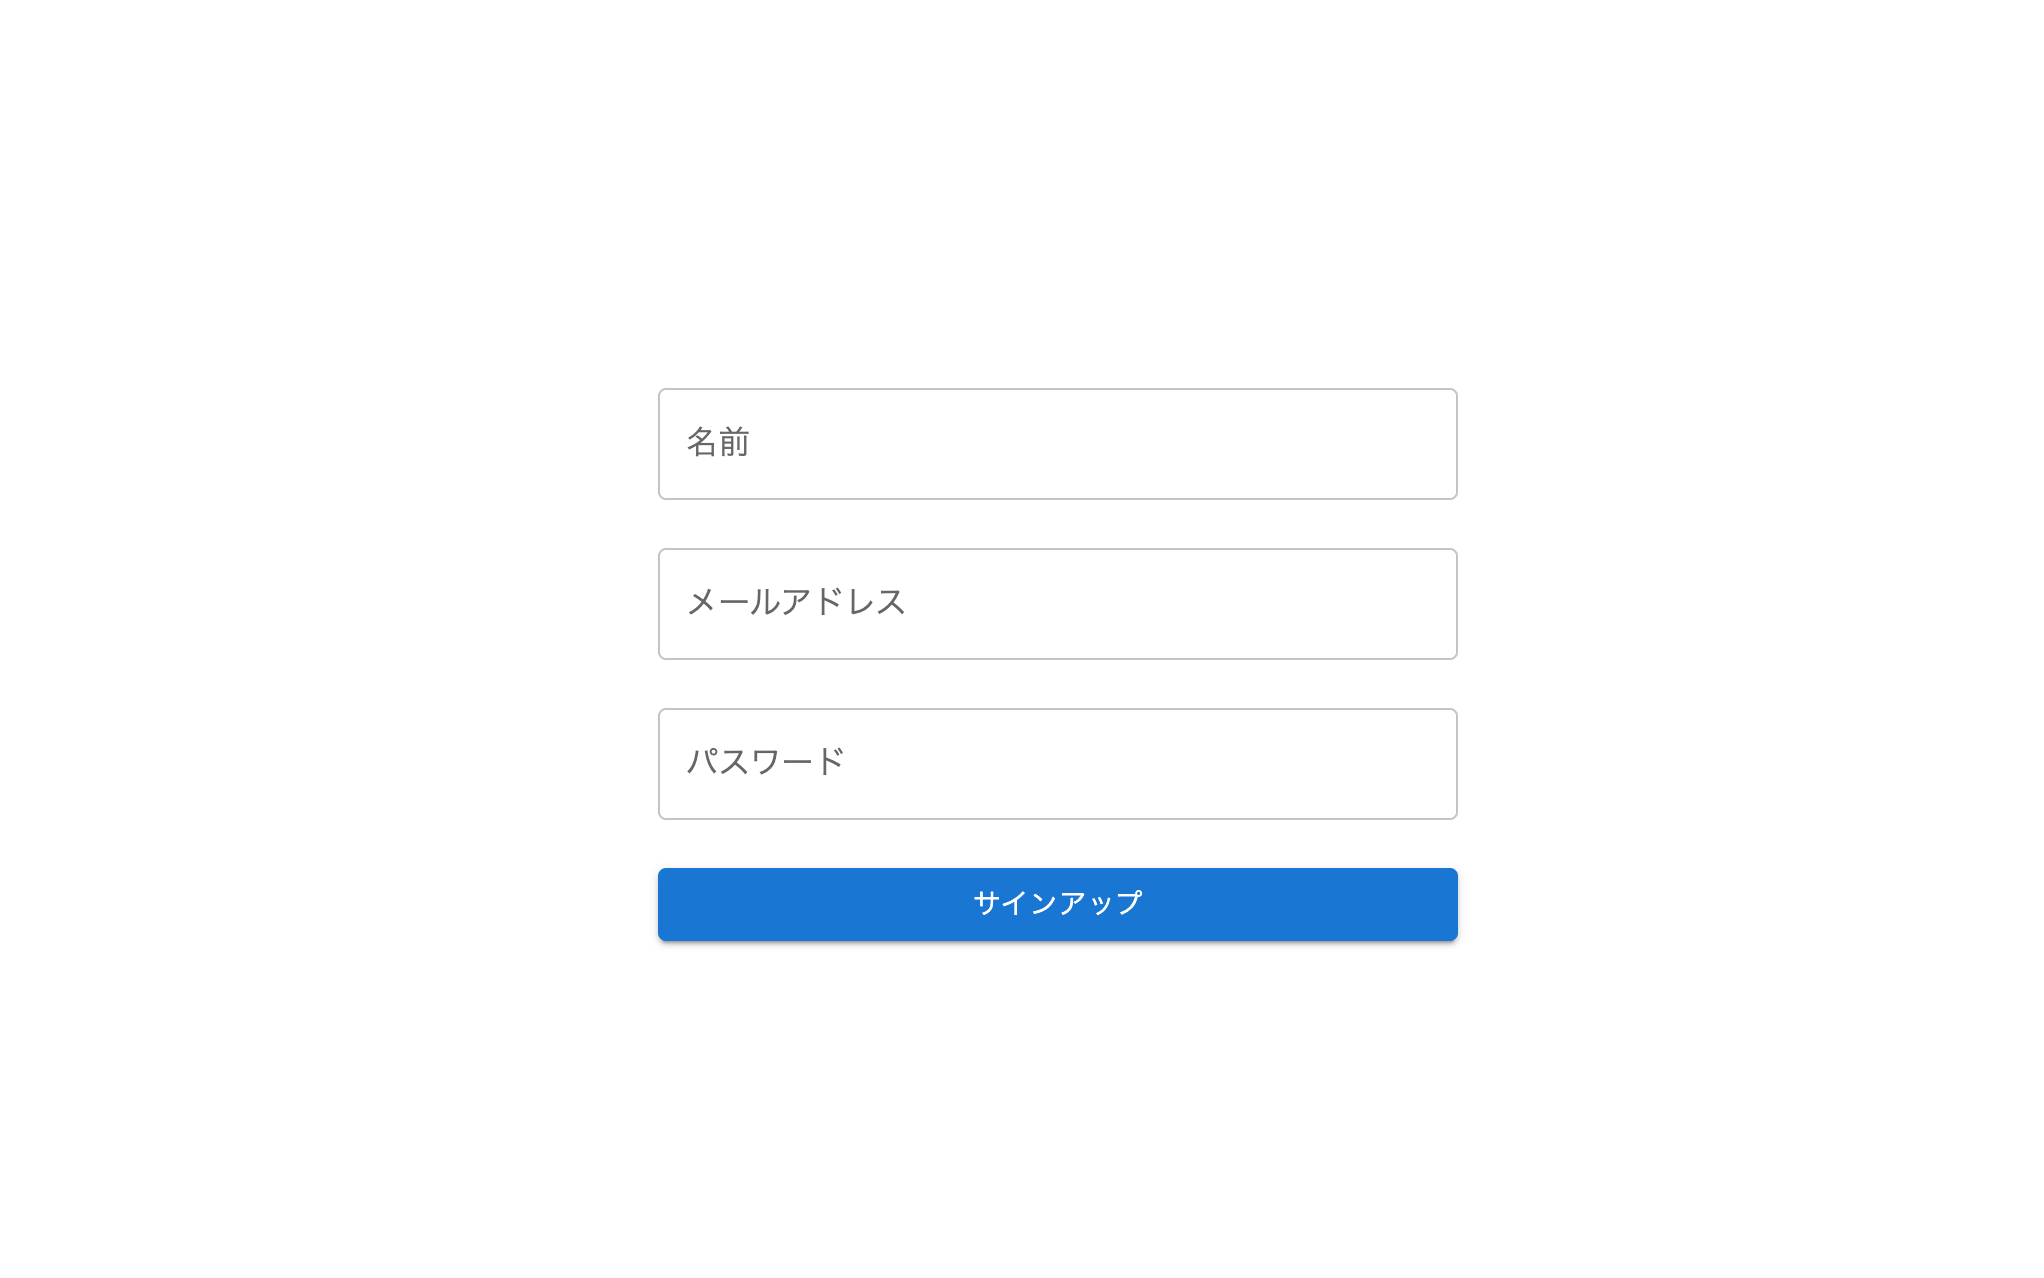
この後にタイトルを入れて下記の形になりました。
このように質問を細かく分けて行うことで精度の高い生成を行うことができます。

3. モーダル出力
web上で見つけたmaterial-uiのモーダルの例を参考にして、
同じようなモーダルを表示する質問をしました。
material-uiのreact-modal
結果、参考にしたモーダルと指示内容を統合してモーダルを表示してくれています。
質問:

signupを押下したときに下記コードを参考にname, emailの入力内容を表示するモーダルを表示してください。


<Button onClick={handleOpen}>Open modal</Button>
<Modal
  open={open}
  onClose={handleClose}
  aria-labelledby="modal-modal-title"
  aria-describedby="modal-modal-description"
>
  <Box sx={style}>
    <Typography id="modal-modal-title" variant="h6" component="h2">
      Text in a modal
    </Typography>
    <Typography id="modal-modal-description" sx={{ mt: 2 }}>
      Duis mollis, est non commodo luctus, nisi erat porttitor ligula.
    </Typography>
  </Box>
</Modal>
回答
import React, { useState } from 'react';
import { useForm, SubmitHandler } from 'react-hook-form';
import { TextField, Button, Box, Typography, Modal } from '@mui/material';

type Inputs = {
  name: string;
  email: string;
  password: string;
};

export const SignUp = () => {
  const { register, handleSubmit, formState: { errors } } = useForm<Inputs>();
  const [open, setOpen] = useState(false);
  const [modalContent, setModalContent] = useState({ name: '', email: '' });

  const handleOpen = () => setOpen(true);
  const handleClose = () => setOpen(false);

  const onSubmit: SubmitHandler<Inputs> = data => {
    setModalContent({ name: data.name, email: data.email });
    handleOpen();
  };

  const style = {
    position: 'absolute' as 'absolute',
    top: '50%',
    left: '50%',
    transform: 'translate(-50%, -50%)',
    width: 400,
    bgcolor: 'background.paper',
    border: '2px solid #000',
    boxShadow: 24,
    p: 4,
  };

  return (
    <Box display="flex" flexDirection="column" justifyContent="center" alignItems="center" height="100vh">
      <Typography variant="h4" component="h1" gutterBottom>
        SignUp
      </Typography>
      <Box component="form" onSubmit={handleSubmit(onSubmit)} sx={{ display: 'flex', flexDirection: 'column', width: '100%', maxWidth: '400px' }}>
        <TextField
          label="名前"
          variant="outlined"
          margin="normal"
          {...register('name', { required: '名前を入力してください。' })}
          error={!!errors.name}
          helperText={errors.name?.message}
        />
        <TextField
          label="メールアドレス"
          variant="outlined"
          margin="normal"
          type="email"
          {...register('email', { required: 'メールアドレスを入力してください。' })}
          error={!!errors.email}
          helperText={errors.email?.message}
        />
        <TextField
          label="パスワード"
          variant="outlined"
          margin="normal"
          type="password"
          {...register('password', { required: 'パスワードを入力してください。' })}
          error={!!errors.password}
          helperText={errors.password?.message}
        />
        <Button type="submit" variant="contained" color="primary" sx={{ mt: 2 }}>
          SignUp
        </Button>
      </Box>
      <Modal
        open={open}
        onClose={handleClose}
        aria-labelledby="modal-modal-title"
        aria-describedby="modal-modal-description"
      >
        <Box sx={style}>
          <Typography id="modal-modal-title" variant="h6" component="h2">
            登録内容確認
          </Typography>
          <Typography id="modal-modal-description" sx={{ mt: 2 }}>
            名前: {modalContent.name}
          </Typography>
          <Typography id="modal-modal-description" sx={{ mt: 2 }}>
            メールアドレス: {modalContent.email}
          </Typography>
        </Box>
      </Modal>
    </Box>
  );
};


※この記事ではCursorの機能に集中するため、ログイン機能の実装は記載しておりません。Cursorに相談しながら実装していくことも可能ですので試してみてください。
コード修正
ファイルや行単位でコードの修正を行ってもらうことができます。
1. リファクタリング
ファイル全体に対して修正を依頼したところ、
修正方法の観点および修正内容の提案を行なってくれました。
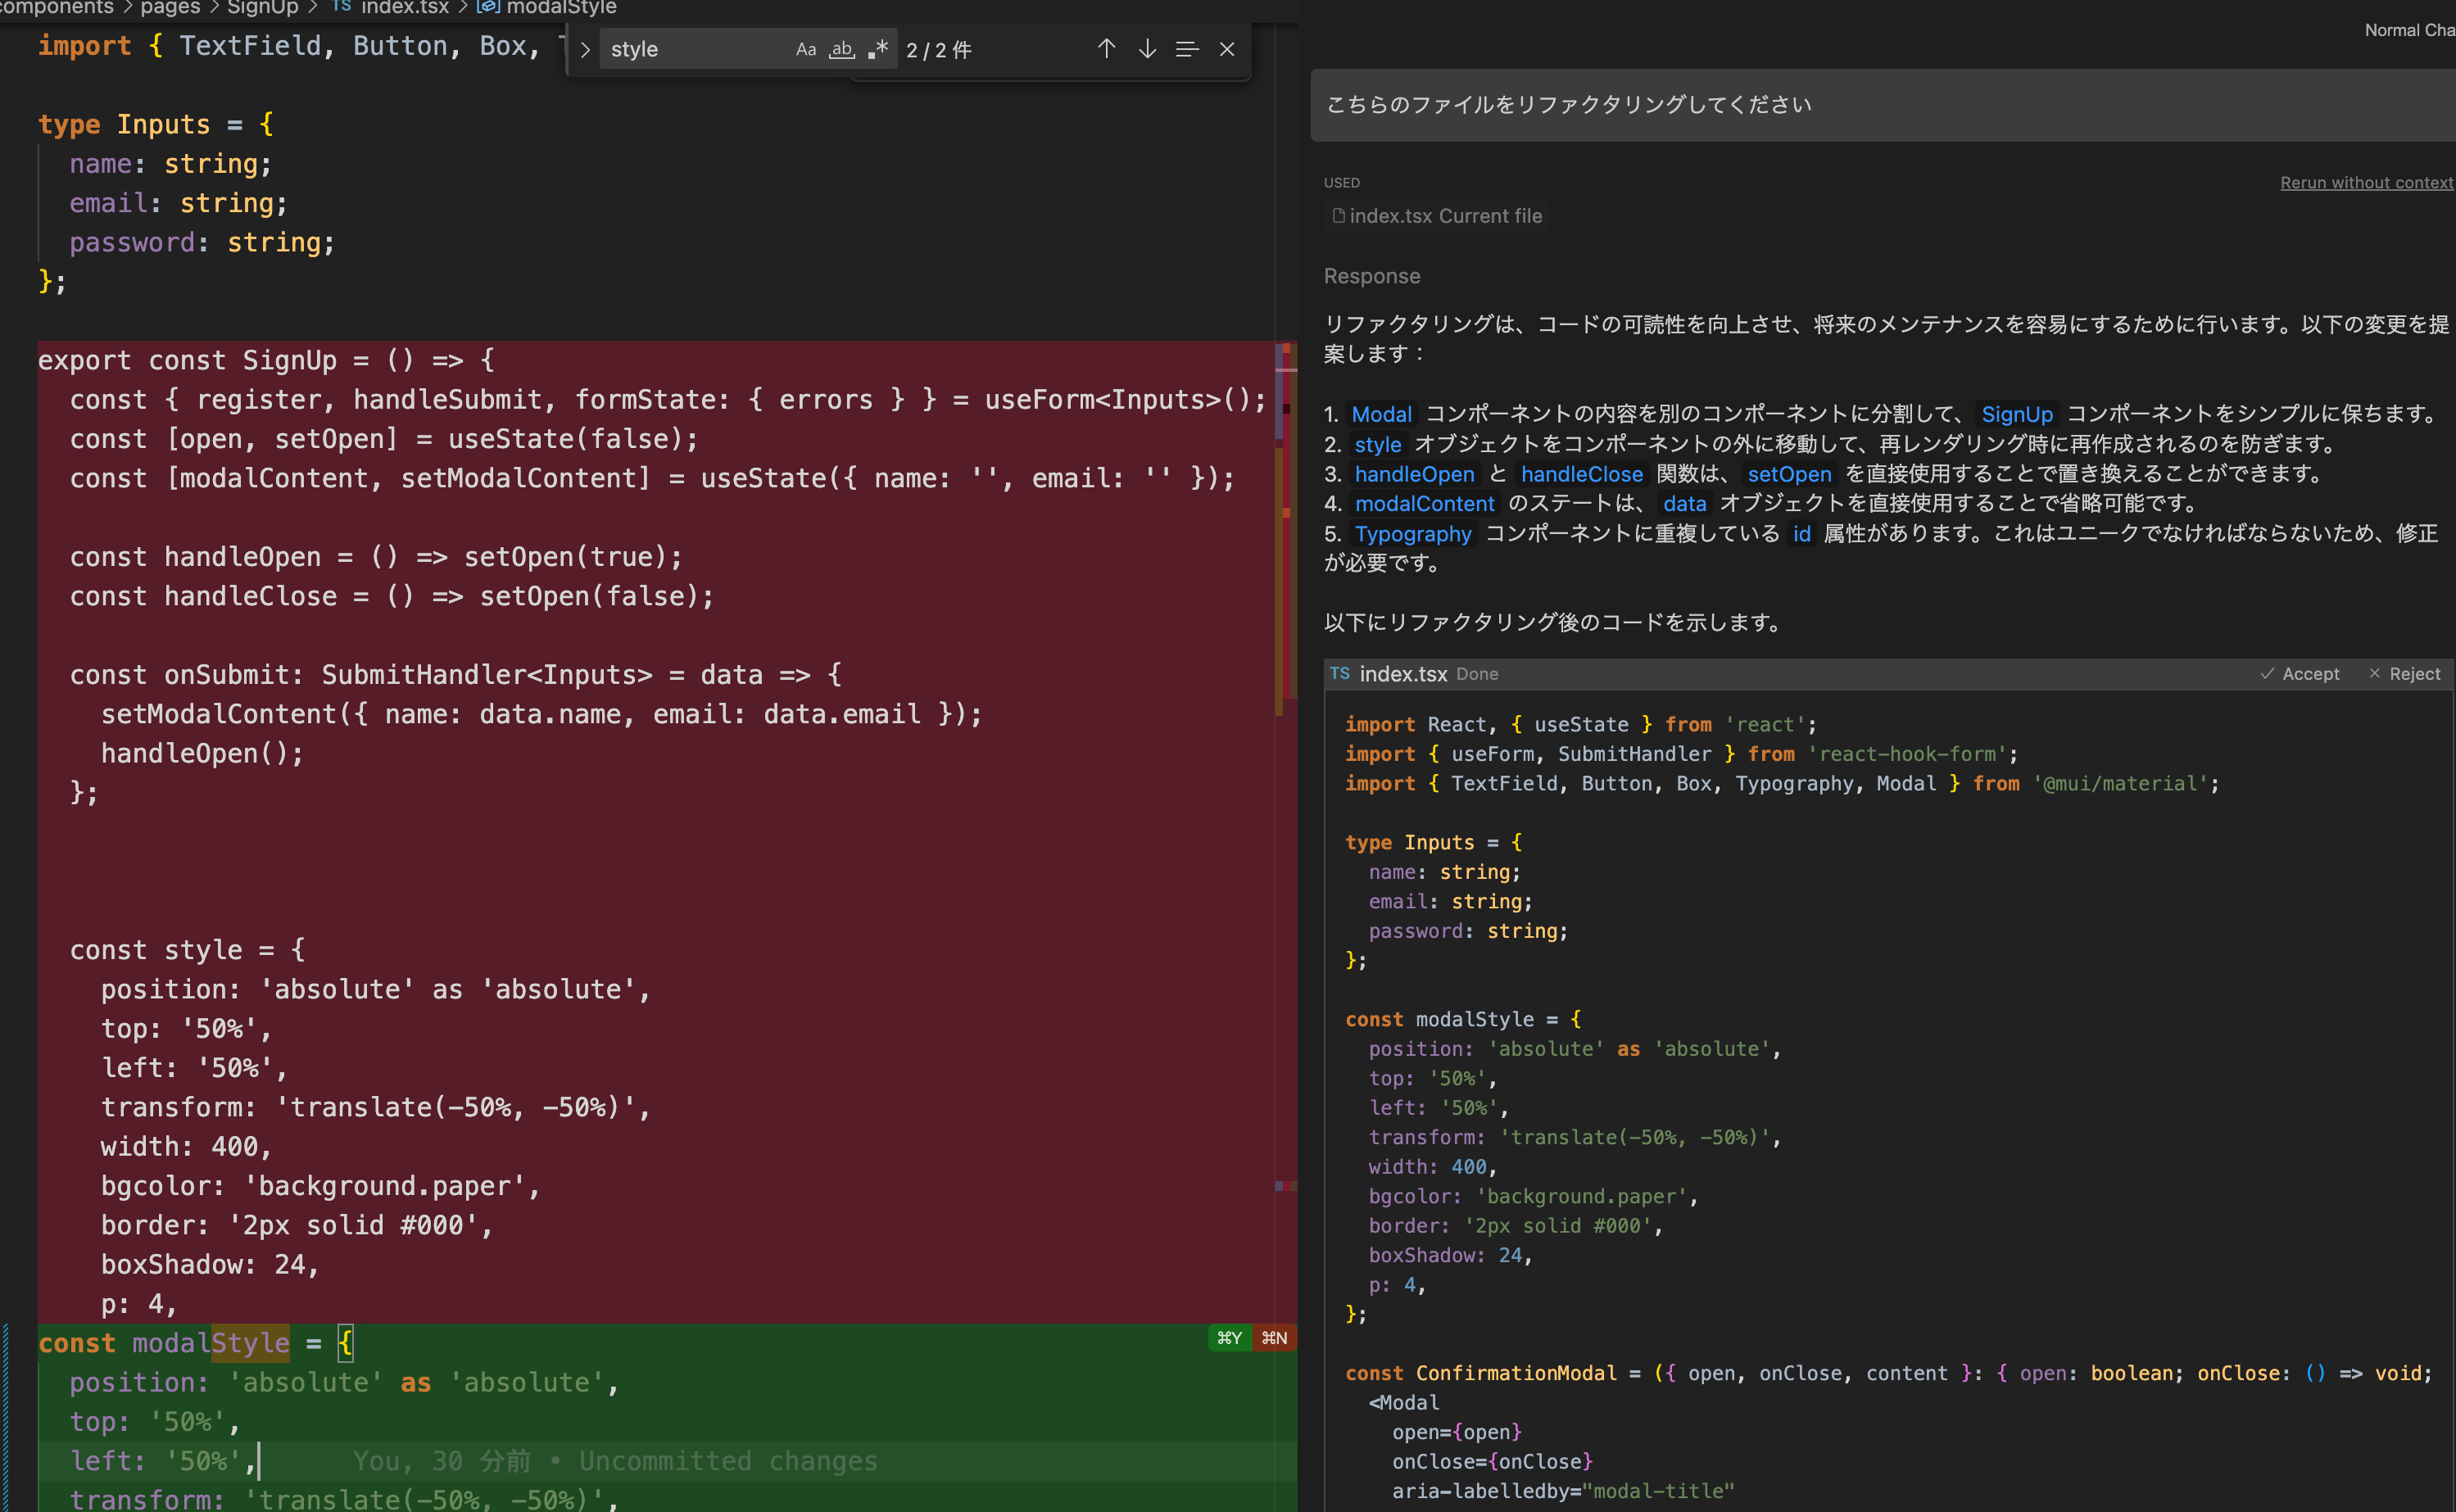
質問:こちらのファイルをリファクタリングしてください
※対象のファイルを開いた状態で質問をしてください。
回答
リファクタリングは、コードの可読性を向上させ、将来のメンテナンスを容易にするために行います。以下の変更を提案します:

1. Modal コンポーネントの内容を別のコンポーネントに分割して、SignUp コンポーネントをシンプルに保ちます。
2. style オブジェクトをコンポーネントの外に移動して、再レンダリング時に再作成されるのを防ぎます。
3. handleOpen と handleClose 関数は、setOpen を直接使用することで置き換えることができます。
4. modalContent のステートは、data オブジェクトを直接使用することで省略可能です。
5. Typography コンポーネントに重複している id 属性があります。これはユニークでなければならないため、修正が必要です。

以下にリファクタリング後のコードを示します。

import React, { useState } from 'react';
import { useForm, SubmitHandler } from 'react-hook-form';
import { TextField, Button, Box, Typography, Modal } from '@mui/material';

type Inputs = {
  name: string;
  email: string;
  password: string;
};

const modalStyle = {
  position: 'absolute' as 'absolute',
  top: '50%',
  left: '50%',
  transform: 'translate(-50%, -50%)',
  width: 400,
  bgcolor: 'background.paper',
  border: '2px solid #000',
  boxShadow: 24,
  p: 4,
};

const ConfirmationModal = ({ open, onClose, content }: { open: boolean; onClose: () => void; content: Inputs }) => (
  <Modal
    open={open}
    onClose={onClose}
    aria-labelledby="modal-title"
    aria-describedby="modal-description"
  >
    <Box sx={modalStyle}>
      <Typography id="modal-title" variant="h6" component="h2">
        登録内容確認
      </Typography>
      <Typography id="modal-description-name" sx={{ mt: 2 }}>
        名前: {content.name}
      </Typography>
      <Typography id="modal-description-email" sx={{ mt: 2 }}>
        メールアドレス: {content.email}
      </Typography>
    </Box>
  </Modal>
);

export const SignUp = () => {
  const { register, handleSubmit, formState: { errors } } = useForm<Inputs>();
  const [open, setOpen] = useState(false);
  const [formData, setFormData] = useState<Inputs>({ name: '', email: '', password: '' });

  const onSubmit: SubmitHandler<Inputs> = data => {
    setFormData(data);
    setOpen(true);
  };

  return (
    <Box display="flex" flexDirection="column" justifyContent="center" alignItems="center" height="100vh">
      <Typography variant="h4" component="h1" gutterBottom>
        SignUp
      </Typography>
      <Box component="form" onSubmit={handleSubmit(onSubmit)} sx={{ display: 'flex', flexDirection: 'column', width: '100%', maxWidth: '400px' }}>
        {/* ... 各 TextField コンポーネント ... */}
        <Button type="submit" variant="contained" color="primary" sx={{ mt: 2 }}>
          SignUp
        </Button>
      </Box>
      <ConfirmationModal open={open} onClose={() => setOpen(false)} content={formData} />
    </Box>
  );
};
上記ではConfirmationModalを別コンポーネントに分けてくれました。
2. 再度リファクタリング
上記ではConfirmationModalを別コンポーネントに分けてくれましたが通常は別ファイルに分けて管理します。
そこで再度リファクタリングの依頼をしてみました。
ConfirmationModalを分けてくれるだけでなく、
SignUpファイルに関しても修正を行ってくれました。
ただし、lintエラーが出る場合もありますので、
回答が怪しいと思った際は自身でコードが正しいか判断してください。
質問:さらにリファクタリングしてください
回答
リファクタリングの一環として、以下の変更を行います:

1. ConfirmationModal コンポーネントを別のファイルに分割して、可読性と再利用性を向上させます。
2. useForm フックの register 関数を使用する際に、バリデーションルールを外部の定数として定義し、コードの重複を減らします。
3. onSubmit 関数内で直接 setOpen を呼び出すのではなく、handleOpen と handleClose という名前の関数を作成して、モーダルの開閉を管理します。

まず、ConfirmationModal コンポーネントを新しいファイルに分割します。

import React from 'react';
import { Box, Typography, Modal } from "@mui/material";

type Inputs = {
  name: string;
  email: string;
};

const modalStyle = {
  position: "absolute" as "absolute",
  top: "50%",
  left: "50%",
  transform: "translate(-50%, -50%)",
  width: 400,
  bgcolor: "background.paper",
  border: "2px solid #000",
  boxShadow: 24,
  p: 4
};

const ConfirmationModal = ({ open, onClose, content }: { open: boolean; onClose: () => void; content: Inputs }) => (
  <Modal open={open} onClose={onClose} aria-labelledby="modal-title" aria-describedby="modal-description">
    <Box sx={modalStyle}>
      <Typography id="modal-title" variant="h6" component="h2">
        登録内容確認
      </Typography>
      <Typography id="modal-description-name" sx={{ mt: 2 }}>
        名前: {content.name}
      </Typography>
      <Typography id="modal-description-email" sx={{ mt: 2 }}>
        メールアドレス: {content.email}
      </Typography>
    </Box>
  </Modal>
);

export default ConfirmationModal;


次に、SignUp コンポーネントを更新します。

import React, { useState } from "react"
import { useForm, SubmitHandler } from "react-hook-form"
import { TextField, Button, Box, Typography } from "@mui/material"
import ConfirmationModal from './ConfirmationModal';

type Inputs = {
  name: string
  email: string
  password: string
}

const validationRules = {
  name: { required: "名前を入力してください。" },
  email: { required: "メールアドレスを入力してください。", pattern: { value: /\S+@\S+\.\S+/, message: "有効なメールアドレスを入力してください。" } },
  password: { required: "パスワードを入力してください。", minLength: { value: 6, message: "パスワードは6文字以上である必要があります。" } }
};

export const SignUp = () => {
  const { register, handleSubmit, formState: { errors } } = useForm<Inputs>();
  const [open, setOpen] = useState(false);
  const [formData, setFormData] = useState<Inputs>({ name: "", email: "", password: "" });

  const handleOpenModal = (data: Inputs) => {
    setFormData(data);
    setOpen(true);
  };

  const onSubmit: SubmitHandler<Inputs> = (data) => handleOpenModal(data);

  return (
    <Box display="flex" flexDirection="column" justifyContent="center" alignItems="center" height="100vh">
      <Typography variant="h4" component="h1" gutterBottom>
        SignUp
      </Typography>
      <Box
        component="form"
        onSubmit={handleSubmit(onSubmit)}
        sx={{ display: "flex", flexDirection: "column", width: "100%", maxWidth: "400px" }}
      >
        {Object.keys(validationRules).map((key) => (
          <TextField
            key={key}
            label={key === "name" ? "名前" : key === "email" ? "メールアドレス" : "パスワード"}
            variant="outlined"
            margin="normal"
           margin="normal"
           {...register(key as keyof Inputs, validationRules[key as keyof typeof validationRules])}
           error={!!errors[key as keyof typeof errors]}
           helperText={errors[key as keyof typeof errors]?.message}
           type={key === "password" ? "password" : "text"}
          />
        ))}
        <Button type="submit" variant="contained" sx={{ mt: 3 }}>
          登録
        </Button>
      </Box>
      <ConfirmationModal open={open} onClose={() => setOpen(false)} content={formData} />
    </Box>
  );
};

export default SignUp;


まとめ
今回はCursorの普段の使い方をまとめました。
Cursorはこまめにアップデートされていて、これ以外にも使用方法は沢山あります。
慣れてくると自分で操作するよりも早く実装できることがあるので、
様々なAIへの指示の出し方を試してみてください。