はじめに
SpringBoot + Thymeleaf + Mavenで「Hello World」を表示させる手順を記載します。
開発環境
OS:windows10
IDE:eclipse(4.15.0)
Java:11
ビルドツール:Maven
手順
「Hello World」を表示させるまでの手順は下記です。
- プロジェクトの作成
- pom.xmlの編集
- 画面の作成
- Controllerの作成
- 実行
1. プロジェクト作成
eclipseを起動します。
eclipseの[ファイル]→[新規]→[プロジェクト]を選択します。

「Spring スターター・プロジェクト」を選択し、「次へ」ボタンを押下します。

次の画面で以下を確認し、「次へ」ボタンを押下します。
・型:Maven
・Javaバージョン:11
・パッケージング:Jar
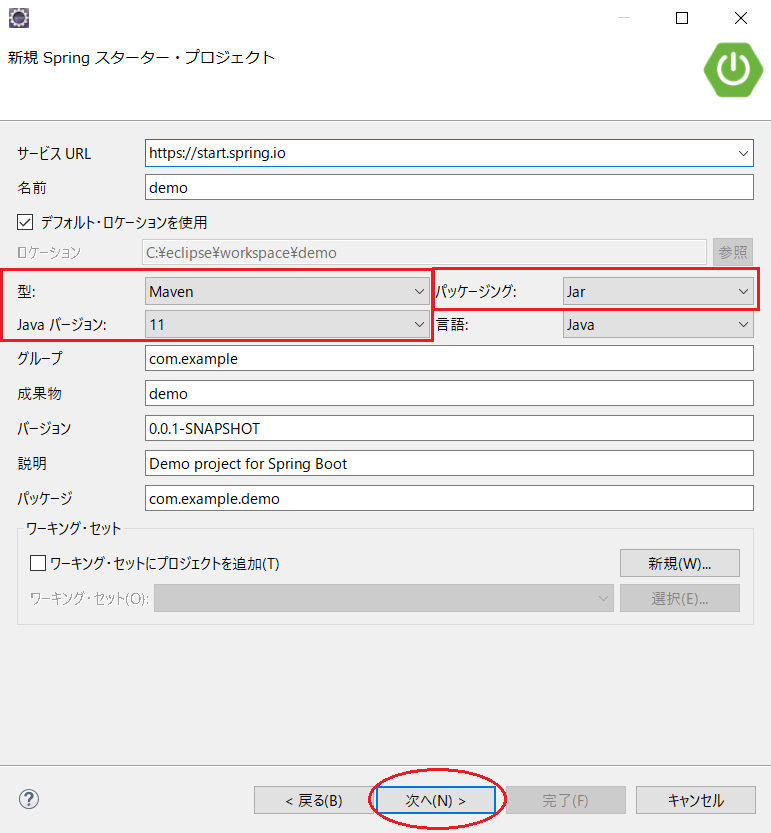
[Web]→[Spring Web]を選択し、「完了」ボタンを押下します。

プロジェクトが作成されました!

2. pom.xmlの編集
pom.xml はプロジェクトに関する情報を持つMavenの設定ファイルです。
例えば、プロジェクトのビルドに関する情報、依存ライブラリの情報、プラグインの情報などが含まれます。
今回は「Thymeleaf」を使用するのでライブラリをMavenでインストールします。
pom.xmlを開き、以下のように編集してください。
<?xml version="1.0" encoding="UTF-8"?>
<project xmlns="http://maven.apache.org/POM/4.0.0" xmlns:xsi="http://www.w3.org/2001/XMLSchema-instance"
	xsi:schemaLocation="http://maven.apache.org/POM/4.0.0 https://maven.apache.org/xsd/maven-4.0.0.xsd">
	<modelVersion>4.0.0</modelVersion>
	<parent>
		<groupId>org.springframework.boot</groupId>
		<artifactId>spring-boot-starter-parent</artifactId>
		<version>2.5.3</version>
		<relativePath/> <!-- lookup parent from repository -->
	</parent>
	<groupId>com.example</groupId>
	<artifactId>demo</artifactId>
	<version>0.0.1-SNAPSHOT</version>
	<name>demo</name>
	<description>Demo project for Spring Boot</description>
	<properties>
		<java.version>11</java.version>
	</properties>
	<dependencies>
		<dependency>
			<groupId>org.springframework.boot</groupId>
			<artifactId>spring-boot-starter-web</artifactId>
		</dependency>

		<!-- ↓ ここから -->
        <dependency>
            <groupId>org.springframework.boot</groupId>
            <artifactId>spring-boot-starter-thymeleaf</artifactId>
        </dependency>
		<!-- ↑ ここまで追加 -->

		<dependency>
			<groupId>org.springframework.boot</groupId>
			<artifactId>spring-boot-starter-test</artifactId>
			<scope>test</scope>
		</dependency>
	</dependencies>

	<build>
		<plugins>
			<plugin>
				<groupId>org.springframework.boot</groupId>
				<artifactId>spring-boot-maven-plugin</artifactId>
			</plugin>
		</plugins>
	</build>

</project>
3. 画面の作成
プロジェクトが作成できたので、次は画面を作成していきます。
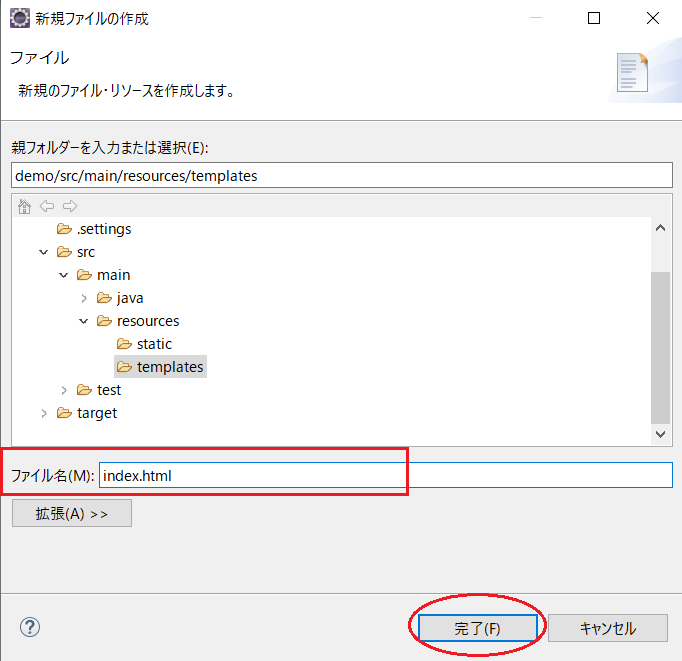
「src/main/resources/templates」で右クリックし、[新規]⇒[ファイル]を選択します。

ファイル名に「index.html」と入力し、「完了」ボタンを押下します。
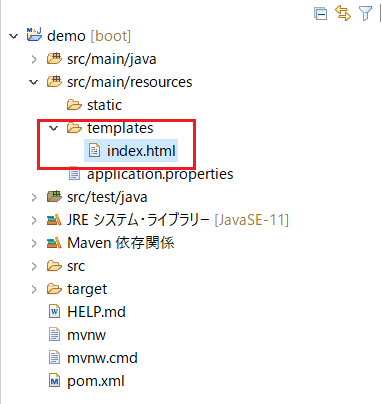
「index.html」ファイルが追加されました。
「index.html」ファイルを開き、以下のように記載してください。
<!DOCTYPE html>
<html xmlns="http://www.w3.org/1999/xhtml" xmlns:th="http://www.thymeleaf.org">
 <head>
   <title>Hello World</title>
   <meta charset="utf-8" />
 </head>
 <body>
   <h1>Spring Boot</h1>
   <p>
     <span th:text="${message}"></span>
   </p>
 </body>
</html>
これで画面の作成は完了です。
4. Controllerの作成
次はControllerを作成します。
「com.example.demo」パッケージ上で右クリックし、[新規]→[クラス]を選択します。
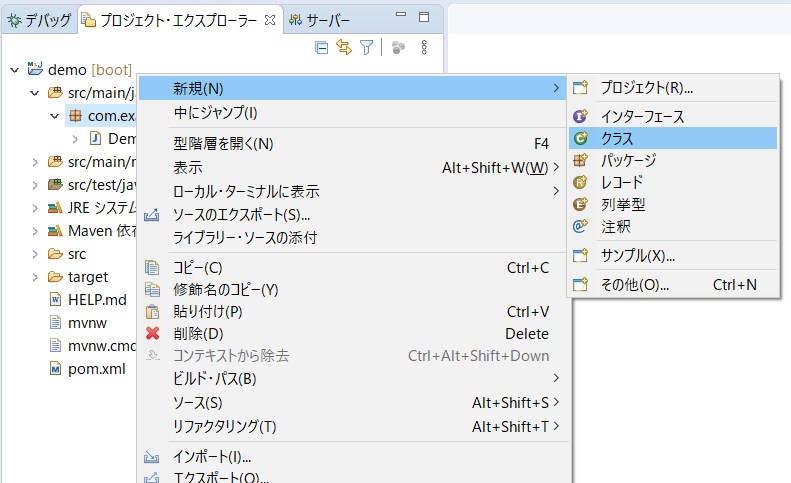
名前に「HelloWorldController」を入力し、「完了」ボタンを押下します。
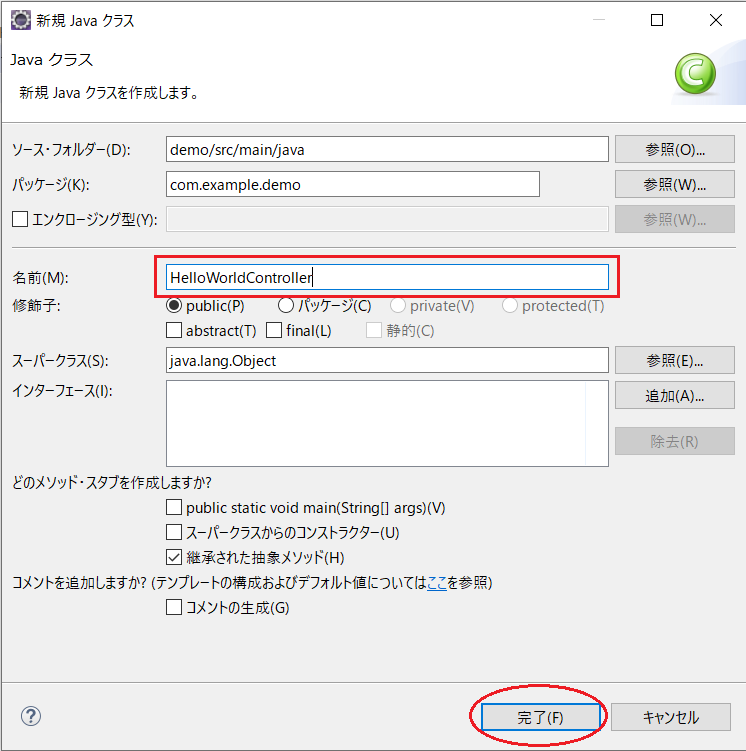
「HelloWorldController.java」ファイルを開き、以下のように記載してください。
package com.example.demo;

import org.springframework.stereotype.Controller;
import org.springframework.ui.Model;
import org.springframework.web.bind.annotation.RequestMapping;
import org.springframework.web.bind.annotation.RequestMethod;

@Controller
public class HelloWorldController {

    @RequestMapping(value = "/", method = RequestMethod.GET)
    public String helloWorld(Model model) {
        model.addAttribute("message", "Hello World!!");
        return "index";
    }
}
これでControllerの作成は完了です。
5. 実行
次はプロジェクトを実行してみましょう。
プロジェクト上で右クリック > [実行] > [Spring Boot App] を選択します。
起動したら、ブラウザから以下のURLにアクセスしてください。
URL:http://localhost:8080/
