こんにちは。八ツ橋まろんです!
3DのバーチャルYouTuberをやっていると「コラボのサムネ作るから立ち絵くれ~」って感じで、3Dモデルのスクショ(それも透過画像)が必要なことが多いです。
VRChatのカメラ機能に透過モードがあるので、VRChatやってる人はこの機能を使うことが多いようですが、視野角が60度で固定だし、いちいちVRChatにVRモードで入るの面倒なので、Unity上でスクショ撮りましょう。という記事です。
完成ファイルは以下のリンクからDLするか、下に貼るスクリプトをコピペしてください。
https://www.pixiv.net/fanbox/creator/16717003/post/560406
使い方とスクリプトを以下に書きます。
スクリプト
using System;
using System.Collections;
using System.IO;
using UnityEngine;
using UnityEngine.UI;
# if UNITY_EDITOR
using UnityEditor;
# endif


public class ScreenShot : MonoBehaviour
{
    public bool Alpha = true;
    public string Floder = "Assets/Resources";

    IEnumerator CaptureWithAlpha()
    {
        yield return new WaitForEndOfFrame();

        var tex = ScreenCapture.CaptureScreenshotAsTexture();

        var width = tex.width;
        var height = tex.height;
        var texNoAlpha = new Texture2D(width, height, TextureFormat.RGB24, false);
        var texAlpha = new Texture2D(width, height, TextureFormat.ARGB32, false);

        if (Alpha)
        {
            // Read screen contents into the texture
            texAlpha.ReadPixels(new Rect(0, 0, width, height), 0, 0);
            texAlpha.Apply();
        }
        else
        {
            // Read screen contents into the texture
            texNoAlpha.ReadPixels(new Rect(0, 0, width, height), 0, 0);
            texNoAlpha.Apply();
        }

# if UNITY_EDITOR
        SafeCreateDirectory(Floder);
# endif
        // Encode texture into PNG
        var bytes = texAlpha.EncodeToPNG(); ;
        if (!Alpha)
        {
             bytes = texNoAlpha.EncodeToPNG();
        }
        Destroy(tex);
        File.WriteAllBytes(Floder + "/" + DateTime.Now.ToString("yyyy-MM-dd_HH-mm-ss") + ".png", bytes);
        AssetDatabase.Refresh();
    }
    public static DirectoryInfo SafeCreateDirectory(string path)
    {
        return Directory.Exists(path) ? null : Directory.CreateDirectory(path);
    }
    [ContextMenu("Screenshot")]
    public void Screenshot()
    {
        StartCoroutine(CaptureWithAlpha());
    }
}
使い方
・スクリプトをインポートして、適当なオブジェクトに付けてください
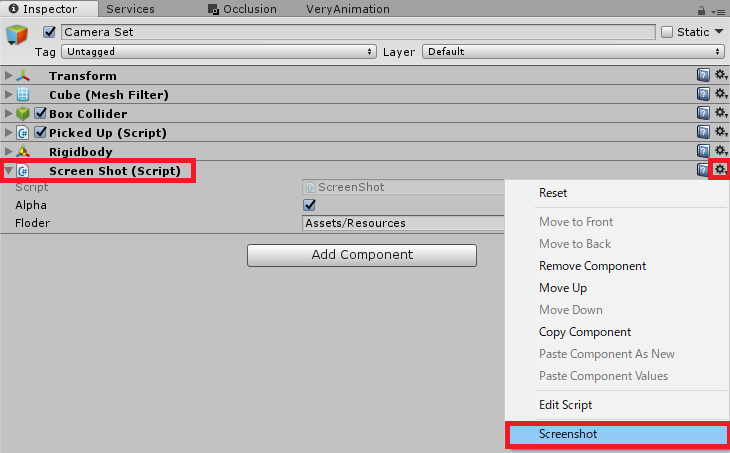
・インスペクターのScreen Shotの右上の歯車を押して下に出てくるScreenshotを押すとGame画面のスクリーンショットがpng形式で保存されます
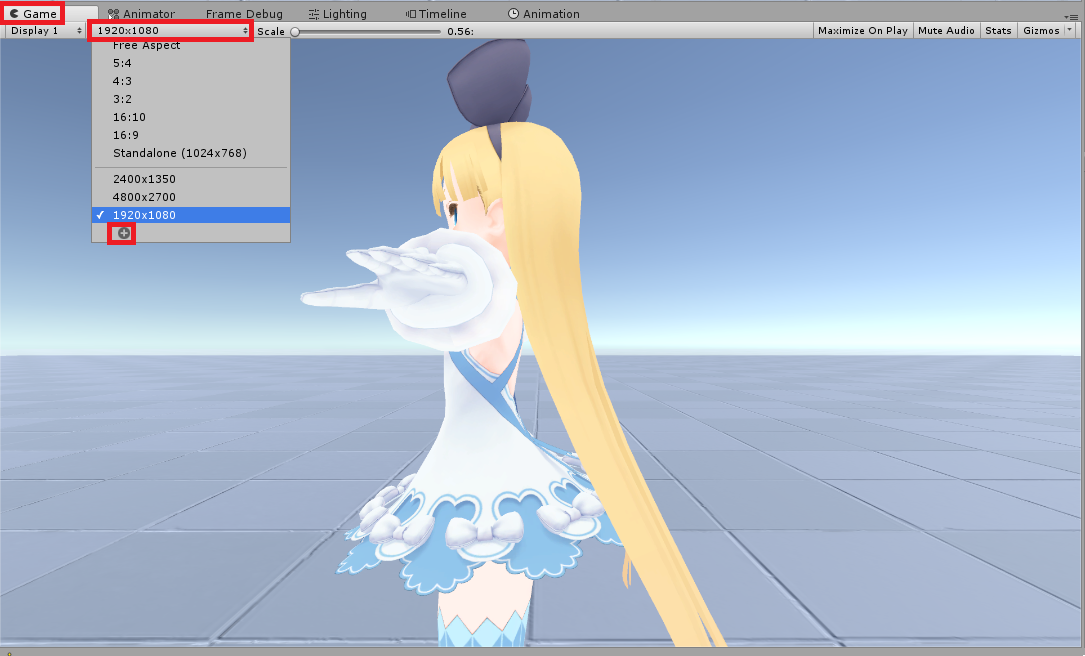
・Game画面のタブを開いていないと保存されません。
・保存場所は、デフォルトではAssets/Resourcesフォルダに保存されます。
・解像度はGame画面のアスペクトによって決まるので、ほしいサイズのアスペクトを+ボタンで作るとよいです
・インスペクターのScreen ShotのAlphaで透過画像か否かを選択できます(デフォルトでは透過画像)
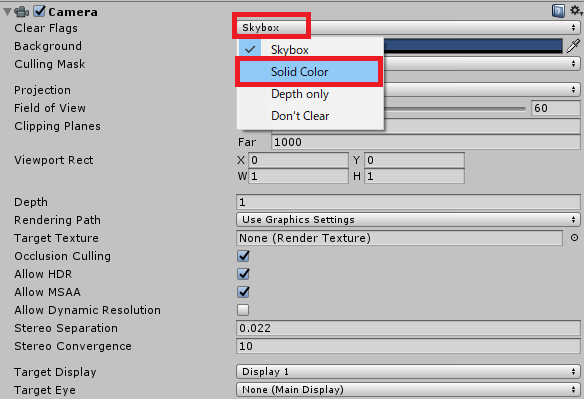
ただし、透過画像にするにはCameraの設定が必要です。CameraのClear FlagsをSkyboxからSolid Colorに変更してください。
これで、Game画面をスクショした時に透過画像として保存されます。
・保存フォルダはデフォルトではAssets/Resourcesフォルダに保存され、Resourcesフォルダがない場合はフォルダが生成されます
・インスペクターのScreen ShotのFolderを変更すれば、好きなフォルダに保存できます
・その他に、スクショの実行はpublicメソッドなので、別の所からScreenshot()を実行すればスクショが保存されます(わかる人向け)
public void Screenshot()
    {
        StartCoroutine(CaptureWithAlpha());
    }
以上、Unity画面のスクショを撮るスクリプトでしたっ
<参考>
Unityで透過png書き出しをしたい! <トマシープが学ぶ>
🌟🌟🌟よければこちらも覗いてみてねっ🌟🌟🌟
Twitter
https://twitter.com/Maron_Vtuber
Youtube
https://www.youtube.com/channel/UCiIbLpncjzahHsp8cokG56g