こんにちは。八ツ橋まろんです。
「UnityでVRゲームを開発するときに必要なSteamVR Pluginの導入から、Viveコントローラで前後左右の移動と左右の回転ができるようになるまで」を説明します。
本記事で解説するのは、pixivFANBOXで公開しているモーションキャプチャ用unitypackage「VR Motion Recorder」で実装されている機能のうち、SteamVR Pluginの導入の部分と、コントローラによる移動・回転に関する部分の実装の解説になります。
https://www.pixiv.net/fanbox/creator/16717003/post/566230
使用するSteamVR Pluginはver.2.3.2で行います。(2019年9月現在の最新)
SteamVR Pluginはver.1.x.xからver.2.x.xで内容が大きく変わり、使い方が全く別のものになったため、もしver.3.x.xが出たらこの記事も使い物にならない可能性があるということはご了承ください。
環境
Unity(この記事ではUnity2017.4.28f1。SteamVR Pluginの要件を満たせば何でも良い。)
HTC Vive
SteamVR Plugin ver.2.3.2
導入
・Unityで新しいプロジェクトを作り、SteamVR Pluginをインポート
SteamVR Plugin
(https://assetstore.unity.com/packages/tools/integration/steamvr-plugin-32647)
・[CameraRig]プレハブをヒエラルキーに置き、再生ボタンを押す
・この画面が出るので、以下の操作を行います
①Actionsの右下の"+"を押して行を追加する
②追加した行のNameを"direction"にする(directionは変数名なので変えてもいい)
③変数のTypeをvector2にする
④"Save and generate"を押す
⑤SteamVRを起動し、Viveのコントローラの電源を入れてSteamVRにコントローラを認識させ、"Open binding UI"を押す。

⑥上記⑤でブラウザでこの画面が開くので、"編集"を押す
(Unityのプロジェクト名に全角文字が入っているとプロジェクトが上手く認識されないため、この画面にならない)

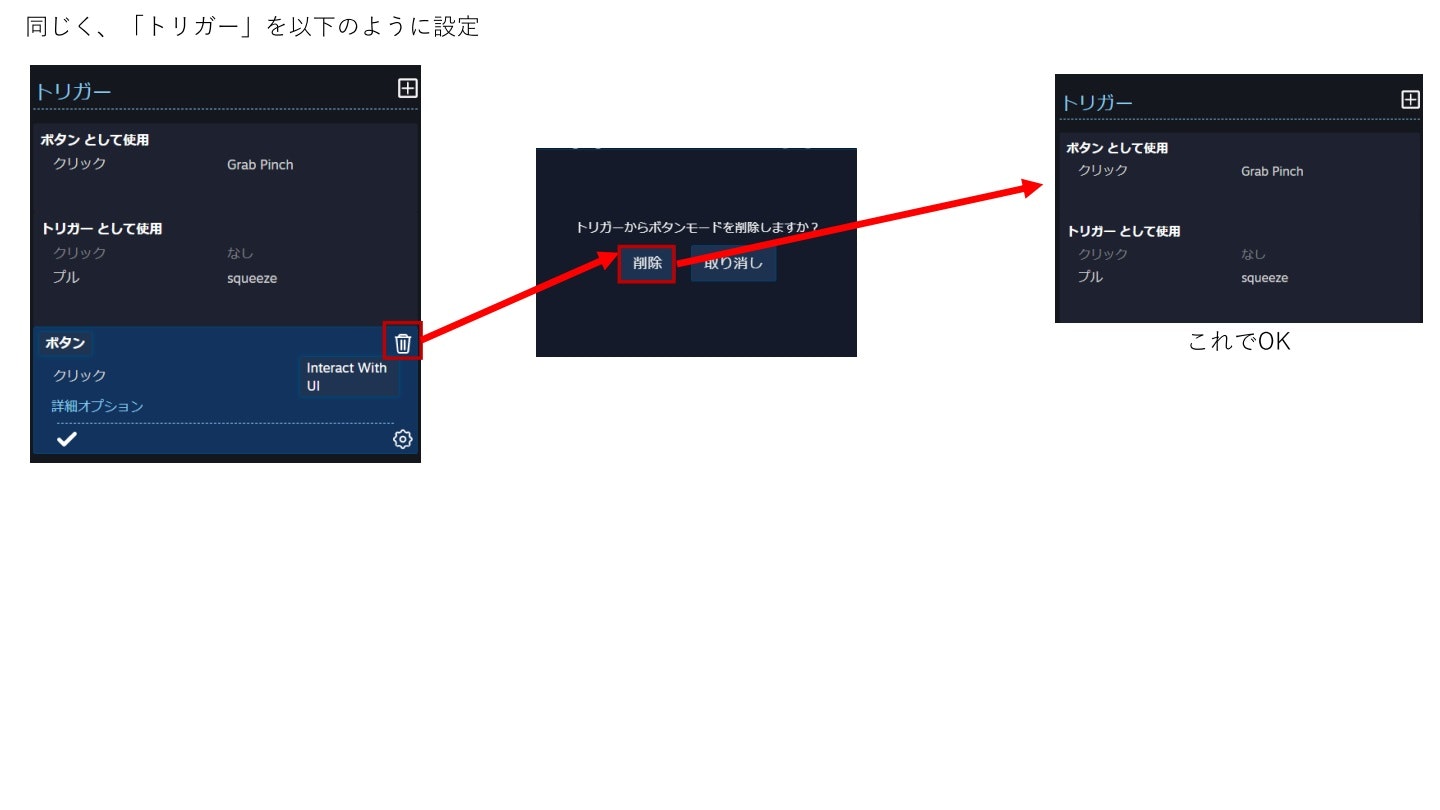
⑦コントローラの割り当て画面が開くので、以下の画像と同じように設定する


さて、ここまでが完了したら、Unityの画面に戻ります。
[CameraRig]のオブジェクトに以下のPlayerControllerスクリプトをアタッチしましょう。
/*
【概要】
VIVEコントローラで前後左右の移動と回転をするスクリプト

左手:タッチパッドの入力で『上下左右』を判定し↑←↓→の移動をする
右手:タッチパッドの入力で『左右』を判定し右回転と左回転をする
*/

using UnityEngine;
using Valve.VR;

public class PlayerController : MonoBehaviour
{
    public SteamVR_Input_Sources lefthandType;
    public SteamVR_Input_Sources righthandType;
    public SteamVR_Action_Boolean teleport;
    public SteamVR_Action_Vector2 direction;
    public Transform _VRCamera;
    public float _Movespeed = 3f;
    public float _Rotspeed = 2f;

    void Update()
    {
        if (CheckGrabLeft())
        {
            Move();
        }
        if (CheckGrabRight())
        {
            Rotate();
        }
    }

    private void Move()
    {
        // HMD(=カメラ)の向いている方向から上下左右に水平方向に進む
        // 進む方向はCheckDirectionLeft()で計算する
        this.transform.position += _Movespeed * Vector3.ProjectOnPlane(CheckDirectionLeft(), Vector3.up) / 100;
    }
    private void Rotate()
    {
        // HMD(=カメラ)位置を中心として左右に回転する
        // 左右の判定はCheckDirectionRight()で計算する
        this.transform.RotateAround(_VRCamera.position, Vector3.up, _Rotspeed * CheckDirectionRight());
    }
    private bool CheckGrabLeft()
    {
        return teleport.GetState(lefthandType);
    }
    private bool CheckGrabRight()
    {
        return teleport.GetState(righthandType);
    }
    private Vector3 CheckDirectionLeft()
    {
        // タッチパッドのタッチ位置をVector2で取得
        Vector2 dir = direction.GetAxis(lefthandType);
        if (Mathf.Abs(dir.y) >= Mathf.Abs(dir.x))
        {
            // Y方向の絶対値の方が大きければ、HMD(=カメラ)に対して前か後ろ方向を返す
            return Mathf.Sign(dir.y) * Vector3.RotateTowards(new Vector3(0f, 0f, 1f), _VRCamera.forward, 360f, 360f);
        }
        else
        {
            // X方向の絶対値の方が大きければ、HMD(=カメラ)に対して右か左方向を返す
            return Mathf.Sign(dir.x) * Vector3.RotateTowards(new Vector3(1f, 0f, 0f), _VRCamera.right, 360f, 360f);
        }
    }
    private float CheckDirectionRight()
    {
        // タッチパッドのタッチ位置をVector2で取得
        Vector2 dir = direction.GetAxis(righthandType);
        if (Mathf.Abs(dir.y) >= Mathf.Abs(dir.x))
        {
            // Y方向の絶対値の方が大きければ、回転量=0を返す
            return 0f;
        }
        else
        {
            // X方向の絶対値の方が大きければ、回転量= 1か -1を返す
            return Mathf.Sign(dir.x);
        }
    }
}
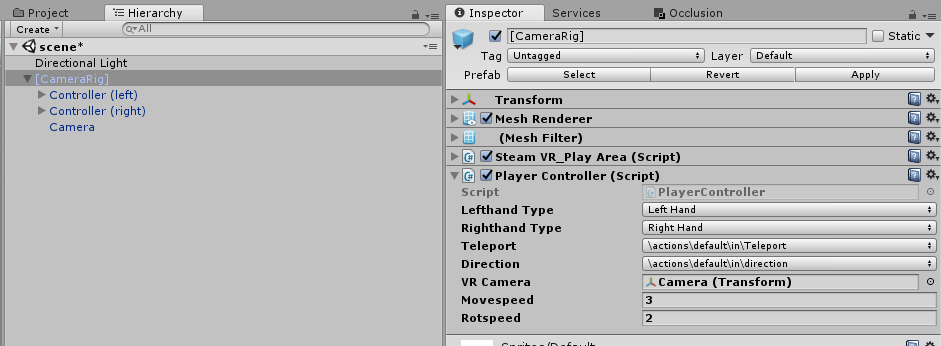
[CameraRig]のPlayerControllerのInspectorを以下のように設定します。

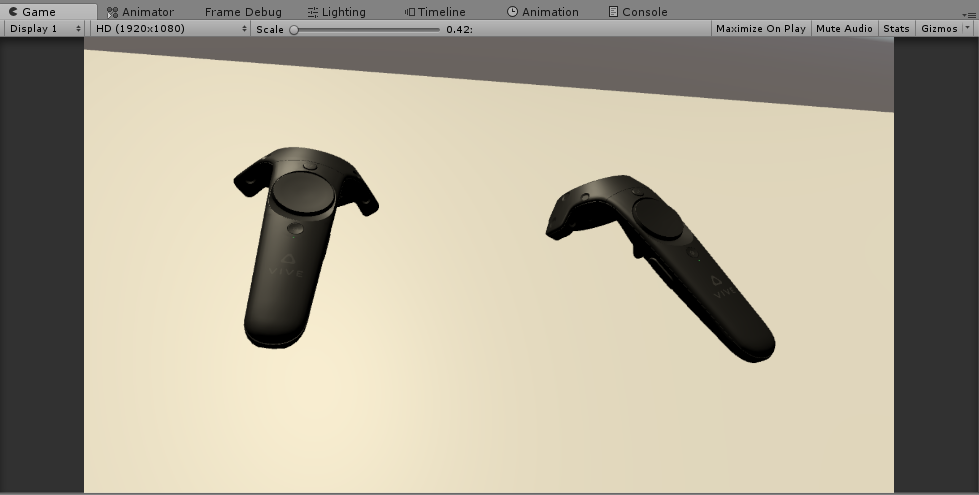
これで再生ボタンを押すと、HMDに画面が表示され、コントローラで移動・回転ができるようになります。

🌟🌟🌟ちょいと解説🌟🌟🌟
Update関数内で、左右のコントローラのタッチパッドをクリックしたか否かを常に監視しています。
 void Update()
    {
        if (CheckGrabLeft())
        {
            Move();
        }
        if (CheckGrabRight())
        {
            Rotate();
        }
    }
タッチパッドのクリック判定は、『パラメータ.GetState(入力デバイス)』で行います。
判定結果はbooleanで帰ってきます。
private bool CheckGrabLeft()
    {
        return teleport.GetState(lefthandType);
    }
上記では、パラメータ=teleportですが、それは以下のSteamVR Inputで設定したものでした。

また、入力デバイス=lefthandTypeですが、その中身はInspectorで設定します。

🌟🌟🌟解説終わり🌟🌟🌟
SteamVRはデフォルトだとテレポート移動のため、VR酔いしづらいですが移動しづらいです。
個人的にはコントローラで前後移動と回転をしたいので、これを作ってみました。
以上、「SteamVR Pluginの導入から VIVEコントローラの入力取得まで」でしたっ!
八ツ橋まろん
🌟🌟🌟こちらも覗いてみてねっ🌟🌟🌟
Twitter
https://twitter.com/Maron_Vtuber
pixivFANBOX (ツールの配布)
https://www.pixiv.net/fanbox/creator/16717003
Youtube (ツールの解説やVtuber活動)
https://www.youtube.com/channel/UCiIbLpncjzahHsp8cokG56g
