初めに
最近WordPressでサイトを作成する必要がありました.
せっかく作るのでちょっと凝りたいと思って分散ストレージであるLonghornを使用して構築してみました.よかったら参考にしてみてください.
環境
今回は以下の構成でクラスタを作成します.合計4台です.作成方法はこちらを参考にしてください.
Kubernetesクラスタ(RKE2で作成)
- Master
- CPU(4GB)
- Memory(4GB)
- Storage(30GB)
- Worker(1~3)
- CPU(4GB)
- Memory(4GB)
- Storage(30GB)
注意
Kubernetesクラスタを3台で構成した時,Longhornが立ちませんでした.
Longhornの構築
Longhornの構築は意外と簡単でした.
まずは,LonghornのiSCSIサポートをインストールします.
$ kubectl apply -f https://raw.githubusercontent.com/longhorn/longhorn/v1.5.3/deploy/prerequisite/longhorn-iscsi-installation.yaml
LonghornのNFSサポートをインストール
$ kubectl apply -f https://raw.githubusercontent.com/longhorn/longhorn/v1.5.3/deploy/prerequisite/longhorn-nfs-installation.yaml
Longhorn v1.5.3のインストール
$ kubectl apply -f https://raw.githubusercontent.com/longhorn/longhorn/v1.5.3/deploy/longhorn.yaml
LonghornのPodとサービスの状態を確認
$ kubectl -n longhorn-system get pod
NAME                                                     READY   STATUS    RESTARTS       AGE
csi-attacher-785fd6545b-n72gt                            1/1     Running   0              6h
csi-attacher-785fd6545b-pjht6                            1/1     Running   0              6h
csi-attacher-785fd6545b-q4ffm                            1/1     Running   0              6h
csi-provisioner-8658f9bd9c-ck8m7                         1/1     Running   0              6h
csi-provisioner-8658f9bd9c-lvdtj                         1/1     Running   0              6h
csi-provisioner-8658f9bd9c-mhw2b                         1/1     Running   0              6h
csi-resizer-68c4c75bf5-jhf7q                             1/1     Running   0              6h
csi-resizer-68c4c75bf5-kgg4h                             1/1     Running   0              6h
csi-resizer-68c4c75bf5-w65fn                             1/1     Running   0              6h
csi-snapshotter-7c466dd68f-5vtrm                         1/1     Running   0              6h
csi-snapshotter-7c466dd68f-js8qw                         1/1     Running   0              6h
csi-snapshotter-7c466dd68f-mchmb                         1/1     Running   0              6h
engine-image-ei-68f17757-22pbc                           1/1     Running   0              6h1m
engine-image-ei-68f17757-87vbh                           1/1     Running   0              6h1m
engine-image-ei-68f17757-gw2hv                           1/1     Running   0              6h1m
engine-image-ei-68f17757-pl8ts                           1/1     Running   0              6h1m
instance-manager-08fa37dc20b41400bf2850c82c29c031        1/1     Running   0              6h1m
instance-manager-5f3d55e0dc3fc72e35d209e4ed542f97        1/1     Running   0              6h1m
instance-manager-b84383382aa321e5cbc5952d5ea7d7f5        1/1     Running   0              6h1m
instance-manager-c1b1301c843cca7b9aebaf8ded30c797        1/1     Running   0              6h1m
longhorn-csi-plugin-7nq7x                                3/3     Running   0              6h
longhorn-csi-plugin-c229g                                3/3     Running   0              6h
longhorn-csi-plugin-t4cd9                                3/3     Running   0              6h
longhorn-csi-plugin-zn7kh                                3/3     Running   0              6h
longhorn-driver-deployer-7d5dc67667-z4qcw                1/1     Running   0              6h1m
longhorn-manager-85fc8                                   1/1     Running   0              6h1m
longhorn-manager-nf8xt                                   1/1     Running   0              6h1m
longhorn-manager-wjppp                                   1/1     Running   1 (6h1m ago)   6h1m
longhorn-manager-xwhvk                                   1/1     Running   1 (6h1m ago)   6h1m
longhorn-ui-85cc67494f-cs9d8                             1/1     Running   0              6h1m
longhorn-ui-85cc67494f-gvrf2                             1/1     Running   0              6h1m
share-manager-pvc-11fdf582-4c09-4ded-93bd-165946466d4b   1/1     Running   0              5h12m
share-manager-pvc-f929bee3-c369-41dd-ab82-b2b85677fed6   1/1     Running   0              5h12m
すごい数ですね.これで動かせます.
PortFowardしてUIを見てみましょう!!
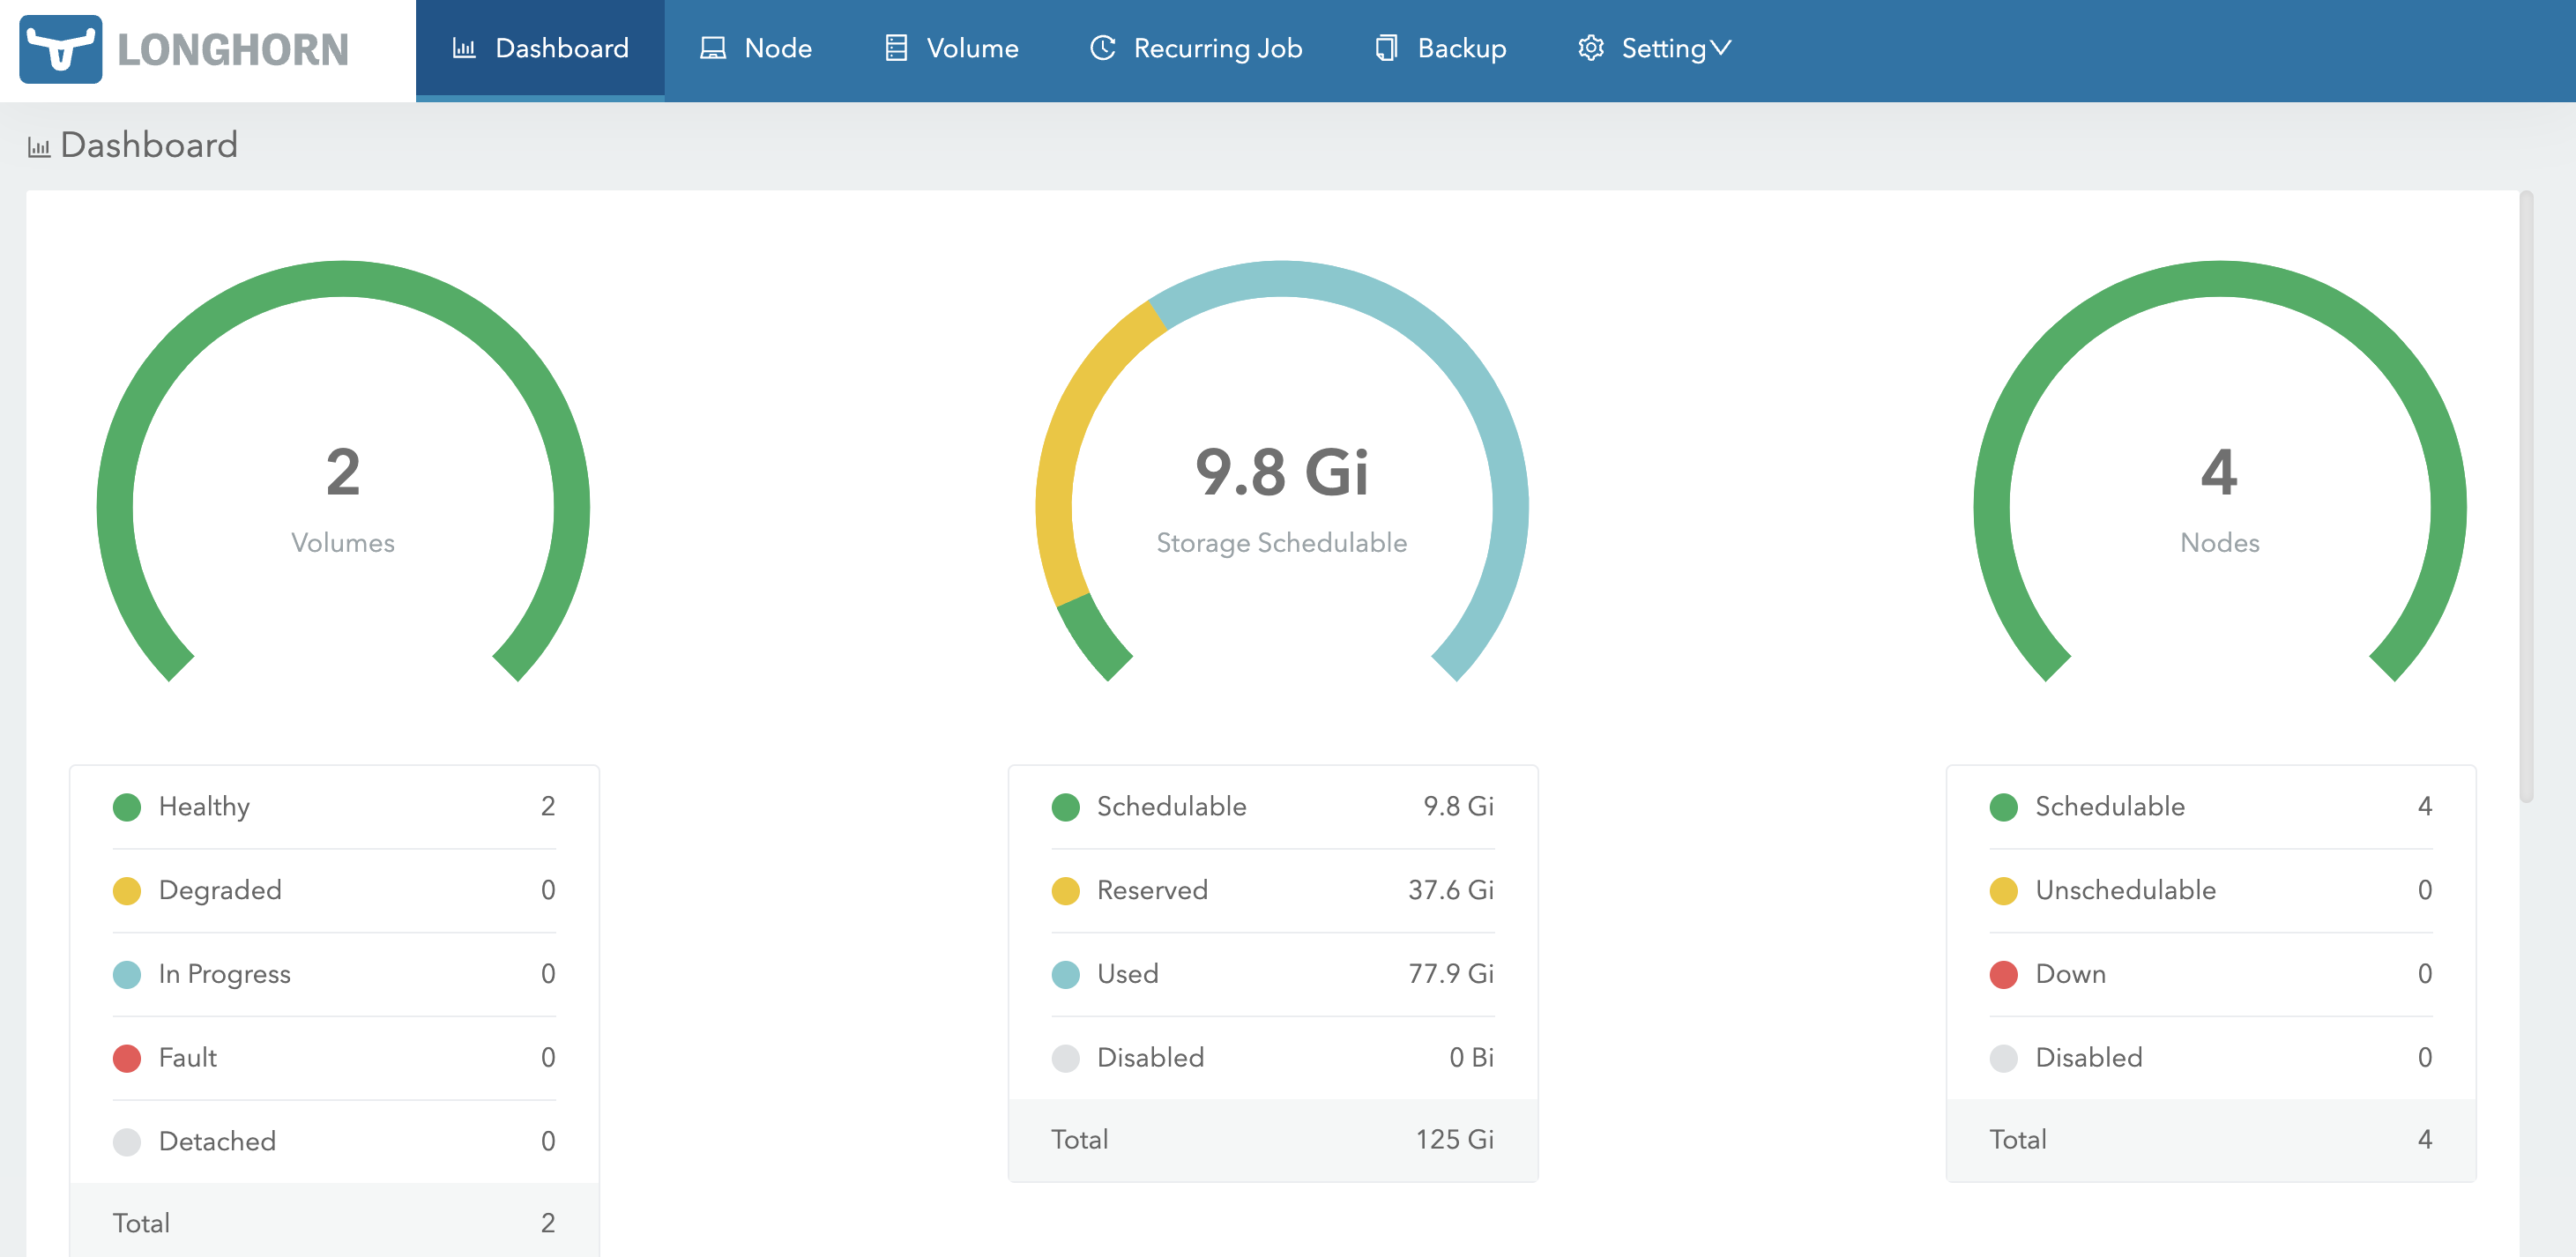
右にあるNodeと書かれている箇所はKubernetesのノード数になります.真ん中は割り振られているストレージ量になります.左のVolumesはLonghornを用いて作成されたPVを表します.
$ kubectl port-forward -n longhorn-system svc/longhorn-frontend 9090:80 --address 0.0.0.0
これであとはWordPressを作成するだけです.
注意しなければいけないのは,Longhornを用いてWordPressを構築する場合,YAMLファイル内でPVを作成しないでください.
WordPressの構築
namespaceを作成します.今回は,testというnamespaceで行います.
$ kubectl create namespace test
MySQL
以下の設定ファイルで構築します.
apiVersion: v1
kind: PersistentVolumeClaim
metadata:
  name: sql-testpvc
  labels:
    app: testsql
    tier: testsql
spec:
  storageClassName: longhorn # ストレージクラス名:longhorn
  accessModes:
    - ReadWriteMany
  resources:
    requests:
      storage: 1Gi
---
apiVersion: v1
kind: Service
metadata:
  name: sqltest
  labels:
    app: sqltest
spec:
  type: ClusterIP
  ports:
    - port: 3306
      targetPort: 3306
  selector:
    app: sqltest
---
apiVersion: apps/v1
kind: Deployment
metadata:
  name: sqltest
  labels:
    app: sqltest
spec:
  replicas: 1
  selector:
    matchLabels:
      app: sqltest
  template:
    metadata:
      labels:
        app: sqltest
    spec:
      containers:
        - image: mysql:8.0
          name: sqltest
          env:
            - name: MYSQL_ROOT_PASSWORD
              value: test
            - name: MYSQL_DATABASE
              value: wordpress
            - name: MYSQL_USER
              value: test
            - name: MYSQL_PASSWORD
              value: test-2024
          ports:
            - containerPort: 3306
              name: test
          volumeMounts:
            - name: sctest
              mountPath: /var/lib/mysql
      volumes:
        - name: sctest
          persistentVolumeClaim:
            claimName: sql-testpvc
WordPress
以下の設定ファイルでできます.
---
apiVersion: v1
kind: PersistentVolumeClaim
metadata:
  name: wptest-pvc
  labels:
    app: wptest
    tier: wptest
spec:
  storageClassName: longhorn  # ストレージクラス名:longhorn
  accessModes:
    - ReadWriteMany
  resources:
    requests:
      storage: 2Gi
---
apiVersion: v1
kind: Service
metadata:
  labels:
    app: wordpresstest
  name: wptest
spec:
  type: ClusterIP
  selector:
    app: wordpresstest
  ports:
    - port: 80
      targetPort: 80
      protocol: TCP
---
apiVersion: apps/v1
kind: Deployment
metadata:
  name: wptest
  labels:
    app: wordpresstest
spec:
  replicas: 3
  selector:
    matchLabels:
      app: wordpresstest
  template:
    metadata:
      labels:
        app: wordpresstest
    spec:
      containers:
        - image: wordpress
          name: wptest
          env:
            - name: WORDPRESS_DB_HOST
              value: sqltest
            - name: WORDPRESS_DB_NAME
              value: wordpress
            - name: WORDPRESS_DB_USER
              value: test
            - name: WORDPRESS_DB_PASSWORD
              value: test-2024
          ports:
            - containerPort: 80
              name: test
          volumeMounts:
            - name: test-sc
              mountPath: /var/www/html
      volumes:
        - name: test-sc
          persistentVolumeClaim:
            claimName: wptest-pvc
構築後の確認
まず,PVとPVCを確認してみましょう!
できてますね↓
$ kubectl get pv
NAME                                       CAPACITY   ACCESS MODES   RECLAIM POLICY   STATUS   CLAIM                       STORAGECLASS   REASON   AGE
pvc-11fdf582-4c09-4ded-93bd-165946466d4b   1Gi        RWX            Delete           Bound    test/c0a20131-sql-testpvc   longhorn                17h
pvc-f929bee3-c369-41dd-ab82-b2b85677fed6   2Gi        RWX            Delete           Bound    test/c0a20131-wptest-pvc    longhorn                17h


$ kubectl get pvc -n test
NAME                   STATUS   VOLUME                                     CAPACITY   ACCESS MODES   STORAGECLASS   AGE
sql-testpvc   Bound    pvc-11fdf582-4c09-4ded-93bd-165946466d4b   1Gi        RWX            longhorn       17h
wptest-pvc    Bound    pvc-f929bee3-c369-41dd-ab82-b2b85677fed6   2Gi        RWX            longhorn       17h
最後にPodの確認になります!
できていますね↓
$ kubectl get pods -n test
NAME                                READY   STATUS    RESTARTS   AGE
sqltest-85b55c6966-cq2k9   1/1     Running   0          6h24m
wptest-68ff4b6f74-9ls9c    1/1     Running   0          6h24m
wptest-68ff4b6f74-fgdpl    1/1     Running   0          6h24m
wptest-68ff4b6f74-vkjsn    1/1     Running   0          6h24m
最後に
既存にあるNFSなどを使うよりもめちゃくちゃ簡単にできたのでぜひ使ってみてください!
英語番
https://medium.com/@c0a201310c/creating-wordpress-with-longhorn-ac160c178d2a
