7
7

Delete article

Deleted articles cannot be recovered.

Draft of this article would be also deleted.

Are you sure you want to delete this article?

More than 5 years have passed since last update.

JMeterの使い方1(MacOS):基本の使い方

Last updated at Posted at 2019-08-29

目次

  1. インストール
  2. スレッドグループ、HTTPリクエストサンプラーを作る
  3. CUIで起動
  4. GUIで起動
  5. テスト結果を確認

インストール

brew install jmeter でインストールする方法と、下記公式HPからtgz形式のファイルを落として解答する方法がある。この手順書ではtgz形式のファイルを使用して説明する。

apache公式HP

スクリーンショット 2019-08-29 10.50.48.png

apache-jmeter-5.1.1.tgzを選択し、ローカル環境の任意のディレクトリでWクリックして解凍する。
※現時点での最新バージョン

GUIで起動

tgz形式のファイルを解凍した場合

解凍したディレクトリの下にある⁨bin⁩を開き、ApacheJMeter.jarをWクリックする

スクリーンショット 2019-08-29 10.55.45.png

home brew でインストールした場合

コマンドでjmeterと入力しEnter

jmeterをGUIで起動すると下記画面が表示される
スクリーンショット 2019-08-29 10.59.00.png

スレッドグループ、HTTPリクエストサンプラーを作る

この辺を参照し、テスト計画を保存する
http://tech-blog.rakus.co.jp/entry/2017/08/24/111332

CUIでテスト実行

負荷テスト実行時には必ずCUIでテストを実行すること!

tgz形式のファイルを解凍した場合

# binが置いてあるディレクトリまで移動
$ cd apache-jmeter-5.1.1/bin/
# テスト計画実行
$ ./jmeter -n -t /{テスト計画のパス}/テスト計画.jmx  -l log.jtl

※テスト計画.jmxはテスト計画で保存した名前に置き換えてください。

home brew でインストールした場合

# テスト計画実行
$ jmeter -n -t /{テスト計画のパス}/テスト計画.jmx  -l log.jtl

※テスト計画.jmxはテスト計画で保存した名前に置き換えてください。

GUIでテスト実行

テスト計画が動くかどうかの確認やデバッグの際はGUIでテストを実行する!

実行前
スクリーンショット 2019-08-29 11.16.54.png

実行中
スクリーンショット 2019-08-29 11.18.45.png

緑の矢印:テスト実行
赤いSTOP:テスト停止
歯車にほうき:実行結果をクリア

テスト結果を確認

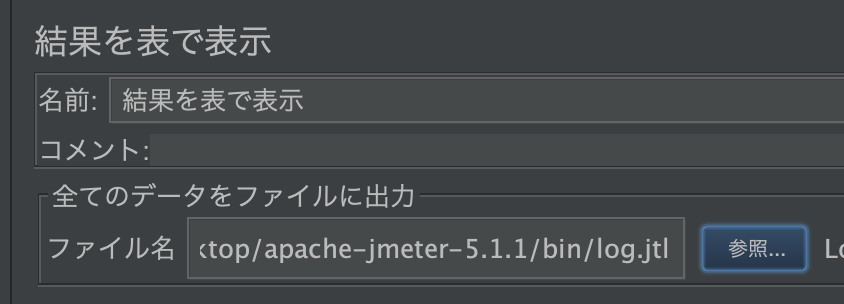
apache-jmeter-5.1.1/bin 直下に実行結果のログがlog.jtlという名前で保存されるので、それをGUIで確認する
追加→リスナー→結果を表で表示

スクリーンショット 2019-08-29 11.22.50.png

結果を表で表示画面でのファイル名にlog.jtlを指定
スクリーンショット 2019-08-29 11.23.44.png

こんな感じで結果が出てくる
スクリーンショット 2019-08-29 11.25.02.png

参考資料

7
7
0

Register as a new user and use Qiita more conveniently

  1. You get articles that match your needs
  2. You can efficiently read back useful information
  3. You can use dark theme
What you can do with signing up
7
7

Delete article

Deleted articles cannot be recovered.

Draft of this article would be also deleted.

Are you sure you want to delete this article?