Alexa Presentation Languageとは
10月30日よりAlexa Presentation Languageのパブリックベータが公開されました。そもそもAlexa Presentation Languageとはなんぞや?という話からです。
従来のAlexa向けスキルでは、Amazonが用意しているTemplateに合わせて画面付きデバイスに任意のコンテンツを表示することで、Amazon Echo Spotや海外で先行発売されているEcho Showなどの画面付きAlexaデバイスの画面表示に対応していました。しかし、Templateは決められた枠組みでしか表示することが出来ないため表現の幅が広くなかったという問題もありました。その表現の幅がAlexa Presentation Languageによって広がり、自由なビジュアル表現が可能になります。自由なビジュアル表現が可能になったことで、よりスキルの世界観やブランドイメージに適した画面表現が可能になりました。
Alexa Presentation Languageを表示する
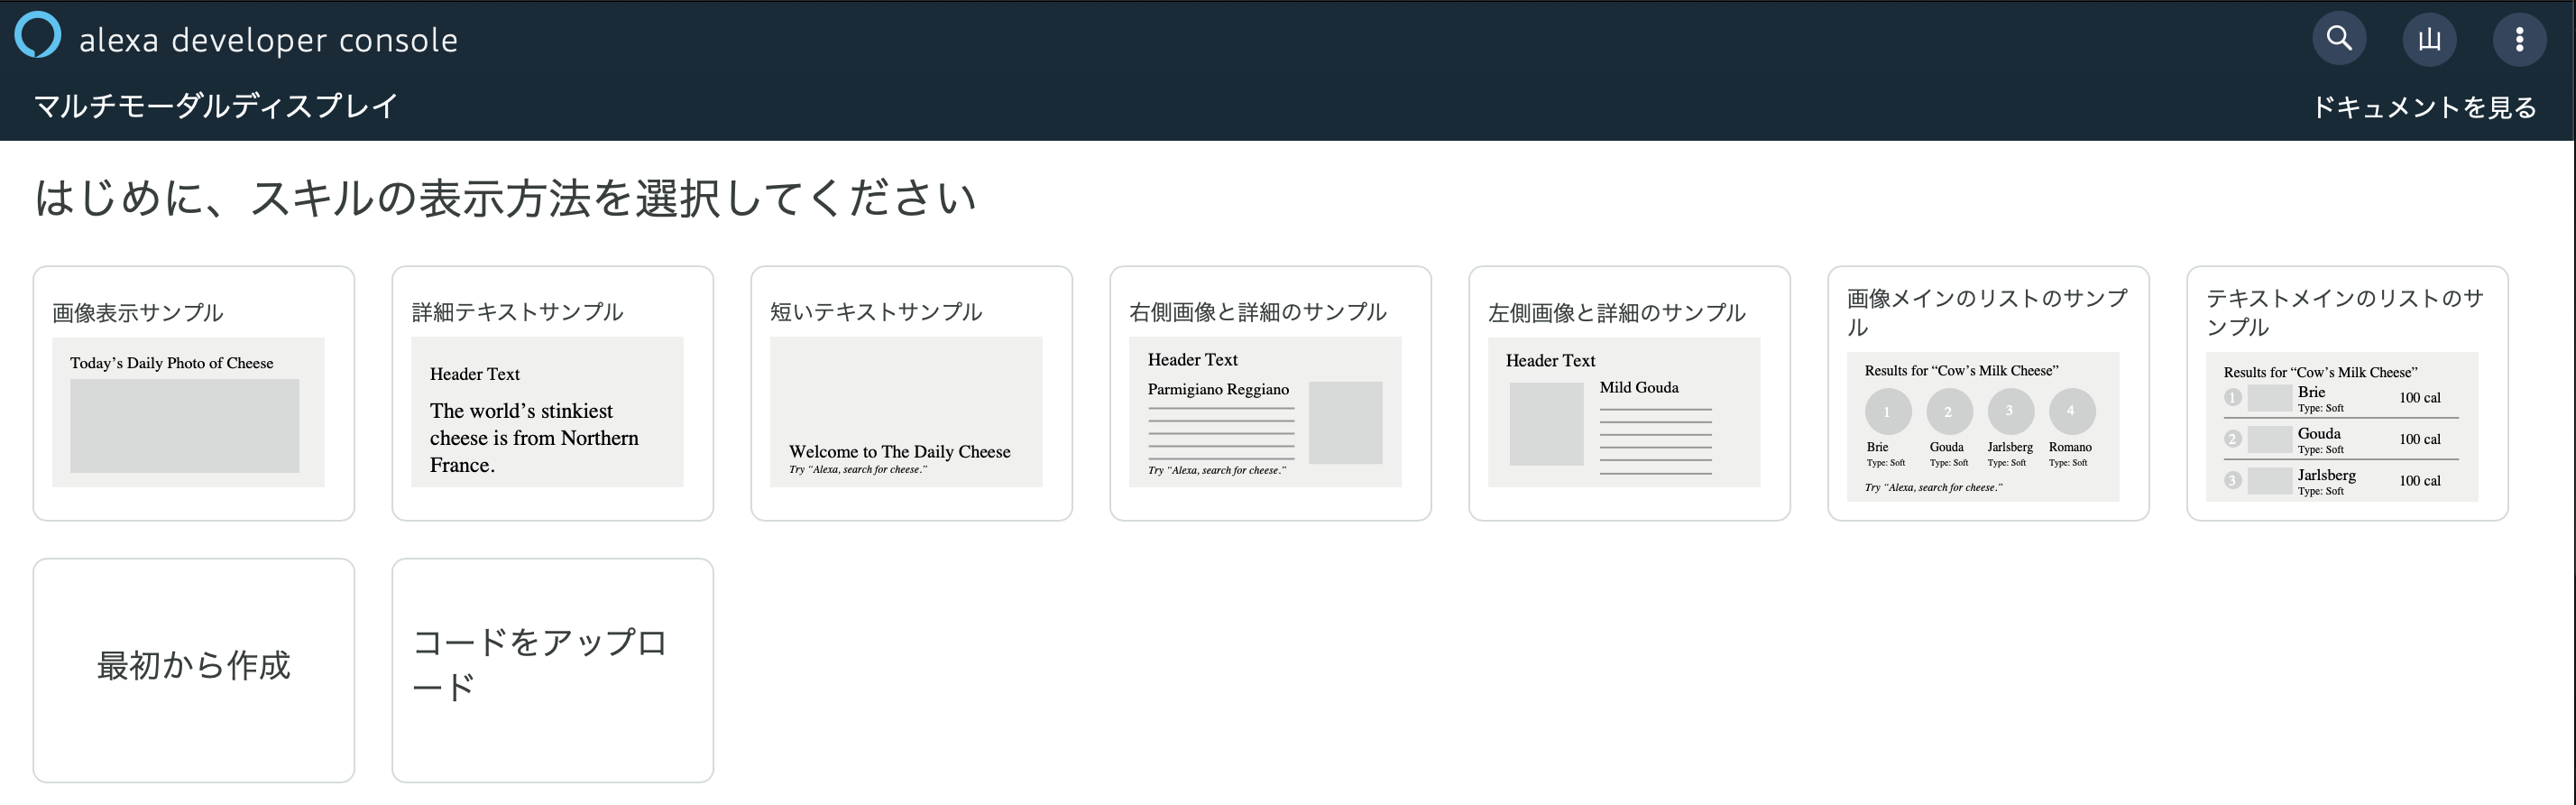
実際に画面をつくる際は、スキルページのビルドタブの最下部に表示されている「画面表示【ベータ】」からマルチモーダルディスプレイのWebエディタを開くことが出来ます。
エディタからは、今まで使えていたTemplateベースに画面をつくることも可能です。一方、ゴリゴリオリジナルな画面を作りたい場合は、0から作成することも出来ます。そしてこのWebエディタ保存機能がありません。そのため、ある程度のタイミングでJSONを書き出し、作業を再開するときは途中まで作成したコードをアップロードして、作業を再開するような形になります。割とエラーなどで、画面表示ができなくなったりすることも多いため、逐一JSONは書き出しておく方がよいでしょう。
通常の表示
Templateの表示では、addRenderTemplateDirectiveに対して表示したいTemplateのTypeやタイトルの文字列などを渡して表示をしていましたが、Alexa Presentation Languageの表示では下記のようになります。
標準的な表示方法に関しては、現在英語版のみですがリファレンスがありますので、そちらを参照してください。
return handlerInput.responseBuilder
	.speak("hogehoge")
	.addDirective({
		type: 'Alexa.Presentation.APL.RenderDocument',
		version: '1.0',
		document: require('./APLTemplate.json');
		datasources: require('./APLDataSource.json');
	})
	.withShouldEndSession(true)
	.getResponse();
動的コンテンツを含む画面表示を考える
はい、今回の主題です。基本的には、APLを扱う時には大きく分けて2つのJSONがあります。画面表示の構成情報を保持したTemplateのJSONと表示用のデータJSONです。前者の画面の構成情報を保持したJSONは、Webエディタ上から生成することが出来ます。後者のデータ用のJSONは、静的なデータであれば一度作ってしまえば使い回しは聞くと思います。しかし、実際には動的なデータを表示したいという場合が多いと思います。
しかし、データ用のJSONを組み立てるのも面倒ですし、既存のAPIをラップして必要な情報を含んだJSONにして返却してくれるAPIを作るのも少し骨が折れます。今回はデータ用のテンプレートJSONファイルをスキル側に保持させて、APIの返答結果をデータ用のテンプレートJSONファイルの適宜必要なKeyに投げ込む形で、直近は対応することとしました。
{
    "listTemplate1Metadata": {
        "type": "object",
        "objectId": "lt1Metadata",
        "backgroundImage": {
            "contentDescription": null,
            "smallSourceUrl": null,
            "largeSourceUrl": null,
            "sources": [
                {
                    "url": "https://d2o906d8ln7ui1.cloudfront.net/images/LT1_Background.png",
                    "size": "small",
                    "widthPixels": 0,
                    "heightPixels": 0
                },
                {
                    "url": "https://d2o906d8ln7ui1.cloudfront.net/images/LT1_Background.png",
                    "size": "large",
                    "widthPixels": 0,
                    "heightPixels": 0
                }
            ]
        },
        "title": "Calories in 1 Serving of Cheese",
        "logoUrl": "https://d2o906d8ln7ui1.cloudfront.net/images/cheeseskillicon.png"
    },
    "listTemplate1ListData": {
        "type": "list",
        "listId": "lt1Sample",
        "totalNumberOfItems": 10,
        "listPage": {
            "listItems": [
                {
                    "listItemIdentifier": "gouda",
                    "ordinalNumber": 1,
                    "textContent": {
                        "primaryText": {
                            "type": "PlainText",
                            "text": "Gouda"
                        },
                        "secondaryText": {
                            "type": "PlainText",
                            "text": "Serving Size: 1oz (28g)"
                        },
                        "tertiaryText": {
                            "type": "PlainText",
                            "text": "100 cal"
                        }
                    },
                    "image": {
                        "contentDescription": null,
                        "smallSourceUrl": null,
                        "largeSourceUrl": null,
                        "sources": [
                            {
                                "url": "https://d2o906d8ln7ui1.cloudfront.net/images/sm_gouda.png",
                                "size": "small",
                                "widthPixels": 0,
                                "heightPixels": 0
                            },
                            {
                                "url": "https://d2o906d8ln7ui1.cloudfront.net/images/sm_gouda.png",
                                "size": "large",
                                "widthPixels": 0,
                                "heightPixels": 0
                            }
                        ]
                    },
                    "token": "gouda"
                },
                {
                    "listItemIdentifier": "parm",
                    "ordinalNumber": 6,
                    "textContent": {
                        "primaryText": {
                            "type": "PlainText",
                            "text": "Parm"
                        },
                        "secondaryText": {
                            "type": "RichText",
                            "text": "Serving Size: 1oz (28g)"
                        },
                        "tertiaryText": {
                            "type": "PlainText",
                            "text": "122 cal"
                        }
                    },
                    "image": {
                        "contentDescription": null,
                        "smallSourceUrl": null,
                        "largeSourceUrl": null,
                        "sources": [
                            {
                                "url": "https://d2o906d8ln7ui1.cloudfront.net/images/sm_parm.png",
                                "size": "small",
                                "widthPixels": 0,
                                "heightPixels": 0
                            },
                            {
                                "url": "https://d2o906d8ln7ui1.cloudfront.net/images/sm_parm.png",
                                "size": "large",
                                "widthPixels": 0,
                                "heightPixels": 0
                            }
                        ]
                    },
                    "token": "parm"
                }
            ]
        }
    }
}
上記は、テキストメインのリストのサンプルのデータJSONです。
このようなリスト形式でのJSONだとなおさら組み立てるのは面倒ですね。今回は下記の3つのファイルに切り分けます。
{
    "listTemplate1Metadata": {
        "type": "object",
        "objectId": "lt1Metadata",
        "backgroundImage": {
            "contentDescription": null,
            "smallSourceUrl": null,
            "largeSourceUrl": null,
            "sources": [
                {
                    "url": "https://d2o906d8ln7ui1.cloudfront.net/images/LT1_Background.png",
                    "size": "small",
                    "widthPixels": 0,
                    "heightPixels": 0
                },
                {
                    "url": "https://d2o906d8ln7ui1.cloudfront.net/images/LT1_Background.png",
                    "size": "large",
                    "widthPixels": 0,
                    "heightPixels": 0
                }
            ]
        },
        "title": "",
        "logoUrl": ""
    },
    "listTemplate1ListData": {
        "type": "list",
        "listId": "lt1Sample",
        "totalNumberOfItems": 0,
        "listPage": {
            "listItems": [
            ]
        }
    }
}
{
    "listItemIdentifier": "",
    "ordinalNumber": null,
    "textContent": {
        "primaryText": {
            "type": "PlainText",
            "text": ""
        },
        "secondaryText": {
            "type": "PlainText",
            "text": ""
        },
        "tertiaryText": {
            "type": "PlainText",
            "text": ""
        }
    },
    "image": {
        "contentDescription": null,
        "smallSourceUrl": null,
        "largeSourceUrl": null,
        "sources": [
        ]
    },
    "token": ""
}
{
    "url": "",
    "size": "",
    "widthPixels": 0,
    "heightPixels": 0
}
今回は、Listに表示する配列内の部分をrow.json、それ以外のベースとなるデータ部分をListBaseTemplate.jsonとして切り分けています。
ListBaseTemplate.jsonにもBackgroundImageなど項目の内容を動的に変更することが考えられるのでこの部分は適宜変更するのが良いでしょう。
root/
├ APL/
│ ├Template   //APLの画面表示に関するjson群
│ └DataSource //DataSourceのテンプレート用json群
└ index.js
切り分けたDataSource用のjsonと、APLの表示用に定義したTemplateのjsonは上記の様なディレクトリ構成で今回配置しています。これに関しては好みもありますので適宜環境に合わせてください。
{
  "response": {
  	"data": [
  		{
  			"id": "gouda",
		    "primaryText": "Gouda",
		    "secondaryText": "Serving Size: 1oz (28g)",
  			"tertiaryText": "100 cal",
  			"smallImgUrl": "https://d2o906d8ln7ui1.cloudfront.net/images/sm_gouda.png",
  			"largeImgUrl": "https://d2o906d8ln7ui1.cloudfront.net/images/sm_gouda.png"
  		},
  		{
  			"id": "cheddar",
		    "primaryText": "Sharp Cheddar",
		    "secondaryText": "Serving Size: 1 slice (28g)",
  			"tertiaryText": "113 cal",
  			"smallImgUrl": "https://d2o906d8ln7ui1.cloudfront.net/images/sm_cheddar.png",
  			"largeImgUrl": "https://d2o906d8ln7ui1.cloudfront.net/images/sm_cheddar.png"
  		},
  		{
  			"id": "blue",
		    "primaryText": "Blue",
		    "secondaryText": "Serving Size: 1c, crumbled (135g)",
  			"tertiaryText": "476 cal",
  			"smallImgUrl": "https://d2o906d8ln7ui1.cloudfront.net/images/sm_blue.png",
  			"largeImgUrl": "https://d2o906d8ln7ui1.cloudfront.net/images/sm_blue.png"
  		}
  	]
  }
}
今回は特定のAPIを叩くと上記のようなJSONがレスポンスとして返却される前提で考えます。
dataという名前の配列に3つのチーズの情報が含まれています。この配列の中の件数は条件によって増減する前提です。
const fs = require('fs');
const request = require('request');

// CheeseAPIを叩いて、Responseを生成します
async function createCheeseListResponse (handlerInput) {
    let requestUrl = "https://cheesecheese/api/randomcheesedata";
    let resultCheese = await syncRequest(requestUrl);
    let speakText = "私はチーズが大好きだ";

    //Display付き端末か判別します
    if (displayDeviceCheck(handlerInput)) {
        let aplItem = getCheeseTemplate(speakText , resultCheese);
        return handlerInput.responseBuilder
            .speak(speakText)
            .addDirective(aplItem)
            .withShouldEndSession(true)
            .getResponse();
    }else{
        return handlerInput.responseBuilder
            .speak(speakText)
            .withShouldEndSession(true)
            .getResponse();
    }
}

//APLの表示項目を生成します
function getCheeseTemplate (speakText , cheeseListData) {
    var responseDirective = getAPLDirective();
    //APLのTemplateを読み込み
    let aplTemplate = JSON.parse(fs.readFileSync('./APL/Template/ListAPLTemplate.json', 'utf8'));
    responseDirective['document'] = aplTemplate;
    //DataSourceのTemplateを読み込み
    let listData = JSON.parse(fs.readFileSync('./APL/DataSource/ListBaseTemplate.json', 'utf8'));
    //タイトルの設定
    //読み上げ内容を今回は設定
    listData.listTemplate1Metadata.title = speakText;
    //Listの件数を設定
    listData.listTemplate1ListData.totalNumberOfItem = cheeseListData.length;

    for (var i in cheeseListData) {
        //RowのTemplateを読み込み
        let rowData = JSON.parse(fs.readFileSync('./APL/DataSource/row.json', 'utf8'));
        let item = cheeseListData[i];
        //Rowの番号を設定
        rowData.ordinalNumber = Number(i) + 1;
        //IDとTokenを設定
        let id = item['id'];
        rowData.listItemIdentifier = id;
        rowData.token = id;
        //テキストを設定
        let primaryText     = item['primaryText'];
        let secondaryText   = item['secondaryText'];
        let tertiaryText    = item['tertiaryText'];
        rowData.textContent.primaryText.text = primaryText;
        rowData.textContent.secondaryText.text = secondaryText;
        rowData.textContent.tertiaryText.text = tertiaryText;
        //大小のImageSourceを設定
        let smallImgUrl = item['smallImgUrl'];
        let largeImgUrl = item['largeImgUrl'];
        let smallImgTemplate = JSON.parse(fs.readFileSync('./APL/DataSource/imageSource.json', 'utf8'));
        let largeImgTemplate = JSON.parse(fs.readFileSync('./APL/DataSource/imageSource.json', 'utf8'));
        smallImgTemplate.size = "small";
        largeImgTemplate.size = "large";
        smallImgTemplate.url = smallImgUrl;
        largeImgTemplate.url = largeImgUrl;
        //ImageSourceをRowDataに登録
        rowData.image.sources = [smallImgTemplate , largeImgTemplate];
        //ListTemplateのListItemに登録
        listData.listPage.listItems.push(rowData);
    }
    responseDirective['datasources'] = listData;
    return responseDirective;
}

// DirectiveのAPL登録項目を返却します
function getAPLDirective () {
    return {
        type: 'Alexa.Presentation.APL.RenderDocument',
        version: '1.0',
        document: null,
        datasources: null
    }
}

// ディスプレイ付き端末であるか判別を行います
function displayDeviceCheck (handlerInput) {
    const context = handlerInput.requestEnvelope.context;
    if (context) {
        const system = context.System;
        if (system) {
            const device = system.device;
            if (device) {
                const supportedInterfaces = device.supportedInterfaces;
                if (supportedInterfaces) {
                    const display = supportedInterfaces.Display;
                    if (display) {
                        return true;
                    }
                }
            }
        }
    }
    return false
}

// 同期リクエスト
async function syncRequest (reqURL) {
    const response = function () {
        return new Promise(function (resolve , reject){
            request.get({
                url:reqURL
            } , function (error , response , body) {
                if(!error) {
                    resolve(body);
                } else {
                    reject(error);
                }
            })
        });
    }
    let res = await response();
    var resJson = JSON.parse(res);
    return resJson;
}
正直無駄が多いコードですが、その点は目をつぶって頂き....
基本的には、特定のAPIを叩くと先ほどのチーズのデータがランダムで個数が代わり返却され、取得したチーズの項目をEchoSpotやShowの画面に表示するようにしています。
コツとしては、requireによるJSONの読み込みは行わないことです。requireを用いるとJSONがキャッシュされるため、APLのデータソースをうまく組み立てることが出来ません。
そのため、fs.readFileSyncによる読み込みを行ってキャッシュをされることを回避しています。
読み込んだデータソースのテンプレートに対して、APIの取得した項目から必要なデータを登録するような形で私は、現状APLに対応することにしました。
表示する画面によって動的な部分は変わるとは思いますが、基本としてデータ単位で切り分けて、取得結果を元に各テンプレートを引っ張りだして、テンプレートに対して値を付与してやってaddDirectiveに最終的に渡してあげることがいま現状一番いいのかなと思っています。
最後に
正直これをスキルスクリプト側で、やるのもどうなのかという意見があるかもしれませんが、サードパーティのAPIをスキルスクリプトから直で呼ぶこともあると思いますので、そんな時少しでもデータソース部分の組み立てが楽になればと思って今回記事を書いてみました。
理想としては、ラッパーAPIなんかを組んでスキルスクリプト側にこの処理を持たせない方がソースとしてはスッキリとすると思います。
まだまだ、ベストプラクティスが存在しないAlexa界隈ですが、いろいろ試していきたいと思いますので、ご意見などもあれば是非コメントで教えていただけると嬉しいです。