はじめに
以前自分のハンズオンセミナーで作成したアプリの説明を備忘録として残します。
少しでも参考になれば幸いです。
作成したアプリ
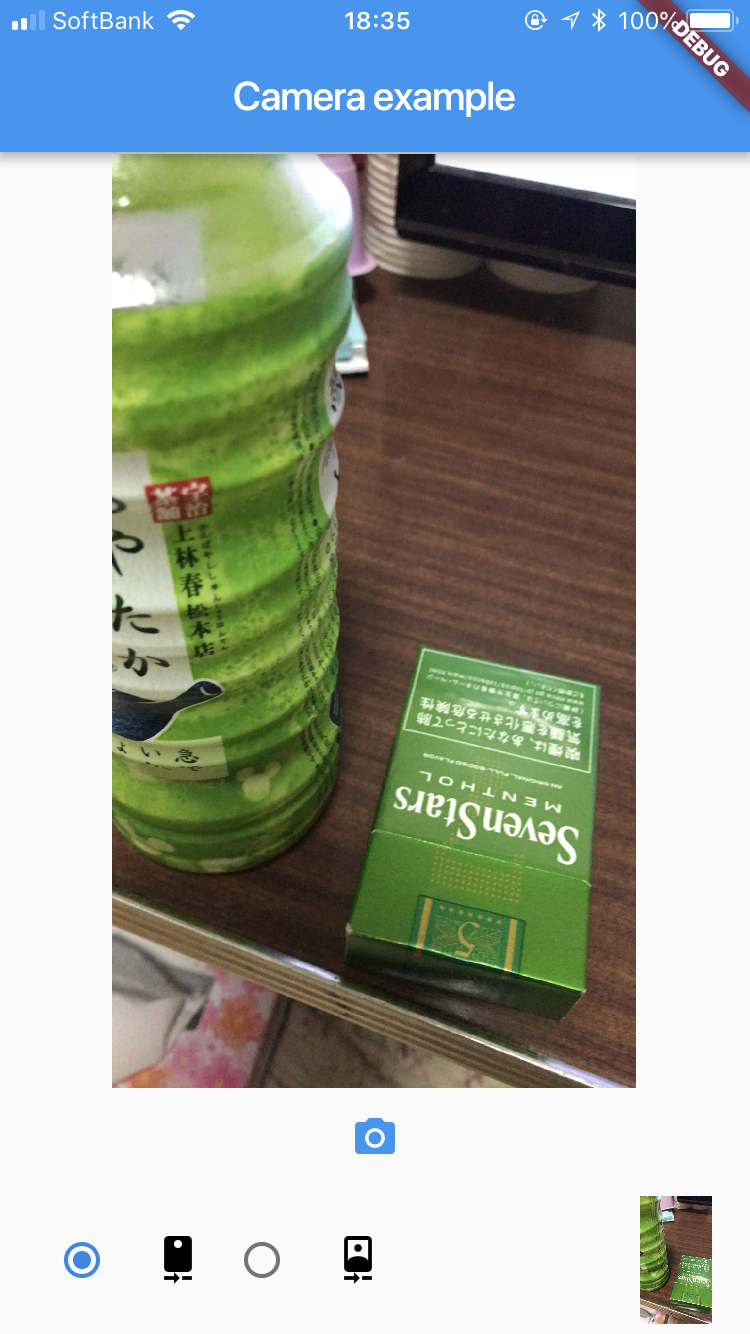 上の画像は作成したアプリのスクリーンショットですが、お分かりの方は「ん?」ってなるかもしれません。
実はこのアプリ、pub.dartlangに公開されている[camera](https://pub.dartlang.org/packages/camera#-example-tab-)パッケージのExampleをセミナー用に改変したものになります。
Flutterにはパッケージが豊富に用意されていますが、その中にはExampleが公開されているものも多いため、使用する際にExampleで試して見るのも良いと思います。
上の画像は作成したアプリのスクリーンショットですが、お分かりの方は「ん?」ってなるかもしれません。
実はこのアプリ、pub.dartlangに公開されている[camera](https://pub.dartlang.org/packages/camera#-example-tab-)パッケージのExampleをセミナー用に改変したものになります。
Flutterにはパッケージが豊富に用意されていますが、その中にはExampleが公開されているものも多いため、使用する際にExampleで試して見るのも良いと思います。
Flutter開発に必要なもの
Flutterでアプリ開発をするために、以下のものをご用意下さい。
- Android Studio3.0以上(またはIntelliJかVSCodeでも可)
- Flutter SDK
- Xcode最新版
- できれば実機(iOS/Android)
Flutter SDKの準備
まずはFlutter SDKをGithubからクローンしてきます
$ git clone -b beta https://github.com/flutter/flutter.git
$ export PATH=`pwd`/flutter/bin:$PATH
※注意
pwd の部分は、cloneしたFlutterSDKまでのパスを指定して下さい。
次にFlutterのセットアップが完了しているかどうかチェックします。
$ flutter doctor
チェックした際に、問題がある場合は以下のように[x]や[!]が表示されます。しかし、焦ることはありません。
よく見るとちゃんと「これをインストールしてね」「このコマンドを叩いてね」的なメッセージも付属されていますので、コピーしてペしましょう。
[✗] Android toolchain - develop for Android devices
    ✗ Unable to locate Android SDK.
      Install Android Studio from: https://developer.android.com/studio/index.html
      On first launch it will assist you in installing the Android SDK components.
      (or visit https://flutter.io/setup/#android-setup for detailed instructions).
      If Android SDK has been installed to a custom location, set $ANDROID_HOME to that location.
[!] iOS toolchain - develop for iOS devices
    ✗ Xcode installation is incomplete; a full installation is necessary for iOS development.
      Download at: https://developer.apple.com/xcode/download/
      Or install Xcode via the App Store.
      Once installed, run:
        sudo xcode-select --switch /Applications/Xcode.app/Contents/Developer
    ✗ libimobiledevice and ideviceinstaller are not installed. To install, run:
        brew install --HEAD libimobiledevice
        brew install ideviceinstaller
    ✗ ios-deploy not installed. To install:
        brew install ios-deploy
    ✗ CocoaPods not installed.
        CocoaPods is used to retrieve the iOS platform side's plugin code that responds to your plugin usage on the Dart side.
        Without resolving iOS dependencies with CocoaPods, plugins will not work on iOS.
        For more info, see https://flutter.io/platform-plugins
      To install:
        brew install cocoapods
        pod setup
以下のように、全ての項目にチェックが付けばおkです。
[✓] Flutter (Channel beta, v0.5.1, on Mac OS X 10.13.4 17E199, locale ja-JP)
[✓] Android toolchain - develop for Android devices (Android SDK 27.0.3)
[✓] iOS toolchain - develop for iOS devices (Xcode 9.4.1)
[✓] Android Studio
    ✗ Flutter plugin not installed; this adds Flutter specific functionality.
    ✗ Dart plugin not installed; this adds Dart specific functionality.
[✓] Android Studio (version 3.0)
[✓] Connected devices (1 available)
Pluginのインポート
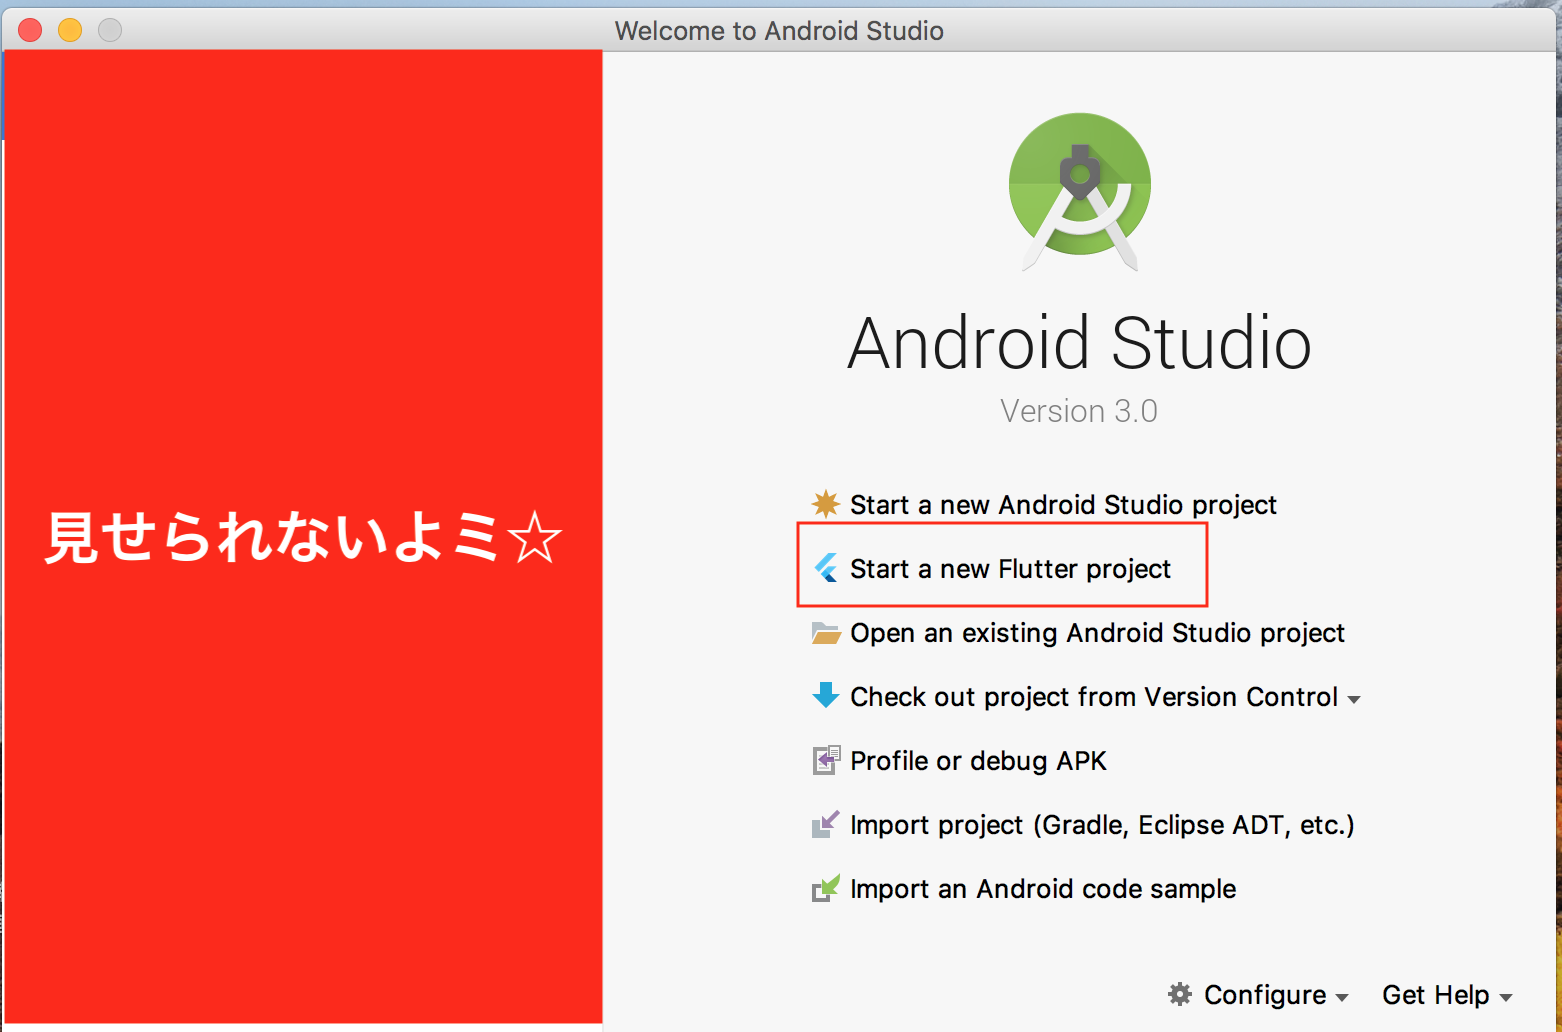
Flutterの準備ができたら、Android StudioにFlutterプラグインを入れます。
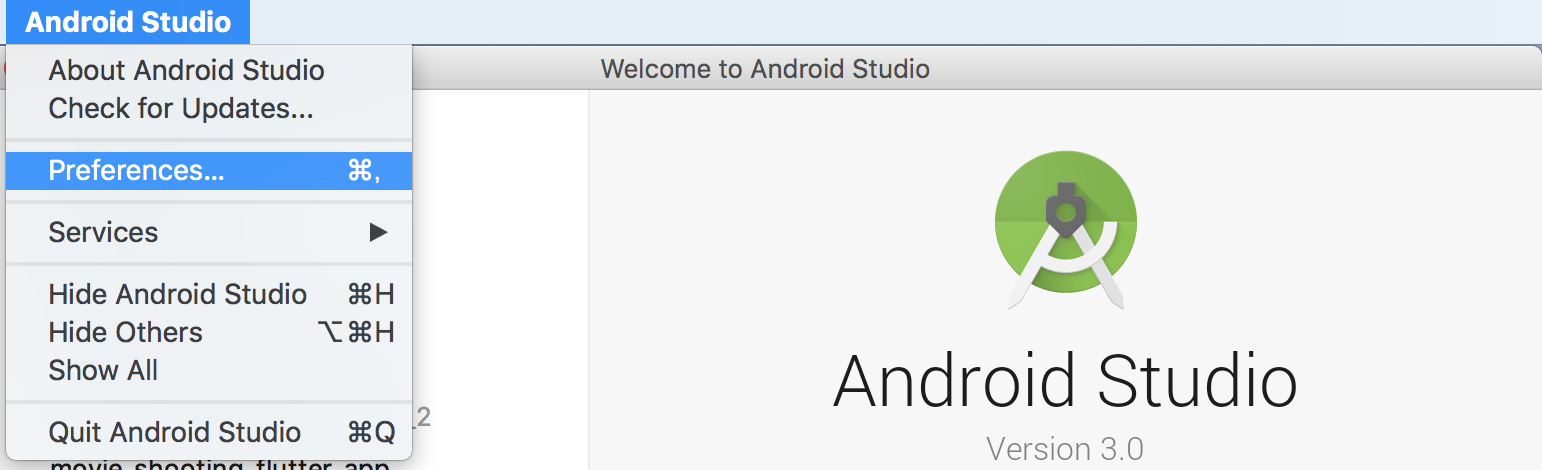
まずはAndroid Studioを開いて、 Android Studio > Preferences を開きます。
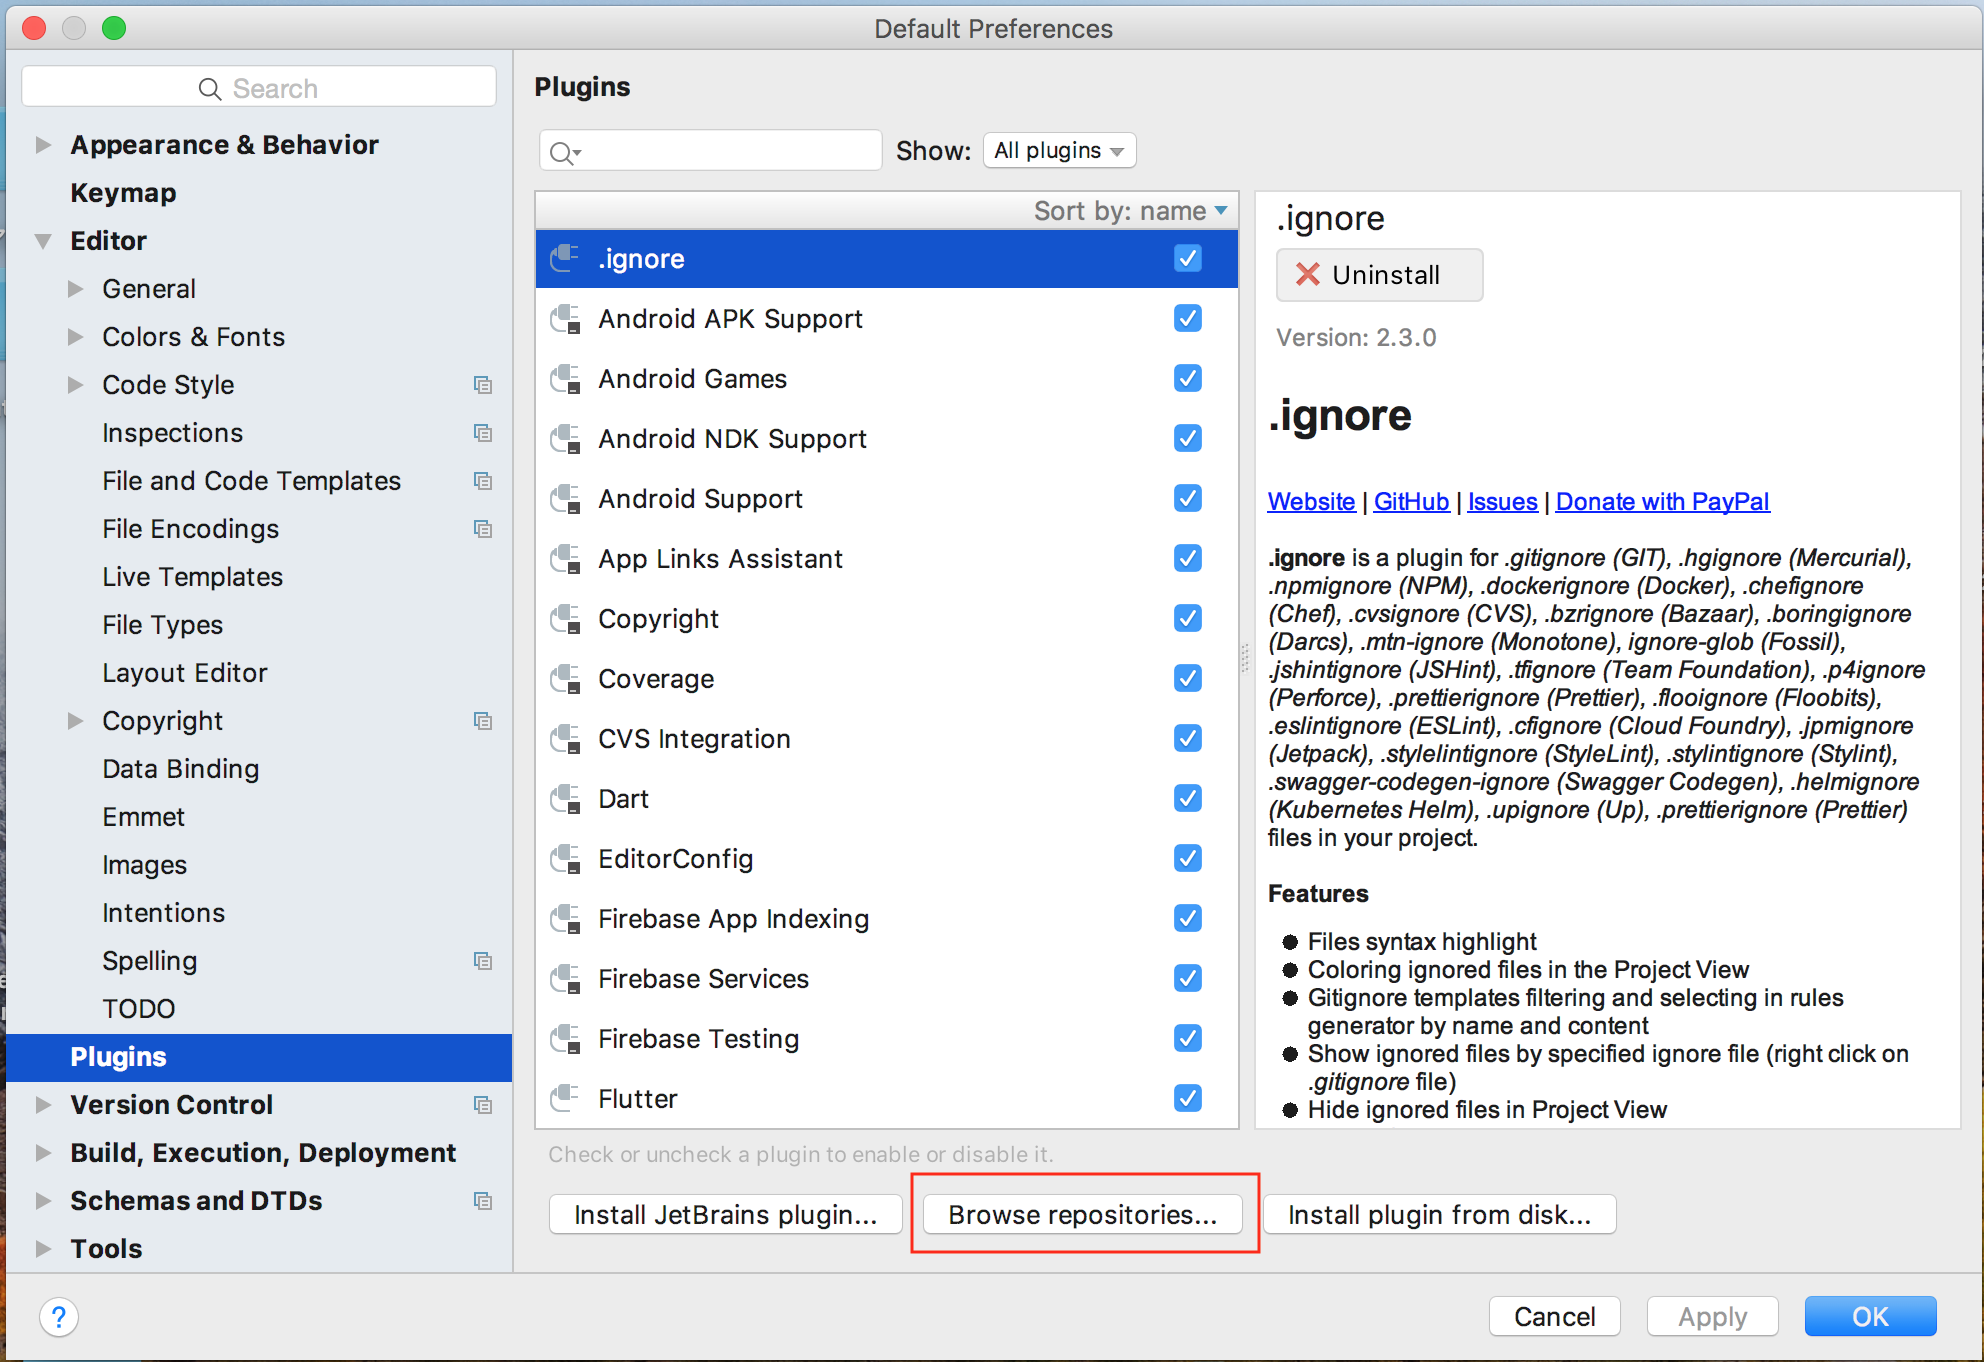
Preferencesの左側のメニューからPluginsを選択し、Browse repositories**を開きます。
左上にある検索窓に「Flutter」と入力すると、Flutterプラグインが表示されるので、インストールします。
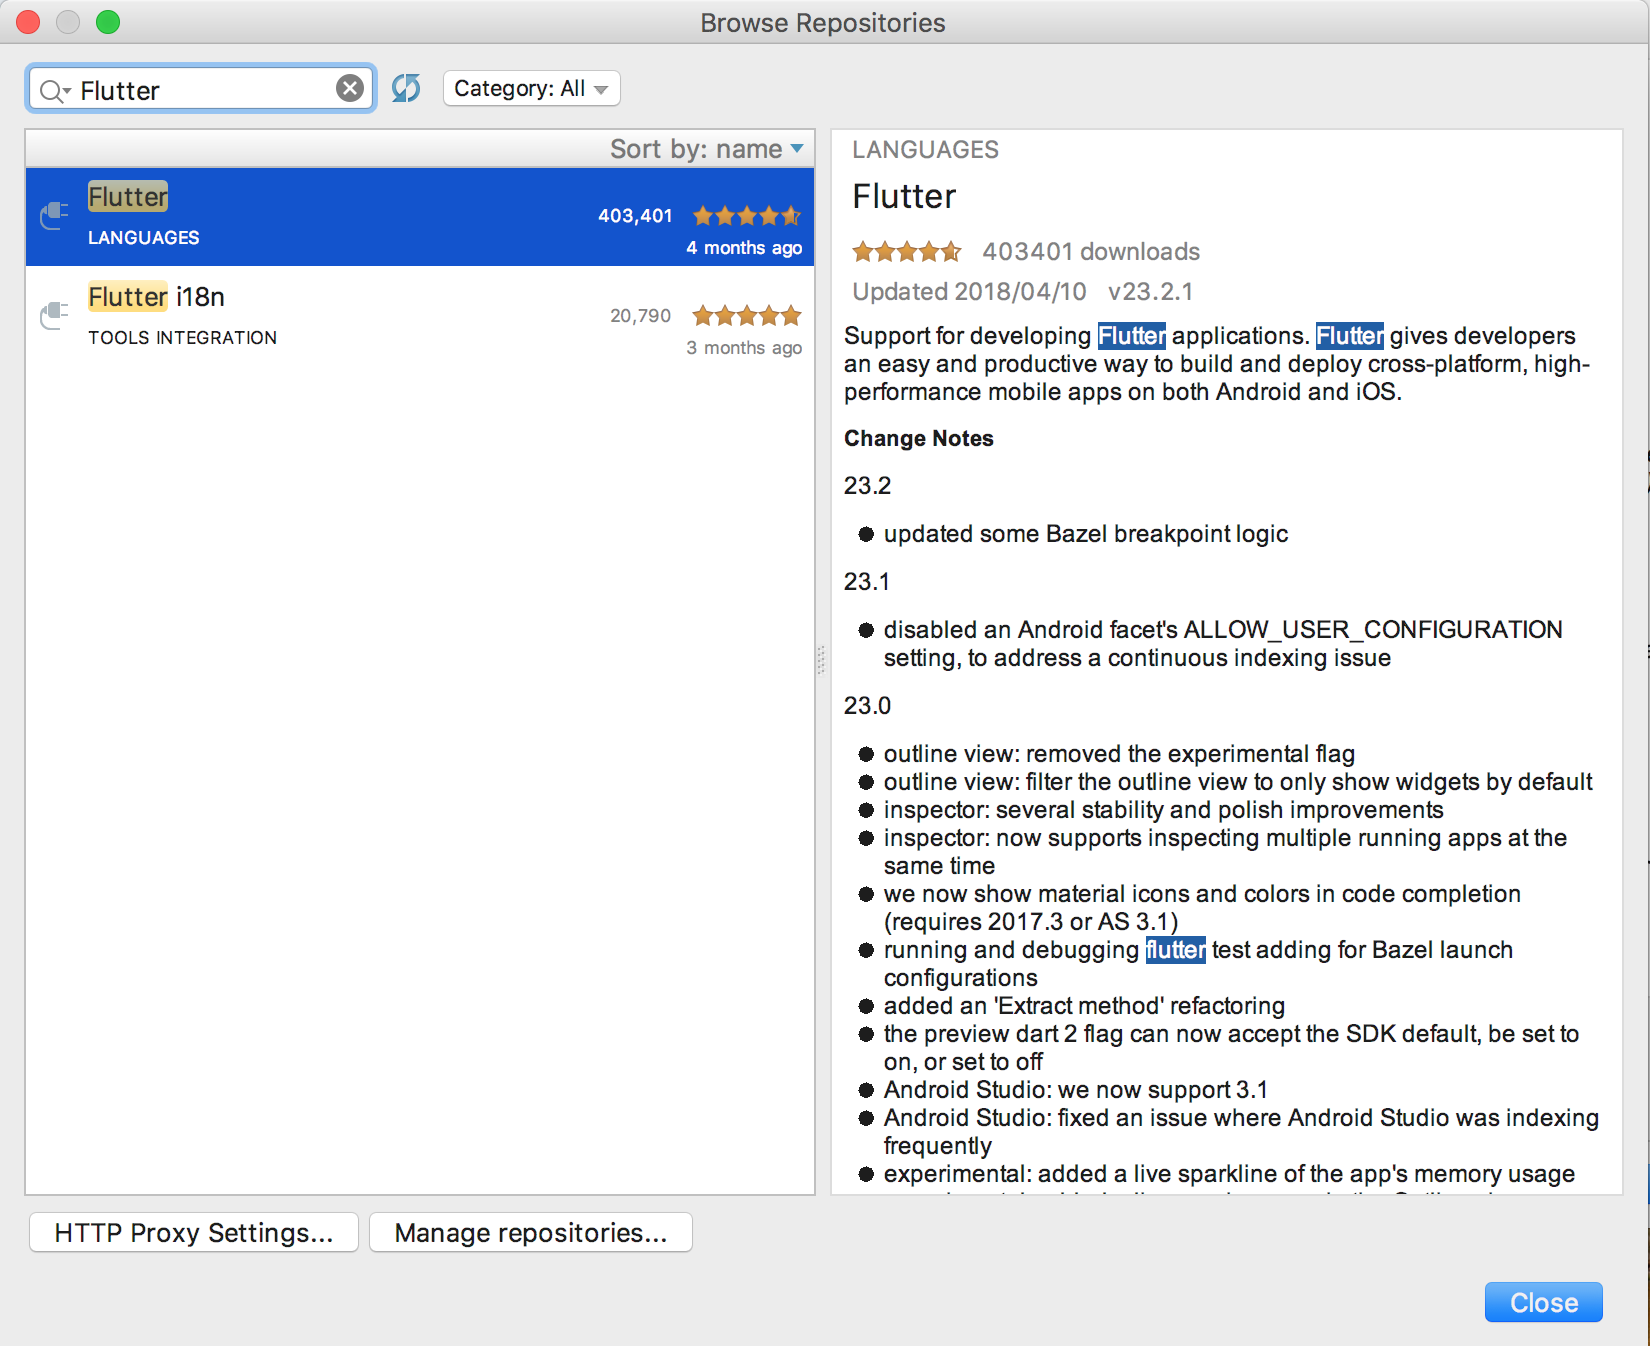
インストールが完了したら再起動が促されますので、そのまま再起動してください。
プラグインを入れたら、Flutterプロジェクトが作成できるようになります。
パッケージとの依存関係を設定
アプリを作成する前に、使用するパッケージとの依存関係を設定します。
パッケージを使用する場合は、pubspec.yamlに記述します。
dependencies:
  flutter:
    sdk: flutter

  camera: "^0.2.1"
  path_provider: "0.4.0"
記述したら、右上に水色で表示されているPackages getをクリックします。こうすることで、プロジェクトにパッケージとの依存関係を設定することができます。
main.dartの実装
Flutterで作成するアプリはStatefulWidgetとStatelessWidget、及びStateを実装する必要があります。また、コンパイルされて実行されるmain関数も実装する必要があります。各種を簡単に説明します。
▪️StatefulWidget
Stateを管理するWidgetクラス。アプリ内で動的にStateが変化するWidgetを管理します。
▪️StatelessWidget
Stateを持たないWidget。アプリ内で静的Widgetを管理します。
▪️State
WidgetのStateを管理します。基本的にはこのクラス内でコンポーネントやクリックした時の処理を行います。
ここからmain.dartで実装していきます。
import 'dart:async';
import 'dart:io';

import 'package:camera/camera.dart';
import 'package:flutter/material.dart';
import 'package:path_provider/path_provider.dart';
まずは使用するパッケージをインポートします。
List<CameraDescription> cameras;

// 実行されるmain関数
Future<Null> main() async {
  try {
    cameras = await availableCameras();
  } on CameraException catch (e) {}

  runApp(new MyApp());
}
今回のアプリはカメラ機能を使用していますので、main関数で利用できるカメラの種類を初期化します。初期化した値はトップレベルに定義しておきます。
このmain関数がアプリが起動した際に呼ばれます。値の初期化などはここでやってしまいましょう。
// Stateを持たないWidgetオブジェクト
class MyApp extends StatelessWidget {
  @override
  Widget build(BuildContext context) {
    return new MaterialApp(
      home: new MyHomePage(),
    );
  }
}

// Stateを持つWidgetオブジェクト
class MyHomePage extends StatefulWidget {
  @override
  _MyHomePageState createState() => new _MyHomePageState();
}
そしたらStatelessWidgetとStatefulWidgetを継承したクラスを定義します。ここで@overrideしている関数は、定義しないとエラーとなりますので必ず定義してください。
// StatefulWidgetで管理されるStateオブジェクト
class _MyHomePageState extends State<MyHomePage> {
  CameraController controller;
  String imagePath;

  final GlobalKey<ScaffoldState> _scaffoldKey = new GlobalKey<ScaffoldState>();

  @override
  Widget build(BuildContext context) {
    return new Scaffold(
      key: _scaffoldKey,
      appBar: new AppBar(
        title: const Text('Camera example'),
      ),
      body: new Column(
        children: <Widget>[
          new Expanded(
            child: new Container(
              child: new Padding(
                padding: const EdgeInsets.all(1.0),
                child: new Center(
                  child: _cameraPreviewWidget(),
                ),
              ),
            ),
          ),
          _captureIconWidget(),
          new Padding(
            padding: const EdgeInsets.all(5.0),
            child: new Row(
              mainAxisAlignment: MainAxisAlignment.start,
              children: <Widget>[
                _cameraTogglesRowWidget(),
                _thumbnailWidget(),
              ],
            ),
          ),
        ],
      ),
    );
  }

  // カメラのプレビューWidget
  Widget _cameraPreviewWidget() {
    if (controller == null || !controller.value.isInitialized) {
      return const Text(
        'Tap a camera',
        style: TextStyle(
          color: Colors.white,
          fontSize: 24.0,
          fontWeight: FontWeight.w900,
        ),
      );
    } else {
      return new AspectRatio(
        aspectRatio: controller.value.aspectRatio,
        child: new CameraPreview(controller),
      );
    }
  }

  // サムネイルWidget
  Widget _thumbnailWidget() {
    return new Expanded(
      child: new Align(
        alignment: Alignment.centerRight,
        child: imagePath == null
            ? null
            : new SizedBox(
          child: new Image.file(new File(imagePath)),
          width: 64.0,
          height: 64.0,
        ),
      ),
    );
  }

  // カメラのアイコンWidget
  Widget _captureIconWidget() {
    return new Row(
      mainAxisAlignment: MainAxisAlignment.spaceEvenly,
      mainAxisSize: MainAxisSize.max,
      children: <Widget>[
        new IconButton(
          icon: const Icon(Icons.camera_alt),
          color: Colors.blue,
          onPressed: controller != null &&
              controller.value.isInitialized
              ? onTakePictureButtonPressed
              : null,
        ),
      ],
    );
  }

  // カメラのインアウトを切り替えるトグルWidget
  Widget _cameraTogglesRowWidget() {
    final List<Widget> toggles = <Widget>[];

    if (cameras.isEmpty) {
      return const Text('No camera found');
    } else {
      for (CameraDescription cameraDescription in cameras) {
        toggles.add(
          new SizedBox(
            width: 90.0,
            child: new RadioListTile<CameraDescription>(
              title:
              new Icon(getCameraLensIcon(cameraDescription.lensDirection)),
              groupValue: controller?.description,
              value: cameraDescription,
              onChanged: onNewCameraSelected,
            ),
          ),
        );
      }
    }

    return new Row(children: toggles);
  }

  // トグルが選択された時に呼ばれるコールバック関数
  void onNewCameraSelected(CameraDescription cameraDescription) async {
    if (controller != null) {
      await controller.dispose();
    }
    controller = new CameraController(cameraDescription, ResolutionPreset.high);

    controller.addListener(() {
      if (mounted) setState(() {});
    });

    try {
      await controller.initialize();
    } on CameraException catch (e) {}

    if (mounted) {
      setState(() {});
    }
  }

  // カメラアイコンが押された時に呼ばれるコールバック関数
  void onTakePictureButtonPressed() {
    takePicture().then((String filePath) {
      if (mounted) {
        setState(() {
          imagePath = filePath;
        });
      }
    });
  }

  // タイムスタンプを返す関数
  String timestamp() => new DateTime.now().millisecondsSinceEpoch.toString();

  // カメラで撮影した画像を保存する関数(非同期)
  Future<String> takePicture() async {
    if (!controller.value.isInitialized) {
      return null;
    }

    final Directory extDir = await getApplicationDocumentsDirectory();
    final String dirPath = '${extDir.path}/Pictures/flutter_test';
    await new Directory(dirPath).create(recursive: true);
    final String filePath = '$dirPath/${timestamp()}.jpg';

    if (controller.value.isTakingPicture) {
      return null;
    }

    try {
      await controller.takePicture(filePath);
    } on CameraException catch (e) {
      return null;
    }

    return filePath;
  }

  // カメラのアイコン画像を返す関数
  IconData getCameraLensIcon(CameraLensDirection direction) {
    switch (direction) {
      case CameraLensDirection.back:
        return Icons.camera_rear;
      case CameraLensDirection.front:
        return Icons.camera_front;
      case CameraLensDirection.external:
        return Icons.camera;
    }
    throw new ArgumentError('Unknown lens direction');
  }
}
最後にStateを継承したクラスを定義し、クラス内にWidgetを返す関数とタップされた時に走るコールバック関数を定義して完了です。
特徴的な部分を抜粋して説明します。
  @override
  Widget build(BuildContext context) {
    return new Scaffold(
      key: _scaffoldKey,
      appBar: new AppBar(
        title: const Text('Camera example'),
      ),
      body: new Column(
        children: <Widget>[
          new Expanded(
            child: new Container(
              child: new Padding(
                padding: const EdgeInsets.all(1.0),
                child: new Center(
                  child: _cameraPreviewWidget(),
                ),
              ),
            ),
          ),
          _captureIconWidget(),
          new Padding(
            padding: const EdgeInsets.all(5.0),
            child: new Row(
              mainAxisAlignment: MainAxisAlignment.start,
              children: <Widget>[
                _cameraTogglesRowWidget(),
                _thumbnailWidget(),
              ],
            ),
          ),
        ],
      ),
    );
  }
この関数はStateクラスの関数となっており、アプリ内で表示するWidgetやボタンが押された時のコールバック処理を定義しております。
childプロパティにはWidgetを定義することができるのですが、そのまま中に書くといくらでもネストが深くなってしまうため、Widgetを返す関数を定義しておくことでそれを防いでいます。
  // トグルが選択された時に呼ばれるコールバック関数
  void onNewCameraSelected(CameraDescription cameraDescription) async {
    if (controller != null) {
      await controller.dispose();
    }
    controller = new CameraController(cameraDescription, ResolutionPreset.high);

    controller.addListener(() {
      if (mounted) setState(() {});
    });

    try {
      await controller.initialize();
    } on CameraException catch (e) {}

    if (mounted) {
      setState(() {});
    }
  }

  // カメラアイコンが押された時に呼ばれるコールバック関数
  void onTakePictureButtonPressed() {
    takePicture().then((String filePath) {
      if (mounted) {
        setState(() {
          imagePath = filePath;
        });
      }
    });
  }
関数の中で走らせている**setState()関数が非常に重要になります。
この関数は、Stateの変更を適用して画面に反映してくれます。今回のアプリだと、トグルを切り替えた際にsetState()**を走らせており、そのタイミングでトグルの切り替えが表示されるようになっています。
セミナーで作成したアプリはgithubにも公開しておりますので、よろしければ中身を読んでみたりクローンして遊んでみてください。
https://github.com/mht-shun-ishigaki/flutter_camera_sample
最後に
長くなってしまいましたが、少しでもFlutterでの開発の手助けになれば幸いです。
個人的には、ネストが深くなってしまうのと、ついついmain.dartに色々書いちゃって肥大化してしまうのが悩みですが、ほぼJSな感じで書けるしiOS/Androidのアプリが簡単に作れてしまうので、初心者の方にもオススメです。