0
0

Delete article

Deleted articles cannot be recovered.

Draft of this article would be also deleted.

Are you sure you want to delete this article?

EPGstationをCloudflare Tunnelに対応させる

Last updated at Posted at 2025-03-31

前提条件

次の準備が全て問題なく終わっていることを確認してから進める。

  • Cloudflareにドメインを登録していること
  • Cloudflare Tunnelが何なのか分かっていること
  • Cloudflare Accessの設定が一通り終わっていること
  • EPGstationの設定が終わっていること

すべてのセットアップが終わるまでEPGstationを起動してはいけません。
外部からアクセスできるようになり非常に危険です。
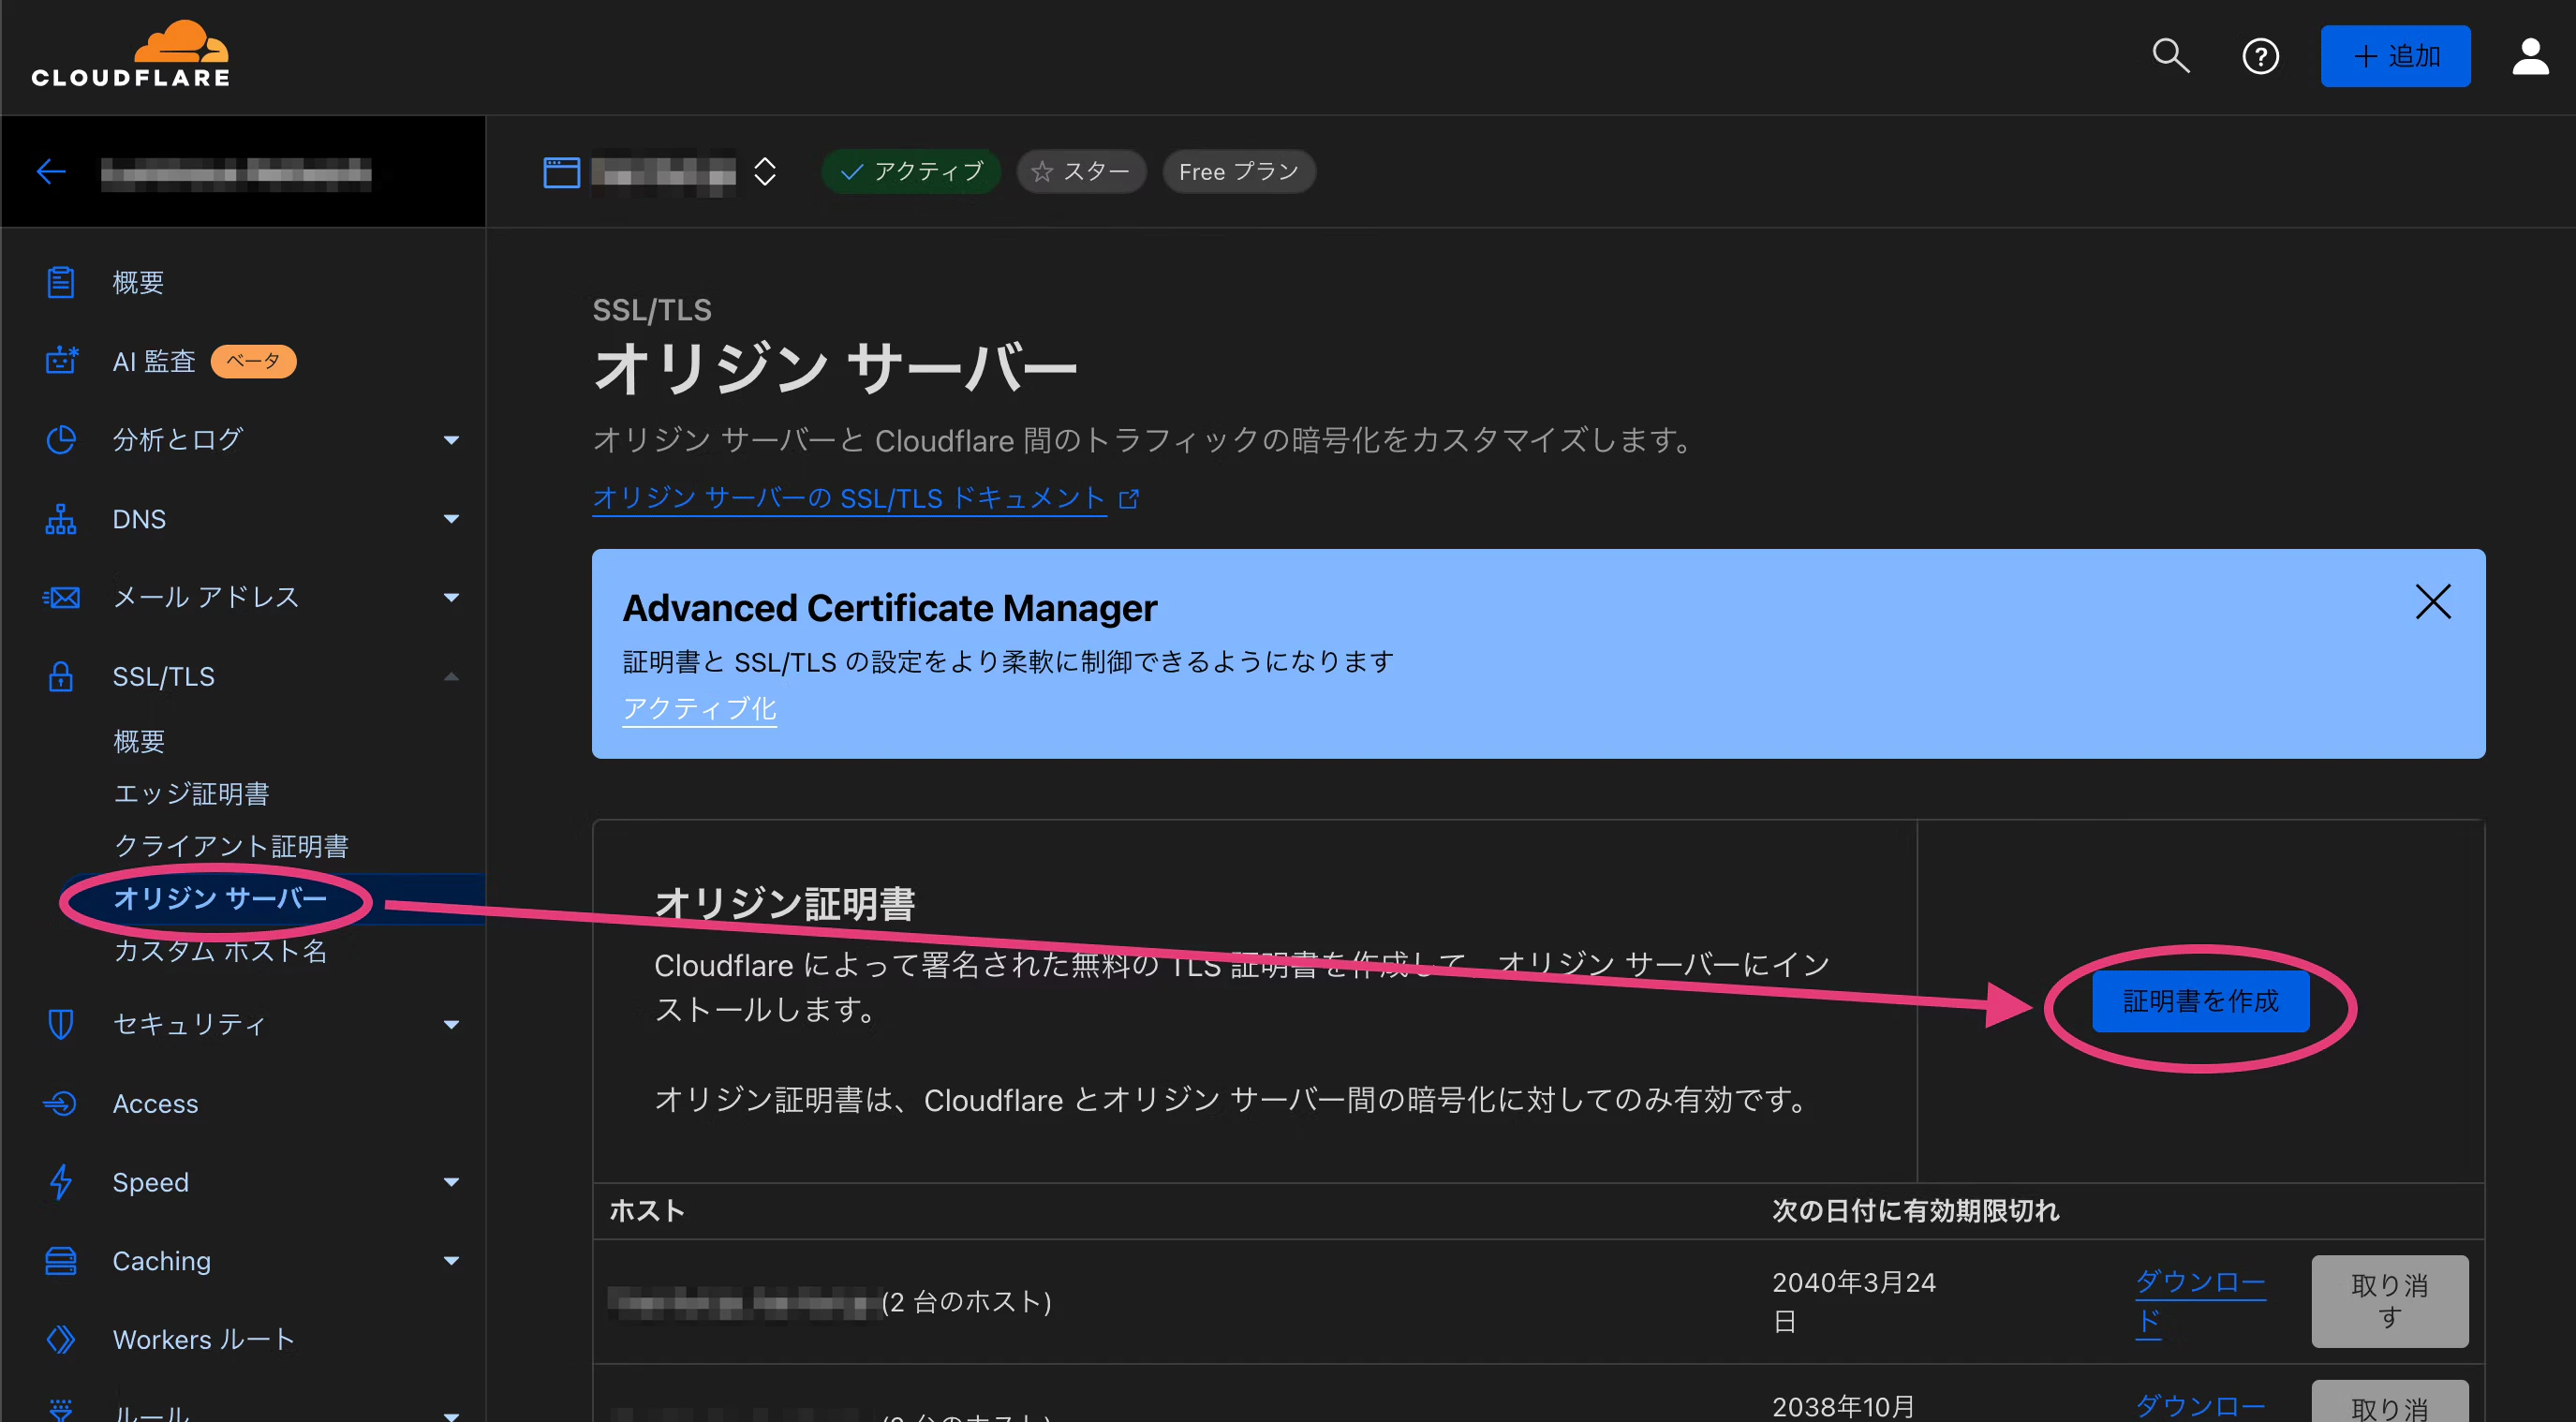
証明書の作成

ドメインの項目から、 SSL/TLS → オリジンサーバー → 証明書の作成 で証明書を作成する。

秘密鍵と公開鍵をそれぞれ保存する。

https___qiita-image-store_s3_ap-northeast-1_amazonaws_com_0_69399_ce39b93f-c10a-4cbf-bbe4-cadd9135bb84.png

証明書をEPGstationにセット

config.ymlの下記の設定を書き換える

# port: 8888 # <= コメントアウトして無効化
mirakurunPath: http://127.0.0.1:40772

直下に下記の項目を追加する。portとsocketioportを同じにするのがポイント。

https:
    port: 8443
    cert: 'C:\\Users\\hogehoge\\pub.pem' # <= 公開鍵を指定
    key: 'C:\\Users\\hogehoge\\priv.crt' # <=秘密鍵を指定
    socketioPort: 8443

Cloudflare Tunnel/Accessの設定

詳しい説明は割愛。

https://localhost:8443 をルーティングするようにする。

ルーティングの準備ができたらCloudflare Accessの設定を必ず設定して自分以外アクセスできないようにすること。

0
0
0

Register as a new user and use Qiita more conveniently

  1. You get articles that match your needs
  2. You can efficiently read back useful information
  3. You can use dark theme
What you can do with signing up
0
0

Delete article

Deleted articles cannot be recovered.

Draft of this article would be also deleted.

Are you sure you want to delete this article?