※2023.06.24更新
- micro-ROS for Arduino本家の
v2.0.6リリースはMicro-XRCE-DDS-Client絡みのバグを含んでいるとのことで,すぐにv2.0.7がリリースされている.
※2023.06.17更新
- micro-ROS for Arduino本家で
humbleのv2.0.6がリリースされたことにより,今回のWio Terminal対応がリリースバージョンで使用可能となった-
iron,rollingも同時にリリースされている
-
※2023.02.23更新
- micro-ROS for Arduino本家にWio Terminalのサポートがマージされた
- 最新の
foxyブランチアーカイブをここからダウンロードしてArduino IDEへのインポート手順に則ってインストールすればmicro-ros_publisher_wifiをビルドできるようになった- リリースタグはまだ打たれていない
- Wio Terminal固有のLCDサポートなどは入れていないため,使用する場合は本記事中のexampleを参考にされたい
-
humbleブランチにもバックポートされているのでhumbleでも動作すると思われる
はじめに
ROS2 Advent Calendar 2022の記事として,ROS Japan UG #46 LT大会にてデモンストレーション(飛び込みLT枠のためビデオアーカイブなし)した内容について投稿する.
本記事は,読者がmicro-ROSについての基本的な知識(一部のプラットフォームを除いて,micro-ROS Agentを介してROS2 topicをやり取りすることなど)を持っていることを前提に書かれている.
ライブラリの修正箇所はmicro-ROS for Arduino本家へのPull Requestを予定しており,Seeed Studio Wio Terminal用のサンプルスケッチはそこからforkした筆者のリポジトリで公開予定である.それらの進捗があり次第,本記事も更新していく.
記事概要
Wio TerminalからWiFi経由でROS2 topicをPubするための手順を紹介する.
これにより,ESP32シリーズ以外のMCUでもWirelessでROS2 topicをPub可能であることが示された.
環境
環境構築の詳細な手順は割愛する.
ハードウェア
- Wio Terminal
- ホストPC(amd64)
- 筆者は1台のPCで以下の役割を兼ねさせた
- ArduinoIDEによる開発
- Wio TerminalとのUDP通信を受け持つmicro-ROS Agentの実行
- micro-ROS AgentからのROS2 topicをSubする
- 筆者は1台のPCで以下の役割を兼ねさせた
- WiFiルータ
- Wio Terminal側はDHCPを使用してIPアドレスを取得するので,DHCPサーバ機能を持つこと
- micro-ROS Agentを実行するホストPC側のIPアドレスはArduinoスケッチに埋め込まれるので,静的IPアドレスを割り振っておくこと
ソフトウェア
- Ubuntu
20.04amd64 - ROS2 Foxy
- ArduinoIDE
1.8.19(筆者はsudo snap install arduinoコマンドによりインストールした)-
Wio Terminalボードライブラリのインストール
- Seeed SAMD Boards
1.8.3
- Seeed SAMD Boards
-
Wio TerminalのWiFiを使用するために必要なライブラリのインストール
- Seeed Arduino rpcWiFi
1.0.6 - インストール時に
rpcUnifiedなどの関連するライブラリを一緒にインストールするか聞かれるので,全て一緒にインストールすること
- Seeed Arduino rpcWiFi
-
Wio Terminalボードライブラリのインストール
-
WiFiコアのファームウェアアップデート手順を実施しておくこと
- 筆者は
RTL8720 Firmware Version: 2.1.3で動作確認している
- 筆者は
- micro-ROS for Arduino
v2.0.5-foxyprecompiled
ビルド手順
Arduinoの各種ライブラリやスケッチを保存するディレクトリがあるArduinoディレクトリを起点とする.
micro-ROS for Arduinoのヘッダとソースの改変
libraries/micro_ros_arduino-2.0.5-foxy/src/以下にあるmicro_ros_arduino.hとwifi_transport.cppの一部を以下のように改変する.
- #if defined(ESP32) || defined(TARGET_PORTENTA_H7_M7) || defined(ARDUINO_NANO_RP2040_CONNECT)
+ #if defined(ESP32) || defined(TARGET_PORTENTA_H7_M7) || defined(ARDUINO_NANO_RP2040_CONNECT) || defined(ARDUINO_WIO_TERMINAL)

#if defined(ESP32) || defined(TARGET_PORTENTA_H7_M7)
#include <WiFi.h>
#include <WiFiUdp.h>
#elif defined(ARDUINO_NANO_RP2040_CONNECT)
#include <SPI.h>
#include <WiFiNINA.h>
+ #elif defined(ARDUINO_WIO_TERMINAL)
+ #include <rpcWiFi.h>
+ #include <WiFiUdp.h>
#endif
- #if defined(ESP32) || defined(TARGET_PORTENTA_H7_M7) || defined(ARDUINO_NANO_RP2040_CONNECT)
+ #if defined(ESP32) || defined(TARGET_PORTENTA_H7_M7) || defined(ARDUINO_NANO_RP2040_CONNECT) || defined(ARDUINO_WIO_TERMINAL)

#include <Arduino.h>


#if defined(ESP32) || defined(TARGET_PORTENTA_H7_M7)
#include <WiFi.h>
#include <WiFiUdp.h>
#elif defined(ARDUINO_NANO_RP2040_CONNECT)
#include <SPI.h>
#include <WiFiNINA.h>
+ #elif defined(ARDUINO_WIO_TERMINAL)
+ #include <rpcWiFi.h>
+ #include <WiFiUdp.h>
#endif
ボードの選択とスケッチの作成
ボードとしてWio Terminalを選択する.設定は特に変える必要はない.
スケッチを新規作成,以下のソースで上書きして保存する.
set_microros_wifi_transports("WIFI SSID", "WIFI PASS", "192.168.1.57", 8888);の第1引数と第2引数をWiFiルータの設定に合わせる.第3引数はmiro-ROS Agentを走らせるホストPCのIPアドレスを指定することに注意.
#include <micro_ros_arduino.h>

#include <stdio.h>
#include <rcl/rcl.h>
#include <rcl/error_handling.h>
#include <rclc/rclc.h>
#include <rclc/executor.h>

#include <TFT_eSPI.h>

#include <std_msgs/msg/int32.h>

#include "Free_Fonts.h"

rcl_publisher_t publisher;
std_msgs__msg__Int32 msg;
rclc_support_t support;
rcl_allocator_t allocator;
rcl_node_t node;

#define LED_PIN 13

#define RCCHECK(fn) { rcl_ret_t temp_rc = fn; if((temp_rc != RCL_RET_OK)){error_loop();}}
#define RCSOFTCHECK(fn) { rcl_ret_t temp_rc = fn; if((temp_rc != RCL_RET_OK)){}}

TFT_eSPI tft;

void error_loop(){
  while(1){
    digitalWrite(LED_PIN, !digitalRead(LED_PIN));
    delay(100);
  }
}

void setup() {
  pinMode(LED_PIN, OUTPUT);
  digitalWrite(LED_PIN, LOW);

  // Setup Wio Terminal's LCD
  tft.begin();
  tft.setRotation(3);
  tft.fillScreen(TFT_BLACK);
  tft.setFreeFont(FMB12);

  // Show Connecting Message to LCD
  const String connecting_message = "Connecting to WiFi ...";
  tft.setCursor((320 - tft.textWidth(connecting_message))/2, 120);
  tft.print(connecting_message);

  set_microros_wifi_transports("WIFI SSID", "WIFI PASS", "192.168.1.57", 8888);

  // Show Connected Message to LCD
  tft.fillScreen(TFT_BLACK);
  const String connected_message = "Connected!";
  tft.setCursor((320 - tft.textWidth(connected_message))/2, 120);
  tft.print(connected_message);

  digitalWrite(LED_PIN, HIGH);

  delay(2000);

  allocator = rcl_get_default_allocator();

  //create init_options
  RCCHECK(rclc_support_init(&support, 0, NULL, &allocator));

  // create node
  RCCHECK(rclc_node_init_default(&node, "micro_ros_arduino_wifi_node", "", &support));

  // create publisher
  RCCHECK(rclc_publisher_init_best_effort(
    &publisher,
    &node,
    ROSIDL_GET_MSG_TYPE_SUPPORT(std_msgs, msg, Int32),
    "topic_name"));

  msg.data = 0;
}

void loop() {
    delay(1000);
    RCSOFTCHECK(rcl_publish(&publisher, &msg, NULL));
    msg.data++;
}
フォントファイルのコピー
Wio TerminalのLCDに適合したフォントファイルをダウンロードして,スケッチを保存したディレクトリにコピーする.
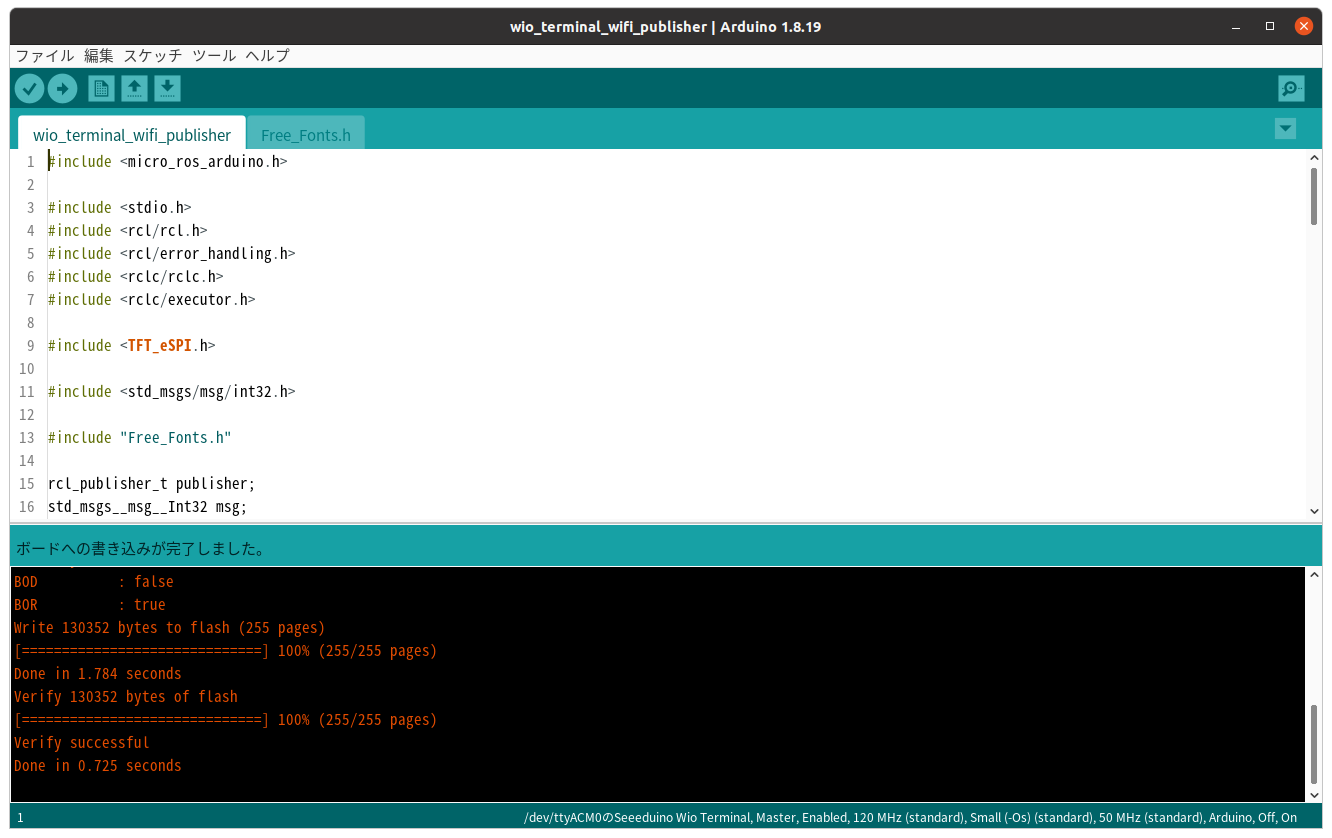
スケッチのコンパイルと書き込み
Wio TerminalとホストPCをUSBケーブルで接続し「マイコンボードに書き込む」を実行する.以下のようになればOK.
動作確認
ホストPCでのmicro-ROS Agentの起動
書き込み終わったWio Terminalの電源スイッチをいったんOFFにしておく.USBケーブルはホストPCに接続したままで良い(後の工程でWio Terminalの電源としてのみ使用するため).
本記事ではDockerを使用したmicro-ROS Agentについて紹介するが,もちろんネイティブ環境でビルドしたものを使用しても良い(むしろより良い).
$ docker pull microros/base:foxy
$ docker run -it --net=host microros/micro-ros-agent:foxy udp4 -p 8888
Wio Terminalの電源スイッチをONにする
LCDにConnecting to WiFi...と表示された後に,WiFiルータやmicro-ROS Agentとの接続に問題なければConnected!と表示される.
micro-ROS Agentを起動した端末では以下のように表示され,接続が確立したことがわかる.
$ docker run -it --net=host microros/micro-ros-agent:foxy udp4 -p 8888
[1671409046.554536] info     | UDPv4AgentLinux.cpp | init                     | running...             | port: 8888
[1671409046.555203] info     | Root.cpp           | set_verbose_level        | logger setup           | verbose_level: 4
[1671409057.332292] info     | Root.cpp           | create_client            | create                 | client_key: 0x6FCEB7C8, session_id: 0x81
[1671409057.332937] info     | SessionManager.hpp | establish_session        | session established    | client_key: 0x6FCEB7C8, address: 192.168.11.7:47138
[1671409057.371542] info     | ProxyClient.cpp    | create_participant       | participant created    | client_key: 0x6FCEB7C8, participant_id: 0x000(1)
[1671409057.382665] info     | ProxyClient.cpp    | create_topic             | topic created          | client_key: 0x6FCEB7C8, topic_id: 0x000(2), participant_id: 0x000(1)
[1671409057.391553] info     | ProxyClient.cpp    | create_publisher         | publisher created      | client_key: 0x6FCEB7C8, publisher_id: 0x000(3), participant_id: 0x000(1)
[1671409057.400132] info     | ProxyClient.cpp    | create_datawriter        | datawriter created     | client_key: 0x6FCEB7C8, datawriter_id: 0x000(5), publisher_id: 0x000(3)
ROS2 topicのSub
$ source /opt/ros/foxy/setup.bash
$ ros2 topic list
/parameter_events
/rosout
/topic_name
$ ros2 topic echo /topic_name
data: 128
---
data: 129
---
data: 130
---
data: 131
---
data: 132
---