まくら
今回はStoryboardを使ったお話。
力技です悪しからず。
バッドノウハウになる可能性もあるので用法用量をきちんと見極めてやで。
さて、UITableViewのレイアウトってどうしてますか?
今は初学者向けにどんな手法が紹介されているかわかりませんが、自分がiOS触りだした時に割とみんな書いていたのが、xibファイルにUITableViewCellのレイアウトを用意して、
self.tableView.register(nib: UINib?, forCellReuseIdentifier: String)
これで呼び出して使うって方法です。
カスタムレイアウトのセルを多用する時に、この方法だとそれぞれのファイルで別のレイアウトを管理するので、競合が起こりづらく、変更も当該ファイルだけでいいと紹介されてると思います。
それは至極正しいです。いや全く。
でもですね、実務でレイアウト調整やらする時に思う訳ですよ。
「xibファイルの切り替えが面倒くせぇ」
と。
それなり以上の規模になればソースの分割は至上命題なのですが、正直そんな規模にはならんし、サクッとレイアウト管理したいんじゃーと思う方もいるでしょう。 ...でしょう?
とくれば、1つのStoryboardに複数のレイアウトを押し込んでしまえば解決やん?という方法です。
(注: 1ファイルに押し込めるのでもちろん複数人で触ると競合します。その場合はおとなしくファイルを割りましょう)
ほんだい
方法は簡単。
1つのStoryboardに複数のセルレイアウトを作り、Identifierに固有名を付けてソースで参照します。
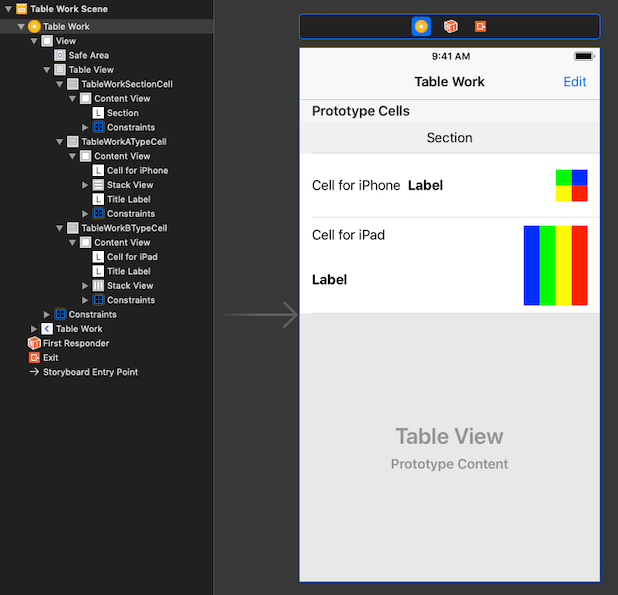
まずはStoryboard
TableViewのPrototype Cellsを3に設定し、
- セクション
- iPhone用レイアウト
- iPad用レイアウト
以上のレイアウトを用意したものです。
キモはセクションまで用意してある事です。
次にファイルを用意しましょう。
ファイルは別々で用意しています。
ファイルの中身は、ほぼ生まれたままの姿ですが、固有の情報を持たせたいので、次のようにしています。
static let id = "TableWorkSectionCell"
static let id = "TableWorkATypeCell"
static let height: CGFloat = 80
static let id = "TableWorkBTypeCell"
static let height: CGFloat = 120
で、本体のViewControllerの実装です。(一部抜粋)
(注: デバイス判定用にUIDeviceを拡張しています)
extension TableWorkViewController: UITableViewDataSource {
    // セクション数
    func numberOfSections(in tableView: UITableView) -> Int {
        return 2
    }

    // セクションレイアウト
    func tableView(_ tableView: UITableView, viewForHeaderInSection section: Int) -> UIView? {

        let id = TableWorkSectionCell.id
        let sectionCell = self.tableView.dequeueReusableCell(withIdentifier: id) as! TableWorkSectionCell

        return sectionCell
    }

    // 行数
    func tableView(_ tableView: UITableView, numberOfRowsInSection section: Int) -> Int {
        return 3
    }

    // cell
    func tableView(_ tableView: UITableView, cellForRowAt indexPath: IndexPath) -> UITableViewCell {

        switch UIDevice.isIPhone() {
        case true:
            let id = TableWorkATypeCell.id
            let cell = self.tableView.dequeueReusableCell(withIdentifier: id, for: indexPath) as! TableWorkATypeCell

            cell.titleLabel.text = String("\(indexPath.row)")

            cell.subviews.forEach { (view) in
                if view.isKind(of: TableWorkColorKeepView.self) {
                    view.backgroundColor = UIColor.orange
                }
            }

            return cell
        case false:
            let id = TableWorkBTypeCell.id
            let cell = self.tableView.dequeueReusableCell(withIdentifier: id, for: indexPath) as! TableWorkBTypeCell

            cell.titleLabel.text = String("\(indexPath.row)")

            return cell
        }
    }
}

extension TableWorkViewController: UITableViewDelegate {

    // セル高さ
    func tableView(_ tableView: UITableView, heightForRowAt indexPath: IndexPath) -> CGFloat {
        return UIDevice.isIPhone() ? TableWorkATypeCell.height : TableWorkBTypeCell.height
    }
}
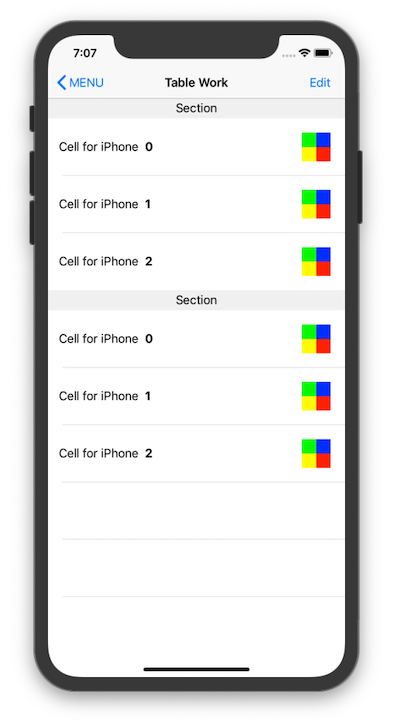
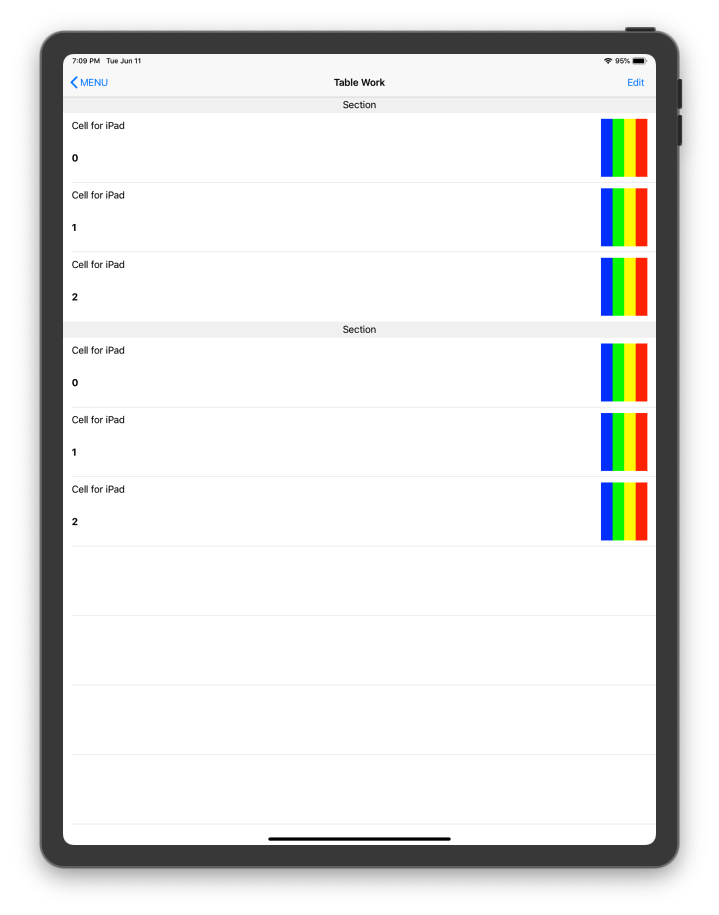
シミュレータで動かすと、それぞれこうなります。
ソースで一目瞭然ですが、要は、
self.tableView.dequeueReusableCell()
を使うと1つのStoryboardから色々レイアウトが参照できるよっていうネタです。
ファイル分割は置いておいて、セルレイアウトの参照方法は応用の効く話だと思うので、そんな事もできるんやーくらいで見ていただければ、これ幸い。
以上でござる。


