はじめに
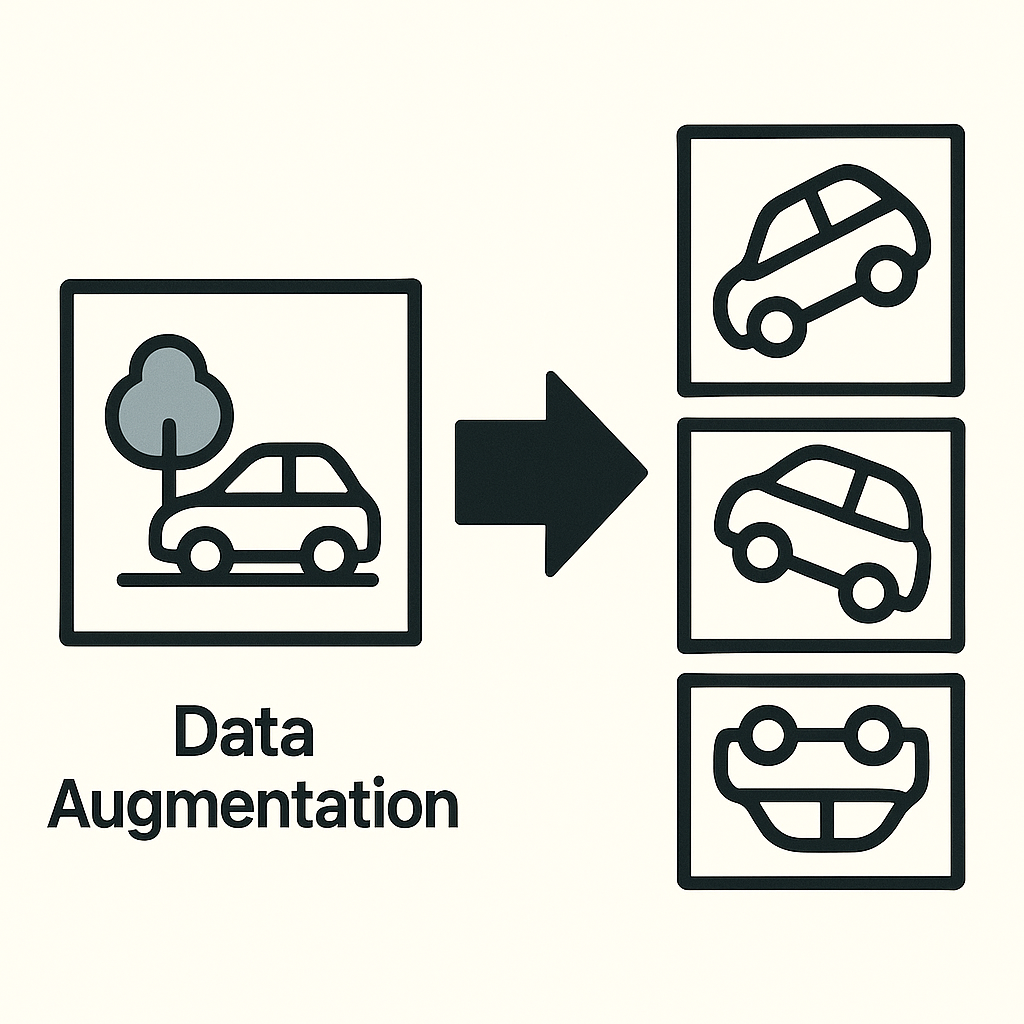
本記事では、画像認識のためのAIモデル開発における、データセットの作成方法およびデータセットのデータ拡張の方法を解説します。データ拡張(Augmentation)と聞くと難しそうですが、作業は超簡単です。
"Augumentation"と"Albumentations"
ちなみに、"Augumentation"とは、辞書を引くと「増加、増大、増加率、増加物、添加物」を指す言葉です。
一方、"Albumentations"とは、データ拡張"Data Augumentation"するためのライブラリ名として現在使われています。
元々は、2020年にAlexander Buslaevらの研究グループが発表した論文名と画像拡張ライブラリ名が"Albumentations"でした。
【出典:「Albummentations: 高速で柔軟な画像拡張」
https://www.mdpi.com/2078-2489/11/2/125
】
本記事で獲得できるスキル
・データセットの作成
・データ拡張
データセットのデータ拡張を行なう利点
データセットのデータ拡張を行なうことで画像認識のためのAIモデルの精度向上が期待できます。
次回の記事で、データ拡張前と後でのモデルの精度を比較してみましょう。
環境
・Windows 11 Home
・Google Colaboratory
※Colabは無料版でもモデル学習は可能ですが、時間が掛かり、スクリプト実行中にランタイムの接続が切断されます。筆者は100コンピューティング単位につき、1,179円のPay As You GoプランでT4を利用しています。
手順
1)画像データセットのセッティング
・用意するもの:アノテーション済みのデータセット
アノテーションについては下記記事をご参考ください。
[YOLOカスタムモデルをRaspberry Piでデプロイ①]LabelImgでアノテーションをする最も簡単な方法[Windows]
https://qiita.com/LatanKee/items/d87a729ab47f6ce605f7
・Google Drive上に作業フォルダを作成し、画像データとラベルデータを分けて格納する
元画像データ格納先:
/content/drive/MyDrive/Traffic_Project/datasets/all_images
元ラベルデータ格納先:
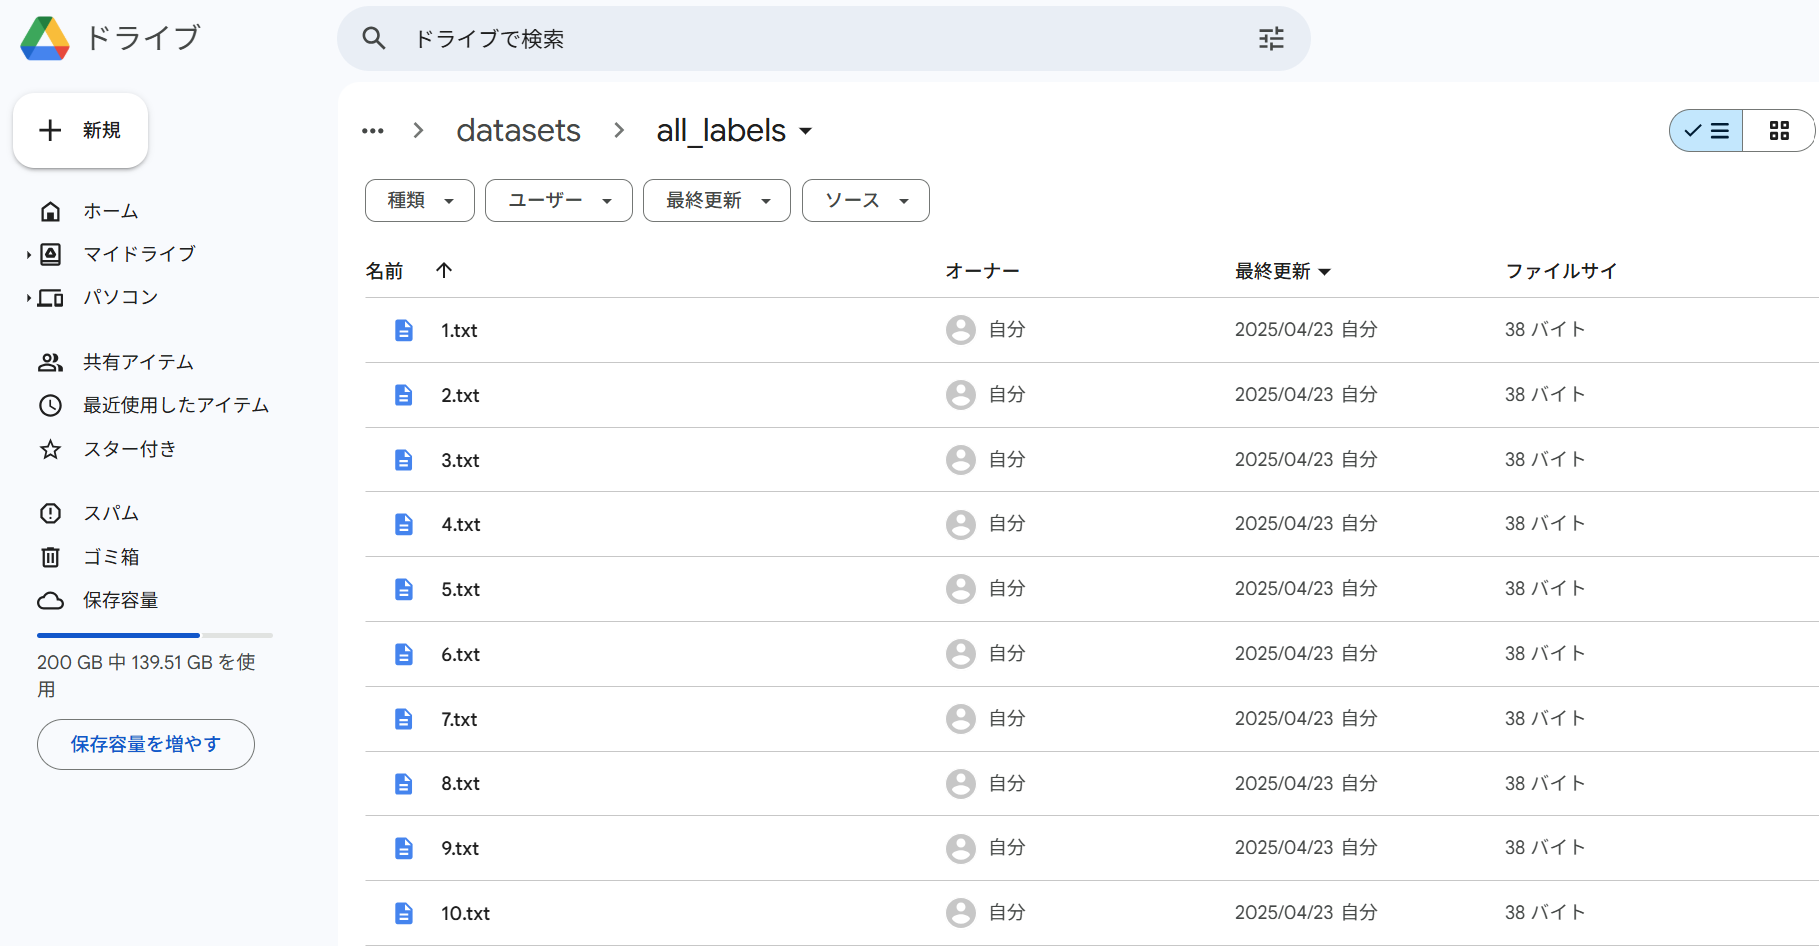
/content/drive/MyDrive/Traffic_Project/datasets/all_labels
下記の様に作業フォルダ2つ(all_images, all_labels)を作成する。
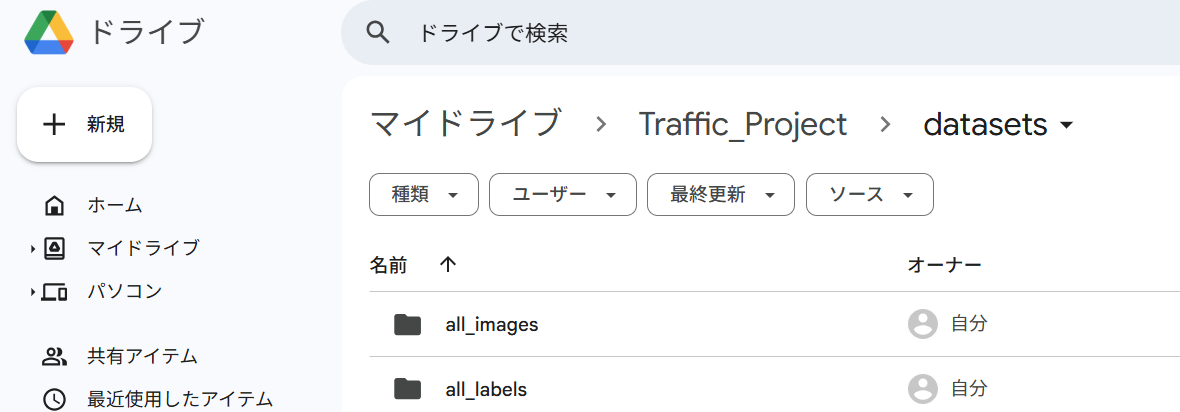
all_imagesに画像データを格納する。

all_labelsにラベルデータを格納する。
※画像データと対になるように同じファイル名でテキストファイルを作成できていることを確認してください。
2)Google Colaboratoryでデータセットの拡張スクリプトの実行
・GoogleDriveのマウント
from google.colab import drive
drive.mount('/content/drive')
・各種ライブラリのインポート
import os
import random
import shutil
import numpy as np
import pandas as pd
import cv2
import yaml
import glob
from sklearn.model_selection import train_test_split
import albumentations as A
from albumentations import BboxParams
・データ拡張
1枚の画像データを元に、10倍にデータ拡張します。
つまり、新たに10枚の画像データを生成します。
ちなみに、筆者の用意したデータセットは、
7クラス×40枚=計280枚の画像データです。
スクリプトのポイント
・拡張画像・ラベルを別フォルダに保存
・YOLOフォーマット出力時に小数点6桁精度で保存
・Albumentationsに class_id を分離して渡す
・このコードでは 1枚の画像から10枚の拡張画像 を生成します(num_augments=10)
・オリジナル画像やラベルは変更されず、すべて aug_images/ および aug_labels/ に保存されます
・f.write(f"{int(label)} {bbox_str}\n") によって float型の class_id(例:3.0)を int(3)に強制変換
# Colab用コマンド
%cd '/content/drive/MyDrive/Traffic_Project/datasets'

# 入力画像・ラベル(元データ)
images_dir = '/content/drive/MyDrive/Traffic_Project/datasets/all_images'
labels_dir = '/content/drive/MyDrive/Traffic_Project/datasets/all_labels'

# 出力先ディレクトリ(拡張画像・ラベルを別に)
output_images_dir = '/content/drive/MyDrive/Traffic_Project/datasets/aug_images'
output_labels_dir = '/content/drive/MyDrive/Traffic_Project/datasets/aug_labels'
os.makedirs(output_images_dir, exist_ok=True)
os.makedirs(output_labels_dir, exist_ok=True)

# データ拡張設定
def get_augmentations(with_bboxes=True):
    if with_bboxes:
        return A.Compose([
            A.ShiftScaleRotate(shift_limit=0.05, scale_limit=0.1, rotate_limit=0, p=0.5),
            A.RandomBrightnessContrast(brightness_limit=0.2, contrast_limit=0.2, p=0.5),
            A.RGBShift(r_shift_limit=20, g_shift_limit=20, b_shift_limit=20, p=0.5),
            A.Blur(blur_limit=(3, 5), p=0.3),
        ], bbox_params=BboxParams(format='yolo', label_fields=['class_labels']))
    else:
        return A.Compose([
            A.ShiftScaleRotate(shift_limit=0.05, scale_limit=0.1, rotate_limit=0, p=0.5),
            A.RandomBrightnessContrast(brightness_limit=0.2, contrast_limit=0.2, p=0.5),
            A.RGBShift(r_shift_limit=20, g_shift_limit=20, b_shift_limit=20, p=0.5),
            A.Blur(blur_limit=(3, 5), p=0.3)
        ])

def generate_new_filename(filename, idx):
    name, ext = os.path.splitext(filename)
    return f"{name}_augmented_{idx}{ext}"

def load_annotations(label_path):
    bboxes = []
    with open(label_path, 'r') as file:
        for line in file.readlines():
            parts = line.strip().split()
            class_id = int(parts[0])
            bbox = list(map(float, parts[1:5]))  # x_center, y_center, width, height
            bboxes.append(bbox + [class_id])
    return bboxes

def augment_and_save(image_path, label_path, output_image_dir, output_label_dir, num_augments):
    image = cv2.imread(image_path)
    if image is None:
        print(f"エラー: {image_path} を読み込めませんでした")
        return

    image = cv2.cvtColor(image, cv2.COLOR_BGR2RGB)

    if os.path.exists(label_path):
        bboxes_raw = load_annotations(label_path)
        boxes_only = [bbox[:-1] for bbox in bboxes_raw]
        class_labels = [int(bbox[-1]) for bbox in bboxes_raw]
        augmentations = get_augmentations(with_bboxes=True)
    else:
        boxes_only = []
        class_labels = []
        augmentations = get_augmentations(with_bboxes=False)

    for idx in range(num_augments):
        if boxes_only:
            augmented = augmentations(image=image, bboxes=boxes_only, class_labels=class_labels)
            aug_bboxes = augmented['bboxes']
            aug_labels = augmented['class_labels']
        else:
            augmented = augmentations(image=image)
            aug_bboxes = []
            aug_labels = []

        aug_img = cv2.cvtColor(augmented['image'], cv2.COLOR_RGB2BGR)
        new_image_name = generate_new_filename(os.path.basename(image_path), idx)
        new_label_name = generate_new_filename(os.path.basename(label_path), idx)

        cv2.imwrite(os.path.join(output_image_dir, new_image_name), aug_img)

        # 修正済み保存:class_id を明示的に int に変換して保存
        if aug_bboxes:
            with open(os.path.join(output_label_dir, new_label_name), 'w') as f:
                for bbox, label in zip(aug_bboxes, aug_labels):
                    bbox_str = " ".join(f"{x:.6f}" for x in bbox)
                    f.write(f"{int(label)} {bbox_str}\n")  # ← 修正ポイント

def process_all_images(images_dir, labels_dir, output_images_dir, output_labels_dir, num_augments=10):
    for image_file in os.listdir(images_dir):
        if image_file.lower().endswith(('.png', '.jpg', '.jpeg')):
            image_path = os.path.join(images_dir, image_file)
            label_path = os.path.join(labels_dir, os.path.splitext(image_file)[0] + '.txt')
            augment_and_save(image_path, label_path, output_images_dir, output_labels_dir, num_augments)

# データ拡張の実行
process_all_images(images_dir, labels_dir, output_images_dir, output_labels_dir, num_augments=10)
データ拡張は以上で完了です。
筆者の場合は、元の画像データ280枚+データ拡張後画像データ2800枚=計3080枚のデータセットが完成しました。
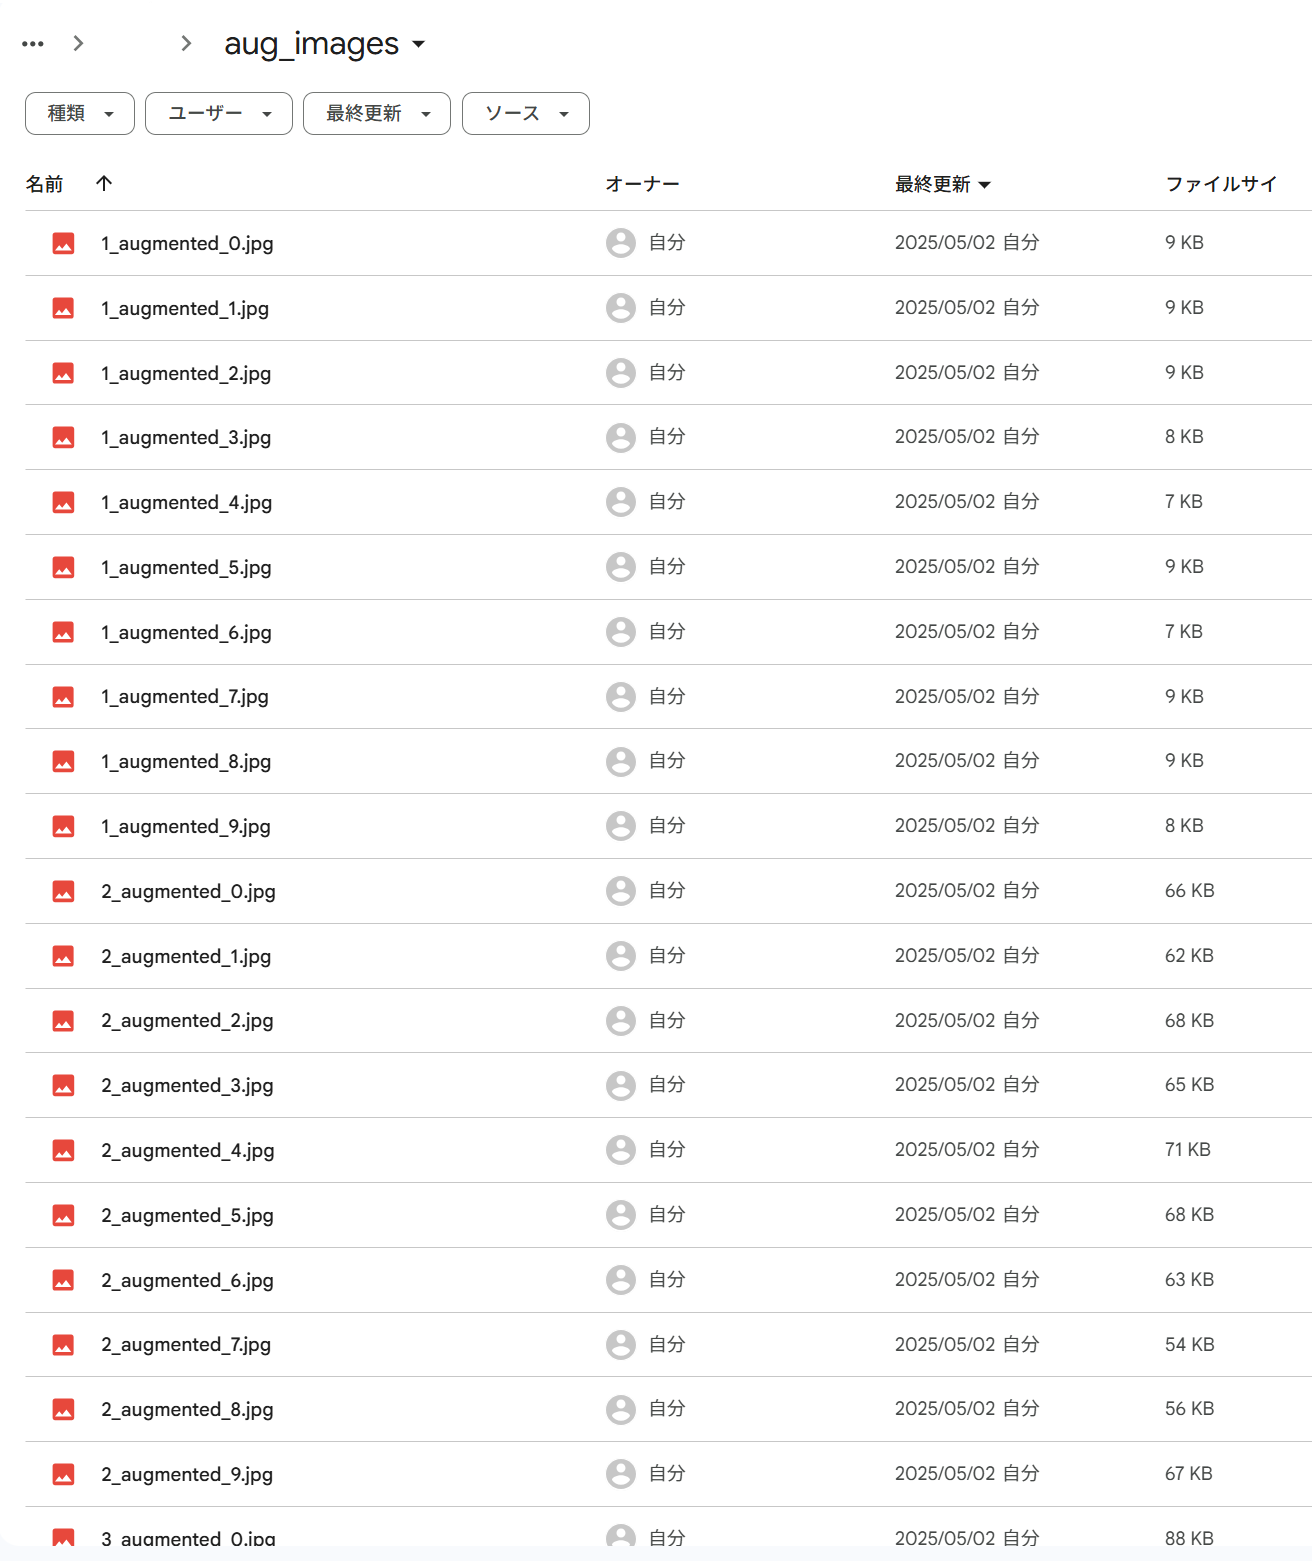
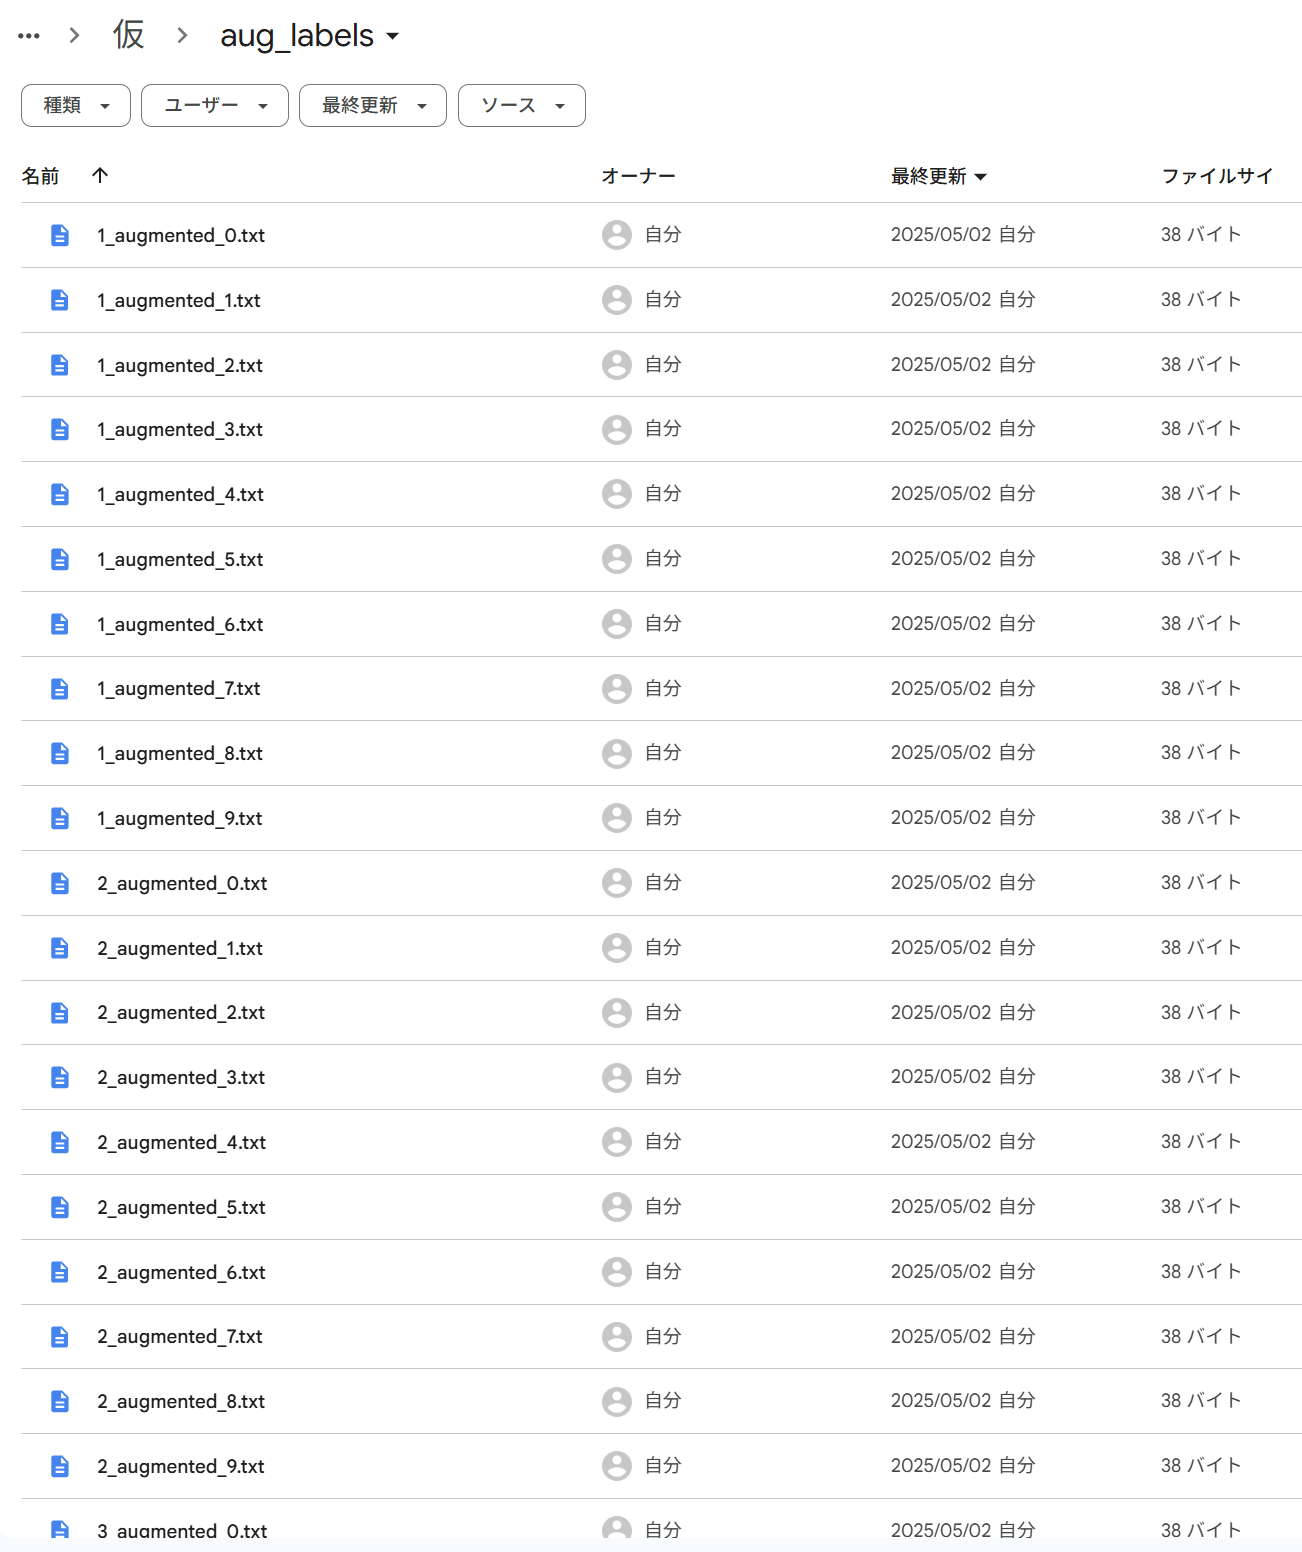
例:ファイル名が「1」の場合、画像データ「1_augmented_0.jpg」~「1_augmented_9.jpg」が生成され、ラべルデータ「1_augmented_0.txt」~「1_augmented_9.txt」が生成されます。
▼データ拡張された画像データ
▼データ拡張されたラベルデータ
3)トレーニングセットを構成するスクリプト実行
データ拡張が完了したところで、YOLOのモデル学習スクリプト実行に向けて、トレーニングセットを構成します。早くモデル学習したい気持ちになりますが、エラーの原因にもなりやすい点ですので、この作業が地味に大事です。もう少しの辛抱です。不要な方は飛ばしてください。
拡張画像と元画像を合体させてトレーニングセットを構成するスクリプト
import os
import shutil

# 入力フォルダ
orig_images_dir = '/content/drive/MyDrive/Traffic_Project/datasets/all_images'
orig_labels_dir = '/content/drive/MyDrive/Traffic_Project/datasets/all_labels'
aug_images_dir  = '/content/drive/MyDrive/Traffic_Project/datasets/aug_images'
aug_labels_dir  = '/content/drive/MyDrive/Traffic_Project/datasets/aug_labels'

# 統合先フォルダ
merged_images_dir = '/content/drive/MyDrive/Traffic_Project/datasets/train_dataset/images'
merged_labels_dir = '/content/drive/MyDrive/Traffic_Project/datasets/train_dataset/labels'
os.makedirs(merged_images_dir, exist_ok=True)
os.makedirs(merged_labels_dir, exist_ok=True)

# 関数:画像・ラベルをコピー
def copy_dataset(src_img_dir, src_lbl_dir, dst_img_dir, dst_lbl_dir):
    for file in os.listdir(src_img_dir):
        if file.lower().endswith(('.jpg', '.jpeg', '.png')):
            src_img_path = os.path.join(src_img_dir, file)
            src_lbl_path = os.path.join(src_lbl_dir, os.path.splitext(file)[0] + '.txt')

            dst_img_path = os.path.join(dst_img_dir, file)
            dst_lbl_path = os.path.join(dst_lbl_dir, os.path.splitext(file)[0] + '.txt')

            shutil.copy2(src_img_path, dst_img_path)
            if os.path.exists(src_lbl_path):
                shutil.copy2(src_lbl_path, dst_lbl_path)

# 元データのコピー
copy_dataset(orig_images_dir, orig_labels_dir, merged_images_dir, merged_labels_dir)

# 拡張データのコピー
copy_dataset(aug_images_dir, aug_labels_dir, merged_images_dir, merged_labels_dir)

print("✅ 統合完了: train_dataset/images および labels に保存されました。")
train・valid・testデータの分割スクリプト
データセットの割合は次の通りです。
・train 80%
・valid 16%
・test 4%
別表現をすると、次の通りです。
train : valid + test = 8 : 2 , valid : test = 8 : 2
import os
import shutil
from sklearn.model_selection import train_test_split

# 統合されたデータセット
images_dir = '/content/drive/MyDrive/Traffic_Project/datasets/train_dataset/images'
labels_dir = '/content/drive/MyDrive/Traffic_Project/datasets/train_dataset/labels'

# 出力先ディレクトリ
output_base = '/content/drive/MyDrive/Traffic_Project/datasets'
train_img_dir = os.path.join(output_base, 'train/images')
train_lbl_dir = os.path.join(output_base, 'train/labels')
valid_img_dir = os.path.join(output_base, 'valid/images')
valid_lbl_dir = os.path.join(output_base, 'valid/labels')
test_img_dir  = os.path.join(output_base, 'test/images')
test_lbl_dir  = os.path.join(output_base, 'test/labels')

for path in [train_img_dir, train_lbl_dir, valid_img_dir, valid_lbl_dir, test_img_dir, test_lbl_dir]:
    os.makedirs(path, exist_ok=True)

# 画像ファイル一覧
image_files = [f for f in os.listdir(images_dir) if f.lower().endswith(('.jpg', '.jpeg', '.png'))]

# 第一段階:train(80%) vs 残り(20%)
train_files, remaining_files = train_test_split(image_files, test_size=0.2, random_state=42)

# 第二段階:remainingを valid(16%)と test(4%)に分割 → 比率 80:20
valid_files, test_files = train_test_split(remaining_files, test_size=0.2, random_state=42)

# コピー処理
def copy_split_data(file_list, src_img_dir, src_lbl_dir, dst_img_dir, dst_lbl_dir):
    for img_file in file_list:
        lbl_file = os.path.splitext(img_file)[0] + '.txt'

        shutil.copy2(os.path.join(src_img_dir, img_file), os.path.join(dst_img_dir, img_file))
        lbl_path = os.path.join(src_lbl_dir, lbl_file)
        if os.path.exists(lbl_path):
            shutil.copy2(lbl_path, os.path.join(dst_lbl_dir, lbl_file))

# 分割実行
copy_split_data(train_files, images_dir, labels_dir, train_img_dir, train_lbl_dir)
copy_split_data(valid_files, images_dir, labels_dir, valid_img_dir, valid_lbl_dir)
copy_split_data(test_files,  images_dir, labels_dir, test_img_dir,  test_lbl_dir)

print("✅ 分割完了:")
print(f" - Train: {len(train_files)} 画像")
print(f" - Valid: {len(valid_files)} 画像")
print(f" - Test : {len(test_files)} 画像")
実行結果
✅ 分割完了:
- Train: 2464 画像
- Valid: 492 画像
- Test : 124 画像
おまけ)YOLO形式ラベルのバウンディングボックスが正しく記述されているかチェックするスクリプト
import os
import cv2
import matplotlib.pyplot as plt
# 可視化対象の画像・ラベルディレクトリ(例:拡張データ)
images_dir = '/content/drive/MyDrive/Traffic_Project/datasets/aug_images'
labels_dir = '/content/drive/MyDrive/Traffic_Project/datasets/aug_labels'
# クラスIDと名前の対応(YOLOのdata.yamlと一致させてください)
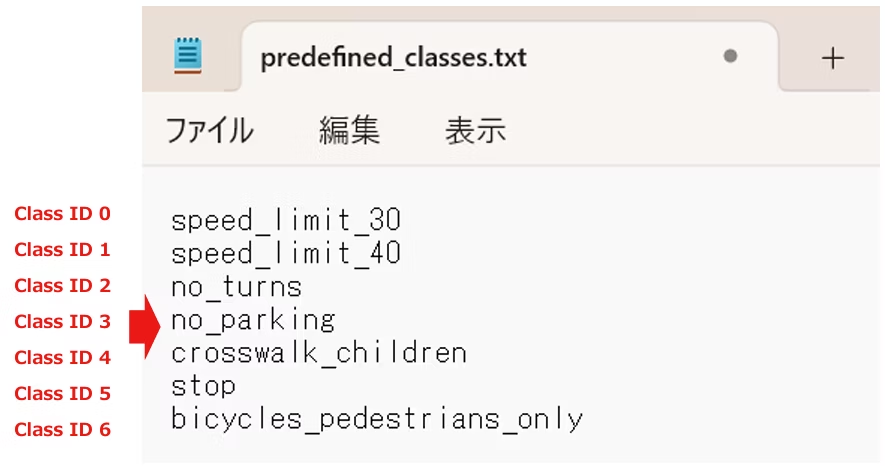
class_names = [
'speed_limit_30',
'speed_limit_40',
'no_turns',
'no_parking',
'crosswalk_children',
'stop',
'bicycles_pedestrians_only'
]
# 画像サイズに対する相対座標 → 絶対座標への変換
def yolo_to_bbox(x_center, y_center, width, height, img_w, img_h):
x1 = int((x_center - width / 2) * img_w)
y1 = int((y_center - height / 2) * img_h)
x2 = int((x_center + width / 2) * img_w)
y2 = int((y_center + height / 2) * img_h)
return x1, y1, x2, y2
# 単一画像を描画
def visualize(image_path, label_path):
image = cv2.imread(image_path)
if image is None:
print(f"読み込み失敗: {image_path}")
return
h, w = image.shape[:2]
if not os.path.exists(label_path):
print(f"ラベルなし: {label_path}")
return
with open(label_path, 'r') as f:
lines = f.readlines()
for line in lines:
parts = line.strip().split()
if len(parts) != 5:
continue
class_id = int(float(parts[0]))
x_center, y_center, width, height = map(float, parts[1:])
x1, y1, x2, y2 = yolo_to_bbox(x_center, y_center, width, height, w, h)
color = (0, 255, 0)
cv2.rectangle(image, (x1, y1), (x2, y2), color, 2)
label = class_names[class_id] if class_id < len(class_names) else str(class_id)
cv2.putText(image, label, (x1, y1 - 10), cv2.FONT_HERSHEY_SIMPLEX, 0.6, color, 2)
# 表示(matplotlib経由で RGB に変換)
image_rgb = cv2.cvtColor(image, cv2.COLOR_BGR2RGB)
plt.figure(figsize=(8, 8))
plt.imshow(image_rgb)
plt.axis('off')
plt.show()
# 実行例(1枚だけテスト表示)
sample_image = '280_augmented_0.jpg' # 実際のファイル名に合わせて変更
image_path = os.path.join(images_dir, sample_image)
label_path = os.path.join(labels_dir, os.path.splitext(sample_image)[0] + '.txt')
visualize(image_path, label_path)
スクリプト下から5行目を自身のデータに合わせて実行してください。(下記スクリプト参考)
sample_image = '280_augmented_0.jpg' # 実際のファイル名に合わせて変更
実行結果
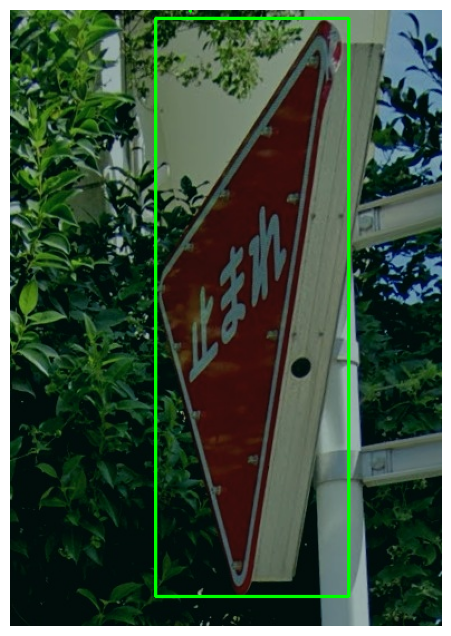
ラベルテキストに正しくバウンディングボックスが記述されていることが確認できます。
4)データセットの構造確認
データセットは次のような構造になっています。ここまでのスクリプトを実行することで、下記の様な構造のデータセットが完成していれば成功です。YAMLファイルについては最後に説明します。
datasets/

├── train/

│ ├── images/

│ │ ├── image1.jpg

│ │ ├── image2.jpg

│ │ └── ...

│ └── labels/

│ ├── image1.txt

│ ├── image2.txt

│ └── ...

├── valid/

│ ├── images/

│ └── labels/

├── test/

│ ├── images/

│ └── labels/

data.yaml
5)YAMLファイルの保存
最後に、YAMLファイルを作成します。
下記のスクリプトを元にご自身のデータセットに合わせて書き換えてください。
train: /content/drive/MyDrive/Traffic_Project/datasets/train
val: /content/drive/MyDrive/Traffic_Project/datasets/valid
test: /content/drive/MyDrive/Traffic_Project/datasets/test

nc: 7
names: [
  'speed_limit_30',
  'speed_limit_40',
  'no_turns',
  'no_parking',
  'crosswalk_children',
  'stop',
  'bicycles_pedestrians_only'
]
names: []のラベルは上から順に
0より始まる整数のクラスIDと一致するように記述してください。
クラスIDの定義については、下記記事をご参考ください。
https://qiita.com/LatanKee/items/d87a729ab47f6ce605f7#7%E3%83%A9%E3%83%99%E3%83%AB%E3%82%92%E8%A8%98%E8%BF%B0%E3%81%82%E3%82%8B%E3%81%84%E3%81%AF%E9%81%B8%E6%8A%9E
YAMLファイル検証サイトで有効なファイルを作成できたか検証することもできます。
https://www.site24x7.com/ja/tools/yaml-validator.html
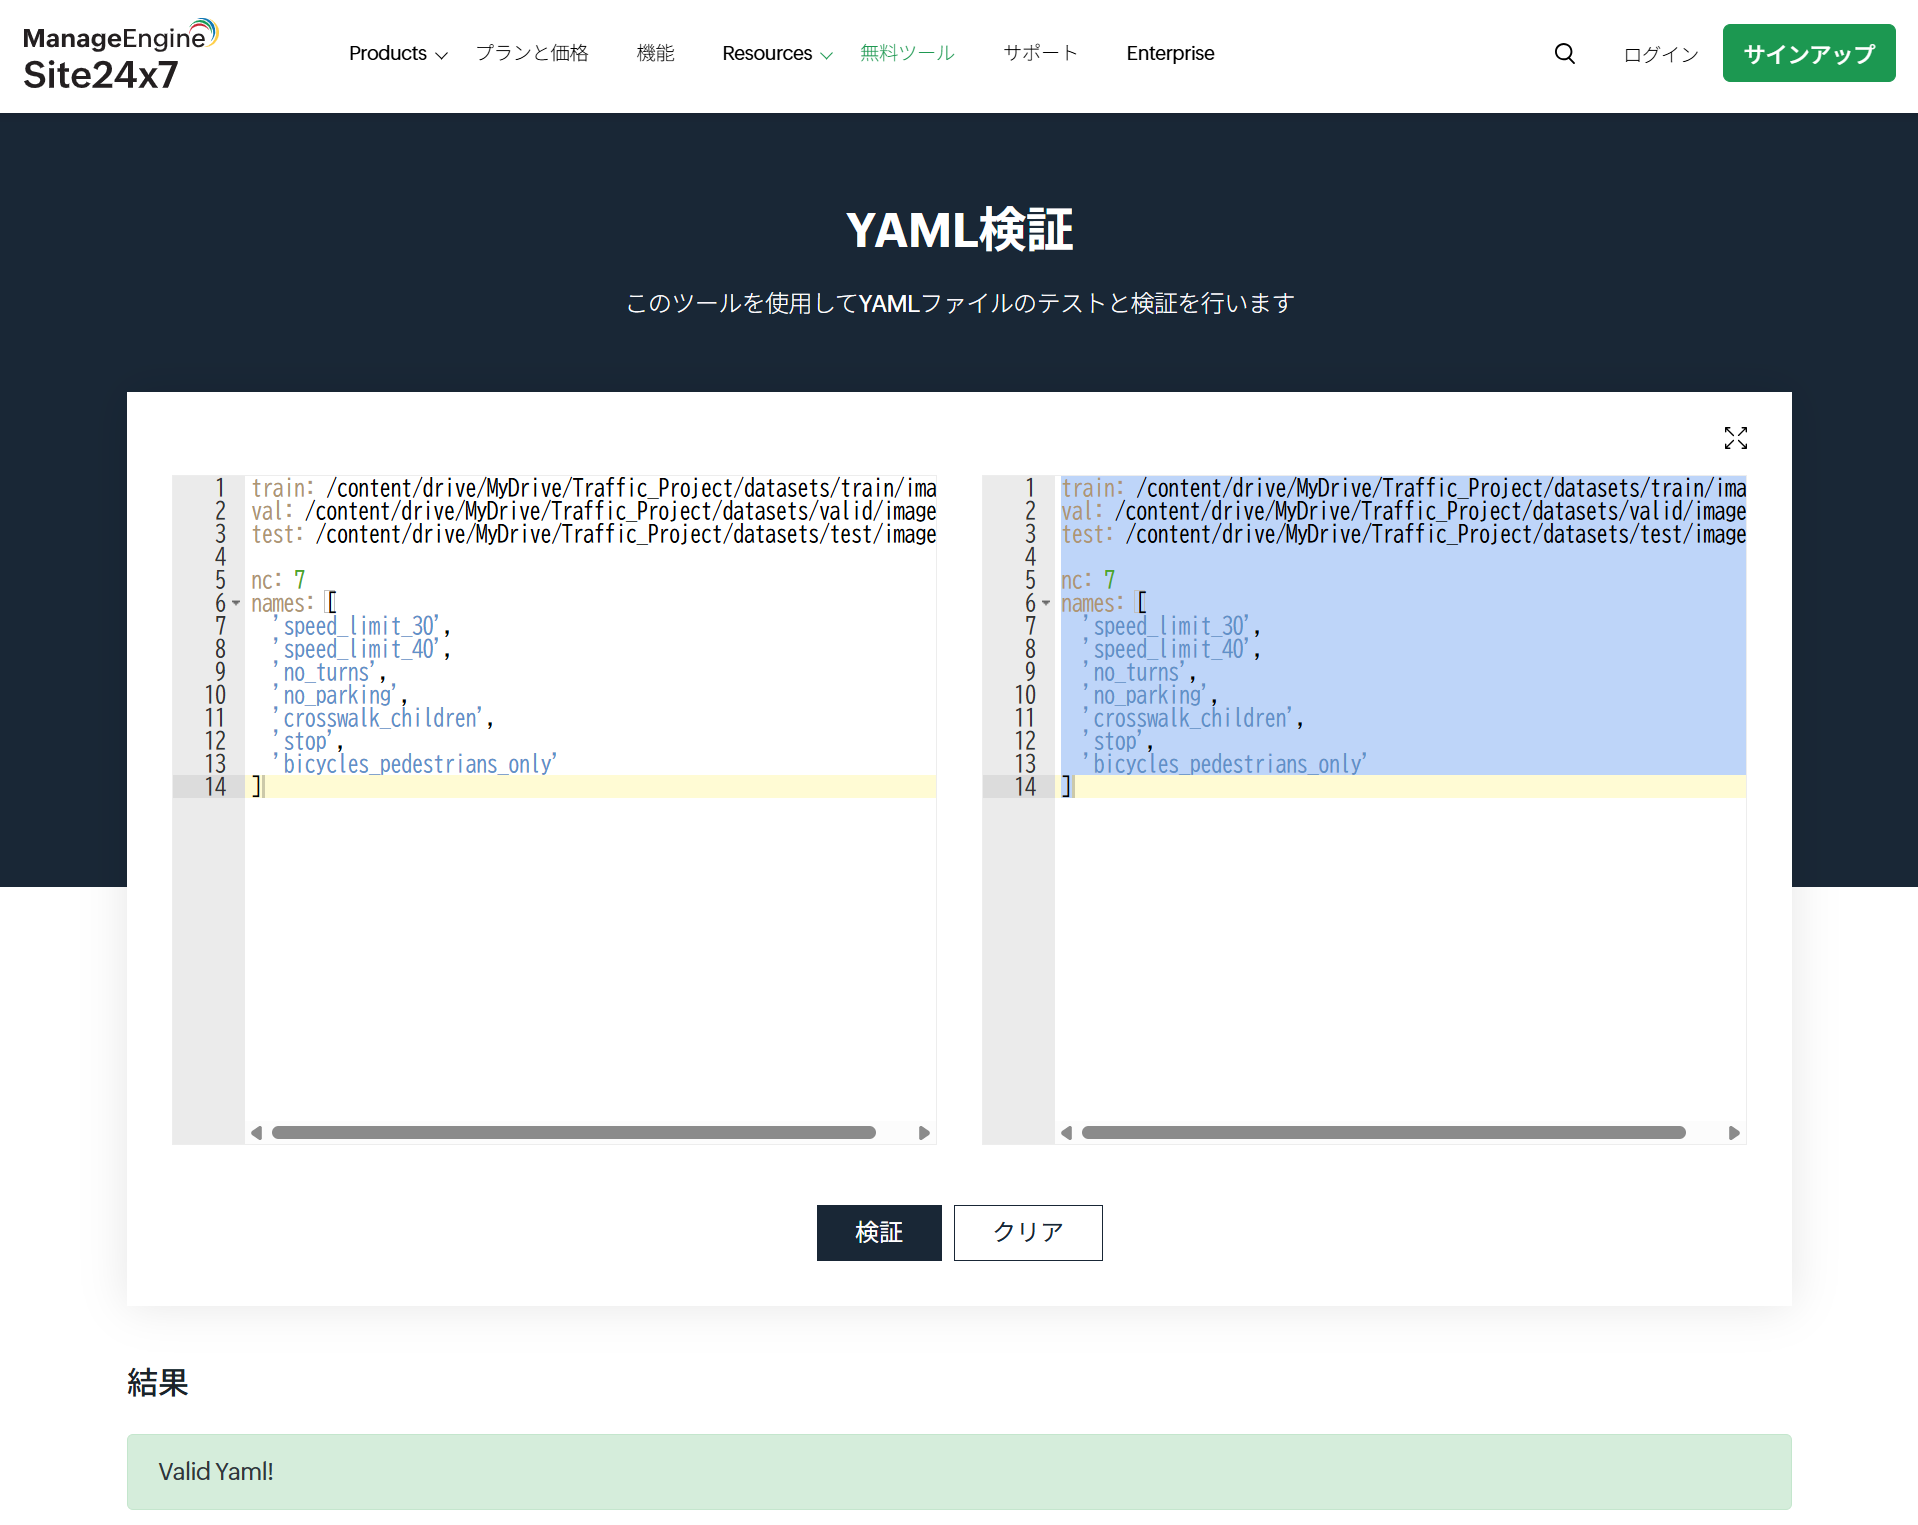
有効なYAMLファイルを作成できたことを確認できました。
※YAMLファイルが原因でモデル学習の際にエラーを起こすことも多分にあります。半角スペースやカンマ、括弧の過不足等、正しくYAMLファイルを作成できているか確認することが、地味に大事です。
▼ご参考までに、ここまでのスクリプトを実行した筆者のGoogle Driveは次の画像の通りです。
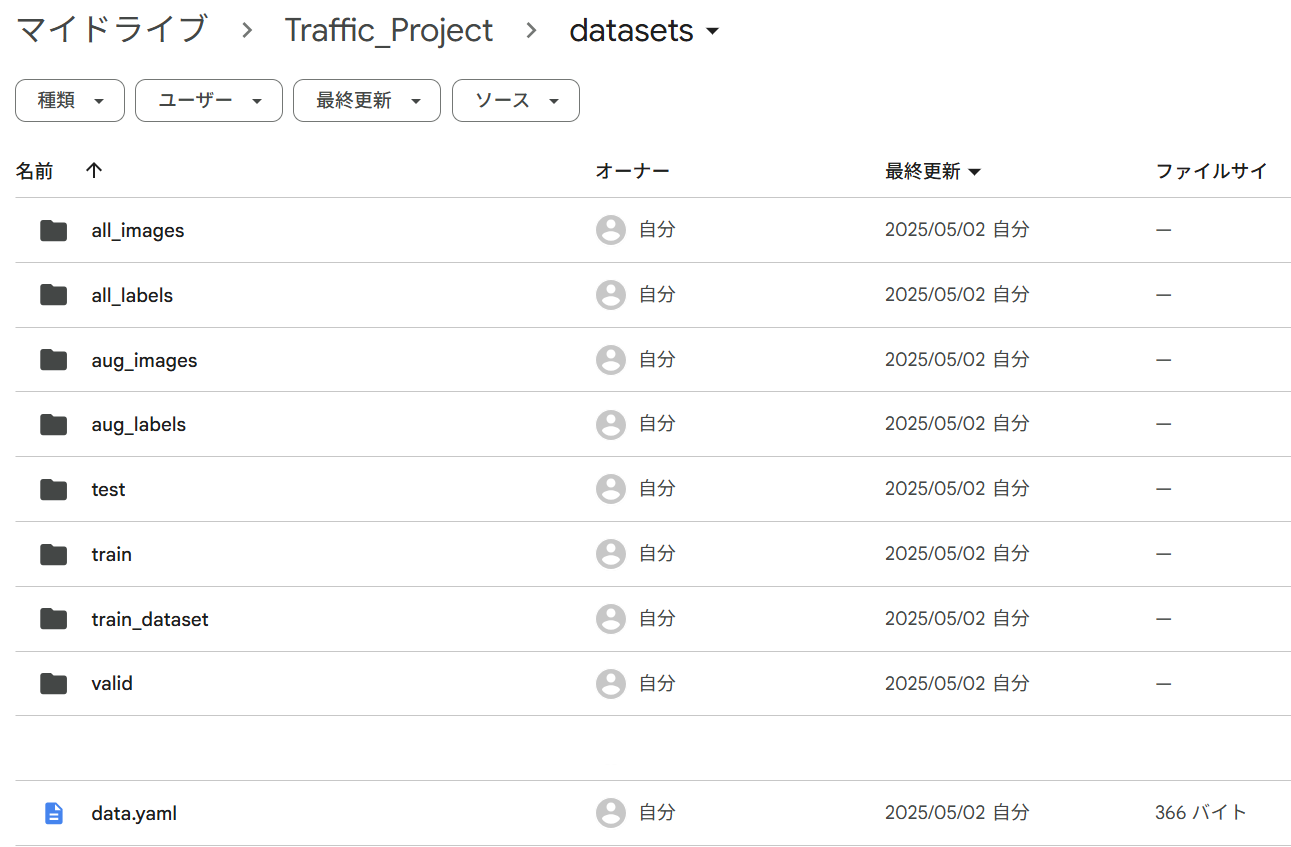
※YAMLファイルをGoogle Driveに格納する際「data.yaml.txt」等と拡張子が自動で書き換えられてしまうことがあります。ファイル名は「data.yaml」とファイル名を変更するか、モデル学習の際に正しいYAMLファイルのパスを渡すようにご留意ください。筆者はこの点でエラーを起こしました。
シリーズ他記事
本記事はシリーズで構成されており、最終的に、YOLOカスタムモデルをRaspberry Piでデプロイする方法を解説します。シリーズでご覧いただくと、ゼロから画像認識技術を学ぶことができます。
[YOLOカスタムモデルをRaspberry Piでデプロイ①]LabelImgでアノテーションをする最も簡単な方法[Windows]
https://qiita.com/LatanKee/items/d87a729ab47f6ce605f7
(目指す最終イメージ)
おわりに
データ拡張自体は簡単な作業ですが、多数のデータファイルの操作が意外と手間と時間が掛かる作業だと思います。本記事では大変なファイル操作をスクリプトによって簡単にしています。ぜひご活用ください![]()
次回
次のトピックについて解説します。
・YOLOのモデル学習
・データセット拡張なし版とあり版の精度検証・比較
お楽しみに![]()