必要なツールのインストール
VirtualBoxのインストール
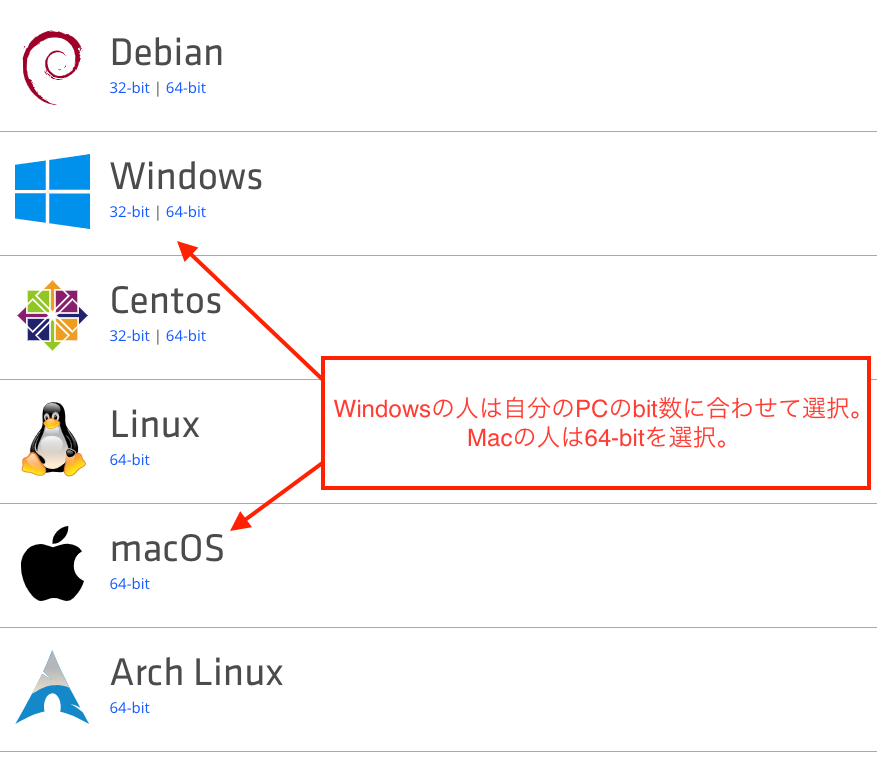
下記のURLから自分のパソコンのOSにあったものをダウンロードしてください。
https://www.virtualbox.org/wiki/Downloads
Vagrantのインストール
https://www.vagrantup.com/downloads.html
VirtualBoxにOSをインストール
Windowsの方はgit bash、Macの方はターミナルを使用して作業します。
$ cd

$ mkdir MyVagrant

$ cd MyVagrant

$ mkdir centos74

$ cd centos74

$ vagrant plugin install vagrant-vbguest

$ vagrant box add bento/centos-7.4
# 注意!
# ここで下記のような選択肢がでます
# 1) hyperv
# 2) parallels
# 3) virtualbox
# 4) vmware_desktop
# これは3を選んでEnterを押してください。

$ vagrant init bento/centos-7.4

$ vi Vagrantfile
# 35行目あたりに以下の記述があるので、#を消してコメントアウトを解除してください。
# config.vm.network "private_network", ip: "192.168.33.10"  // コメントアウト状態
config.vm.network "private_network", ip: "192.168.33.10"   // コメントアウト解除

$ vagrant up

# 以下コマンドを入力し、「running」とでていればOK!
$ vagrant status
vagrant upでこんな赤いメッセージが出る
Vagrant was unable to mount VirtualBox shared folders. This is usually
because the filesystem "vboxsf" is not available. This filesystem is
made available via the VirtualBox Guest Additions and kernel module.
Please verify that these guest additions are properly installed in the
guest. This is not a bug in Vagrant and is usually caused by a faulty
Vagrant box. For context, the command attempted was:

mount -t vboxsf -o uid=1000,gid=1000 vagrant /vagrant

The error output from the command was:

/sbin/mount.vboxsf: mounting failed with the error: No such device
仮装環境にログイン後に解決していきます。
まずは以下で仮装環境内のCentOSにログインします。
$ vagrant ssh
# コンソールが以下のようになったら、ログイン成功です。
[vagrant@localhost ~] $
ログイン後、カーネルをアップデートします。
$ sudo yum -y update kernel
アップデートが終了したら、以下をそのまま実行してください。必要なものをインストールします。
$ sudo yum -y install kernel-devel kernel-headers kernel-tools kernel-tools-libs
インストールが完了したら、一度仮想サーバーを再起動します。
$ exit
$ vagrant reload
これで大丈夫かと思います。
ついでにLaravelのプロジェクトを配置する、ディレクトリを作成しておきましょう。
$ cd
$ mkdir laravelapp
※ 今回は「laravelapp」という名前にしていますが、好きな名前で大丈夫です。
※ 当記事は「laravelapp」で進めていきます。
ここからはvagrant環境内の設定をおこなっていきます。
$ cd MyVagrant/centos74/
$ vi Vagrantfile

# 46行目を以下のように修正してください。
# config.vm.synced_folder "../data", "/vagrant_data"
config.vm.synced_folder "~/laravelapp", "/var/www/html"

# 仮想マシンの起動状況を確認します。
$ vagrant status
# running の場合、「vagrant reload」それ以外の場合は「vagrant up」と入力してください。

$ vagrant ssh

$ sudo -s

# OSのアップデート
$ yum -y update
# CentOSの日本語化
$ localectl set-locale LANG=ja_JP.UTF-8
# ファイヤーウォールを停止
$ systemctl stop firewalld.service
# ファイアウォールの自動起動を停止
$ systemctl mask firewalld.service
# スーパーユーザーから抜ける
$ exit
# vagrantから抜ける
$ exit
# 設定ファイルを編集
$ vi Vagrantfile
# 46行目を以下のように修正。
config.vm.synced_folder "~/laravelapp", "/var/www/html", ←カンマを忘れないでください。
            :mount_options => ["dmode=777,fmode=777"]
$ vagrant reload
$ vagrant ssh
# スーパーユーザーになっておく
$ sudo -s
上記の設定をおこなうことで、ローカル環境の ~/laravelapp ディレクトリ配下に置いたファイルが
仮想環境の /var/www/html/ 配下に自動的に同期されるため、
FileZillaなどのFTPツールで毎度ファイルをアップする手間が省けます。
そのため、ソース修正する際は、ローカルのlaravelappディレクトリ内のファイルを直接いじれば
自動的に仮想環境に反映されるので、そちらで開発をおこなうといいかと思います。
Apacheのインストール
# Apacheのインストール
$ yum -y install httpd
# サーバーが常に自動起動になるように設定
$ systemctl enable httpd.service
# Webサーバーの起動
$ systemctl start httpd
Apacheの設定変更
$ vi /etc/httpd/conf/httpd.conf
httpd.conf は非常に長い設定ファイルなので、修正箇所を見つけるのが大変です。
そのため検索をかけましょう。
/Directory "/var/www/html" と入力してください。修正箇所が表示されるかと思います。
表示されたら、以下の箇所を修正してください。
#
# AllowOverride controls what directives may be placed in .htaccess files.
# It can be "All", "None", or any combination of the keywords:
#   Options FileInfo AuthConfig Limit
#
    AllowOverride None

#
# Controls who can get stuff from this server.
#
↓
#
# AllowOverride controls what directives may be placed in .htaccess files.
# It can be "All", "None", or any combination of the keywords:
#   Options FileInfo AuthConfig Limit
#
    AllowOverride ALL

#
# Controls who can get stuff from this server.
#
また最後の方に以下の記述がありますので、こちらも修正してください。
# filesystems or if support for these functions is otherwise
# broken on your system.
# Defaults if commented: EnableMMAP On, EnableSendfile Off
#
# EnableMMAP off
EnableSendfile on

# Supplemental configuration
#
EnableSendfile on を EnableSendfile off に変更してください。
最後にサーバーを再起動します。
$ systemctl restart httpd
PHPのインストール
# 準備その1
$ yum install -y epel-release
# 準備その2
$ rpm -Uvh http://rpms.famillecollet.com/enterprise/remi-release-7.rpm
# PHPのインストール
$ yum install --enablerepo=remi,remi-php72 php php-devel php-mbstring php-pdo php-gd php-intl php-mysqlnd
PHPの設定変更
# cpコマンドでphp.iniのバックアップを取る
$ cp /etc/php.ini /etc/php.ini.org

# sedコマンドでphp.ini内の記述を書き換える
$ sed -i -e "s/;error_log = php_errors.log/error_log = \/var\/log\/php_errors.log/g" /etc/php.ini
$ sed -i -e 's/;default_charset = "iso-8859-1"/default_charset = "UTF-8"/g' /etc/php.ini
$ sed -i -e "s/;mbstring.language = Japanese/mbstring.language = Japanese /g" /etc/php.ini
$ sed -i -e "s/;mbstring.internal_encoding = EUC-JP/mbstring.internal_encoding = UTF-8/g" /etc/php.ini
$ sed -i -e "s/;mbstring.http_input = auto/mbstring.http_input = auto/g" /etc/php.ini
$ sed -i -e "s/;mbstring.http_output = SJIS/mbstring.http_output = pass/g" /etc/php.ini
$ sed -i -e "s/;mbstring.encoding_translation = Off/mbstring.encoding_translation = Off/g" /etc/php.ini
$ sed -i -e "s/;mbstring.detect_order = auto/mbstring.detect_order = auto/g" /etc/php.ini
$ sed -i -e "s/;date.timezone =/date.timezone = Asia\/Tokyo/g" /etc/php.ini

# サーバーの再起動
$ systemctl restart httpd
MySQLのインストール
$ yum localinstall -y http://dev.mysql.com/get/mysql57-community-release-el7-10.noarch.rpm
$ yum -y install mysql-community-server
完了したら、MySQLのバージョンを確認しておきましょう。
$ mysql --version
mysql  Ver 14.14 Distrib 5.7.18, for Linux (x86_64) using  EditLine wrapper
確認できたら、MySQLに関しても設定ファイルを編集します。
# まずはcpコマンドでバックアップのためコピー
$ cp /etc/my.cnf /etc/my.cnf.org
# my.cnfを編集します
$ vi /etc/my.cnf
下記のように設定ファイルを丸々書き換えてください。
[mysqld]
datadir=/var/lib/mysql
socket=/var/lib/mysql/mysql.sock
user=mysql
# Disabling symbolic-links is recommended to prevent assorted security risks
symbolic-links=0

character_set_server=utf8
default-storage-engine=InnoDB
innodb_file_per_table
log-error=/var/log/mysqld.log
[mysql]
default-character-set=utf8
[mysqldump]
default-character-set=utf8

[mysqld_safe]
log-error=/var/log/mysqld.log
pid-file=/var/run/mysqld/mysqld.pid
書き換えが完了したら、MySQLを起動します。
# サーバーが起動したらMySQLも起動させる
$ systemctl enable mysqld.service
# MySQLの起動
$ systemctl start mysqld
続いてmysqlの初期設定とパスワード設定をおこないます。
まずmysqlの初期パスワードを調べます。
$ cat /var/log/mysqld.log | grep root
[Note] A temporary password is generated for root@localhost: <初期パスワード>
初期パスワードをコピーしてください。
$ mysql_secure_installation

# Securing the MySQL server deployment.

Enter password for user root: <先ほど調べたrootパスワード>

# The existing password for the user account root has expired. Please set a new password.

# 半角英数字・記号を含めないと設定出来ないので一旦仮のパスワードを設定します。
New password:
Re-enter new password:


# The 'validate_password' plugin is installed on the server.
# The subsequent steps will run with the existing configuration
# of the plugin.
# Using existing password for root.

# Estimated strength of the password: 100
Change the password for root ? ((Press y|Y for Yes, any other key for No) : <yと入力>

New password:
Re-enter new password:

# Estimated strength of the password: 100
Do you wish to continue with the password provided?(Press y|Y for Yes, any other key for No) : <yと入力>

# By default, a MySQL installation has an anonymous user,
# allowing anyone to log into MySQL without having to have
# a user account created for them. This is intended only for
# testing, and to make the installation go a bit smoother.
# You should remove them before moving into a production
# environment.

Remove anonymous users? (Press y|Y for Yes, any other key for No) : <yと入力>
# Success.

# Normally, root should only be allowed to connect from
# 'localhost'. This ensures that someone cannot guess at
# the root password from the network.

Disallow root login remotely? (Press y|Y for Yes, any other key for No) : <yと入力>
# Success.

# By default, MySQL comes with a database named 'test' that
# anyone can access. This is also intended only for testing,
# and should be removed before moving into a production
# environment.

Remove test database and access to it? (Press y|Y for Yes, any other key for N : <yと入力>
# - Dropping test database...
# Success.

# - Removing privileges on test database...
# Success.

# Reloading the privilege tables will ensure that all changes
# made so far will take effect immediately.

# Reload privilege tables now? (Press y|Y for Yes, any other key for No) : <yと入力>
# Success.

# All done!
こちらは以下の設定をおこなってます。
- rootパスワード変更
- 匿名ユーザーの削除
- リモートホストからrootログイン禁止
- テスト用データベース削除
- ユーザー権限が保存されているテーブルをリロード
ここまで出来たらmysqlにログインしてパスワードをもっと簡単なものに変更できます。
$ mysql -u root -p
Enter password: <先ほど設定した仮パスワード>

# パスワードの長さを変更(最低4文字以上)
mysql> set global validate_password_length=4;
# パスワードの制約を変更
mysql> set global validate_password_policy=LOW;
# 設定が反映されているか確認
mysql> show variables like 'validate_password%';
+--------------------------------------+-------+
| Variable_name                        | Value |
+--------------------------------------+-------+
| validate_password_check_user_name    | OFF   |
| validate_password_dictionary_file    |       |
| validate_password_length             | 4     |
| validate_password_mixed_case_count   | 1     |
| validate_password_number_count       | 1     |
| validate_password_policy             | LOW   |
| validate_password_special_char_count | 1     |
+--------------------------------------+-------+
7 rows in set (0.00 sec)

# パスワードを変更します。今回は root に設定。
mysql> set password for root@localhost=password('root');
# Query OK, 0 rows affected, 1 warning (0.00 sec)

# 新パスワードでログインできるかの確認のため、一旦ログアウト
mysql> exit
# Bye

# 再度ログイン
$ mysql -u root -p
Enter password: <新パスワードを入力>
# ログインできればOK

mysql> exit
パーミッション(権限)の変更
# /var/www/html に書き込みを許可する
$ chmod -R 777 /var/www/html
# /var/lib/mysql に書き込みを許可する
$ chmod -R 777 /var/lib/mysql
Composerのインストール
まずはLaravel利用の準備を整えます。
Laravelは一般的なアプリケーションのように
プログラムをダウンロードしてインストールする といったやり方はしません。
そこで「Composer」というプログラムを利用します。
# composerのインストール
$ curl -sS https://getcomposer.org/installer | php
# ファイル設置場所の変更
$ mv composer.phar /usr/local/bin/composer
# パーミッションの変更
$ chmod 777 /usr/local/bin/composer
# スーパーユーザーから抜ける
$ exit
# composerのバージョン確認
# バージョンが表示されれば、正常にインストールできています
$ composer -V

#  gitのインストール
$ sudo yum -y install git
# php-zipのインストール
$ sudo yum -y install --enablerepo=remi-php72 php-pecl-zip
# php-domのインストール
$ sudo yum -y install --enablerepo=remi --enablerepo=remi-php72 php-dom
# unzipのインストール
$ sudo yum -y install unzip
Laravelのインストール
$ cd /var/www/html
$ composer global require "laravel/installer=~1.1"
インストールには少し時間がかかります。
環境変数のPATHを通す
この後の説明に出てきますが、laravelコマンドを仮想サーバー内のどこに居ても使えるよう設定をおこないます。
細かい説明は省きます。
# PATHを通す
$ export PATH="~/.config/composer/vendor/bin:$PATH"
プロジェクトの作成
ここまでくればあとはこれから開発しようとしている新規プロジェクトを作成するだけです!
前回にも説明があったように、ディレクトリの同期設定をおこなっているので、
プロジェクトを作成する場合は、 /var/www/html/配下に作成します。
laravel new コマンドを使用するだけで、簡単にLaravelのプロジェクト作成が出来ます。
laravel new <プロジェクト名> とし、プロジェクト名は何に設定しても大丈夫です。
今回は「laraProject」とします。
# プロジェクトの作成
laravel new laraProject
192.168.33.10/laraProject/public へアクセスすると、Laravelの画面が表示されるはずです。
プロジェクトの作成がうまくいかない
laravel new <プロジェクト名> と入力した際にエラーが発生することがあります。
それぞれ以下のように対応してください。
# 一度プロジェクトを削除
$ rm -rf /var/www/html/laraProject
# こんなエラーがでた
Problem 1
    - Installation request for erusev/parsedown 1.7.1 -> satisfiable by erusev/parsedown[1.7.1].
    - erusev/parsedown 1.7.1 requires ext-mbstring * -> the requested PHP extension mbstring is missing from your system.

# mbstringをインストールする。
$ yum install --enablerepo=remi-php72 php-mbstring
# こんなエラーがでた
 [InvalidArgumentException]
  Script "post-install-cmd" is not defined in this package

# composerをアップデートします。
$ composer global update
最後にプロジェクトの再作成をおこないます。
$ laravel new laraProject
hosts設定
最後にhosts設定を行います。
毎度毎度 192.168.33.10/laraProject/public と入力しなくても
好きなドメイン名を設定できるようになります。
こちらの設定はVagrant環境内ではなく、クライアント側での設定が必要なため、一旦Vagrant環境から抜けてから実行してください。
# Vagrant環境から抜ける
$ exit
# クライアント側での設定
$ sudo vi /etc/hosts
一番下に以下を追記します。
192.168.33.10 local.lara-project.jp
ただlaravelの場合、これだけだと上手く動作してくれないため、
DocumentRootの設定というものを行う必要があります。
$ cd
$ cd MyVagrant/centos74
$ vagrant ssh
ログインしたら続いて設定ファイルの編集
$ sudo -s
$ vi /etc/httpd/conf/httpd.conf
以下を修正します。
#
# DocumentRoot: The directory out of which you will serve your
# documents. By default, all requests are taken from this directory, but
# symbolic links and aliases may be used to point to other locations.
#
DocumentRoot "/var/www/html"

#
# Relax access to content within /var/www.
#
↓
#
# DocumentRoot: The directory out of which you will serve your
# documents. By default, all requests are taken from this directory, but
# symbolic links and aliases may be used to point to other locations.
#
DocumentRoot "/var/www/html/laraProject/public/"

#
# Relax access to content within /var/www.
#
最後にサーバーを再起動して完了です。
※ なお、一つのサーバー上で複数プロジェクトを管理する場合は、httpd.confではなく、
/etc/httpd/conf.d/ 配下に拡張ファイルを用意する必要があるので、上記設定は不可。
# 最後にApacheを再起動
$ systemctl restart httpd
上記の設定を行うと、local.lara-project.jpと入力すると先ほどと同じ画面が表示されるはずです。
これで全て完成です!
ここからは快適なLaravelライフをお送りください!
お疲れ様でした!!
※手順通り進めたが、画面表示がうまくいかなくなった場合
原因としては、Apacheの自動起動に失敗している状態です。
なぜ自動起動しないのか(設定はしたのに)理由は~~調査中ですが、ひとまず以下の方法で対応可能です。~~以下です。
原因:
以下記事を参考にさせていただきました。
Vagrantによるマウントが完了する前にApacheが起動してしまい、
DocumentRootのシンボリックリンクが読めないため発生しているとのこと。
以下の方法で対応可能です。
# cdで移動
$ cd ~/MyVagrant/centos74/
# Vagrantfileを修正
$ vi Vagrantfile
以下のように一番下の end の上に3行追記します。
# Enable provisioning with a shell script. Additional provisioners such as
  # Puppet, Chef, Ansible, Salt, and Docker are also available. Please see the
  # documentation for more information about their specific syntax and use.
  # config.vm.provision "shell", inline: <<-SHELL
  #   apt-get update
  #   apt-get install -y apache2
  # SHELL

  # 以下を追加
  config.vm.provision "shell", run: "always", :inline => <<-COMMAND
    sudo systemctl start httpd.service
  COMMAND

end
追加できたら以下の手順を実行
# vagrant を再起動
$ vagrant reload
# vagrant にログイン
$ vagrant ssh
# apacheが動いているか確認
$ systemctl status httpd
これで以下のようになっていれば大丈夫です!
● httpd.service - The Apache HTTP Server
   Loaded: loaded (/usr/lib/systemd/system/httpd.service; enabled; vendor preset: disabled)
   # ↓ここがactiveになっていればOK!
   Active: active (running) since 火 2019-02-19 03:20:36 UTC; 17min ago
     Docs: man:httpd(8)
           man:apachectl(8)
   Process: 3006 ExecStop=/bin/kill -WINCH ${MAINPID} (code=exited, status=1/FAILURE)
   Main PID: 4897 (httpd)
   Status: "Total requests: 0; Current requests/sec: 0; Current traffic:   0 B/sec"
   CGroup: /system.slice/httpd.service
           ├─4897 /usr/sbin/httpd -DFOREGROUND
           ├─4898 /usr/sbin/httpd -DFOREGROUND
           ├─4899 /usr/sbin/httpd -DFOREGROUND
           ├─4900 /usr/sbin/httpd -DFOREGROUND
           ├─4901 /usr/sbin/httpd -DFOREGROUND
           └─4902 /usr/sbin/httpd -DFOREGROUND
vagrantを起動する際にコマンドで直接Apacheを起動するよう設定したので、
次回以降、vagrant up するだけで自動起動するはずです。


