LaBee FrameworkはJavaによるWebシステム開発のデファクトスタンダードを目指す、ゼロから作られた国産のJavaフレームワークです。 海外製フレームワーク特有の難解さや情報不足による工数や人員の増大を解消しJavaのWeb開発を効率化する為に作られました。 LGPLライセンスでソースコードをオープンソース公開しており、個人・企業問わずどなたでも無償で利用出来ます
https://www.bee-wkspace.com/

ポップアップウインドウ表示
LaBeeFrameworkはモーダルポップアップウィンドウ機能を持ち(表示はjQueryを利用)、ポップアップウィンドウ画面内で通常のビジネスロジックと同様の画面処理を実行する事が出来ます。
またポップアップ画面内の処理が完了してウインドウを閉じる際のイベントとして親ウインドウを再サブミット、親ウインドウの画面項目を動的書換え、連続して別のポップアップを表示するなどの様々な機能を選択する事が出来ます。
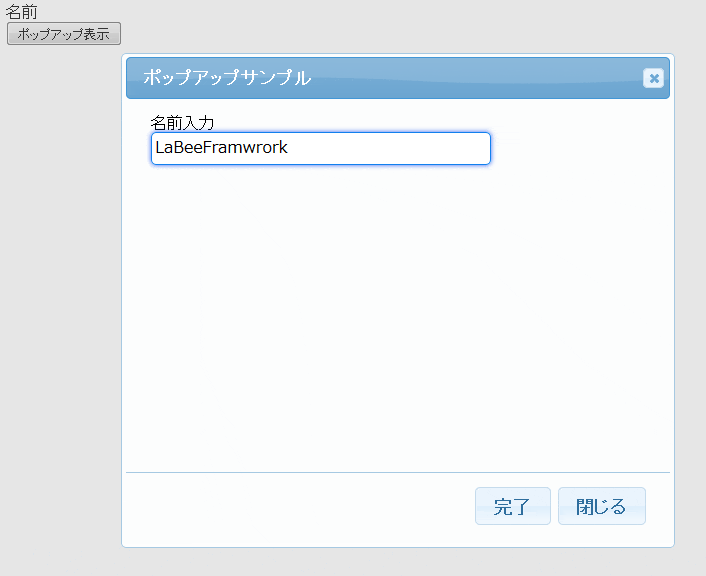
サンプル例では呼び出し側の親画面(JSP)からモーダルポップアップウインドウを開き、ポップアップ側で名前テキストボックスの入力を行い、
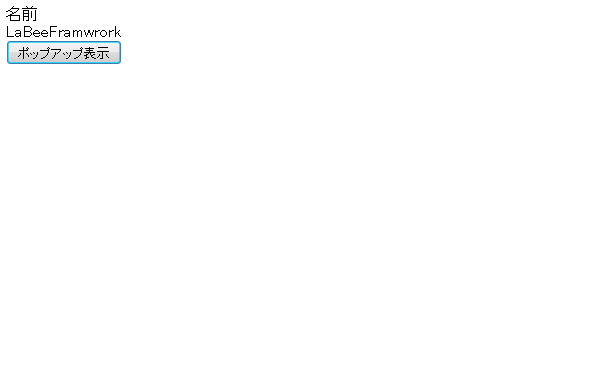
完了ボタン押下で入力チェックが正常の場合にポップアップ表示を完了させ、親画面の名前表示div値を動的に書換える処理を行ないます。
呼び出し側 親JSP実装例
<%@page pageEncoding="UTF-8" contentType="text/html; charset=UTF-8"%>
<%@ page session="false"%>
<%@ taglib prefix="LaBee"  uri="/WEB-INF/lib/LaBeeFramework.jar"%>
<!DOCTYPE html>
<html lang="ja">
<head>
    <meta http-equiv="Content-Type" content="text/html; charset=UTF-8">
    <LaBee:header requestScope="${requestScope}"/>
</head>
<body>
    <form name="mainForm" method="post" action="ctrl">
    <div>名前</div>
    <div id="userName"></div>

     <button type="button"
         onClick="<LaBee:showPopupWindow
            target="web.PopupSample"
            execute="start"
            width="500"
            height="350"
            nextForm="mainForm"
            nextTarget="web.PopupSample"
            nextExecute="confirm"
            entryButtonName="完了"
            closeButtonName="閉じる"
            requestScope="${requestScope}"
         />">
         ポップアップ表示
     </button>

    </form>
</body>
</html>
ポップアップ側 JSP実装例
<%@page pageEncoding="UTF-8" contentType="text/html; charset=UTF-8"%>
<%@ page session="false"%>
<%@ taglib prefix="LaBee"  uri="/WEB-INF/lib/LaBeeFramework.jar"%>
<!DOCTYPE html>
<html lang="ja">
<head>
    <meta http-equiv="Content-Type" content="text/html; charset=UTF-8">
    <LaBee:header requestScope="${requestScope}"/>
</head>
<body>
    <form name="mainForm" method="post" action="ctrl">
      <div>名前入力</div>
      <LaBee:textbox
            name="userName"
            value="${bean.userName}"
            bean="${bean}"/>

    </form>
</body>
</html>
- ポップアップウインドウ側のJSPも通常のJSP実装内容と違いはありません。
ポップアップ側 bean実装例
package sample.bean.web;
import java.io.Serializable;
import com.bee_wkspace.labee_fw.app.base.AppBaseBean;
import com.bee_wkspace.labee_fw.app.base.AppInputCheckBean;
import com.bee_wkspace.labee_fw.common.Validater;
import com.bee_wkspace.labee_fw.core.annotation.AutoSetterParam;
/**
 * ポップアップサンプルビーン。
 */
public class PopupSampleBean extends AppBaseBean implements Serializable {
    /** 名前 */
    private String userName;
    /**
     * コンストラクタ。
     */
    public PopupSampleBean() {
        super();
    }
    /**
     * 初期化
     */
    @Override
    public void init() {
        super.init();
        userName = null;
    }

    /**
     * 名前をセットし入力チェックを行なう。
     *
     * @param paramName パラメータ名
     * @param value パラメータ値
     */
    @AutoSetterParam
    public void setUserName(String paramName, String value) {
        userName = value;
        AppInputCheckBean inpChkBean = new AppInputCheckBean(this, paramName, value, "名前");
        Validater.checkNull(inpChkBean);
        Validater.checkMaxLength(inpChkBean, 16);
    }
    public String getUserName() {
        return userName;
    }
}
- ポップアップウインドウ側のBeanも通常のJSP実装内容と違いはありません。
ポップアップ側 Blogic実装例
package sample.blogic.web;
import sample.bean.web.PopupSampleBean;
import com.bee_wkspace.labee_fw.app.base.AppPopupBaseBlogic;
import com.bee_wkspace.labee_fw.core.annotation.FwBlogic;
import com.bee_wkspace.labee_fw.core.annotation.FwExeMethod;
import com.bee_wkspace.labee_fw.core.base.BaseBean;
import com.bee_wkspace.labee_fw.core.context.JsonValueContext;
import com.bee_wkspace.labee_fw.core.context.ResponseContext;
import com.bee_wkspace.labee_fw.exception.FwException;
/**
 * ポップアップロジックサンプル。
 */
@FwBlogic(beanReuse = true)
public class PopupSampleBlogic extends AppPopupBaseBlogic<PopupSampleBean> {
    /**
     * コンストラクタ。
     */
    public PopupSampleBlogic() {
        super();
    }
    /**
     * 初期表示イベント処理。
     */
    @Override
    @FwExeMethod
    public ResponseContext start() throws FwException {
        bean.init();
        return responseContext;
    }
    /**
     * 完了ボタン押下イベント処理。
     */
    @FwExeMethod
    public ResponseContext confirm() throws FwException {
        try {
            // 自動パラメータセッター実行
            super.doAutoBeanSetter();
            // パラメータ入力チェック結果判定
            if (bean.isInputChkErrFlg() == BaseBean.INPUT_CHK_RESULT_SUCCESS) {
                JsonValueContext appJsonData = new JsonValueContext();
                appJsonData.addJsonValue("userName", bean.getUserName());
                // 親画面にJSONを返却し画面を動的に書き換えるレスポンスを設定
                super.setPopupToParentJsonResponse(appJsonData);
            }
        } catch (Exception e) {
            throw new FwException(e);
        }
        return responseContext;
    }
}
- ポップアップウインドウ側のビジネスロジックは通常と違いcom.bee_wkspace.labee_fw.app.base.AppPopupBaseBlogicを継承します。
- 51行目 親クラスで定義しているsuper.setPopupToParentJsonResponse(appJsonData);を呼ぶ事でポップアップ表示を完了して親画面にJSONを返却し画面を動的に書き換えるレスポンスを設定を行ないます。ポップアップのレスポンスタイプは数種類あり、任意に
設定出来ます。
ポップアップ完了時のレスポンス設定種類
| レスポンスタイプ | 概要 |
|---|---|
| 通常 | ResponseContextに何も設定を行なわない場合はデフォルトでポップアップウインドウ内でイベント処理が実行されて ポップアップ画面がそのまま表示されます。 |
| setPopupCloseOnlyResponse() | ポップアップウインドウの表示を完了させて、その他の処理は何も行ないません。(ポップアップを閉じるだけ) |
| setPopupToParentSubmitResponse(String target, String execute, String... params) | ポップアップウインドウの表示を完了させて、そのまま親画面に対して指定したターゲットのイベント処理を実行します。 |
| setPopupToParentJsonResponse(JsonValueContext jsonvalContext) | ポップアップウインドウの表示を完了させて、JSONをレスポンスに返し、親画面の要素を動的に書き換えます。当サンプルで 実装したレスポンス方法です。 |
| setPopupToNextPopupResponse(AppPopupContext popupContext) | ポップアップウインドウの表示を完了させて、続けて別の処理を行なうポップアップ画面を表示するレスポンス方法です。 |


