今対応している案件で、Firestoreのデータを定期的にシミュレーションAPIに渡し、結果を反映するという処理が必要になってきました。
Functionsについては面倒くさがって触ってこなかったのですが、Firestoreの変更にトリガーしてプッシュ通知出したり、Storageの追加にトリガーしてバックエンドでサムネイル作ったりと使いみちはかなり豊富そうだったので、ここらで試してみようとなった次第です。
前提
- Nodeが入っている
- ブラウザ上でFirebaseプロジェクトが作れる
- FirebaseのBlaze(従量制)プランにアップグレードしている
ちなみにNodeのversion
$ node --version
v12.13.1
この辺は調べれば一瞬で構築できると思うので、省略します。
FirebaseのBlazeプランは、定期実行処理を構築するのに必要です。
まあSparkと同量の無料枠を使い切らないと課金は始まらないので(2020/06/08現在)、今回みたいな個人の試験的な実装程度ではまず課金は発生しません。
気軽にアップグレードしていきます。
FunctionsでHello Worldする
プロジェクト生成時にHello Worldが用意されるので、まずはこれを動かしてみます。
Firebaseプロジェクトの作成
CLIからも作成できますが、事前に作ってあった方が話が早いので作ります。
ここではfunctions-testという名前にしました。
また、プロジェクト作成後、サイドメニューのDatabaseよりFirestoreのデータベースを作成しておいてください。
データベースの保護ルールの選択を求められますが、お試しで使うだけなのでテストモードで開始でスタートします。
リージョンはアジアのどこかにしておくと通信速度が早いかもしれません。
公式に沿ってCLIをインストール
$ npm install -g firebase-tools
or
$ yarn global add firebase-tools

$ firebase --version
8.4.1
ログイン
firebase loginでFirebaseにログインします。
$ firebase login
i  Firebase optionally collects CLI usage and error reporting information to help improve our products. Data is collected in accordance with Google's privacy policy (https://policies.google.com/privacy) and is not used to identify you.

? Allow Firebase to collect CLI usage and error reporting information? No

Visit this URL on this device to log in:
https://accounts.google.com/o/oauth2/auth?...

Waiting for authentication...

✔  Success! Logged in as mail@example.com
途中「エラー情報の報告を許可するか」という選択肢がありましたが、これはどちらでもよいです。
今回はNoにしました。
プロジェクト作成
プロジェクト作成はfirebase init。
ディレクトリは任意の場所を用意してください。
$ firebase init

     ######## #### ########  ######## ########     ###     ######  ########
     ##        ##  ##     ## ##       ##     ##  ##   ##  ##       ##
     ######    ##  ########  ######   ########  #########  ######  ######
     ##        ##  ##    ##  ##       ##     ## ##     ##       ## ##
     ##       #### ##     ## ######## ########  ##     ##  ######  ########

You're about to initialize a Firebase project in this directory:

  /Users/evosystem/Work/vegetable-community/firebase

? Which Firebase CLI features do you want to set up for this folder? Press Space to select features, then Enter to co
nfirm your choices. (Press <space> to select, <a> to toggle all, <i> to invert selection)
❯◯ Database: Deploy Firebase Realtime Database Rules
 ◯ Firestore: Deploy rules and create indexes for Firestore
 ◯ Functions: Configure and deploy Cloud Functions
 ◯ Hosting: Configure and deploy Firebase Hosting sites
 ◯ Storage: Deploy Cloud Storage security rules
 ◯ Emulators: Set up local emulators for Firebase features
使用するFirebaseの機能を選択しろとのことなので、FirestoreとFunctionsを選択する。
- Firestore: Deploy rules and create indexes for Firestore
- Functions: Configure and deploy Cloud Functions
スペースで選択。複数選択可です。
オプション選択
? Please select an option: (Use arrow keys)
❯ Use an existing project
  Create a new project
  Add Firebase to an existing Google Cloud Platform project
  Don't set up a default project
Firesbaseプロジェクトを選択しろとのこと。
先ほど作ったプロジェクトを使うので、Use an existing projectを選択します。
? Select a default Firebase project for this directory: (Use arrow keys)
❯ functions-test (functions-test)
先ほどのプロジェクトを選択。
? What file should be used for Firestore Rules? (firestore.rules)
? What file should be used for Firestore indexes? (firestore.indexes.json)
データベース設定ファイルの名前を聞かれます。
エンターエンターでデフォルトの名称を使用します。
? What language would you like to use to write Cloud Functions? (Use arrow keys)

❯ JavaScript
  TypeScript
言語を聞かれますが、TypeScriptにしておきます。
Functionsの処理内容に合わせてお好みで。
? Do you want to use ESLint to catch probable bugs and enforce style? (y/N)
まあLintは入れておいて損はないと思います。
? Do you want to install dependencies with npm now? (Y/n)
依存関係をインストールするか聞かれます。
別に後でもいいですが、今やります。
✔ Firebase initialization complete!
なんやかんやあって、init完了!
Hello World
とりあえずhello worldしてみます。
作成されたディレクトリのindex.tsを見ると、コメントアウトされたHello World文があるのでこれをアンコメントしてデプロイします。
/* index.ts */
import * as functions from 'firebase-functions';

// // Start writing Firebase Functions
// // https://firebase.google.com/docs/functions/typescript
//
// ↓ これをアンコメント
export const helloWorld = functions.https.onRequest((request, response) => {
 response.send("Hello from Firebase!");
});
そしてfirebase deployでデプロイ。
$ firebase deploy

=== Deploying to 'functions-test-75a5b'...

i  deploying firestore, functions
Running command: npm --prefix "$RESOURCE_DIR" run lint

> functions@ lint /Users/evosystem/Work/samples/firebase/functions-test/functions
> tslint --project tsconfig.json

Running command: npm --prefix "$RESOURCE_DIR" run build

> functions@ build /Users/evosystem/Work/samples/firebase/functions-test/functions
> tsc

✔  functions: Finished running predeploy script.
i  firestore: reading indexes from firestore.indexes.json...

...

✔  Deploy complete!
なんやかんやあってデプロイ完了!

ブラウザからFirebase Functionsのダッシュボードを見ると、ちゃんとデプロイできているようです。
本番
さて、いよいよ本番。
まず、FunctionsからFirestoreのフィールドを書き換えできるか試します。
Functionsを使ってFirestoreのデータを書き換え
データベース構築
とりあえず、Firestoreに適当なデータを作っておきます。
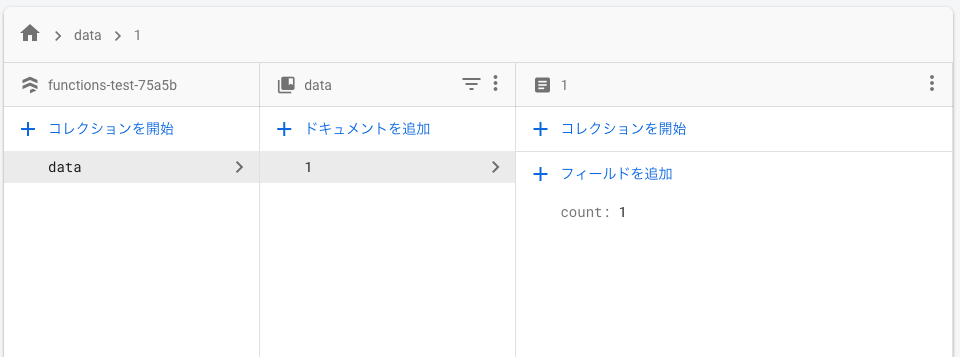
コレクションIDはdataとしておきます。
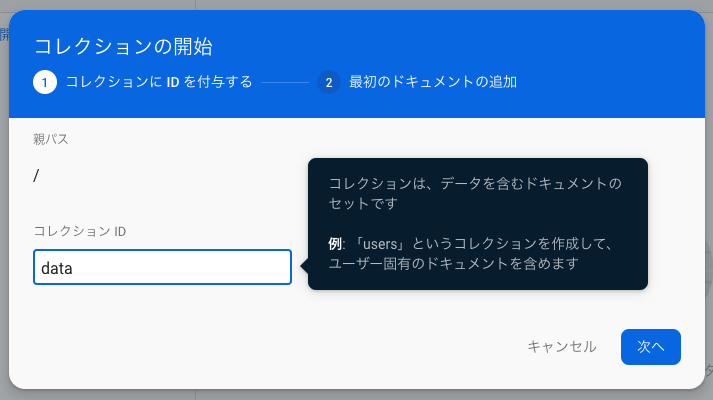
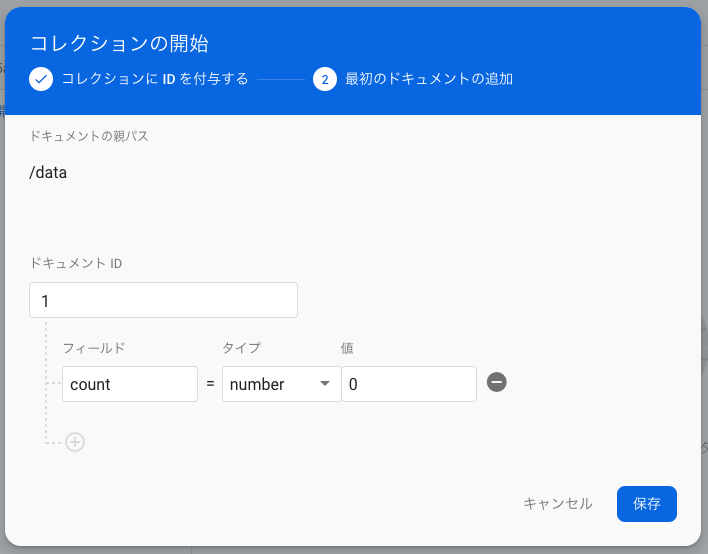
次に、ドキュメントとフィールドを作成し、初期データを挿入します。
ドキュメントIDは1、中にcountという初期値0のnumberを用意しておきます。
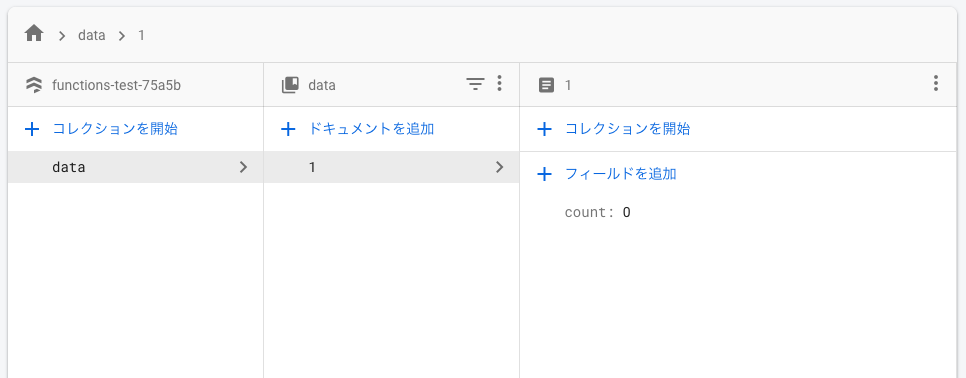
データベース全体はこんな感じ。
Firestoreのデータを書き換え
サーバサイドでFirebaseを扱うために、まずは作成したプロジェクトにfirebase adminをインストール
$ yarn add firebase-admin
ソースはこんな感じ。
データベース上のcountを0 → 1にするだけの簡単なプログラムです。
/* index.ts */
import * as functions from 'firebase-functions';
import * as admin from 'firebase-admin';

admin.initializeApp();

// データベース情報
const collectionId: string = 'data';
const documentId: string = '1';

export const increment = functions.https.onRequest((request, response) => {
    // {count: 1}のJSONを定義
    const updateData = { 'count': 1 };

    // 更新
    admin.firestore().collection(collectionId).doc(documentId).update(updateData).then(() => {
        response.send('Success');
    }
    ).catch((err) => {
        response.send('Failed' + err);
    })
});
デプロイします。
$ firebase deploy
無事Deploy completeしたら、コンソールにURLが表示されます。
これが実行URLなので、開きましょう。
Function URL (increment): https://us-central1-functions-test-1234a.cloudfunctions.net/increment
Functionsのダッシュボードリストにincrement関数が追加されているので、そこのURLをコピペしてもOKです。

実行すると、しばらくしてから画面左上にSuccessの文字列が表示されます。
うーん、簡素。
しかし、これでFirestoreのデータ書き換え完了です!
データベース見ると、ちゃんとcountが1に書き換わってます。
Functionの定期実行
いよいよ定期実行に移ります。
今回は、データベースのconstフィールドを無限インクリメントする謎処理を実装します。
無限インクリメント処理の実装
まず、関数を少し書き換えます。
/* index.ts */
export const increment = functions.https.onRequest((request, response) => {
    // データベースからデータ取得
    admin.firestore().collection(collectionId).doc(documentId).get().then((val) => {
        const data: any = val.data();

        // constフィールドをインクリメント
        const updateData = { 'count': (data.count + 1) };

        // 更新
        admin.firestore().collection(collectionId).doc(documentId).update(updateData).then(() => {
            response.send('Success');
            response.send('count === ' + updateData);
        }
        ).catch((err) => {
            response.send('Failed ' + err);
        })
    }
    ).catch((err) => {
        response.send('Failed ' + err);
    })
});
データベースから現在のデータを取得し、countをインクリメントし、新たなcount値としてupdateします。
firebase deployして実行してみると、実行するたびにcountが増えているのが確認できると思います。
あとはこれを定期実行できれば、フィールドが無限にカウントアップし続ける謎データベースの完成です。
GCPの機能を使った定期実行処理の実装
今回は、Google Cloud Schedulerを使ってスケジュール設定していきます。
この機能を使うために、Blaze(従量制)プランへのアップグレードが必要になります。
index.tsを以下のように書き換えます。
/* index.ts */
import * as functions from 'firebase-functions';
import * as admin from 'firebase-admin';

admin.initializeApp();

// データベース情報
const collectionId: string = 'data';
const documentId: string = '1';

// インクリメント関数
export function increment() {
    // データベースからデータ取得
    admin.firestore().collection(collectionId).doc(documentId).get().then((val) => {
        const data: any = val.data();

        // constフィールドをインクリメント
        const updateData = { 'count': (data.count + 1) };

        // 更新
        admin.firestore().collection(collectionId).doc(documentId).update(updateData).then(() => {
            console.log('Success');
        }
        ).catch((err) => {
            console.log('Failed: ', err);
        })
    }
    ).catch((err) => {
        console.log('Failed: ', err);

    })
}

// 1分ごとにインクリメント関数をを実行
export const scheduledIncrement = functions.pubsub
    .schedule('* * * * *') // 1分ごと
    .timeZone('Asia/Tokyo')
    .onRun((context) => {
        increment();
        return null;
    });
functions.pubsub.schedule().onRun()を使用するすることで、Google Cloud Schedulerによるイベントトリガーが定義できます。
トリガータイミングはUNIX cron形式で定義します。
上記設定では1分ごとにトリガーされますが、'* * * * *'を'*/5 * * * *'にすることで、5分ごとになります。
詳しくはググってください。
これをfirebase deployしてみましょう。
1分ごとに無限インクリメントする謎処理のできあがりです!![]()
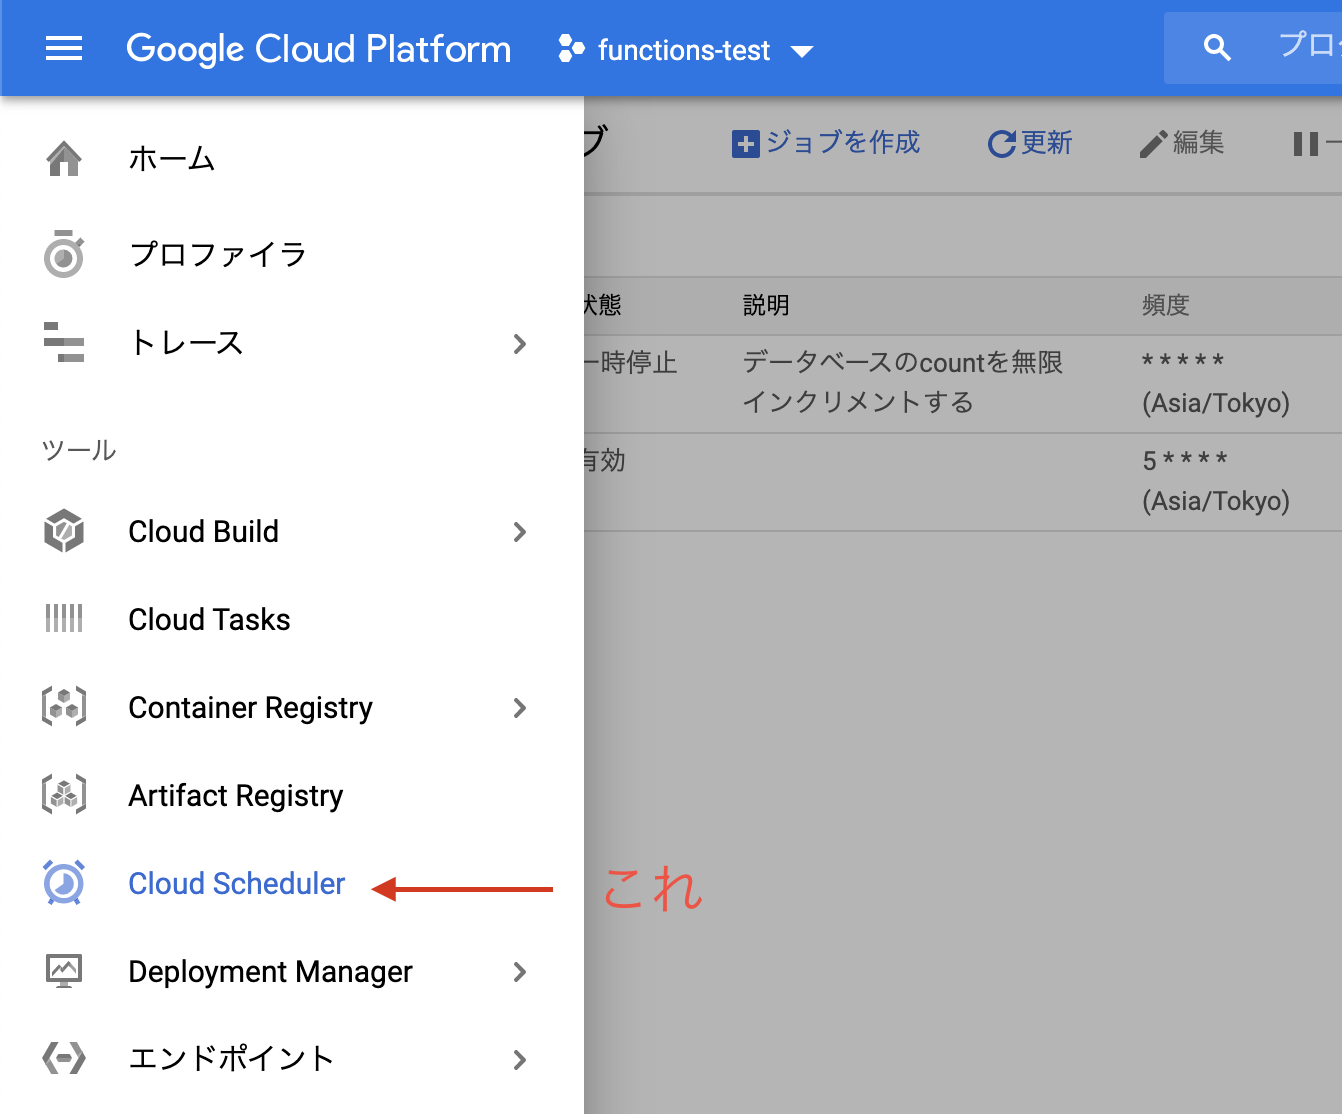
ちなみに今回はイベントトリガーをコードで書きましたが、GUIから設定することも可能です。
Firebaseプロジェクトを作ると自動でGCP(Google Cloud Platform)にもプロジェクトが登録されるので、GCPからCloud Schedulerを設定してください。