はじめに
この記事では以下のことについて説明しています。
- Terraformを使って Node.js関数を Cloud Run functions にデプロイする方法
- Cloud Run functionsリソースの更新をTerraformに伝える方法
前の記事ではCloud Run functionsをローカルマシン経由で gcloud を使いデプロイする方法を紹介しました。本記事では Terraform を使ってデプロイする方法を紹介します。
.
├── dist
├── jest.config.js
├── package-lock.json
├── package.json
├── package.prod.json
├── src
│   ├── hoge
│   │   └── hoge.ts
│   └── index.ts
├── test
│   └── hoge.test.ts
└── tsconfig.json
Terraformで Cloud Run functions にデプロイする
作業に入る前に、シンタックスハイライトがないと .tf ファイルは見づらいのでVSCodeの拡張機能のインスコ必須です。

サンプルコードの編集
実は公式がありがたいことにある程度Terraformのコードのサンプルを用意してくれています。これを使わない手はないです。使いましょう。
サンプルのコードを自分のプロダクトに合うように変えて、main.tf というファイル名でプロジェクトルートに配置します。インフラ構成は一つ前の記事と同じにしています。
terraform {
  required_providers {
    google = {
      source  = "hashicorp/google"
      version = ">= 4.34.0"
    }
  }
}

resource "random_id" "default" {
  byte_length = 8
}

resource "google_storage_bucket" "default" {
  name                        = "${random_id.default.hex}-gcf-source"
  location                    = "asia-northeast1"
  uniform_bucket_level_access = true
}

data "archive_file" "default" {
  type        = "zip"
  output_path = "/tmp/function-source.zip"
  source_dir  = "./dist"
}

resource "google_storage_bucket_object" "object" {
  name   = "function-source.zip"
  bucket = google_storage_bucket.default.name
  source = data.archive_file.default.output_path
}

resource "google_cloudfunctions2_function" "default" {
  name        = "sample-crf"
  location    = "asia-northeast1"
  description = "a new function"

  build_config {
    runtime     = "nodejs20"
    entry_point = "helloGET"
    source {
      storage_source {
        bucket = google_storage_bucket.default.name
        object = google_storage_bucket_object.object.name
      }
    }
  }

  service_config {
    max_instance_count = 1
    available_memory   = "256M"
    timeout_seconds    = 60
  }
}

resource "google_cloud_run_service_iam_member" "member" {
  location = google_cloudfunctions2_function.default.location
  service  = google_cloudfunctions2_function.default.name
  role     = "roles/run.invoker"
  member   = "allUsers"
}

output "function_uri" {
  value = google_cloudfunctions2_function.default.service_config[0].uri
}
Terraform の初期化
terraformコマンドをインスコしていない方は以下の記事を参考にインスコしてください。
terraform init
以下の一文を含む出力が出たらOK。
Terraform has been successfully initialized!
Terraformの実行
terraform plan
すると以下のようなエラーが出てくると思われます。
╷
│ Error: Failed to retrieve project, pid: , err: project: required field is not set
│
│   with google_cloudfunctions2_function.default,
│   on main.tf line 32, in resource "google_cloudfunctions2_function" "default":
│   32: resource "google_cloudfunctions2_function" "default" {
│
そうです。公式のリファレンス通りにやっても動きません。操作する対象の project の情報が存在しないためエラーが発生します。
以下のプロジェクト情報を main.tf に追記しましょう。ついでに project についてのデータソースも追加しておきます。
provider "google" {
  project = "プロジェクト名"
  region  = "asia-northeast1"
}

data "google_project" "project" {
}
もう一度 terraform plan を実行すると無事通ります。
$ terraform plan
data.archive_file.default: Reading...
data.archive_file.default: Read complete after 0s [id=6f9a9b81df6434495ea5c69b16d4962865da523e]

Terraform used the selected providers to generate the following execution plan. Resource actions are indicated with the following symbols:
  + create

Terraform will perform the following actions:

# ...省略

Plan: 5 to add, 0 to change, 0 to destroy.

Changes to Outputs:
  + function_uri = (known after apply)
作成される予定のリソースの情報が表示されます。チェックした上で問題なければ terraform apply を実行して「y」を入力してリソースを作成しましょう。
terraform apply
$ terraform apply
data.archive_file.default: Reading...
data.archive_file.default: Read complete after 0s [id=6f9a9b81df6434495ea5c69b16d4962865da523e]

Terraform used the selected providers to generate the following execution plan. Resource actions are indicated with the following symbols:
  + create

Terraform will perform the following actions:

# ...省略

Plan: 5 to add, 0 to change, 0 to destroy.

Changes to Outputs:
  + function_uri = (known after apply)

Do you want to perform these actions?
  Terraform will perform the actions described above.
  Only 'yes' will be accepted to approve.

  Enter a value: yes

random_id.default: Creating...
random_id.default: Creation complete after 0s [id=v_WoyJ1k9-8]
google_storage_bucket.default: Creating...
google_storage_bucket.default: Creation complete after 2s [id=bff5a8c89d64f7ef-gcf-source]
google_storage_bucket_object.object: Creating...
google_storage_bucket_object.object: Creation complete after 0s [id=bff5a8c89d64f7ef-gcf-source-function-source.zip]
google_cloudfunctions2_function.default: Creating...
google_cloudfunctions2_function.default: Still creating... [10s elapsed]
google_cloudfunctions2_function.default: Still creating... [20s elapsed]
google_cloudfunctions2_function.default: Still creating... [30s elapsed]
google_cloudfunctions2_function.default: Still creating... [40s elapsed]
google_cloudfunctions2_function.default: Still creating... [50s elapsed]
google_cloudfunctions2_function.default: Creation complete after 54s [id=projects/ts-cloudrun-functions/locations/asia-northeast1/functions/sample-crf]
google_cloud_run_service_iam_member.member: Creating...
google_cloud_run_service_iam_member.member: Creation complete after 5s [id=v1/projects/ts-cloudrun-functions/locations/asia-northeast1/services/sample-crf/roles/run.invoker/allUsers]

Apply complete! Resources: 5 added, 0 changed, 0 destroyed.

Outputs:

function_uri = "https://xxx.a.run.app"
最後に出力されたURLをcurlで読んでみると、無事「Hello World!」と返ってきます。
$ curl https://xxx.a.run.app
Hello World!
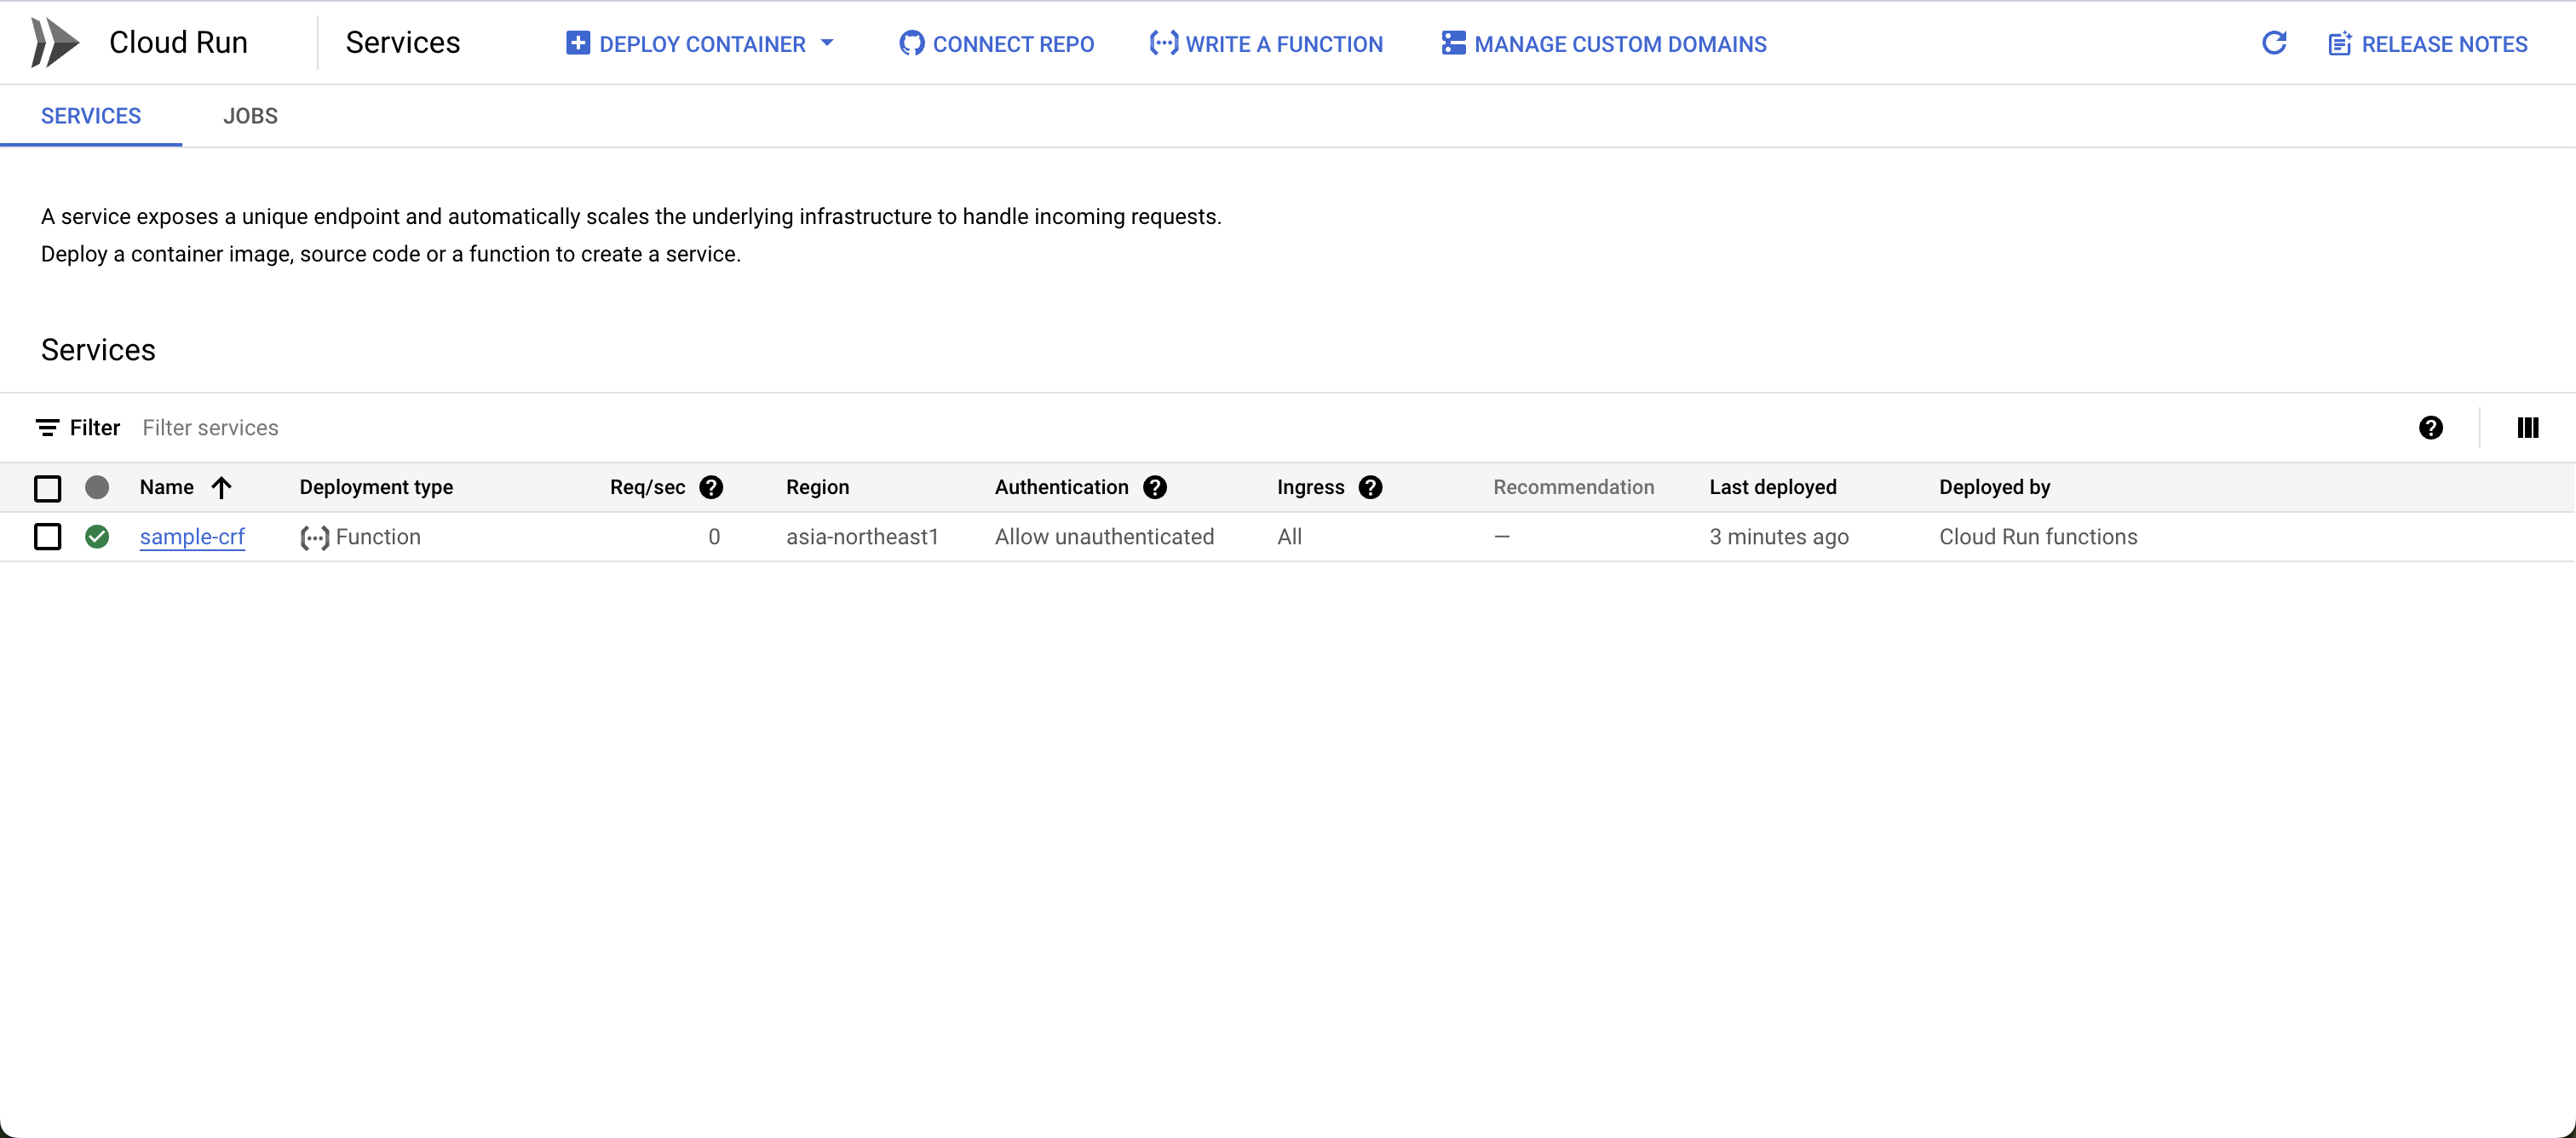
GCPコンソールの方でもリソースが作成されていることが確認できました。
コード変更の反映をTerraformに伝える方法
サンプルの.tfコードでは、コードの修正を検知して google_storage_bucket_object リソースを更新してくれるものの、修正内容は反映されません。
試しにNode.js関数のコードを一部変更してみます。hogeのモジュールインポートを削除し、HelloとWorldの間にカンマを入れました。超地味変更。
import * as ff from '@google-cloud/functions-framework'
import type { HttpFunction } from "@google-cloud/functions-framework";

// import { hoge } from '@/hoge/hoge.js'

export const helloGET: HttpFunction =  (req: ff.Request, res: ff.Response) => {
  // let hogehoge: string = hoge();
  // console.log(hogehoge)
  res.send(`Hello, World!`);
};
ビルド後に terraform plan をしてみます。
$ terraform plan
random_id.default: Refreshing state... [id=v_WoyJ1k9-8]
data.archive_file.default: Reading...
data.archive_file.default: Read complete after 0s [id=cc447bbb8df69d0959cb15637a8b5ed61e0f9716]
google_storage_bucket.default: Refreshing state... [id=bff5a8c89d64f7ef-gcf-source]
google_storage_bucket_object.object: Refreshing state... [id=bff5a8c89d64f7ef-gcf-source-function-source.zip]
google_cloudfunctions2_function.default: Refreshing state... [id=projects/ts-cloudrun-functions/locations/asia-northeast1/functions/sample-crf]
google_cloud_run_service_iam_member.member: Refreshing state... [id=v1/projects/ts-cloudrun-functions/locations/asia-northeast1/services/sample-crf/roles/run.invoker/allUsers]

Terraform used the selected providers to generate the following execution plan. Resource actions are indicated with the following symbols:
  ~ update in-place

Terraform will perform the following actions:

  # google_storage_bucket_object.object will be updated in-place
  ~ resource "google_storage_bucket_object" "object" {
      ~ detect_md5hash   = "+XL6IFQ4tGxA6NvdIXsJAg==" -> "different hash"
        id               = "bff5a8c89d64f7ef-gcf-source-function-source.zip"
        name             = "function-source.zip"
        # (13 unchanged attributes hidden)
    }

Plan: 0 to add, 1 to change, 0 to destroy.
Cloud Run functionsのリソースの更新がなさそう?試しにterraform apply してcurlで呼び出してみましょう。
$ curl https://xxx.a.run.app
Hello World!
あれ?挿入したはずのカンマがないのでやはり変更が反映されていなさそうですね。
これは google_storage_bucket_object.object の name が常に function-source.zip に固定されているためです。ソースコードを更新してアーカイブを再作成しても、オブジェクト名が変わらないため Cloud Run functions のリソース (google_cloudfunctions2_function.default ) に変更が認識されず、再デプロイがトリガーされません。
解決策は、 google_storage_bucket_object.object の name にあるzipパスを変更するようにすると、中身が変わったことを google_cloudfunctions2_function.default に認識させられるようになります。
resource "google_storage_bucket_object" "object" {
  # ファイル名が変わるようにする
  name   = "${data.archive_file.default.output_sha256}-function-source.zip"
  bucket = google_storage_bucket.default.name
  source = data.archive_file.default.output_path
}
terraform plan を実行すると、Cloud Run funcitionsへの変更も反映されるようになっています。
$ terraform plan
// ...省略
Terraform used the selected providers to generate the following execution plan. Resource actions are indicated with the following symbols:
  ~ update in-place
-/+ destroy and then create replacement

Terraform will perform the following actions:

  # google_cloudfunctions2_function.default will be updated in-place
  ~ resource "google_cloudfunctions2_function" "default" {
    // ...省略
    }

  # google_storage_bucket_object.object must be replaced
-/+ resource "google_storage_bucket_object" "object" {
    // ...省略
    }

Plan: 1 to add, 1 to change, 1 to destroy.
apply して呼び出してみると、無事変更が反映されたものになりました。
$ curl https://xxx.a.run.app
Hello, World!
Terraformでリソースの削除
起動させっぱなしだと金がかかるので、Terraform経由で作成したものを全部削除しておきましょう。
terraform destroy
おわりに
本記事ではTerraformを使ってデプロイする方法について書きました。gcloudでデプロイする方法とTerraformでデプロイする方法の2通りのデプロイ方法をお伝えしましたが、どちらにもメリットがあると思います。僕的にはコード見ればインフラの構成がある程度わかるTerraformの方が運用的にもありがたいかなという感じです。コマンドいちいち打つの面倒臭いし。
次回はCloud Run functions以外のサービスを組み合わせて使う事例について紹介したいと思います。
参考文献
