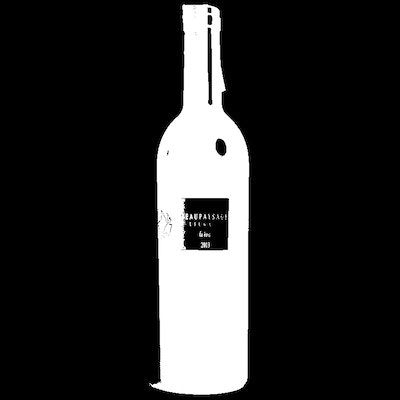
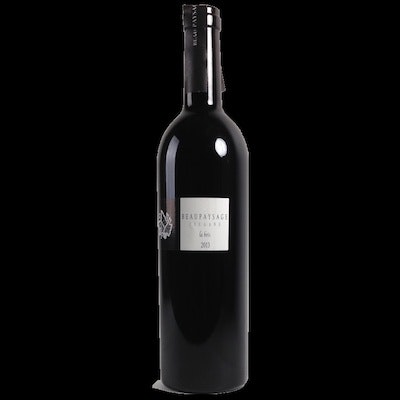
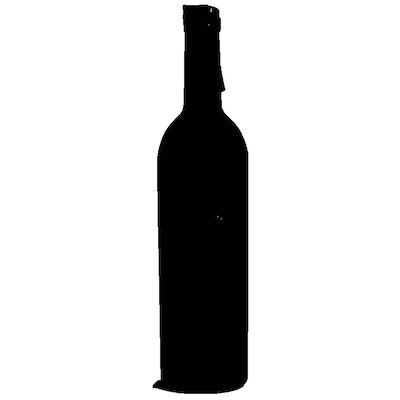
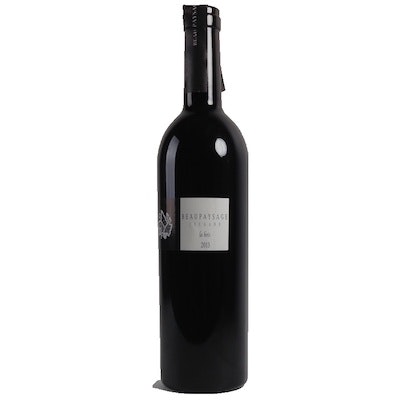
1. 要約
この記事では、Python と OpenCV を使った、画像のグラフカット処理と背景白抜き処理の一例を投稿します。
2. はじめに
この事例は、ある物体画像の背景を白抜きするため、まず画像からグラフカットアルゴリズムにより物体認識をさせ、その物体を抽出してから、白色の背景画像と合成をし、最後にフィルター加工処理を施す一例です。
手動による閾値調整や、自動でプログラムに閾値調整させることで、更に精度を上げることも可能です。
これは、撮影画像のもともとの品質にも影響を受けますが、ある程度の要件で撮影された EC ショップなどの商品画像の背景白抜き処理にも応用できます。
以降では、まず画像加工の処理前と処理後の結果と Python コードを記載し、最後にソースコードの要点を解説していきます。
3. 環境
- RHEL 7 系
- Python 3.6
- opencv-python 3.4
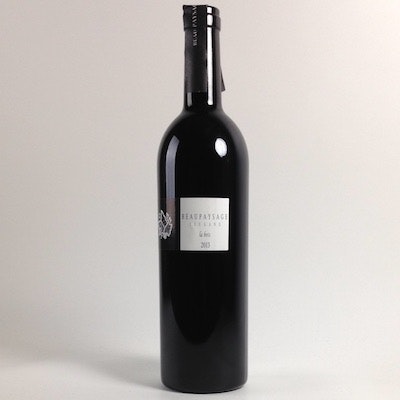
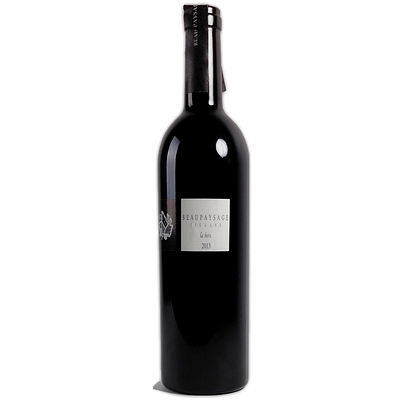
4. 画像加工処理の結果
4-1. グラフカット処理前
4-2. グラフカット処理後
5. Python コード
# coding:utf-8

import sys
import math
import numpy as np
import cv2
from matplotlib import pyplot as plt
import PIL
from PIL import Image
from PIL import ImageEnhance
from PIL import ImageDraw

IMG_SRC = 'input.jpg'

THRESH_MIN, THRESH_MAX = (160, 255)
THRESH_MODE = cv2.THRESH_BINARY_INV

FRAME = 800
CENTERING = True
PADDING = 5

BG_COLOR = (255, 255, 255)
BORDER_COLOR = (255, 255, 255)
BORDER_WIDTH = 0

AA = (1001, 1001)
CONTRAST = 1.1
SHARPNESS = 1.5
BRIGHTNESS = 1.1
SATURATION = 1.0
GAMMA = 1.0

IMG_NAME = 'output'
IMG_TYPE = 'PNG'
IMG_QUALITY = 100
IMG_OPTIMIZE = True

img_src = cv2.imread(IMG_SRC)
img_gray = cv2.cvtColor(img_src, cv2.COLOR_BGR2GRAY)
img_bin = cv2.threshold(img_gray, THRESH_MIN, THRESH_MAX, THRESH_MODE)[1]
img_mask = cv2.merge((img_bin, img_bin, img_bin))

mask_rows, mask_cols, mask_channel = img_mask.shape
min_x = mask_cols
min_y = mask_rows
max_x = 0
max_y = 0

for y in range(mask_rows):
    for x in range(mask_cols):
        if all(img_mask[y, x] == 255):
            if x < min_x:
                min_x = x
            elif x > max_x:
                max_x = x
                if y < min_y:
                    min_y = y
                elif y > max_y:
                    max_y = y

rect_x = min_x
rect_y = min_y
rect_w = max_x - min_x
rect_h = max_y - min_y

mask = np.zeros(img_src.shape[:2],np.uint8)

bg_model = np.zeros((1,65),np.float64)
fg_model = np.zeros((1,65),np.float64)

rect = (rect_x, rect_y, rect_w, rect_h)
cv2.grabCut(img_src, mask, rect, bg_model, fg_model, 5, cv2.GC_INIT_WITH_RECT)
mask2 = np.where((mask == 2) | (mask == 0), 0, 1).astype('uint8')

img_grab = img_src * mask2[:, :, np.newaxis]
img_src_size = img_src.shape
img_bg = np.zeros(img_src_size, dtype=np.uint8)
img_bg[:] = BG_COLOR
img_bg = img_bg * (1 - mask2[:, :, np.newaxis])
img_blend = cv2.addWeighted(img_grab, 0.8, img_bg, 1, 0)

if CENTERING:
    img_rect = img_blend[rect_y: rect_y + rect_h, rect_x: rect_x + rect_w]
else:
    img_rect = img_blend
    rect_w, rect_h = img_rect.shape[:2]

rect_max = max([rect_w, rect_h])
rect_min = min([rect_w, rect_h])

temp_rect_max = FRAME - (PADDING * 2)
resize_rate = temp_rect_max / rect_max
temp_padding = int(PADDING / resize_rate)
temp_frame_max = rect_max + (temp_padding * 2)
img_temp = np.zeros([temp_frame_max, temp_frame_max, 3], dtype=np.uint8)
img_temp[:] = BG_COLOR

min_start = int((rect_max + (temp_padding * 2) - rect_min) / 2)

if rect_w <= rect_h:
    img_temp[temp_padding: temp_padding + rect_h, min_start: min_start + rect_w] = img_rect
else:
    img_temp[min_start: min_start + rect_h, temp_padding: temp_padding + rect_w] = img_rect

img_aa = cv2.GaussianBlur(img_temp, AA, cv2.BORDER_TRANSPARENT)
if GAMMA != 1.0:
    Y = np.ones((256, 1), dtype = 'uint8') * 0
    for i in range(256):
        Y[i][0] = 255 * pow(float(i) / 255, 1.0 / GAMMA)
        img_temp = cv2.LUT(img_temp, Y)

        img_aa = cv2.LUT(img_aa, Y)

img_front = Image.fromarray(cv2.cvtColor(img_temp, cv2.COLOR_BGR2RGB)).convert('RGBA')

img_back = Image.fromarray(cv2.cvtColor(img_aa, cv2.COLOR_BGR2RGB)).convert('RGBA')

img_trans = Image.new('RGBA', img_front.size, (0, 0, 0, 0))

width = img_front.size[0]
height = img_front.size[1]

bg_1, bg_2, bg_3 = BG_COLOR

for x in range(width):
    for y in range(height):
        pixel = img_front.getpixel((x, y))
        if pixel[0] == bg_1 and pixel[1] == bg_2 and pixel[2] == bg_3:
            continue
        img_trans.putpixel((x, y), pixel)

img_front = Image.new('RGBA', img_back.size, (bg_3, bg_2, bg_1, 0))
img_front.paste(img_trans, (0, 0), img_trans)

img_dest = Image.alpha_composite(img_back, img_front)
img_dest = img_dest.resize((FRAME, FRAME), Image.ANTIALIAS)

if CONTRAST != 1.0:
    img_dest = ImageEnhance.Contrast(img_dest)
    img_dest = img_dest.enhance(CONTRAST)

if SHARPNESS != 1.0:
    img_dest = ImageEnhance.Sharpness(img_dest)
    img_dest = img_dest.enhance(SHARPNESS)

if BRIGHTNESS != 1.0:
    img_dest = ImageEnhance.Brightness(img_dest)
    img_dest = img_dest.enhance(BRIGHTNESS)

if SATURATION != 1.0:
    img_dest = ImageEnhance.Color(img_dest)
    img_dest = img_dest.enhance(SATURATION)

if BORDER_WIDTH:
    border_half = BORDER_WIDTH / 2
    floor = math.floor(border_half)
    ceil = FRAME - math.ceil(border_half)
    draw = ImageDraw.Draw(img_dest)
    draw.line((0, floor)+(FRAME, floor), fill=BORDER_COLOR, width=BORDER_WIDTH)
    draw.line((ceil, 0)+(ceil, FRAME), fill=BORDER_COLOR, width=BORDER_WIDTH)
    draw.line((FRAME, ceil)+(0, ceil), fill=BORDER_COLOR, width=BORDER_WIDTH)
    draw.line((floor, FRAME)+(floor, 0), fill=BORDER_COLOR, width=BORDER_WIDTH)

if IMG_TYPE == 'JPEG':
    extension = 'jpg'
elif IMG_TYPE == 'PNG':
    extension = 'png'
elif IMG_TYPE == 'GIF':
    extension = 'gif'
elif IMG_TYPE == 'BMP':
    extension = 'bmp'

img_dest.save(IMG_NAME + '.' + extension, IMG_TYPE, quality=IMG_QUALITY, optimize=IMG_OPTIMIZE)

sys.exit()
6. Python コード解説
6-1. 設定
冒頭は、コメント文の通りで、ライブラリの読み込みや、初期値や閾値などが設定されています。
# coding:utf-8

# インポート
import sys
import math
import numpy as np
import cv2
from matplotlib import pyplot as plt
import PIL
from PIL import Image
from PIL import ImageEnhance
from PIL import ImageDraw

# 設定
## 入力画像設定
IMG_SRC = 'input.jpg'

## スレッショルド設定
THRESH_MIN, THRESH_MAX = (160, 255)
THRESH_MODE = cv2.THRESH_BINARY_INV

## サイズ設定
FRAME = 800
CENTERING = True
PADDING = 5

## カラー設定
### BGR
BG_COLOR = (255, 255, 255)
### RGB
BORDER_COLOR = (255, 255, 255)
BORDER_WIDTH = 0

## フィルター設定
AA = (1001, 1001)
CONTRAST = 1.1
SHARPNESS = 1.5
BRIGHTNESS = 1.1
SATURATION = 1.0
GAMMA = 1.0

## 出力画像設定
IMG_NAME = 'output'
IMG_TYPE = 'PNG'
IMG_QUALITY = 100
IMG_OPTIMIZE = True
6-2. グラフカット処理
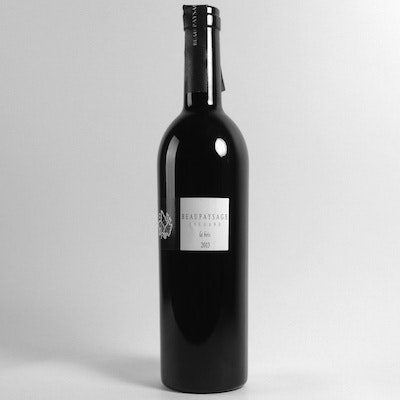
まず、カラーの入力画像を読み込んでから、グレースケール画像を生成します。
# グラフカット処理
## 入力画像の読み込み
img_src = cv2.imread(IMG_SRC)

## 入力画像からグレースケール画像を生成
img_gray = cv2.cvtColor(img_src, cv2.COLOR_BGR2GRAY)
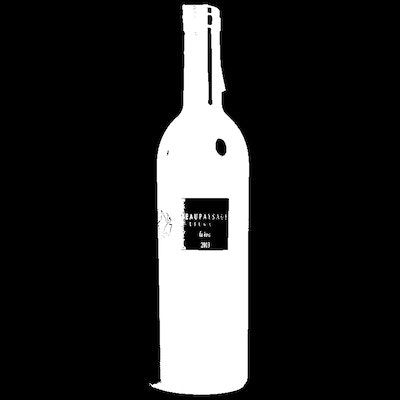
次に、グレースケール画像から、2 値化画像を生成します。
## グレースケール画像から 2 値化画像を生成
img_bin = cv2.threshold(img_gray, THRESH_MIN, THRESH_MAX, THRESH_MODE)[1]
次に、2 値化画像から、マスク画像を生成します。
## 2 値化画像からマスク画像を生成
img_mask = cv2.merge((img_bin, img_bin, img_bin))
次に、マスク画像から shape で矩形を囲い、その座標を取得します。
## マスク画像の矩形をとり、縦横サイズを取得
mask_rows, mask_cols, mask_channel = img_mask.shape
min_x = mask_cols
min_y = mask_rows
max_x = 0
max_y = 0

for y in range(mask_rows):
    for x in range(mask_cols):
        if all(img_mask[y, x] == 255):
            if x < min_x:
                min_x = x
            elif x > max_x:
                max_x = x
            if y < min_y:
                min_y = y
            elif y > max_y:
                max_y = y

rect_x = min_x
rect_y = min_y
rect_w = max_x - min_x
rect_h = max_y - min_y
処理結果:
rect_x: 150, rect_y: 5, rect_w: 98, rect_h: 389
次に、マスク画像から格納領域を準備し、グラフカット処理した画像を生成します。
## 前景マスクデータ格納準備
mask = np.zeros(img_src.shape[:2],np.uint8)

## 前景領域データ、背景領域データ格納準備
bg_model = np.zeros((1,65),np.float64)
fg_model = np.zeros((1,65),np.float64)

## 前景画像の矩形領域設定
# (x, y, w, h) 矩形左上位置: x, y, サイズ: w, h
rect = (rect_x, rect_y, rect_w, rect_h)

## 矩形グラフカットデータ化
cv2.grabCut(img_src, mask, rect, bg_model, fg_model, 5, cv2.GC_INIT_WITH_RECT)

## 領域分割
# 0:矩形外(背景確定)→ 0
# 1:矩形内(グラフカットによる背景かもしれない領域)→ 0
# 2:矩形内(前景確定)→ 1
# 3:矩形内(グラフカット判定による前景かもしれない領域)→ 1
mask2 = np.where((mask == 2) | (mask == 0), 0, 1).astype('uint8')

## グラフカット処理
img_grab = img_src * mask2[:, :, np.newaxis]
次に、背景画像(ここでは白一色の画像)を生成し、背景画像からグラフカット画像部分だけをくり抜き、合成用の背景画像を生成します。
## 背景画像生成
img_src_size = img_src.shape
img_bg = np.zeros(img_src_size, dtype=np.uint8)
img_bg[:] = BG_COLOR

## 背景画像カット
img_bg = img_bg * (1 - mask2[:, :, np.newaxis])
次に、グラフカット画像と、合成用背景画像を合成します。
## 前景画像と背景画像を合成(アルファブレンド)
# arg1: 前景画像
# arg2: 前景画像の合成重みづけ
# arg3: 背景画像
# arg4: 背景画像の合成重みづけ
# arg5: ガンマ補正
img_blend = cv2.addWeighted(img_grab, 0.8, img_bg, 1, 0)
次に、認識できた物体のセンタリング処理をします。
6-3. センタリング処理
# センタリング
if CENTERING:
    ## グラフカット切り抜き
    img_rect = img_blend[rect_y: rect_y + rect_h, rect_x: rect_x + rect_w]
else:
    ## 既存のまま
    img_rect = img_blend
    rect_w, rect_h = img_rect.shape[:2]
6-4. サイズ処理
次に、認識できた物体のサイズ調整処理をします。
# サイズ処理
## 矩形長辺サイズ取得
rect_max = max([rect_w, rect_h])

## 矩形短辺サイズ取得
rect_min = min([rect_w, rect_h])

## リサイズ時矩形最大サイズ取得
temp_rect_max = FRAME - (PADDING * 2)

# ** リサイズ比率
resize_rate = temp_rect_max / rect_max

## 仮パディングサイズを逆リサイズ比率から取得
temp_padding = int(PADDING / resize_rate)

## 仮外形サイズ取得
temp_frame_max = rect_max + (temp_padding * 2)

## 仮背景をコンテンツ長辺サイズ + パディングサイズで生成
img_temp = np.zeros([temp_frame_max, temp_frame_max, 3], dtype=np.uint8)

## 仮背景を白に塗りつぶし
img_temp[:] = BG_COLOR

## コンテンツ短辺側の配置長取得
min_start = int((rect_max + (temp_padding * 2) - rect_min) / 2)

## コンテンツ画像を白背景画像へオーバーレイ
if rect_w <= rect_h:
    img_temp[temp_padding: temp_padding + rect_h, min_start: min_start + rect_w] = img_rect
else:
    img_temp[min_start: min_start + rect_h, temp_padding: temp_padding + rect_w] = img_rect
6-5. アンチエイリアス処理
次に、アンチエイリアス処理をします。
# アンチエイリアス処理
## AA 用に合成画像をガウシアン処理
img_aa = cv2.GaussianBlur(img_temp, AA, cv2.BORDER_TRANSPARENT)

## 合成画像 & AA 画像のガンマ補正
if GAMMA != 1.0:
    Y = np.ones((256, 1), dtype = 'uint8') * 0
    for i in range(256):
        Y[i][0] = 255 * pow(float(i) / 255, 1.0 / GAMMA)

    ### メイン画像に適用
    img_temp = cv2.LUT(img_temp, Y)

    ### AA 画像に適用
    img_aa = cv2.LUT(img_aa, Y)
6-6. PIL 合成処理
次に、PIL 合成処理をします。
# PIL 合成
## 合成画像をメイン画像として PIL 用に変換(アルファチャンネル付き)
img_front = Image.fromarray(cv2.cvtColor(img_temp, cv2.COLOR_BGR2RGB)).convert('RGBA')

## AA 用画を PIL 用に変換(アルファチャンネル付き)
img_back = Image.fromarray(cv2.cvtColor(img_aa, cv2.COLOR_BGR2RGB)).convert('RGBA')
次に、アルファチャンネル処理をします。
## メイン画像用に透明画像を生成
img_trans = Image.new('RGBA', img_front.size, (0, 0, 0, 0))

## メイン画像の縦横サイズ取得
width = img_front.size[0]
height = img_front.size[1]

## 画像背景色分解
bg_1, bg_2, bg_3 = BG_COLOR

## メイン画像の白以外のピクセルを透明画像へ書き込み
for x in range(width):
    for y in range(height):
        pixel = img_front.getpixel((x, y))
            ### 白ピクセルは無視
            if pixel[0] == bg_1 and pixel[1] == bg_2 and pixel[2] == bg_3:
                continue
            ### 画像背景色以外のピクセルを透過画像に書き込み
            img_trans.putpixel((x, y), pixel)

## AA 画像オブジェクト生成
img_front = Image.new('RGBA', img_back.size, (bg_3, bg_2, bg_1, 0))

## AA 画像オブジェクトにメイン透過画像を貼り付け
img_front.paste(img_trans, (0, 0), img_trans)

## アルファチャンネル処理
img_dest = Image.alpha_composite(img_back, img_front)
6-7. PIL リサイズ処理
次に、PIL リサイズ処理をします。
# PIL リサイズ
img_dest = img_dest.resize((FRAME, FRAME), Image.ANTIALIAS)
6-8. PIL フィルター処理
次に、PIL フィルター処理をします。
# PIL フィルター
## コントラスト強調
if CONTRAST != 1.0:
    img_dest = ImageEnhance.Contrast(img_dest)
    img_dest = img_dest.enhance(CONTRAST)

## シャープネス
if SHARPNESS != 1.0:
    img_dest = ImageEnhance.Sharpness(img_dest)
    img_dest = img_dest.enhance(SHARPNESS)

## 明度を上げる
if BRIGHTNESS != 1.0:
    img_dest = ImageEnhance.Brightness(img_dest)
    img_dest = img_dest.enhance(BRIGHTNESS)

## 彩度を上げる
if SATURATION != 1.0:
    img_dest = ImageEnhance.Color(img_dest)
    img_dest = img_dest.enhance(SATURATION)
6-9. PIL ボーダー処理
次に、PIL ボーダー処理をします。
# PIL ボーダー書き込み
if BORDER_WIDTH:

    ## 書き込み中央位置取得
    border_half = BORDER_WIDTH / 2

    ## フレームサイズ始端書き込み位置取得
    floor = math.floor(border_half)

    ## フレームサイズ終端書き込み位置取得
    ceil = FRAME - math.ceil(border_half)

    ## ボーダー書き込み
    draw = ImageDraw.Draw(img_dest)
    draw.line((0, floor)+(FRAME, floor), fill=BORDER_COLOR, width=BORDER_WIDTH)
    draw.line((ceil, 0)+(ceil, FRAME), fill=BORDER_COLOR, width=BORDER_WIDTH)
    draw.line((FRAME, ceil)+(0, ceil), fill=BORDER_COLOR, width=BORDER_WIDTH)
    draw.line((floor, FRAME)+(floor, 0), fill=BORDER_COLOR, width=BORDER_WIDTH)
6-10. 画像拡張子設定
次に、画像の拡張子設定をします。
# 画像拡張子設定
if IMG_TYPE == 'JPEG':
	extension = 'jpg'
elif IMG_TYPE == 'PNG':
	extension = 'png'
elif IMG_TYPE == 'GIF':
	extension = 'gif'
elif IMG_TYPE == 'BMP':
	extension = 'bmp'
6-11. 画像書き込み処理
最後に処理画像の書き込み処理をして完成です。
# 処理画像書き込み
img_dest.save(IMG_NAME + '.' + extension, IMG_TYPE, quality=IMG_QUALITY, optimize=IMG_OPTIMIZE)

# スクリプト終了
sys.exit()
7. まとめ
この記事では、Python と OpenCV による、画像のグラフカット処理と背景白抜き処理の一例を投稿しました。
手動で閾値を調整したり、動的に閾値を自動調整させることで精度を上げることも可能です。
