はじめに
Qiskitにおいて、作成した量子回路を実機で実行する場合、裏では校正されたパルスが使われています。そのパルスをパルスモジュールを使って、自分が好きなようにカスタマイズすることが可能です。この記事では量子回路とパルスモジュールを組み合わせた書き方を紹介したいと思います。
まず、Qiskit Pulseを動かすために必要な記述をまとめておきます。
import numpy as np
from qiskit import QuantumCircuit, transpile, Aer, IBMQ
from qiskit.visualization import *
from qiskit.circuit import Gate

IBMQ.load_account()

provider = IBMQ.get_provider(hub='ibm-q', group='open', project='main')
backend = provider.get_backend('ibmq_armonk')
backend_defaults = backend.defaults()
backend_config = backend.configuration()
カスタムゲートに自作パルスをバインドさせる
基本的な流れは以下のとおりです。
- カスタムゲート作成
- 1で作成したカスタムゲートを含む量子回路を作成
- 自分が作成したいパルスの定義を記述したscheduleクラスを作成
-
add_calibration()を利用して、3で作成したクラスを2で定義したゲートにバインド
以下サンプルコードを見ていきたいと思います。
from qiskit import pulse

GHz = 1.0e9 # Gigahertz
qubit=0
freq_GHz=4.95
freq=freq_GHz*GHz
drive_sigma_sec = 0.075e-6
drive_duration_sec = drive_sigma_sec * 8
drive_amp = 0.3

# 1. カスタムゲート作成
x_pulse = Gate('x_pulse', num_qubits=1, params=[])

# 2. 1で作成したカスタムゲートを含む量子回路を作成
sample = QuantumCircuit(1, 1)
sample.append(x_pulse, [0])
sample.measure(0, 0)

# 3. 自分が作成したいパルスの定義を記述したscheduleクラスを作成
with pulse.build(backend) as x_schedule:
    pulse.set_frequency(freq, pulse.drive_channel(qubit))
    pulse.play(pulse.Gaussian(duration=16 * int(pulse.seconds_to_samples(drive_duration_sec) / 16),
                              amp=drive_amp,
                              sigma=pulse.seconds_to_samples(drive_sigma_sec),
                              name="x_schedule"), pulse.drive_channel(qubit))

# 4. 3で作成したクラスを2で定義したゲートにバインド
sample.add_calibration(x_pulse, (0, ), schedule=x_schedule)
sample.draw(output='mpl')

- カスタムゲート作成
自分で定義したユニタリゲートを作成することができます。
https://qiskit.org/documentation/stubs/qiskit.circuit.Gate.html - 1で作成したカスタムゲートを含む量子回路を作成
カスタムゲートを含む量子回路を作成します。ここでは1量子ビットに対してカスタムゲートを作用させる量子回路を作成しています。 - 自分が作成したいパルスの定義を記述したscheduleクラスを作成
以前紹介したBuilder構文を利用してパルスを定義しています。ここではパルスモジュールで提供されているメソッドseconds_to_samples()を利用しています。このメソッドは引数に秒を与えることで、アクティブなバックエンドで秒単位で経過するサンプルの数を取得することができます。
https://qiskit.org/documentation/stubs/qiskit.pulse.builder.seconds_to_samples.html - 3で作成したクラスを2で定義したゲートにバインド
自分が作成したパルスとゲートをバインドします。
作成した量子回路のパルスを確認する
自分が作成した量子回路がどのようなパルス構成になっているかも確認することができます。
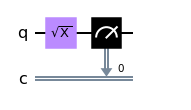
sample_sx = QuantumCircuit(1, 1)
sample_sx.sx(0)
sample_sx.measure(0, 0)
sample_sx.draw(output='mpl')
from qiskit import schedule as build_schedule

# 1. scheduleを定義
schedule = build_schedule(sample_sx,backend)

schedule.draw(backend=backend)
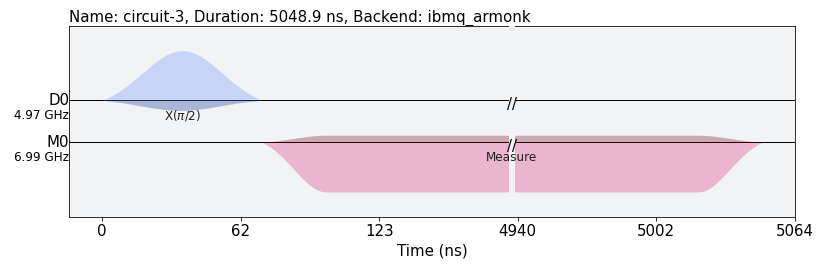
- scheduleを定義
自分が定義した量子回路とバックエンドを定義してscheduleを作成すればパルスの状況が分かります。
まとめ
この記事では量子回路とscheduleについて紹介しました。自分で定義した量子回路がどのようなパルスとなって実行されているかみてみるのも面白いかと思います。