はじめに
vagrant環境は基本的にCUIで操作するため、GUIをもつElectronアプリを動かすにはいくつかの設定が必要です。この記事では、vagrant環境で動かしているCentOS6上でElectronアプリを無理やり実行するための手順を説明します。
CentOS6はいろいろとパッケージのバージョンが古いため、Electronアプリを動かすのはしんどいです。
仮想マシンの作成
今回の場合は仮想マシンを新規作成しますが、既存の仮想マシンを使いたい場合は Vagrantfile の編集のみすればOKです。
$ vagrant box add centos/6 # Boxの追加
$ vagrant init centos/6
$ vim Vagrantfile
vimなどのエディタを使って、Vagrantfileを以下のように編集しましょう。X11 Forwardingを有効にして、SSH経由でGUIを動かせるようにします。
# -*- mode: ruby -*-
# vi: set ft=ruby :

# All Vagrant configuration is done below. The "2" in Vagrant.configure
# configures the configuration version (we support older styles for
# backwards compatibility). Please don't change it unless you know what
# you're doing.
Vagrant.configure("2") do |config|
  # The most common configuration options are documented and commented below.
  # For a complete reference, please see the online documentation at
  # https://docs.vagrantup.com.

  # Every Vagrant development environment requires a box. You can search for
  # boxes at https://vagrantcloud.com/search.
  config.vm.box = "centos/6"

  # Disable automatic box update checking. If you disable this, then
  # boxes will only be checked for updates when the user runs
  # `vagrant box outdated`. This is not recommended.
  # config.vm.box_check_update = false

  # Create a forwarded port mapping which allows access to a specific port
  # within the machine from a port on the host machine. In the example below,
  # accessing "localhost:8080" will access port 80 on the guest machine.
  # NOTE: This will enable public access to the opened port
  # config.vm.network "forwarded_port", guest: 80, host: 8080

  # Create a forwarded port mapping which allows access to a specific port
  # within the machine from a port on the host machine and only allow access
  # via 127.0.0.1 to disable public access
  # config.vm.network "forwarded_port", guest: 80, host: 8080, host_ip: "127.0.0.1"

  # Create a private network, which allows host-only access to the machine
  # using a specific IP.
  # config.vm.network "private_network", ip: "192.168.33.10"

  # Create a public network, which generally matched to bridged network.
  # Bridged networks make the machine appear as another physical device on
  # your network.
  # config.vm.network "public_network"

  # Share an additional folder to the guest VM. The first argument is
  # the path on the host to the actual folder. The second argument is
  # the path on the guest to mount the folder. And the optional third
  # argument is a set of non-required options.
  # config.vm.synced_folder "../data", "/vagrant_data"

  # Provider-specific configuration so you can fine-tune various
  # backing providers for Vagrant. These expose provider-specific options.
  # Example for VirtualBox:
  #
  # config.vm.provider "virtualbox" do |vb|
  #   # Display the VirtualBox GUI when booting the machine
  #   vb.gui = true
  #
  #   # Customize the amount of memory on the VM:
  #   vb.memory = "1024"
  # end
  #
  # View the documentation for the provider you are using for more
  # information on available options.

  # Enable provisioning with a shell script. Additional provisioners such as
  # Puppet, Chef, Ansible, Salt, and Docker are also available. Please see the
  # documentation for more information about their specific syntax and use.
  # config.vm.provision "shell", inline: <<-SHELL
  #   apt-get update
  #   apt-get install -y apache2
  # SHELL
+  config.ssh.forward_x11 = true
end
以降の操作は仮想マシンの中で行うので、
$ vagrant up
$ vagrant ssh
として仮想マシンにログインしましょう。
Nodeやyarnをインストール
Node、yarn、gitなどをインストールします
$ curl -sL https://rpm.nodesource.com/setup_8.x | sudo bash -
$ curl -sL https://dl.yarnpkg.com/rpm/yarn.repo | sudo tee /etc/yum.repos.d/yarn.repo
$ sudo yum install -y gcc-c++ make yarn git
xauthのインストール
X11 Forwarding を使うために、xauthが必要です。
sudo yum install -y xorg-x11-xauth
インストール後はvagrantから一旦ログアウトして、再度vagrant sshでログインしましょう。
Electronアプリを動かしてみる
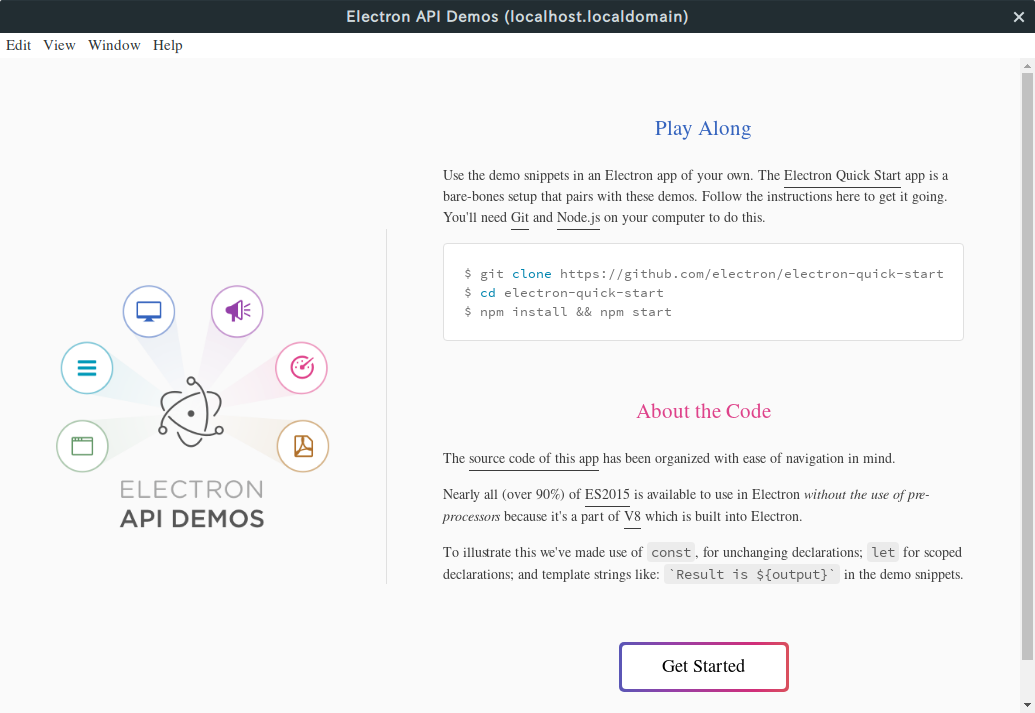
electron-api-demos というサンプルアプリを動かしてみましょう。
$ git clone https://github.com/electron/electron-api-demos
$ cd electron-api-demos
$ yarn install
$ yarn start
yarn start とするとElectronアプリがビルドされて動くはずなのですが、以下のようなエラーが出てしまうかと思います。
$ yarn start
yarn run v1.7.0
$ electron .
/home/vagrant/electron-api-demos/node_modules/electron/dist/electron: error while loading shared libraries: libgtk-3.so.0: cannot open shared object file: No such file or directory
error Command failed with exit code 127.
info Visit https://yarnpkg.com/en/docs/cli/run for documentation about this command.
これは、vagrantにGUIを動かすためのライブラリが足りてないのが原因です。gtk3をインストールすればいいじゃないか、ということになるのですが、CentOS6にgtk3をインストールするのは困難を極めるそうです。
electronのGitレポジトリをみると、バージョン2.0.2でgtk2からgtk3を使うように変更があったようです1 。そこで、ちょっと古いバージョンのelectronを使うように修正します。
electronのダウングレード
一旦electronを削除して、古いバージョンをインストールし直します。
$ yarn remove electron
$ yarn add -D electron@1.8.7
必要なパッケージのインストール
electronを動かすのにいくつかのパッケージが必要なので、インストールします。
$ sudo yum install -y gtk2-2.24.23-9.el6.x86_64 \
    libXtst-1.2.3-1.el6.x86_64 \
    libXScrnSaver-1.2.2-2.el6.x86_64 \
    GConf2-2.28.0-7.el6.x86_64
$ sudo yum install -y libcanberra.x86_64 \
    libcanberra-devel.x86_64 \
    dejavu-lgc-sans-fonts
コラム: インストールすべきパッケージを調べるには?
yarn start を実行すると次のようなエラーメッセージが出て、libgtk-x11-2.0.so.0 という共有ライブラリがないことがわかります。
$ yarn start
yarn run v1.7.0
$ electron .
/home/vagrant/electron-api-demos/node_modules/electron/dist/electron: error while loading shared libraries: libgtk-x11-2.0.so.0: cannot open shared object file: No such file or directory
error Command failed with exit code 127.
info Visit https://yarnpkg.com/en/docs/cli/run for documentation about this command.
yum provides コマンドを使うと、特定の共有ライブラリが含まれるパッケージを検索することができます。では libgtk-x11-2.0.so.0 が含まれるパッケージを検索してみましょう。
$ yum provides libgtk-x11-2.0.so.0*
読み込んだプラグイン:fastestmirror, security
Loading mirror speeds from cached hostfile
 * base: ftp.iij.ad.jp
 * extras: ftp.iij.ad.jp
 * updates: ftp.iij.ad.jp
gtk2-2.24.23-9.el6.x86_64 : The GIMP ToolKit (GTK+), a library for creating GUIs
                          : for X
リポジトリー        : base
一致          :
その他        : libgtk-x11-2.0.so.0()(64bit)


gtk2-2.24.23-9.el6.i686 : The GIMP ToolKit (GTK+), a library for creating GUIs
                        : for X
リポジトリー        : base
一致          :
その他        : libgtk-x11-2.0.so.0
OSはCentOS6、64bitなので、gtk2-2.24.23-9.el6.x86_64をインストールすればよさそうだ、ということがわかります。
$ sudo yum install -y gtk2-2.24.23-9.el6.x86_64
再度 yarn start を実行すると、エラーメッセージが変化するはずなので同様な手順で必要なパッケージを検索してインストールしましょう。
libstdc++ のアップデート
yarn start を実行すると、次のようなエラーメッセージが表示されます。これは、CentOS6に含まれる libstdc++ のバージョンが古いことが原因です。
$ yarn start
yarn run v1.7.0
$ electron .
/home/vagrant/electron-api-demos/node_modules/electron/dist/electron: /lib64/libc.so.6: version `GLIBC_2.14' not found (required by /home/vagrant/electron-api-demos/node_modules/electron/dist/electron)
/home/vagrant/electron-api-demos/node_modules/electron/dist/electron: /lib64/libc.so.6: version `GLIBC_2.15' not found (required by /home/vagrant/electron-api-demos/node_modules/electron/dist/electron)
/home/vagrant/electron-api-demos/node_modules/electron/dist/electron: /usr/lib64/libstdc++.so.6: version `GLIBCXX_3.4.15' not found (required by /home/vagrant/electron-api-demos/node_modules/electron/dist/electron)
/home/vagrant/electron-api-demos/node_modules/electron/dist/electron: /usr/lib64/libstdc++.so.6: version `GLIBCXX_3.4.18' not found (required by /home/vagrant/electron-api-demos/node_modules/electron/dist/electron)
/home/vagrant/electron-api-demos/node_modules/electron/dist/electron: /usr/lib64/libstdc++.so.6: version `CXXABI_1.3.5' not found (required by /home/vagrant/electron-api-demos/node_modules/electron/dist/electron)
/home/vagrant/electron-api-demos/node_modules/electron/dist/electron: /usr/lib64/libstdc++.so.6: version `GLIBCXX_3.4.14' not found (required by /home/vagrant/electron-api-demos/node_modules/electron/dist/electron)
/home/vagrant/electron-api-demos/node_modules/electron/dist/electron: /usr/lib64/libstdc++.so.6: version `GLIBCXX_3.4.19' not found (required by /home/vagrant/electron-api-demos/node_modules/electron/dist/electron)
/home/vagrant/electron-api-demos/node_modules/electron/dist/electron: /lib64/libc.so.6: version `GLIBC_2.14' not found (required by /home/vagrant/electron-api-demos/node_modules/electron/dist/libnode.so)
/home/vagrant/electron-api-demos/node_modules/electron/dist/electron: /usr/lib64/libstdc++.so.6: version `GLIBCXX_3.4.18' not found (required by /home/vagrant/electron-api-demos/node_modules/electron/dist/libnode.so)
/home/vagrant/electron-api-demos/node_modules/electron/dist/electron: /usr/lib64/libstdc++.so.6: version `GLIBCXX_3.4.15' not found (required by /home/vagrant/electron-api-demos/node_modules/electron/dist/libnode.so)
/home/vagrant/electron-api-demos/node_modules/electron/dist/electron: /usr/lib64/libstdc++.so.6: version `GLIBCXX_3.4.14' not found (required by /home/vagrant/electron-api-demos/node_modules/electron/dist/libnode.so)
/home/vagrant/electron-api-demos/node_modules/electron/dist/electron: /usr/lib64/libstdc++.so.6: version `CXXABI_1.3.5' not found (required by /home/vagrant/electron-api-demos/node_modules/electron/dist/libnode.so)
/home/vagrant/electron-api-demos/node_modules/electron/dist/electron: /lib64/libc.so.6: version `GLIBC_2.14' not found (required by /home/vagrant/electron-api-demos/node_modules/electron/dist/libffmpeg.so)
error Command failed with exit code 1.
info Visit https://yarnpkg.com/en/docs/cli/run for documentation about this command.
次のコマンドで調べると、たしかにバージョンが古く、GLIBCXX_3.4.19などが見つからないことがわかります。
$  strings /usr/lib64/libstdc++.so.6 | grep GLIBCXX
GLIBCXX_3.4
GLIBCXX_3.4.1
GLIBCXX_3.4.2
GLIBCXX_3.4.3
GLIBCXX_3.4.4
GLIBCXX_3.4.5
GLIBCXX_3.4.6
GLIBCXX_3.4.7
GLIBCXX_3.4.8
GLIBCXX_3.4.9
GLIBCXX_3.4.10
GLIBCXX_3.4.11
GLIBCXX_3.4.12
GLIBCXX_3.4.13
GLIBCXX_FORCE_NEW
GLIBCXX_DEBUG_MESSAGE_LENGTH
こちらの記事を参考に、libstdc++ のアップデートを行いましょう。makeはとても時間がかかり、私の環境では3時間かかったので寝ている間にビルドしておきましょう。
CentOS 6 の stdlibc++ を更新する
http://dotnsf.blog.jp/archives/1064353059.html
アップデートができたことを確認しましょう。
$ strings /usr/lib64/libstdc++.so.6 | grep GLIBCXX
GLIBCXX_3.4
GLIBCXX_3.4.1
GLIBCXX_3.4.2
GLIBCXX_3.4.3
GLIBCXX_3.4.4
GLIBCXX_3.4.5
GLIBCXX_3.4.6
GLIBCXX_3.4.7
GLIBCXX_3.4.8
GLIBCXX_3.4.9
GLIBCXX_3.4.10
GLIBCXX_3.4.11
GLIBCXX_3.4.12
GLIBCXX_3.4.13
GLIBCXX_3.4.14
GLIBCXX_3.4.15
GLIBCXX_3.4.16
GLIBCXX_3.4.17
GLIBCXX_3.4.18
GLIBCXX_3.4.19
GLIBCXX_FORCE_NEW
GLIBCXX_DEBUG_MESSAGE_LENGTH
glibc のアップデート
こちらを参考に、glibcのアップデートをします。
harv/glibc-2.17_centos6.sh
https://gist.github.com/harv/f86690fcad94f655906ee9e37c85b174
wget http://copr-be.cloud.fedoraproject.org/results/mosquito/myrepo-el6/epel-6-x86_64/glibc-2.17-55.fc20/glibc-2.17-55.el6.x86_64.rpm
wget http://copr-be.cloud.fedoraproject.org/results/mosquito/myrepo-el6/epel-6-x86_64/glibc-2.17-55.fc20/glibc-common-2.17-55.el6.x86_64.rpm
wget http://copr-be.cloud.fedoraproject.org/results/mosquito/myrepo-el6/epel-6-x86_64/glibc-2.17-55.fc20/glibc-devel-2.17-55.el6.x86_64.rpm
wget http://copr-be.cloud.fedoraproject.org/results/mosquito/myrepo-el6/epel-6-x86_64/glibc-2.17-55.fc20/glibc-headers-2.17-55.el6.x86_64.rpm

sudo rpm -Uvh glibc-2.17-55.el6.x86_64.rpm \
    glibc-common-2.17-55.el6.x86_64.rpm \
    glibc-devel-2.17-55.el6.x86_64.rpm \
    glibc-headers-2.17-55.el6.x86_64.rpm --force --nodeps
うごいた