Serverless Frameworkが知らない間に Scala+sbtに対応していたので、
Lamda+APIGatewayで JSON を返す WebAPIを作成してみます。
この辺、キャッチアップを始めた段階で、Serverless Confが開催されて、Web+DB PRESSにServerless Frameworkの紹介記事が載ったので、なんか出遅れた感じがあります。
ただ、Serverless Framework + Scalaについてはほとんど誰も言及してないような雰囲気を感じたので、とりあえずWebAPIを動かすところまでをまとめました。

この記事でやること
- Serverless Frameworkのプロジェクトを作成する
- デフォルトで作成されたプロジェクトをAWS Lamdaに配備して動かす
- デフォルトで作成されたプロジェクトをAPIGateway経由で動かす
事前準備
Serverless Frameworkとsbt、aws cliがインストールされていることを前提に進めます。
プロジェクト作成
Serverless Frameworkがインストール済みであれば、 serverless コマンドが使えます。
ただ、タイプ数が多いので、この記事ではエイリアスの sls コマンドを使っていきます。
Serverless でプロジェクトを作成するには、 create コマンドを実行します。
とりあえず、-hオプションで、 create コマンドのヘルプを確認します。
$ sls create -h
Plugin: Create
create ........................ Create new Serverless service
    --template / -t (required) ......... Template for the service. Available templates: "aws-nodejs", "aws-python", "aws-java-maven", "aws-java-gradle" and "aws-scala-sbt"
    --path / -p ........................ The path where the service should be created (e.g. --path my-service)
    --name / -n ........................ Name for the service. Overwrites the default name of the created service.
出力されたとおり、Serverlessは下記のテンプレートが用意されています
- aws-nodejs
- aws-python
- aws-java-maven
- aws-java-gradle
- aws-scala-sbt
今回は、表題の通り aws-scala-sbt を選択して、 hello-sls という名前のプロジェクトを作ります。
--pathオプションは、省略すればカレントディレクトリがプロジェクトのルートディレクトリとして扱われます。
今回は、とりあえず sls-sbt というディレクトリ以下にプロジェクトを作成することにします。
$ sls create -t aws-scala-sbt -p sls-sbt -n hello-sls
Serverless: Creating new Serverless service…
Serverless: Creating the service in "/home/k2/ProgramProjects/js/sls-sbt"
 _______                             __
|   _   .-----.----.--.--.-----.----|  .-----.-----.-----.
|   |___|  -__|   _|  |  |  -__|   _|  |  -__|__ --|__ --|
|____   |_____|__|  \___/|_____|__| |__|_____|_____|_____|
|   |   |             The Serverless Application Framework
|       |                           serverless.com, v1.0.3
 -------'

Serverless: Successfully created service with template: "aws-scala-sbt"

$ ls
sls-sbt/
sls-sbt というディレクトリが作成されています。
プロジェクト構造
作成された sls-sbt の中を確認すると以下のようになっています。
sls-sbt/
▾ project/
    assembly.sbt
    plugins.sbt
▾ src/
  ▾ main/
    ▾ scala/
      ▾ hello/
          Handler.scala
          Request.scala
          Response.scala
  build.sbt
  event.json
  serverless.yml
とりあえずデプロイ
一旦、できたままのプロジェクトをAWSに配備して、動かしてみます。
配備の前に、 serverless.yml を確認します。
下記は、createコマンドで生成された serverless.yml です。
# Welcome to Serverless!
#
# This file is the main config file for your service.
# It's very minimal at this point and uses default values.
# You can always add more config options for more control.
# We've included some commented out config examples here.
# Just uncomment any of them to get that config option.
#
# For full config options, check the docs:
#    docs.serverless.com
#
# Happy Coding!

service: hello-sls

provider:
  name: aws
  runtime: java8

# you can overwrite defaults here
#  stage: dev
#  region: us-east-1

# you can add statements to the Lambda function's IAM Role here
#  iamRoleStatements:
#    - Effect: "Allow"
#      Action:
#        - "s3:ListBucket"
#      Resource: { "Fn::Join" : ["", ["arn:aws:s3:::", { "Ref" : "ServerlessDeploymentBucket" } ] ]  }
#    - Effect: "Allow"
#      Action:
#        - "s3:PutObject"
#      Resource:
#        Fn::Join:
#          - ""
#          - - "arn:aws:s3:::"
#            - "Ref" : "ServerlessDeploymentBucket"

# you can add packaging information here
package:
#  include:
#    - include-me.java
#  exclude:
#    - exclude-me.java
  artifact: target/scala-2.11/hello.jar

functions:
  hello:
    handler: hello.Handler

#    The following are a few example events you can configure
#    NOTE: Please make sure to change your handler code to work with those events
#    Check the event documentation for details
#    events:
#      - http:
#          path: users/create
#          method: get
#      - s3: ${env:BUCKET}
#      - schedule: rate(10 minutes)
#      - sns: greeter-topic
#      - stream: arn:aws:dynamodb:region:XXXXXX:table/foo/stream/1970-01-01T00:00:00.000

# you can add CloudFormation resource templates here
# resources:
#  Resources:
#    NewResource:
#      Type: AWS::S3::Bucket
#      Properties:
#        BucketName: my-new-bucket
#  Outputs:
#     NewOutput:
#       Description: "Description for the output"
#       Value: "Some output value"
コメント行を除くと、下記の通り必要な設定は僅かです。。
service: hello-sls

provider:
  name: aws
  runtime: java8

package:
  artifact: target/scala-2.11/hello.jar

functions:
  hello:
    handler: hello.Handler
provider
providerは FaaS(Function as a Service)を提供するクラウドサービスを指定します。
今は、AWSしか対応していませんが、今後GCPやAzureも対応する予定みたいです。
AWS Lambdaは nodejs, python, Javaのコードを実行できます。
今回は、Scalaのコードからjarファイルを生成するので、Java8をが選択されています。
package
AWS Lambdaに配備する jarファイルのファイルパスが指定されています。
functions
実行する Lambda Functionを設定してます。
handler には、実行するHandlerクラスを指定します。
デプロイする
予め、aws-cliで configure を実行しておいてください。
もし、profileに名前をつけているなら、serverless.yml の L18あたりを編集して、下記のように provider に profile を追加してください。
provider:
  name: aws
  runtime: java8
  profile: my_profile # <= 追加 profile名を指定
serverless.ymlの設定ができたら、sbt assembly で jarファイルを作り、sls deployでAWSにデプロイします。
$ sbt assembly

$ ls target/scala-2.11
classes  hello.jar

$ sls deploy --verbose
Serverless: Uploading CloudFormation file to S3…
Serverless: Uploading service .zip file to S3…
Serverless: Updating Stack…
Serverless: Checking Stack update progress…
CloudFormation - UPDATE_IN_PROGRESS - AWS::CloudFormation::Stack - hello-sls-dev
CloudFormation - CREATE_IN_PROGRESS - AWS::IAM::Role - IamRoleLambdaExecution
CloudFormation - CREATE_IN_PROGRESS - AWS::IAM::Role - IamRoleLambdaExecution
CloudFormation - CREATE_COMPLETE - AWS::IAM::Role - IamRoleLambdaExecution
CloudFormation - CREATE_IN_PROGRESS - AWS::IAM::Policy - IamPolicyLambdaExecution
CloudFormation - CREATE_IN_PROGRESS - AWS::Lambda::Function - HelloLambdaFunction
CloudFormation - CREATE_IN_PROGRESS - AWS::Lambda::Function - HelloLambdaFunction
CloudFormation - CREATE_COMPLETE - AWS::Lambda::Function - HelloLambdaFunction
CloudFormation - CREATE_IN_PROGRESS - AWS::IAM::Policy - IamPolicyLambdaExecution
CloudFormation - CREATE_COMPLETE - AWS::IAM::Policy - IamPolicyLambdaExecution
CloudFormation - UPDATE_COMPLETE_CLEANUP_IN_PROGRESS - AWS::CloudFormation::Stack - hello-sls-dev
CloudFormation - UPDATE_COMPLETE - AWS::CloudFormation::Stack - hello-sls-dev
Serverless: Stack update finished…

Service Information
service: hello-sls
stage: dev
region: us-east-1
api keys:
  None
endpoints:
  None
functions:
  hello-sls-dev-hello: arn:aws:lambda:us-east-1:xxxxxxxxxxxx:function:hello-sls-dev-hello

Stack Outputs
HelloLambdaFunctionArn: arn:aws:lambda:us-east-1:xxxxxxxxxxxx:function:hello-sls-dev-hello
ServerlessDeploymentBucketName: hello-sls-dev-serverlessdeploymentbucket-xxxxxxxxxxxxx
これで、AWS Lambdaに hello.jar が配備できました。
AWSマネジメントコンソールから、確認しましょう。
https://console.aws.amazon.com/lambda/home?region=us-east-1#/functions?display=listにアクセスします。
Lambdaの利用が始めてなら、下記のようなページが表示されるかもしれません。表示されたら、 GEt Started Now ボタンを押してください。
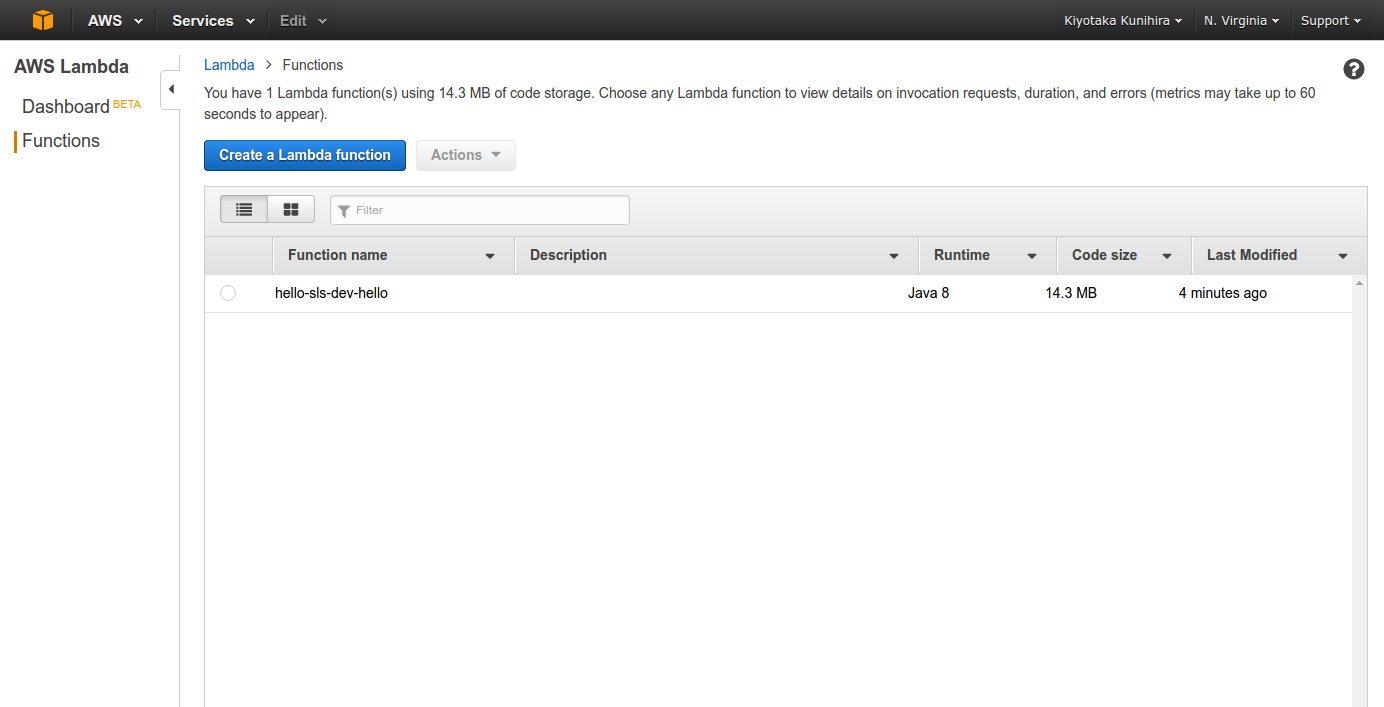
AWS Lambdaのコンソールで、 Functions を選択して、 hello-sls-dev-hello が一覧に出ていれば、配備は成功です。
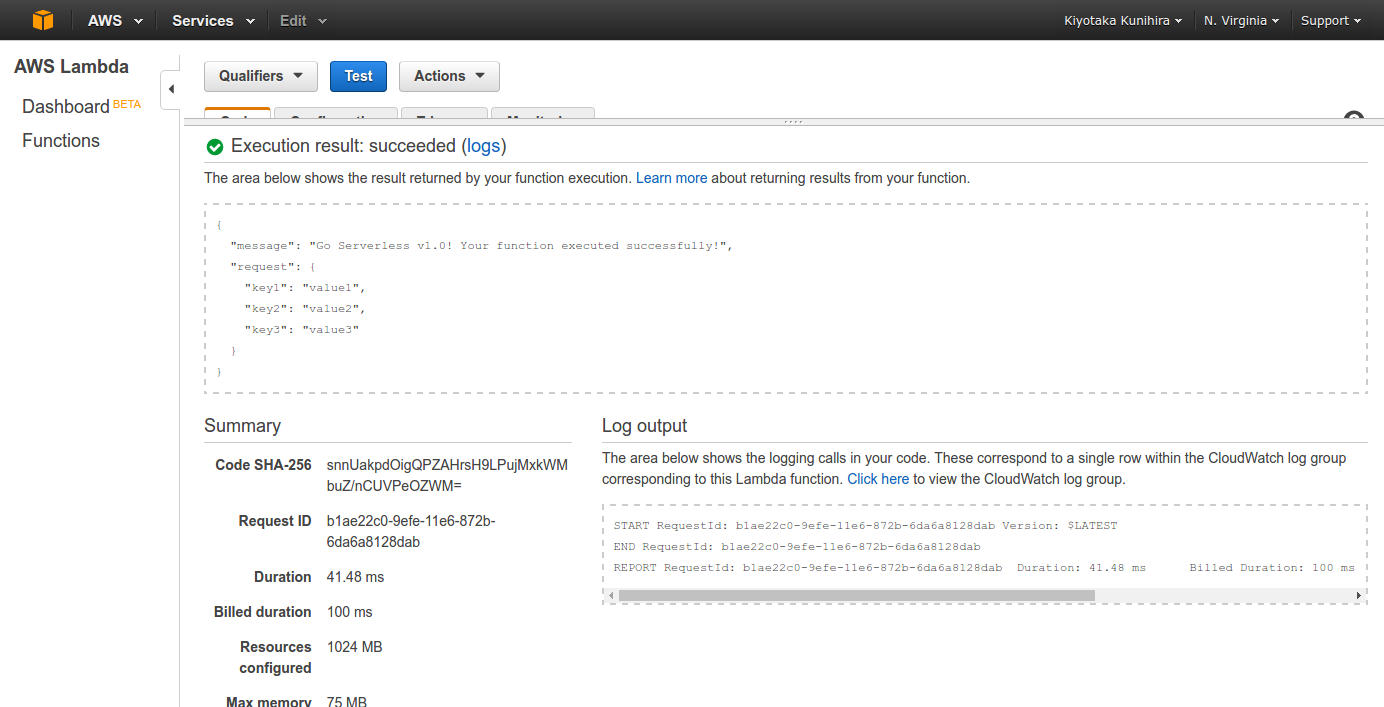
一覧から、選択して、「Test」 -> ダイアログ下部の「Save and test」をクリックしてください。
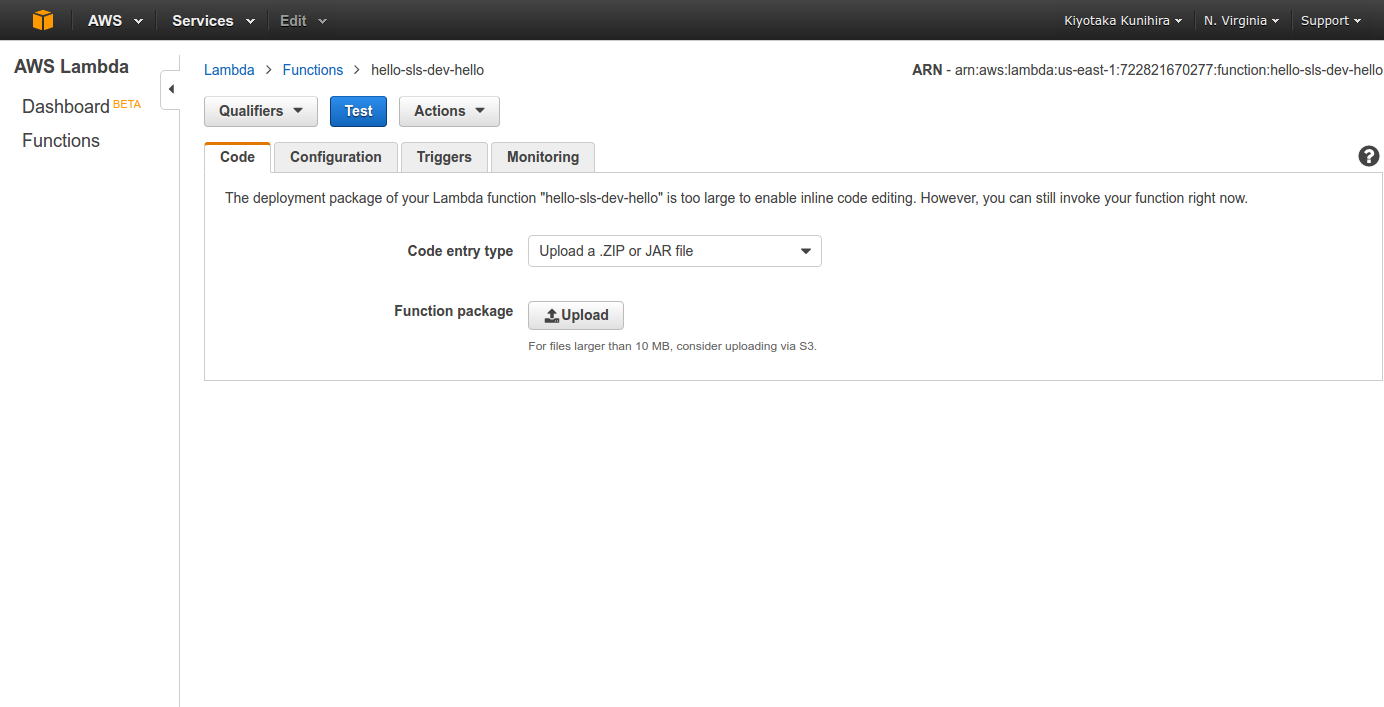
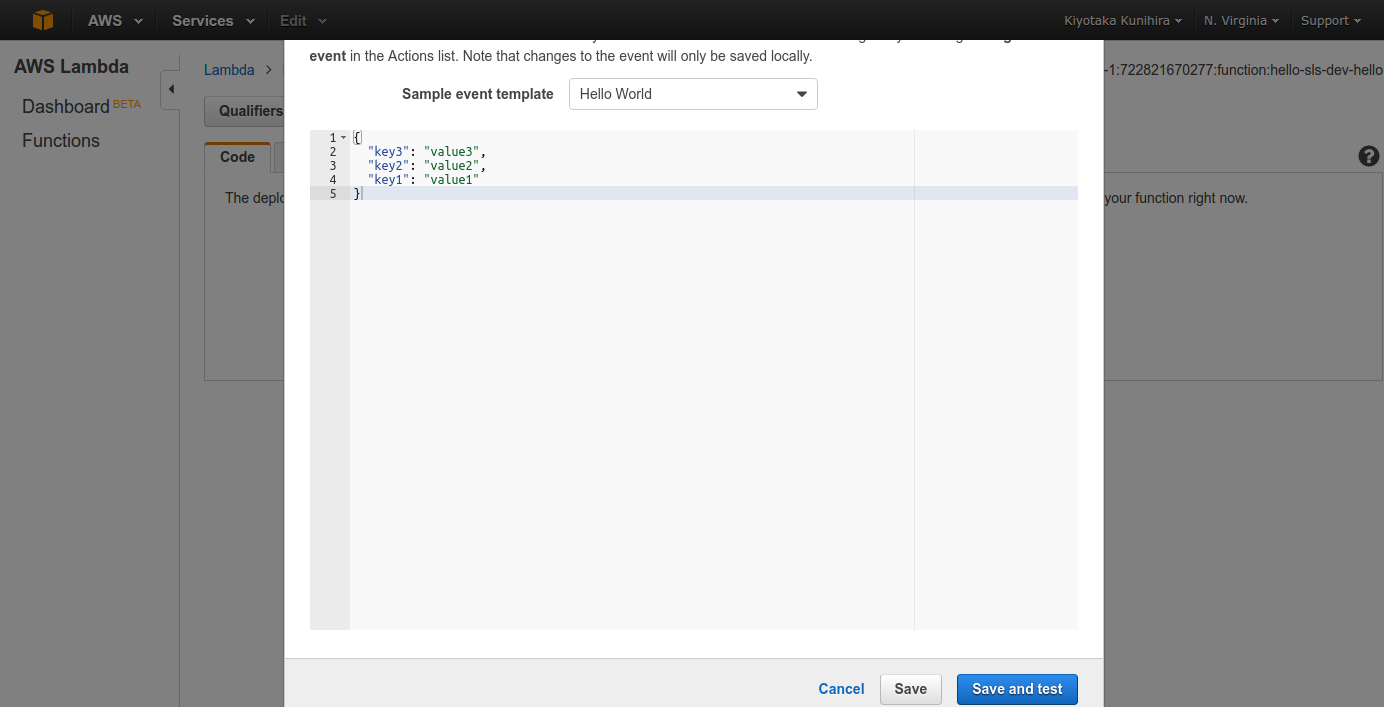
配備した、Lambda Fuctionがテスト実行されます。
下記の様にExecution result: succeededと表示されていれば成功です。
API Gatewayの利用
AWS Lamdaの結果としてJSONを返せる用になりました。
この状態だと、Lamba単体で動作するだけで、WebAPIとしては利用できません。
WebAPIとして利用するには、AWS API Gatewayでリクエストを取得し、API GatewayからLambdaを起動して、結果を返す必要があります。
このAPI Gatewayの設定も serverless.yml を編集するだけで、設定可能です。
serverless.ymlの L55-58をコメントインしてください。
events:
  - http:
    path: users/create
    method: get
events
eventsにはfunctionを実行するきっかけになる eventsを設定していきます。
上記の例だと、 httpのGETリクエストが users/create に届いたら、functionが実行されます。
providerでAWSが設定されているので、この設定は、 API Gatewayに自動で反映されます。
デプロイ
serverless.ymlを編集したら、再度 deployコマンドを実行します。
下記では--verboseオプションを追加して詳細な実行ログを出力しています。
ログの中で、 APIGatewayが作成されているのがわかります。
$ sls deploy --verbose

Serverless: Removing old service versions…
Serverless: Uploading CloudFormation file to S3…
Serverless: Uploading service .zip file to S3…
Serverless: Updating Stack…
Serverless: Checking Stack update progress…
CloudFormation - UPDATE_IN_PROGRESS - AWS::CloudFormation::Stack - hello-sls-dev
CloudFormation - UPDATE_IN_PROGRESS - AWS::Lambda::Function - HelloLambdaFunction
CloudFormation - UPDATE_COMPLETE - AWS::Lambda::Function - HelloLambdaFunction
CloudFormation - CREATE_IN_PROGRESS - AWS::ApiGateway::Deployment - ApiGatewayDeployment1477874275929
CloudFormation - CREATE_IN_PROGRESS - AWS::ApiGateway::Deployment - ApiGatewayDeployment1477874275929
CloudFormation - CREATE_COMPLETE - AWS::ApiGateway::Deployment - ApiGatewayDeployment1477874275929
CloudFormation - UPDATE_COMPLETE_CLEANUP_IN_PROGRESS - AWS::CloudFormation::Stack - hello-sls-dev
CloudFormation - DELETE_IN_PROGRESS - AWS::ApiGateway::Deployment - ApiGatewayDeployment1477874208078
CloudFormation - DELETE_COMPLETE - AWS::ApiGateway::Deployment - ApiGatewayDeployment1477874208078
CloudFormation - UPDATE_COMPLETE - AWS::CloudFormation::Stack - hello-sls-dev
Serverless: Stack update finished…

Service Information
service: hello-sls
stage: dev
region: us-east-1
api keys:
  None
endpoints:
  GET - https://xxxxxxxxxx.execute-api.us-east-1.amazonaws.com/dev/users/create
functions:
  hello-sls-dev-hello: arn:aws:lambda:us-east-1:722821670277:function:hello-sls-dev-hello

Stack Outputs
HelloLambdaFunctionArn: arn:aws:lambda:us-east-1:722821670277:function:hello-sls-dev-hello
ServiceEndpoint: https://cl6vizr70l.execute-api.us-east-1.amazonaws.com/dev
ServerlessDeploymentBucketName: hello-sls-dev-serverlessdeploymentbucket-11rvb21p1b9vf
動作確認
deploy コマンドが成功すると、ログ出力の最後に、 endpointが表示されます。
ブラウザで、ここに表示されたURLにアクセスしてみます。
すると、エラーが表示されます。
エラーの調査
APIGatewayのテストをマネジメントコンソール上から行ってみます。
https://console.aws.amazon.com/apigateway/home?region=us-east-1#/apis にアクセスします。
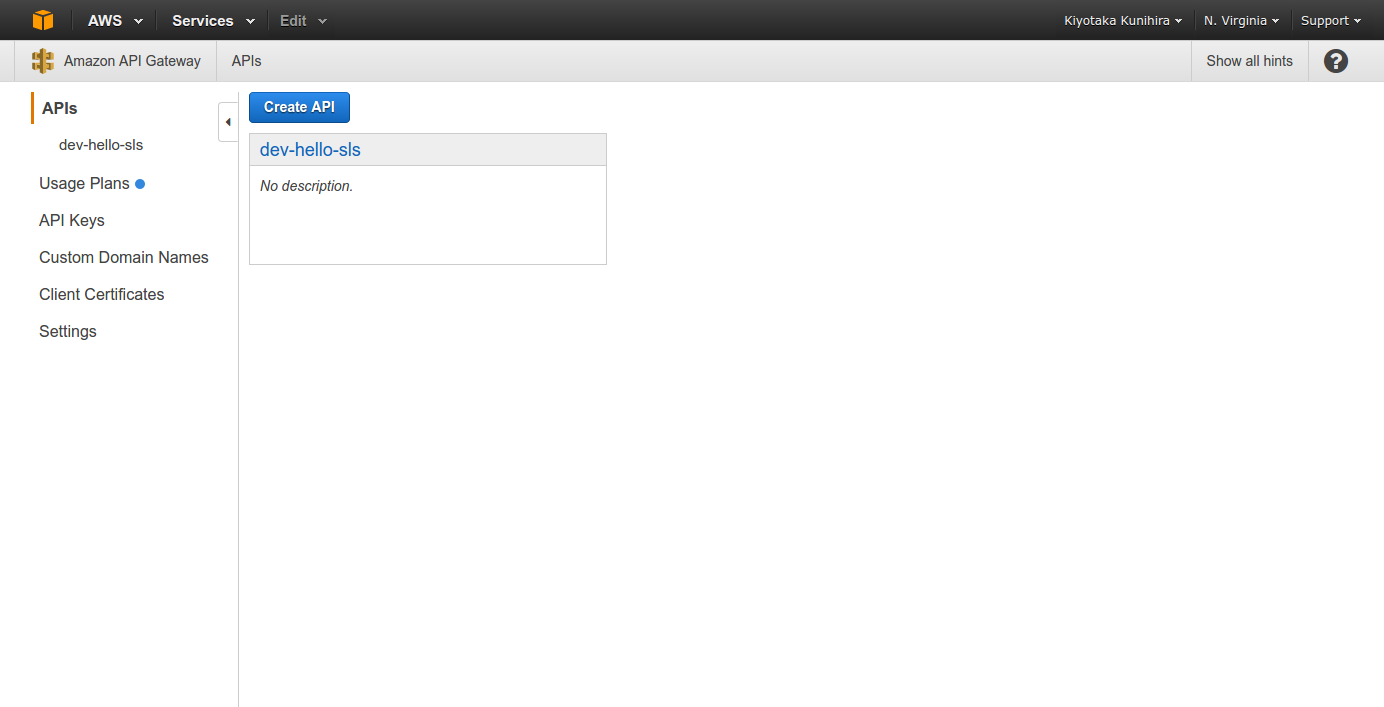
APIs に dev-hello-slsが表示されているはずです。APIGatewayの作成は成功していることがわかります。
「dev-hello-sls」 -> 「Resources」 で作成した urlパスが表示されます。 「/ users / create」のGETをクリックすると、画面右側にGatewayの動作が表示されます。
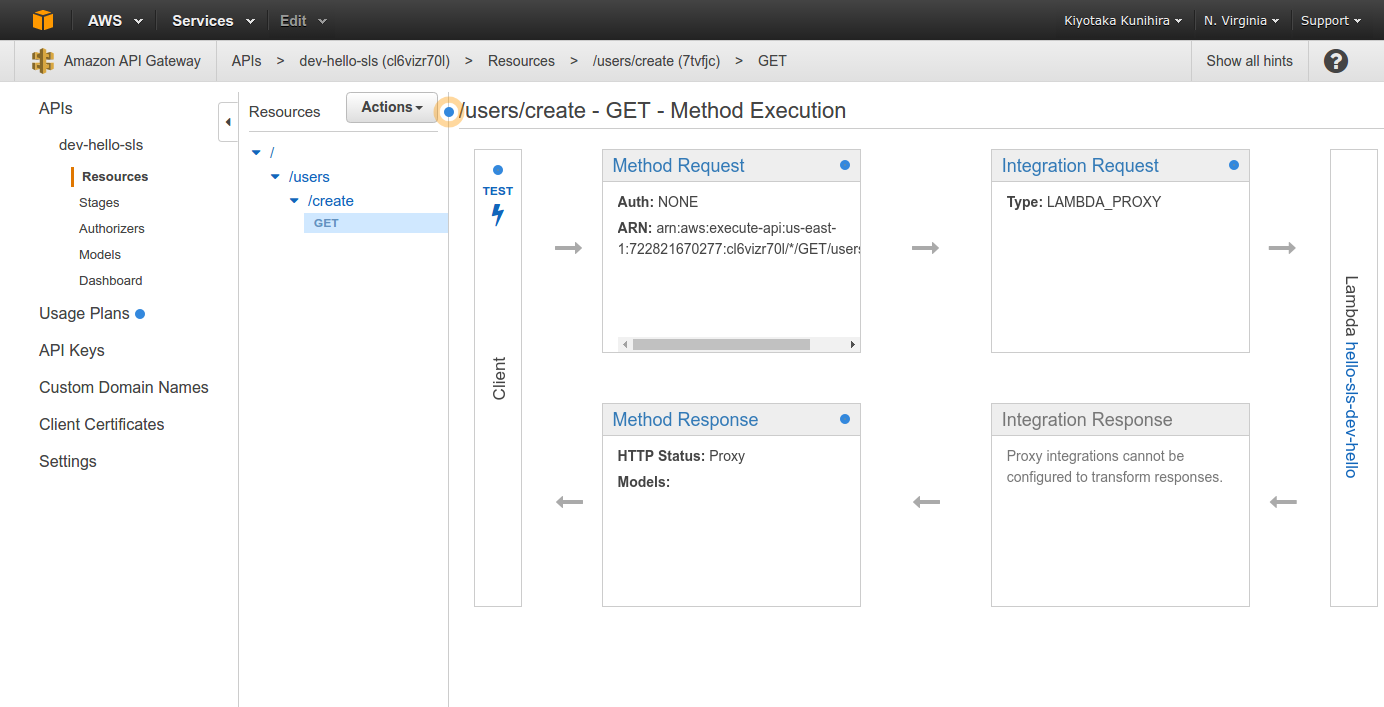
APIGatewayが受けたリクエストが、Lambda Functionに渡されて、その結果がまたAPIGatewayから出て行くフローがわかります。
この画面の「Test」をクリックするとリクエストの動作確認ができます。
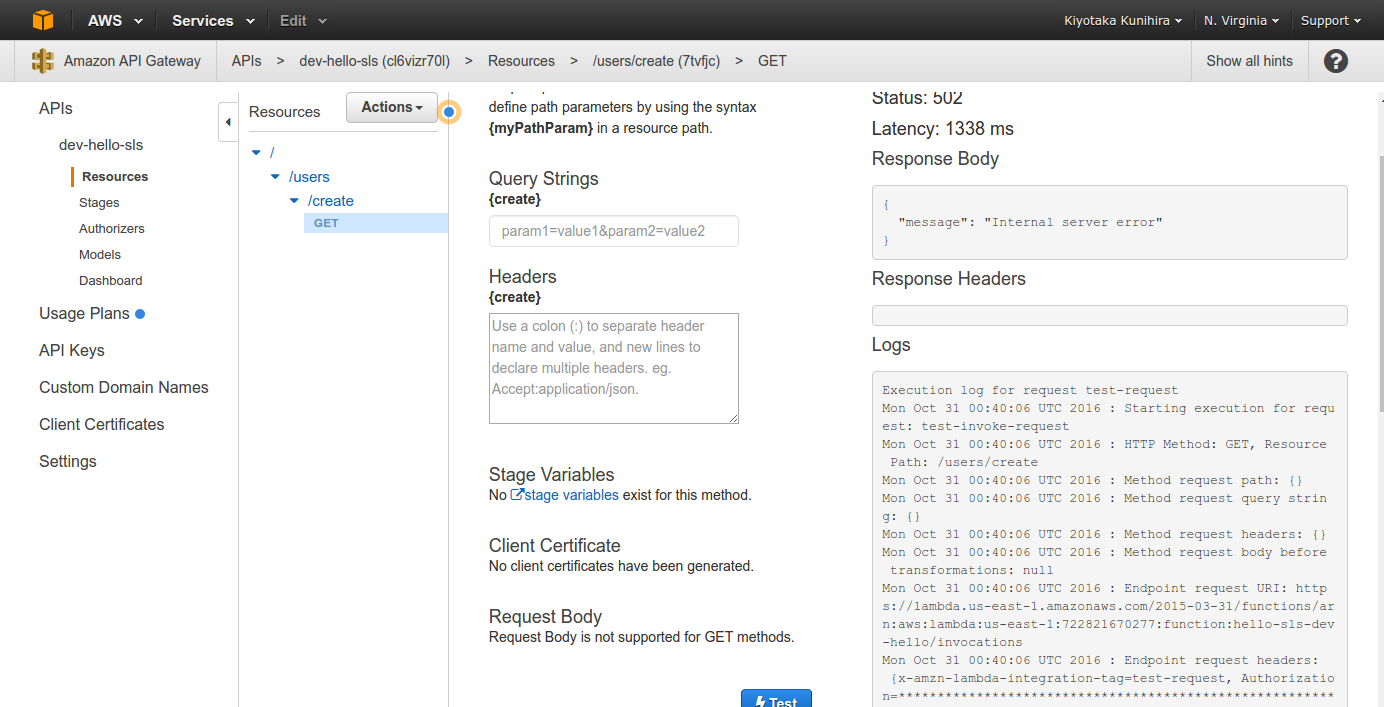
QueryやHeaderは、今は特に必要ないので、 何も入力せず画面下部の 「Test」ボタンをクリックしてください。
すると、更に右側に画面のようにResponseとLogが表示されます。
APIが呼ばれた時に、 502 を返していることがわかります。
Logには下記のように出力されている部分があります。
Mon Oct 31 00:40:08 UTC 2016 : Endpoint response body before transformations: {"message":"Go Serverless v1.0! Your function executed successfully!","request":{"key1":"","key2":"","key3":""}}
Mon Oct 31 00:40:08 UTC 2016 : Endpoint response headers: {x-amzn-Remapped-Content-Length=0, x-amzn-RequestId=9207e24e-9f02-11e6-8b70-a134e8412dfa, Connection=keep-alive, Content-Length=112, Date=Mon, 31 Oct 2016 00:40:07 GMT, Content-Type=application/json}
Mon Oct 31 00:40:08 UTC 2016 : Execution failed due to configuration error: Malformed Lambda proxy response
Mon Oct 31 00:40:08 UTC 2016 : Method completed with status: 502
このログから、 Lamda Functionは実行されて {"message":"Go Serverless v1.0! Your function executed successfully!","request":{"key1":"","key2":"","key3":""}} を返していることがわかります。
また、 Execution failed due to configuration error: Malformed Lambda proxy response とあるので、何かしらLamdaが返すレスポンスのフォーマットに問題があるようです。
この情報を頼りに、AWSのドキュメントを当たると下記の情報が見つかりました。
AWS Documentation | Configure Proxy Integration for a Proxy Resource
{
    "statusCode": httpStatusCode,
    "headers": { "headerName": "headerValue", ... },
    "body": "..."
}
APIGateway経由で、Lamdaの結果を返すには、Lamda Functionが 上記のフォーマットでレスポンスを返す必要があるようです。
フォーマット修正
ここから、APIGatewayのフォーマットに対応していきます。
まず、ScalaでJSONを楽に扱うために、skinny-jsonを使えるようにします。
プロジェクト直下にある build.sbt の libraryDependenciesを下記の用に編集してください。
libraryDependencies ++= Seq(
  "com.amazonaws" % "aws-lambda-java-events" % "1.1.0",
  "com.amazonaws" % "aws-lambda-java-core" % "1.1.0",
  "org.skinny-framework" %% "skinny-json" % "1.3.20"
)
次に、 APIGatewayのフォーマットに沿うレスポンスになるように、 src/main/scala/hello/Response.scala を編集します。
package hello

import scala.beans.BeanProperty
import skinny.util.JSONStringOps._

case class Response(@BeanProperty body: String, @BeanProperty headers: Map[String, String], @BeanProperty statusCode: Int)
object Response {
  val contentJson = "Content-Type" -> "application/json"
  def apply(body: Map[String, Any], headers: Map[String, String] = Map(contentJson), statusCode: Int = 200) = {
    new Response(toJSONString(body), headers, statusCode)
  }
}
Responseクラスが、 body, headers, statusCode を持つように編集するだけです。
コンパニオンオブジェクトに def apply(body: Map[String, Any], headers: Map[String, String], statusCode: Int): Response の apply メソッドを追加して、呼び出し側がJSONに依存しなくていいようにしてあります。
最後に、Handler を修正します。
Response側でJSONを作ってくれるので、 src/main/scala/hello/Handler.scala 内の handleRequest メソッドを下記の用に少し変えればOKです。
package hello

import com.amazonaws.services.lambda.runtime.{Context, RequestHandler}

class Handler extends RequestHandler[Request, Response] {

  def handleRequest(input: Request, context: Context): Response = {
    return Response(Map("message" -> "Go Serverless v1.0! Your function executed successfully!", "request" -> input))
  }
}
再デプロイ
ここまで完了したら、再度 jar ファイルを作りなおして、配備し直します。
$ sbt assembly

$ sls deploy
APIGatewayからテストすると、Statusが 200になっているはずです。
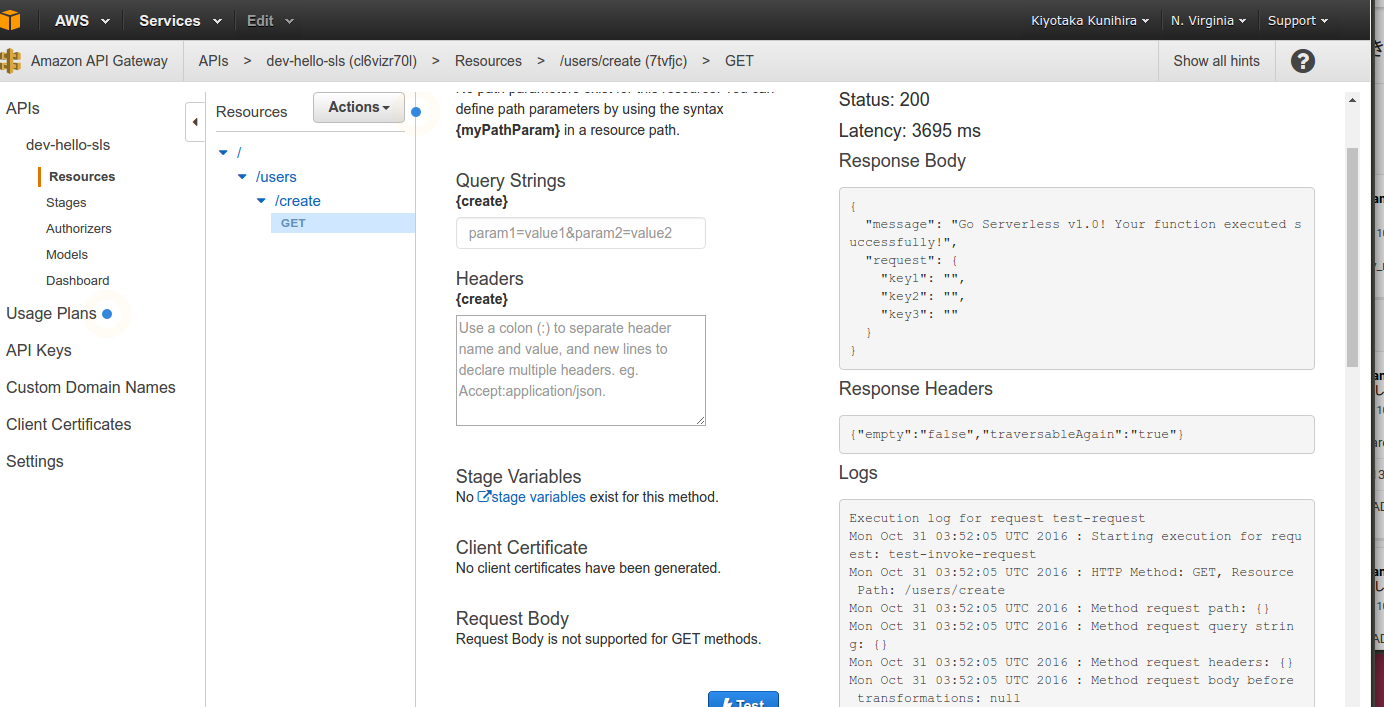
200が帰ってくることが確認できれば、ブラウザからもアクセスしてみて動作確認してください。
まとめ
Serverless Frameworkを使って、Scala製WebAPIを作ることができました。
デフォルトで生成されたFunctionの場合、ScalaだとAPIGatewayを通した時にエラーになってしまいましたが、その点も修正して対応できました。
これがnodejs テンプレートの場合は、コードを修正する必要なく、APIGateway経由で実行できます。
この点が少し不満なのですが、ServerlessFrameworkは、まだまだ開発が進んでいくのでいずれ公式で対応されるかと思います。
Serverless Frameworkを使ってみた所感としては、Serverless Frameworkはクラウドサービスのcliラッパー的に動作していて、非常に楽に Serverless Architectureの構成を配備することができます。
完全な抽象化ではなくて、やはりAWSの各サービスの知識は必要ですし、今後GCPやAzureへの対応が進んだ場合には、それぞれのクラウドサービスの知識が必要になると思います。
しかし、設定を1箇所にまとめて、少ないコマンドで配備できるという点で、FaaSを用いた Serverless Architectureの開発、運用を進めていくうえでは便利に利用できそうです。