はじめに
SwiftにてFSCalendarを使った簡単なカレンダー作成方法を紹介します。
動作環境
- Swift3.0
- CocoaPods 1.3.1
- Xcode 9.1
- macOS Sierra 10.12.6
- CalculateCalendarLogic 0.1.5
- FSCalendar 2.7.9
CocoaPods環境設定
CocoaPodsを既に導入済みの場合は飛ばしてください。
CocoaPodsを未導入の方はターミナルを開いて以下のコマンドを実行します。
最初のコマンドはインストールです。
$ sudo gem install cocoapods
インストールが完了後、次にセットアップを行います。
$ pod setup
これで完了です。
プロジェクト作成
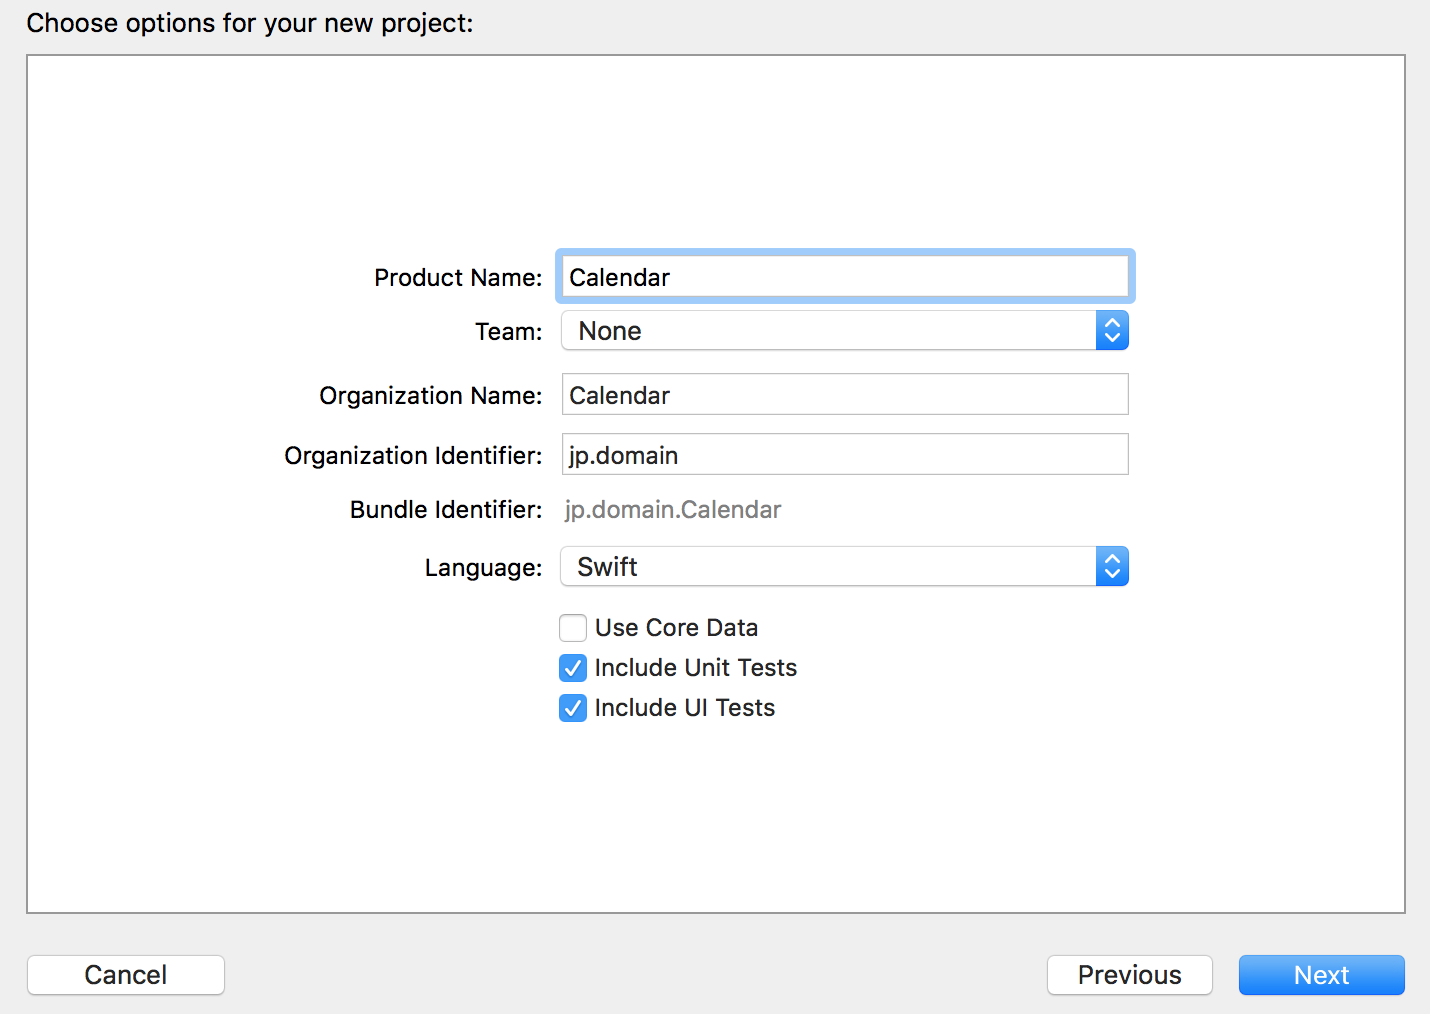
Xcodeを起動して、新規プロジェクト(SingleViewApp)を作成します。

今回はプロジェクト名をCalendarにしました。Teamに関しては各自のAppleIDを使用してください。
ライブラリ導入
CocoaPodsの導入
今回カレンダーの表示用としてFSCalendarを、祝日判定用としてCalculateCalendarLogicを使用します。
ターミナルを起動して、下図のようにxcodeprojがあるフォルダのところまで移動します。
$ ls
Calendar           CalendarTests
Calendar.xcodeproj CalendarUITests
プロジェクトへCocoaPodsを導入するために下記のコマンド実行します。
$ pod init
実行後、ディレクトリ内にPodfileが作成されれば成功です。
CocoaPodsからライブラリの導入
作成されたPodfileを $ vim Podfile で開くと以下のような内容になっています。
# Uncomment the next line to define a global platform for your project
# platform :ios, '9.0'
target 'Calendar' do
  # Comment the next line if you're not using Swift and don't want to use dynamic frameworks
  use_frameworks!

  # Pods for Calendar
  target 'CalendarTests' do
    inherit! :search_paths
    # Pods for testing
  end
  target 'CalendarUITests' do
    inherit! :search_paths
    # Pods for testing
  end
end
今回使用するライブラリはFSCalendarとCalculateCalendarLogicなので、以下のように2行追加します。
  # Comment the next line if you're not using Swift and don't want to use dynamic frameworks
  use_frameworks!

  //追加
  pod 'FSCalendar'
  pod 'CalculateCalendarLogic'

  # Pods for Calendar
  target 'CalendarTests' do
編集が終わったら以下のコマンドでインストールをします。
$ pod install
(既にCocoaPodsを利用して、ライブラリを導入していた場合は$pod updateを実行してください)
インストールが完了したら、プロジェクトファイルに<プロジェクト名>.xcworkspaceが作成されます。今後はこのファイルを使用します。
カレンダー作成
カレンダーの表示
上記で述べたように、今後の作業は<プロジェクト名>.xcworkspaceで行います。
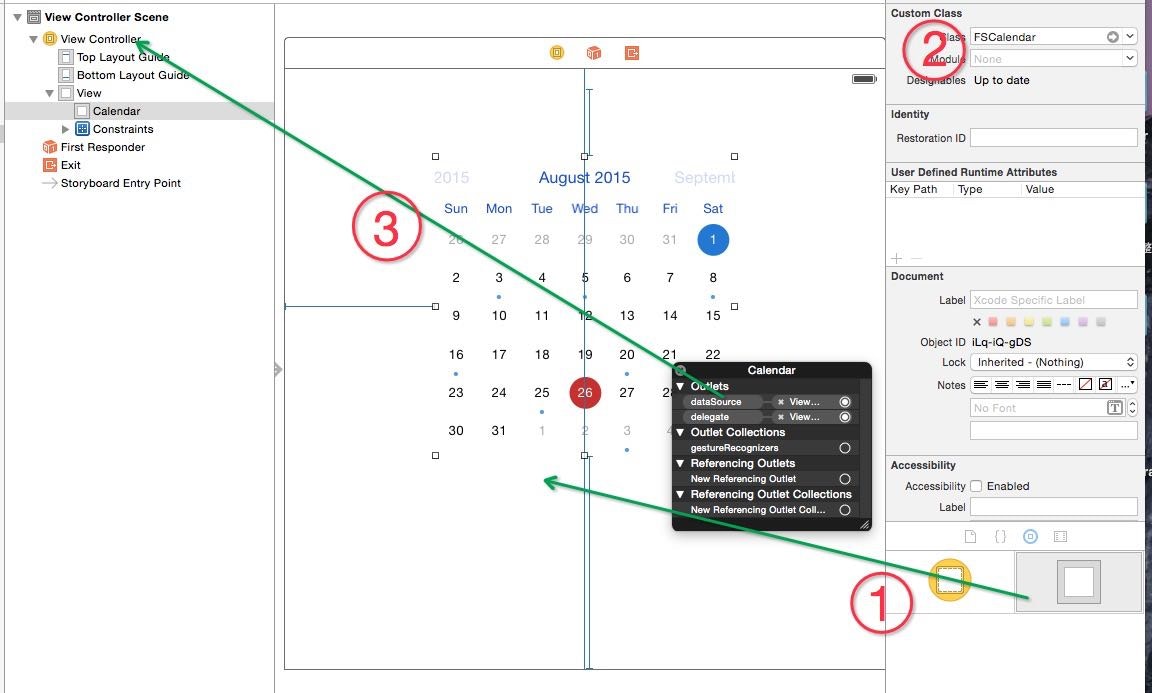
①ます最初に、カレンダーを表示させたい場所にViewを配置します。
②次に配置したViewのCustom ClassをFSCalendarにします。
③その後ViewのdataSourceとdelegateをViewControllerに結びつけます。
(ViewControllerの名前がDataSourceやDelegateに変わっても問題はないです)

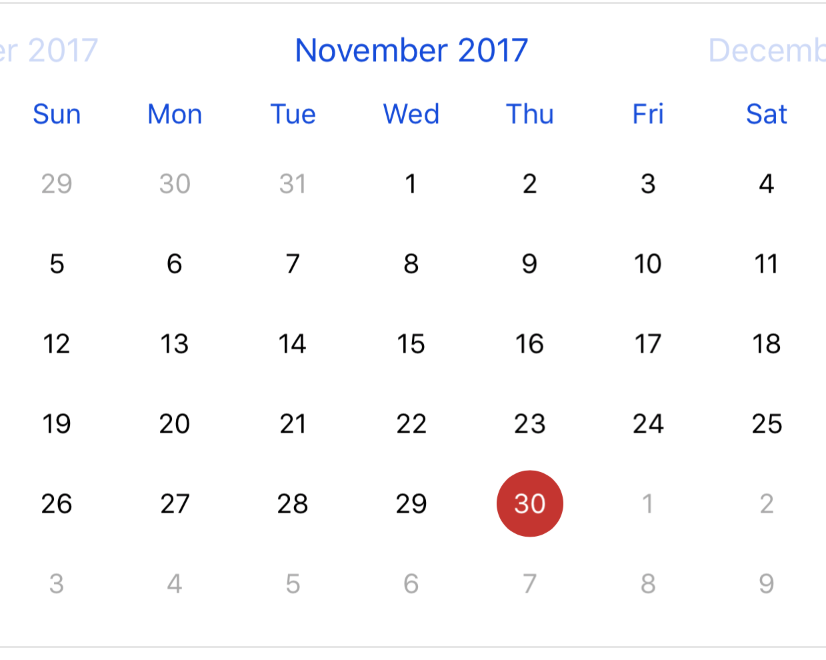
この状態で実行すると以下のようになります。

これでカレンダーの表示ができました!しかしこの段階では祝日の登録がされておらず、一目ではわかりにくくなっています.ここで先に導入したCalculateCalendarLogicが役に立ちます。
祝日判定の追加
CalculateCalendarLogicは以下のような関数が定義されています。
/* CalculateCalendarLogic.swift /
public func judgeJapaneseHoliday(year: Int, month: Int, day: Int) -> Bool {
/*
*
* - Description judge japanese holiday
* - parameter year: year value (Int)
* - parameter month: month value (Int)
* - parameter day: day value (Int)
* - returns: result (Bool)
}
この関数は、(年、月、日)を送ることで祝日ならTrue、通常の日ならfalseを返す関数です。
上記の関数を、カレンダーを表示するViewを配置したViewControllerのプログラムに用いることで祝日の判定をすることができます。
以下に祝日か日曜日なら赤色、土曜日を青色にするプログラムの例を示します。
import UIKit
import FSCalendar
import CalculateCalendarLogic

class ViewController: UIViewController,FSCalendarDelegate,FSCalendarDataSource,FSCalendarDelegateAppearance{

    @IBOutlet weak var calendar: FSCalendar!


    override func viewDidLoad() {
        super.viewDidLoad()
        // デリゲートの設定
        self.calendar.dataSource = self
        self.calendar.delegate = self

    }

    override func didReceiveMemoryWarning() {
        super.didReceiveMemoryWarning()
        // Dispose of any resources that can be recreated.
    }

    fileprivate let gregorian: Calendar = Calendar(identifier: .gregorian)
    fileprivate lazy var dateFormatter: DateFormatter = {
        let formatter = DateFormatter()
        formatter.dateFormat = "yyyy-MM-dd"
        return formatter
    }()

    // 祝日判定を行い結果を返すメソッド(True:祝日)
    func judgeHoliday(_ date : Date) -> Bool {
        //祝日判定用のカレンダークラスのインスタンス
        let tmpCalendar = Calendar(identifier: .gregorian)

        // 祝日判定を行う日にちの年、月、日を取得
        let year = tmpCalendar.component(.year, from: date)
        let month = tmpCalendar.component(.month, from: date)
        let day = tmpCalendar.component(.day, from: date)

        // CalculateCalendarLogic():祝日判定のインスタンスの生成
        let holiday = CalculateCalendarLogic()

        return holiday.judgeJapaneseHoliday(year: year, month: month, day: day)
    }
    // date型 -> 年月日をIntで取得
    func getDay(_ date:Date) -> (Int,Int,Int){
        let tmpCalendar = Calendar(identifier: .gregorian)
        let year = tmpCalendar.component(.year, from: date)
        let month = tmpCalendar.component(.month, from: date)
        let day = tmpCalendar.component(.day, from: date)
        return (year,month,day)
    }

    //曜日判定(日曜日:1 〜 土曜日:7)
    func getWeekIdx(_ date: Date) -> Int{
        let tmpCalendar = Calendar(identifier: .gregorian)
        return tmpCalendar.component(.weekday, from: date)
    }

    // 土日や祝日の日の文字色を変える
    func calendar(_ calendar: FSCalendar, appearance: FSCalendarAppearance, titleDefaultColorFor date: Date) -> UIColor? {
        //祝日判定をする(祝日は赤色で表示する)
        if self.judgeHoliday(date){
            return UIColor.red
        }

        //土日の判定を行う(土曜日は青色、日曜日は赤色で表示する)
        let weekday = self.getWeekIdx(date)
        if weekday == 1 {   //日曜日
            return UIColor.red
        }
        else if weekday == 7 {  //土曜日
            return UIColor.blue
        }

        return nil
    }

}
上記のプログラムを実行すると、以下のようになります。

これで見やすいカレンダーができました!
最後に
今回Swiftを使って簡単にカレンダーを表示することができました。
しかし実際の機能を考えると、予定を書き込めたり、イベントの有無の表示が必要になってくると思います。この機能はrealmやtextViewをもちいることにより追加できますが、作成手順が少し難しくなってくるので質問やコメントがあった場合、また記事を作成していこうと思います。
おまけ
1.カレンダータップイベントの取得
カレンダーのタップイベントは以下の関数となっています。
func calendar(_ calendar: FSCalendar, didSelect date: Date, at monthPosition: FSCalendarMonthPosition){}
上記の関数に以下のコードを追加することで、タッチした日付を取得できます。
let selectDay = getDay(date)
もちろんselectDayには(year, month,day)が入るようになっています。
2.カレンダーヘッダーの変更
初期の状態では "英語の月+年"となっています。
これを通常のように"年+月"の形に変更する方法として、storyboardに配置したカレンダーのinspectorのHeader Date...の部分を以下のようにすることで変更できます。

3.カレンダーのモード変更
FSCalendarの初期設定は月ごとに表示するようになっています。
これを以下のように週ごとに表示することができます。

切り替え方法として、以下の1行をモード変更したい場所に記入すれば良いです。
//月ごとの表示にしたい時
calendar.setScope(.month, animated: true)

//週ごとの表示にしたい時
calendar.setScope(.week, animated: true)
なお、途中で表示のモードを変更した場合、Viewの大きさにズレが生じるので、AutoLayoutと以下の2つを追加し、リサイズした方が良いです。
//カレンダーを表示しているViewのHeightをConstraitし、Outletでつなぐ
IBOutlet weak var calendarHeight: NSLayoutConstraint!
func calendar(_ calendar: FSCalendar, boundingRectWillChange bounds: CGRect, animated: Bool) {
        calendarHeight.constant = bounds.height
        self.view.layoutIfNeeded()
}
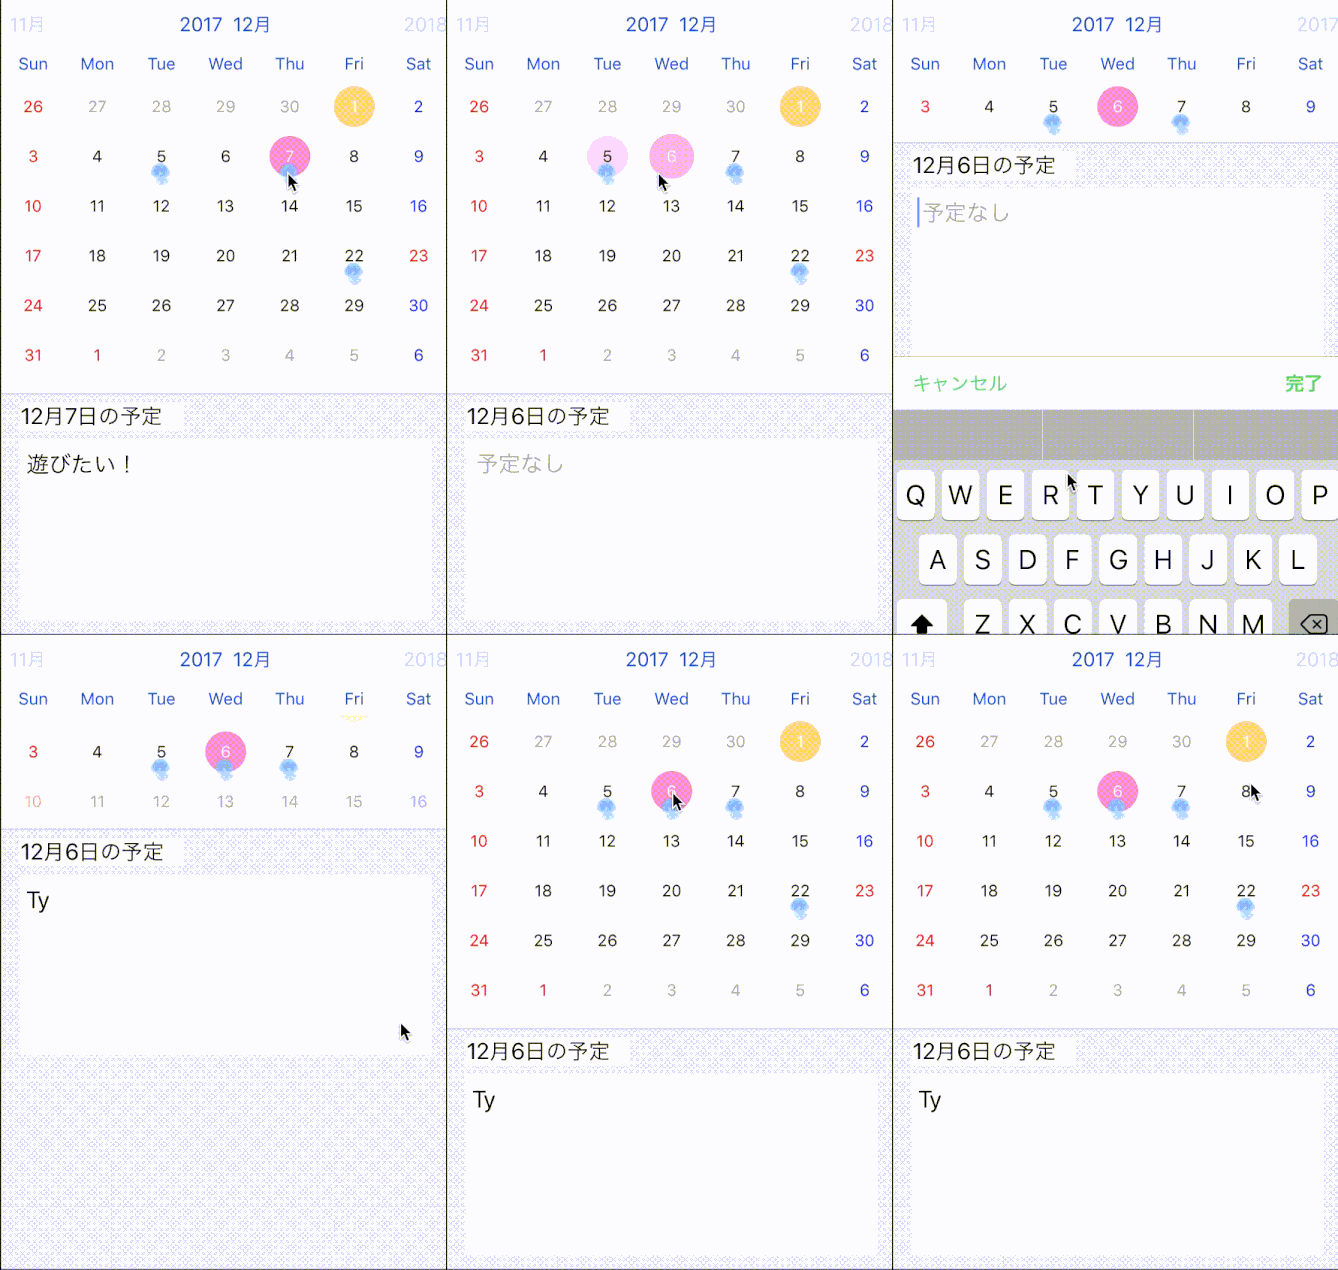
4.イベントや予定がある日に点のマークや画像をつける
下図のように、指定した日に画像や点マークをつけることができます。
実装するためのコードは以下のようになります。
//点マークをつける関数
func calendar(calendar: FSCalendar!, hasEventForDate date: NSDate!) -> Bool {
    return shouldShowEventDot
}
//画像をつける関数
func calendar(_ calendar: FSCalendar!, imageFor date: NSDate!) -> UIImage! {
    return anyImage
}
点マークや画像をつけたい日にはそれぞれtrueやimageをリターンし、それ以外の日にちにはnilをリターンする条件文を付属すれば良いです。
5.その他
他の機能として
- カレンダーの表示月変更のスライドを縦にする
- 複数の日付を選択する
- 一番左の曜日を変更する
- 選択している日付を丸から四角などに変更する
- 日付の下にサブタイトルを付属する
- 複数の月を同時に表示する
- 点マークの数を増やす
などありますが、需要があり次第更新していきます。

