呉高専エンジニア勉強会 Advent Calendar 2017 8日目を担当させてもらいます!
今回、呉高専卒業後に学び初めたSwiftについて書かせてもらいます!

はじめに
今回紹介するのは "BubbleTransition"というライブラリです。このライブラリを使うことで画面遷移が短時間で凝ったような動きになります笑
動作環境
- Swift3.0
- CocoaPods 1.3.1
- Xcode 9.1
- macOS Sierra 10.12.6
- BubbleTransition 2.0.2
CocoaPods環境設定
CocoaPodsを既に導入済みの場合は飛ばしてください。
CocoaPodsを未導入の方はターミナルを開いて以下のコマンドを実行します。
最初のコマンドはインストールです。
$ sudo gem install cocoapods
インストールが完了後、次にセットアップを行います。
$ pod setup
これで完了です。
ライブラリ導入
まずターミナルを起動し、プロジェクトのディレクトリまで移動します。
プロジェクトへCocoaPodsを導入するために下記のコマンド実行します。
$ pod init
実行後、ディレクトリ内にPodfileが作成されれば成功です。
作成されたPodfileを $ vim Podfile で開くと以下のように編集してください。
# Uncomment the next line to define a global platform for your project
# platform :ios, '9.0'
target 'BunbbleTransition' do
  # Comment the next line if you're not using Swift and don't want to use dynamic frameworks

 //追加
  pod 'BubbleTransition'

  use_frameworks!
  # Pods for BunbbleTransition
  target 'BunbbleTransitionTests' do
    inherit! :search_paths
    # Pods for testing
  end
  target 'BunbbleTransitionUITests' do
    inherit! :search_paths
    # Pods for testing
  end
end
編集後、$pod installで完了です!
作成
画面作成
今回はボタンを押した時に遷移する簡単なサンプルプロジェクトに導入します。
ボタンの画像はこちらを使用しました。
サンプルとして下図のように画面2つとボタン、ラベルを配置しています。
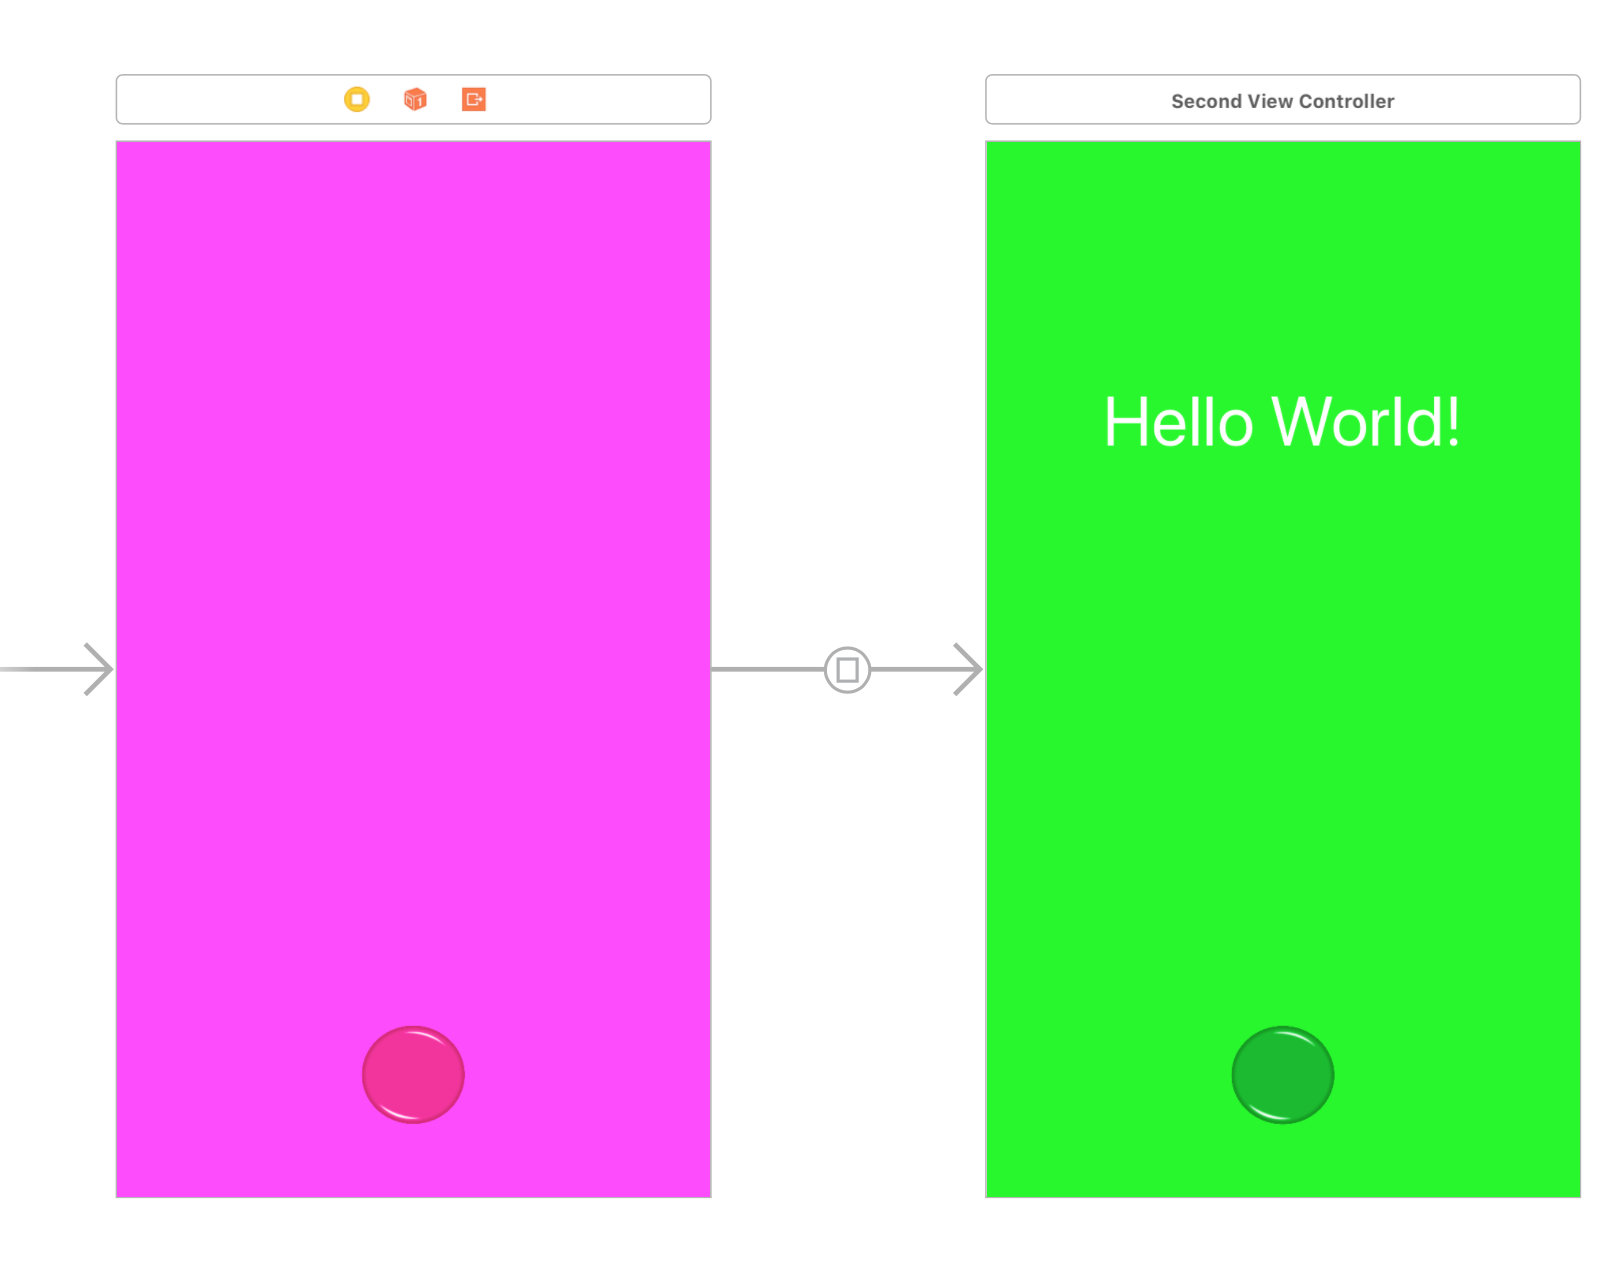
左側のボタンは'Action segue'で'Present Modally'としています。
それでは左側のViewControllerを完成させていきましょう。
プログラム作成
今回は、冒頭のgifのようにタップしたボタンの中心から円が広がって行くように遷移するアクションの作成を行います。
手順は以下の通りです。
①まず最初にBubbleTransitionをimportします。
②Segueを設定したボタンをOutletする。
③今回用いるBubbleTransitionのインスタンスを作成
④Segueの設定を行う関数の作成
⑤UIViewControllerTransitioningDelegateにアニメーションを追加
import UIKit

// 手順①
import BubbleTransition


class ViewController: UIViewController{

    // 手順②
    @IBOutlet weak var nextButton: UIButton!

    // 手順③
    let transition = BubbleTransition()


    override func viewDidLoad() {
        super.viewDidLoad()
        // Do any additional setup after loading the view, typically from a nib.
    }

    override func didReceiveMemoryWarning() {
        super.didReceiveMemoryWarning()
        // Dispose of any resources that can be recreated.
    }


    // 手順④
    override func prepare(for segue: UIStoryboardSegue, sender: Any?) {
        let controller = segue.destination
        controller.transitioningDelegate = self
        controller.modalPresentationStyle = .custom
    }

    // MARK: UIViewControllerTransitioningDelegate
}

extension ViewController : UIViewControllerTransitioningDelegate{

    // 手順⑤
    func animationController(forPresented presented: UIViewController, presenting: UIViewController, source: UIViewController) -> UIViewControllerAnimatedTransitioning? {
        transition.transitionMode = .present
        transition.startingPoint = nextButton.center    //outletしたボタンの名前を使用
        transition.bubbleColor = UIColor.green         //円マークの色
        return transition
    }
    func animationController(forDismissed dismissed: UIViewController) -> UIViewControllerAnimatedTransitioning? {
        transition.transitionMode = .dismiss
        transition.startingPoint = nextButton.center //outletしたボタンの名前を使用
        transition.bubbleColor = UIColor.magenta     //円マークの色
        return transition
    }
}
色やボタン名は各自で設定するものなので、使う場面で随時変更できるように設定する方が本当は好ましいですが、今回は単純な移動にしか使用していなので色指定をしています。
(例: transition.bubbleColor = 〇〇Button.backgroundColor!)
あとは遷移先のViewのボタンにTouchDownEventを設定し、dismissを設定すれば完成です!
self.dismiss(animated: true, completion: nil)
最後に
時間がなくて少々雑な説明が多くなってしまいました。分かりにくいところやエラーなどあれば受け付けているのでその際にはコメント宜しくお願いします。
その他
- ( P&D - Planning and Development - Advent Calendar 2017 )こちらのアドベントカレンダーにも投稿していますので、よければ閲覧お願いします!