ReactとTypeScriptでChrome Extensionを開発
はじめに
初投稿です。
表題の件を実施しようと思ったきっかけは、このプロジェクトの前にCookieに関するChrome ExtensionをTypescriptを使わずにJavascriptとReactを使って製作しました。ですが、思わぬところでエラーが出たりエラーを解決するのに時間がかかってしまったりしたことがあり、もしも、Typescriptを使って開発したら何か違いが出るか試したかったからです。
今回は、ReactとTypescriptを使って「Stand-Up Reminder」という特定の時間内である間隔ごとに、立って体をほぐすことを促すようなExtensionを作りました。長時間座り続けてしまうのはエンジニアの性だと思いこのテーマを思いつきました。
本プロジェクトの完成コードのGithubはこちらから。ブランチ名は実装順。
本記事では、Chrome ExtensionをReactで作るうえでの、React・Typescript・Tailwindの導入部分とBackgroud Wokerを使い通知を送信するといった、最初の導入部分について記事を書いていこうと思います!
こちらのURLの01.make-backgrounブランチは私がChrome Extensionを作るうえで最初に実施したプロセスとなっています。これをスタートポイントにしてChrome Extentionを作ったり、他のTypeScriptプロジェクト等に応用できるかと思います。
この01.make-backgrounブランチで実施したことをこれより下で解説していきます。
手順
01. 最初のBuild
まずは、便利なCRAコマンドを使ってプロジェクトを作成します。
npx create-react-app [プロジェクト名] --template typescript
cd [プロジェクト名]
public/manifest.jsonを編集していきます。
{
   "name": "[タイトル]",
   "description": "[説明文]",
   "version": "1.0",
   "manifest_version": 3,
   "action": {
       "default_popup": "index.html",
       "default_title": "Open the popup"
   },
   "icons": {
       "16": "logo192.png",
       "48": "logo192.png",
       "128": "logo192.png"
   }
}
ターミナルでBuildをします。
npm run build
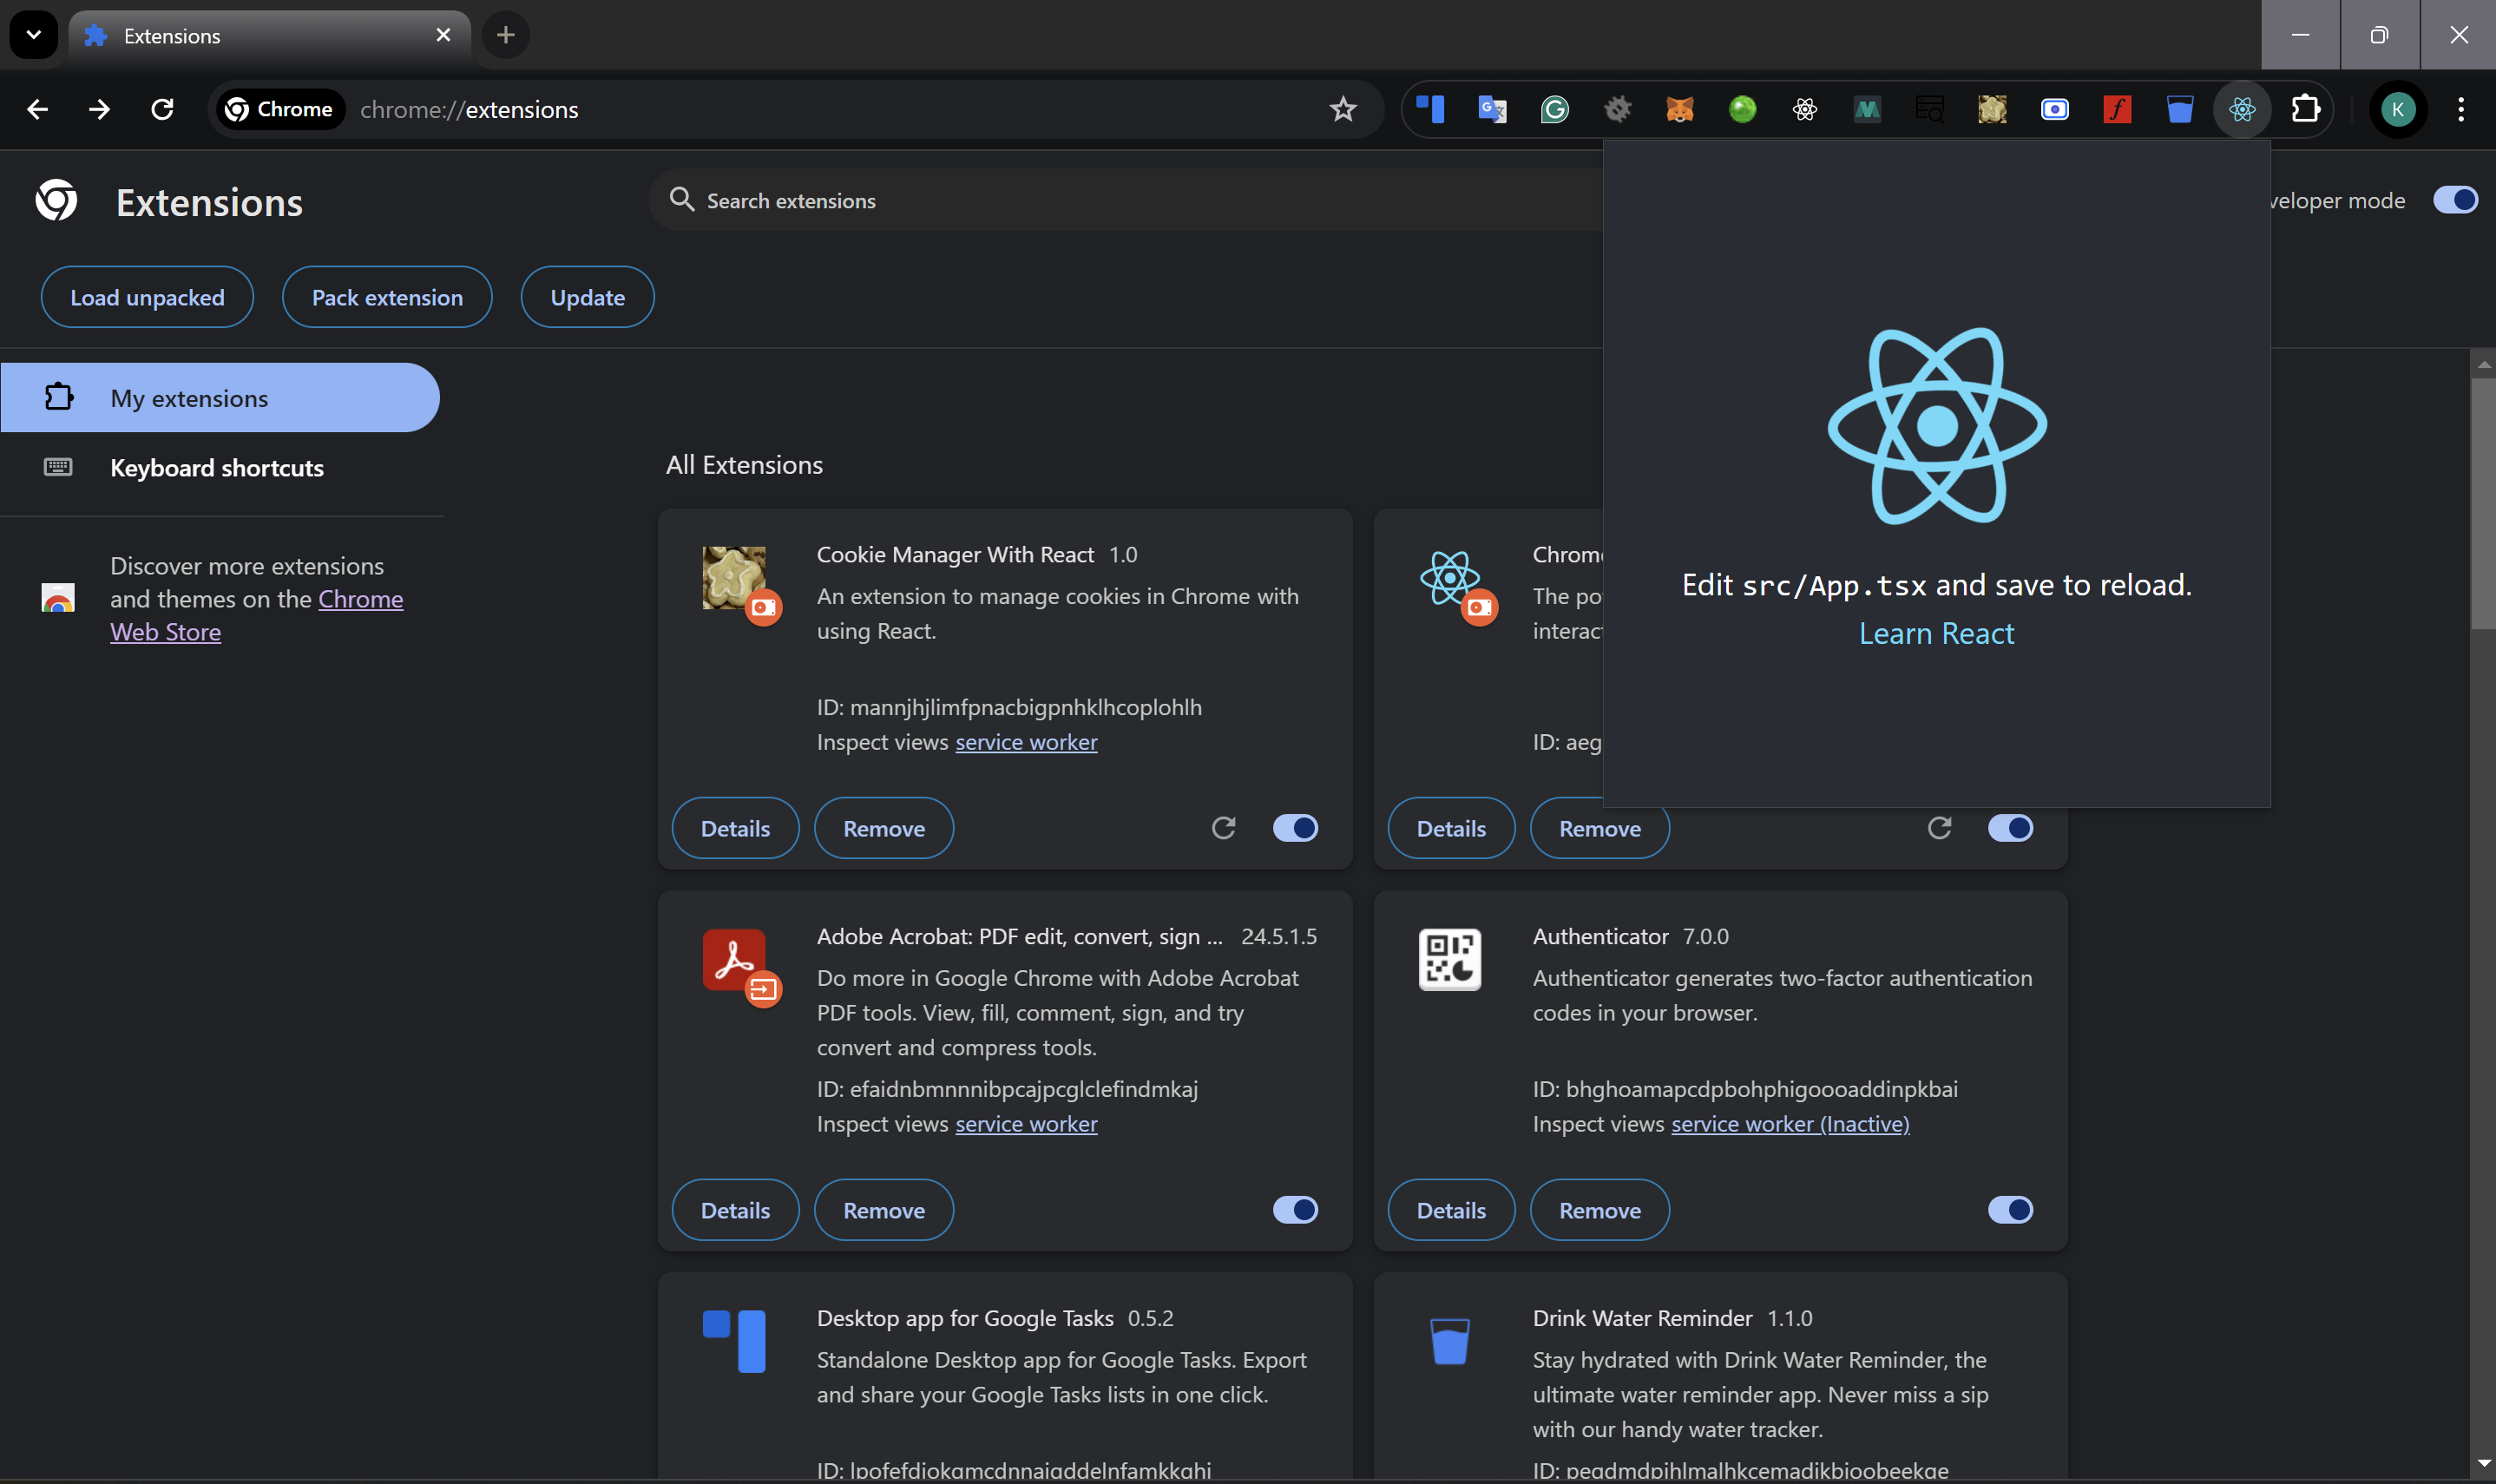
その後、Chrome Extension管理画面から「Load unpacked」をクリックし、buildディレクトリがプロジェクト直下にできるはずなので、それをインポートします。そして、インポートしたものを開くと...おなじみのReactのデフォルト画面が拡張機能として見えるはずです!
02. Tailwindを導入
次にTailwindを導入していきます。
まずインストールです。
npm install -D tailwindcss postcss autoprefixer
npx tailwindcss init -p
次にsrc/index.cssにTailwindを読み込むコードを追加します。
@tailwind base;
@tailwind components;
@tailwind utilities;
Content部分の設定を以下のように変えていきます。
...
content: [
    './src/**/*.{js,jsx,ts,tsx}',
],
...
Tailwindが機能しているか、App.tsxのトップにあるdivのクラスを以下のように変更することで確認できます。
...
 return (
    <div className="App w-96 h-96">
...
Buildします。
npm run build
Buildが終わったら、管理画面から再読み込みボタンを押してリロードします。
縦と横の幅を変えた後の見た目です。一気にアプリっぽくなりましたよね。
03. 通知の送信
次は実際に通知を送信するところまで実装していきます。
まず、サービスワーカーとしてChrome Extensionの核となるsrc/background.tsを作成し、編集していきます。この例では、1分ごとにアラームを発砲し、そのアラームに連動して通知が送信されるような仕組みです。
export {};  // This line makes the file a module
const ALARM_NAME = "standUpAlarm";
const NOTIFICATION_NAME = "standUpNotification";

console.log("Hello from the background script!", ALARM_NAME);

async function createAlarm() {
    const alarm = await chrome.alarms.get(ALARM_NAME);
    if (typeof alarm === 'undefined') {
        await chrome.alarms.create(ALARM_NAME, {
            periodInMinutes: 1
        });
    }
}

createAlarm();

chrome.alarms.onAlarm.addListener(alarm => {
    console.log('Received alarm: ', alarm);
    if (alarm.name === ALARM_NAME) {
        chrome.notifications.create(NOTIFICATION_NAME, {
            type: "basic",
            iconUrl: "logo192.png",
            title: "Time to Stand Up!",
            message: "It's time to stand up and stretch a bit.",
            buttons: [{ title: "Got it!" }],
            priority: 0
        });
    }
});
次にchromeパッケージのインストールです。
npm install @types/chrome --save-dev
続けて、Popup.tsx(後で出てくる)やbackground.tsをエントリーポイントとしてバンドルするのに必要なパッケージのreact-app-rewired, customize-cra, html-webpack-pluginをインストールしていきます。
npm install react-app-rewired customize-cra html-webpack-plugin --save-dev
次にBuildを行う時にreact-app-rewiredを使うように、package.jsonにコマンドを追加します。個人的に新しくデフォルトコマンドと違いが分かるような名前を付けたコマンドを作るのが、わかりやすいと思っていますが、ここは自由ですね。
"scripts": {
    "start": "react-scripts start",
    "build": "react-scripts build",
    "build-with-rewired": "react-app-rewired build",
    "test": "react-scripts test",
    "eject": "react-scripts eject"
},
config-overrides.jsを作成・編集していきます。
const path = require('path');
const HtmlWebpackPlugin = require('html-webpack-plugin');

module.exports = function override(config, env) {
    config.entry = {
        main: './src/components/popup.tsx',
        background: './src/background.ts',
    };

    config.output = {
        path: path.resolve(__dirname, 'build'),
        filename: '[name].js',
    };

    config.optimization = {
        splitChunks: {
            cacheGroups: {
                default: false,
            },
        },
    };
    // Ensure plugins is defined and is an array
    if (!config.plugins) {
        config.plugins = [];
    } else if (!Array.isArray(config.plugins)) {
        config.plugins = [config.plugins];
    }

    config.plugins = config.plugins.filter(plugin => {
        return !(
            plugin.constructor.name === 'HtmlWebpackPlugin' ||
            plugin.constructor.name === 'GenerateSW'
        );
    });

    config.plugins.push(
        new HtmlWebpackPlugin({
            inject: true,
            chunks: ['main'],
            template: path.resolve(__dirname, 'public/index.html'),
            filename: 'index.html',
        }),
    );

    return config;
};
いよいよsrc/components/Popup.tsxを作成し編集していきます。このコンポーネントが、Extensionのポップアップ画面になります。ここでは、summaryを私自身のExtension用にセットしていますが、なくても大丈夫です。config-overrides.jsでmainとして設定しているため。
import React, { useState, useEffect } from 'react';
import ReactDOM from 'react-dom';

const Popup: React.FC = () => {
  const [summary, setSummary] = useState<string>("");

  useEffect(() => {
    chrome.storage.sync.get(["summary"], (result) => {
      setSummary(result.summary || "No summary available.");
    });
  }, []);

  return (
          <div>
                  <h1>Stand-Up Reminder</h1>
                  <p>{summary}</p>
          </div>
);
};

ReactDOM.render(<Popup />, document.getElementById('root'));
Buildします。
npm run build
この後、Chrome Extensionをリロードすると、約1分後に下の画像のような通知が送信されるはずです。
以上、Chrome ExtensionをReact・TypeScriptを使って開発するまでの導入部分の解説でした。
終わりに
いかがだったでしょうか。決まった時間にシンプルに通知を送信するChrome Extensionを作成するには、それほど手順は必要としないことに驚いたのは、私だけではないと思っています。
一番この手順で詰まったのは、config-overrides.jsの以下のラインで「main」としてPopup.tsxを登録しなければいけなかった点です。「main」というキーワードがwebpackのデフォルトとして扱われるため必要なようです。この記事を書いてくれたユーザ:vl4d1m1r4には即いいねしました笑
main: './src/components/popup.tsx',
TypeScriptを使ってみての感想ですが、エラーの発見はピュアJavascriptを使った時よりも少し早くなった気がします。ただ、やはりビルドしたディレクトリをインポートしているため、エラーログがバンドルされた後のコードのログとなってしまう点が、このReactを使ってChrome Extensionを開発する一番の難点かと思います。。。 (2024/7/25 修正) Extensionとしてビルドをするとデバッグする方法がコンソールログのみとなってしまいますが、Extensionとして。ビルド&インポートする前に、「npm run dev」を実行して、一旦Extensionとしてではなく、通常のReactアプリケーションとしてデバッグすることで、ビルド前のコードをデバッグできることを確認しました!
それでも、私自身Chrome Extensionには、パブリッシュするのにサーバコストがかからないといった点等の多数のメリットがあると思っています!
最後までお読みいただき、ありがとうございました!
ご質問・メッセージ等あれば遠慮なくコンタクトください!
参考リンク:
https://blog.logrocket.com/creating-chrome-extension-react-typescript/
https://developer.chrome.com/docs/extensions/develop/concepts/service-workers


