気軽に使える自分用のメモとか、何人かで共有できるメモほしいな〜と思ってたら調度いい感じにHackMDがあったので試してみます。
dockerにちょうどいいのがあったのでこれを使わせてもらいます。
HackMDをソースから入れると、ビルドにメモリ2GBを要求されるのでt2.mediumあたりにしないといけないのも無料枠ユーザには難点ですね。
HTTPS化はLet's Encryptを使わせてもらいます。
環境
Amazon Linux AMI 2017.09.1
・SGでHTTP、HTTPS、SSHだけ開けておきます
・HTTPSL化までやりたい場合、ドメインは用意しておいて下さい
インストール
# gitとdocker
sudo yum update -y && sudo yum install -y git docker

# docker-compose
sudo curl -L https://github.com/docker/compose/releases/download/1.19.0/docker-compose-`uname -s`-`uname -m` -o /usr/local/bin/docker-compose
sudo chmod +x /usr/local/bin/docker-compose
docker hackmd imageを頂戴してコンテナ起動
git clone https://github.com/hackmdio/docker-hackmd.git
cd docker-hackmd && git pull

# dockerの起動
sudo service docker start
sudo docker-compose up

# sudo: docker-compose: コマンドが見つかりません が出た場合
# 一時的にrootのPATHに/usr/local/binを追加して実行
sudo su
PATH=`echo $PATH`:/usr/local/bin
docker-compose up

# 10分くらい待ちます
一旦動いてる事を確認
curl -X GET http://localhost:3000
HTMLっぽいのが返って来てるのが確認できればOKです。
Nginxインストールと設定(まずHTTPで)
sudo yum install -y nginx
sudo vim /etc/nginx/nginx.conf
/etc/nginx/nginx.conf
user nginx;
worker_processes auto;
error_log /var/log/nginx/error.log;
pid /var/run/nginx.pid;

include /usr/share/nginx/modules/*.conf;

events {
    worker_connections 1024;
}

http {
    log_format  main  '$remote_addr - $remote_user [$time_local] "$request" '
                      '$status $body_bytes_sent "$http_referer" '
                      '"$http_user_agent" "$http_x_forwarded_for"';

    access_log  /var/log/nginx/access.log  main;

    sendfile            on;
    tcp_nopush          on;
    tcp_nodelay         on;
    keepalive_timeout   65;
    types_hash_max_size 2048;

    include             /etc/nginx/mime.types;
    default_type        application/octet-stream;

    index   index.html index.htm;

    server {
        listen       80 default_server;
        server_name  サーバのIPアドレス;

        location / {
            proxy_pass http://localhost:3000;
        }
    }
}
# 再起動
sudo service nginx restart
ブラウザからアクセスできる事を確認

ここまででも全然使えるので、ドメイン設定しない場合は完了です。
Route53設定
- AWSコンソールからRoute53を選択

- Hosted zonesを選択

- Create Hosted Zone からルーティング作成

- ドメインとコメントを入力してCreate

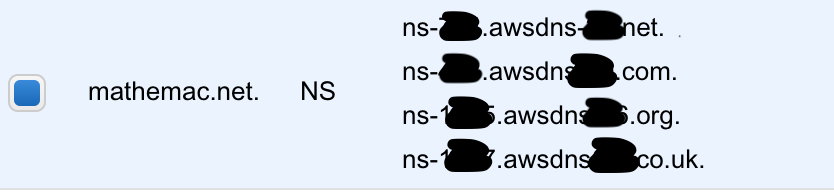
- ここに出てるネームサーバをドメインを買ったサイトに設定
- Create Record SetでインスタンスのIPと紐づける

これで設定完了。ブラウザからアクセスできるか確認。
ネームサーバ設定はたまに反映に時間がかかるっぽいですが、今までいじった感じだとだいたい1分もかからずに完了してます。
HTTPS化しない場合はここまでで完了です。
証明書を取得
@MashMorganさんの投稿を参考に
# Let's Encryptのクライアント入れる
sudo curl https://dl.eff.org/certbot-auto -o /usr/bin/certbot-auto
sudo chmod 700 /usr/bin/certbot-auto

# 証明書取得(domainとmail-addressは各自置き換えて下さい)
sudo certbot-auto certonly -d {domain} --email {mail-address} --debug


# 上のコマンドを投げるといくつか質問るので答えていきます

##### 1. インストール確認 > y
総ダウンロード容量: 32 M
インストール容量: 61 M
Is this ok [y/d/N]: y

# インストールのログ

完了しました!
Creating virtual environment...
Installing Python packages...
Installation succeeded.
Saving debug log to /var/log/letsencrypt/letsencrypt.log
Failed to find executable apachectl in expanded PATH: /sbin:/bin:/usr/sbin:/usr/bin:/usr/local/bin:/usr/local/sbin


##### Apacheがいないと怒られる > 1のNginx
How would you like to authenticate with the ACME CA?
-------------------------------------------------------------------------------
1: Nginx Web Server plugin - Alpha (nginx)
2: Spin up a temporary webserver (standalone)
3: Place files in webroot directory (webroot)
-------------------------------------------------------------------------------
Select the appropriate number [1-3] then [enter] (press 'c' to cancel): 1

Plugins selected: Authenticator nginx, Installer None


##### 利用規約的なものに同意 > A
-------------------------------------------------------------------------------
Please read the Terms of Service at
https://letsencrypt.org/documents/LE-SA-v1.2-November-15-2017.pdf. You must
agree in order to register with the ACME server at
https://acme-v01.api.letsencrypt.org/directory
-------------------------------------------------------------------------------
(A)gree/(C)ancel: A


##### メールアドレスを共有?するか聞かれる > お好みで
-------------------------------------------------------------------------------
Would you be willing to share your email address with the Electronic Frontier
Foundation, a founding partner of the Let's Encrypt project and the non-profit
organization that develops Certbot? We'd like to send you email about EFF and
our work to encrypt the web, protect its users and defend digital rights.
-------------------------------------------------------------------------------
(Y)es/(N)o: N

Obtaining a new certificate
Performing the following challenges:
http-01 challenge for mathemac.net
Waiting for verification...
Cleaning up challenges

IMPORTANT NOTES:
 - Congratulations! Your certificate and chain have been saved at:
   /etc/letsencrypt/live/mathemac.net/fullchain.pem
   Your key file has been saved at:
   /etc/letsencrypt/live/mathemac.net/privkey.pem
   Your cert will expire on 2018-06-15. To obtain a new or tweaked
   version of this certificate in the future, simply run certbot-auto
   again. To non-interactively renew *all* of your certificates, run
   "certbot-auto renew"
 - Your account credentials have been saved in your Certbot
   configuration directory at /etc/letsencrypt. You should make a
   secure backup of this folder now. This configuration directory will
   also contain certificates and private keys obtained by Certbot so
   making regular backups of this folder is ideal.
 - If you like Certbot, please consider supporting our work by:

   Donating to ISRG / Let's Encrypt:   https://letsencrypt.org/donate
   Donating to EFF:                    https://eff.org/donate-le

# ここまでで完了
HTTPS化設定
取得した証明書をNginxに設定
# 設定ファイル編集
sudo vim /etc/nginx/nginx.conf
/etc/nginx/nginx.conf
# serverディレクティブ以下のみ変更
    server {
        listen       443 ssl;
        server_name  ドメイン;

        ssl_certificate     /etc/letsencrypt/live/ドメイン/fullchain.pem;
        ssl_certificate_key /etc/letsencrypt/live/ドメイン/privkey.pem;

        ssl_session_cache shared:le_nginx_SSL:1m;
        ssl_session_timeout 1440m;

        ssl_protocols TLSv1 TLSv1.1 TLSv1.2;
        ssl_prefer_server_ciphers on;

        location / {
            proxy_pass http://localhost:3000;
        }
    }
# 再起動
sudo service nginx restart
これでHTTPSアクセスできるようになりました。
おまけ Basic認証
Basic認証も弱い弱いと言われてますが、最悪覗かれたところで困る内容を書く予定も無いのでこれくらいでとりあえず。
Takafumi Yamanoさんのブログを参考に
# htpasswdコマンドインストール
sudo yum install -y httpd-tools

# パスワードファイル置き場
sudo mkdir /etc/nginx/httpasswd

# htpasswdファイル作成(パスワード入力を求められるので入力)
sudo htpasswd -c /etc/nginx/httpasswd/.htpasswd username
New password:
Re-type new password:
Adding password for user username
# Nginxの設定ファイル編集
sudo vim /etc/nginx/nginx.conf
/etc/nginx/nginx.conf
# locationディレクティブ以下のみ変更
        location / {
            auth_basic "Restricted";
            auth_basic_user_file /etc/nginx/httpasswd/.htpasswd;

            proxy_pass http://localhost:3000;
        }
# 再起動
sudo service nginx restart
これでBasic認証がかかったのでログインします。
最後に
Nginxのセキュリティ設定とか、Let'sEncryptの自動更新とかは後で書き足すか別の記事書きます。
HackMDって作成したページの情報を見れる機能って無いんですかね、履歴以外で。最悪ポスグレのコンテナ覗けば確認できそうですが、、