はじめに
この記事はタイルマップを使った無限に続く横スクロールゲームで、ステージを無限にランダムに生成していく方法を書いています。
環境
- Unity2022.3.5
- Windows11
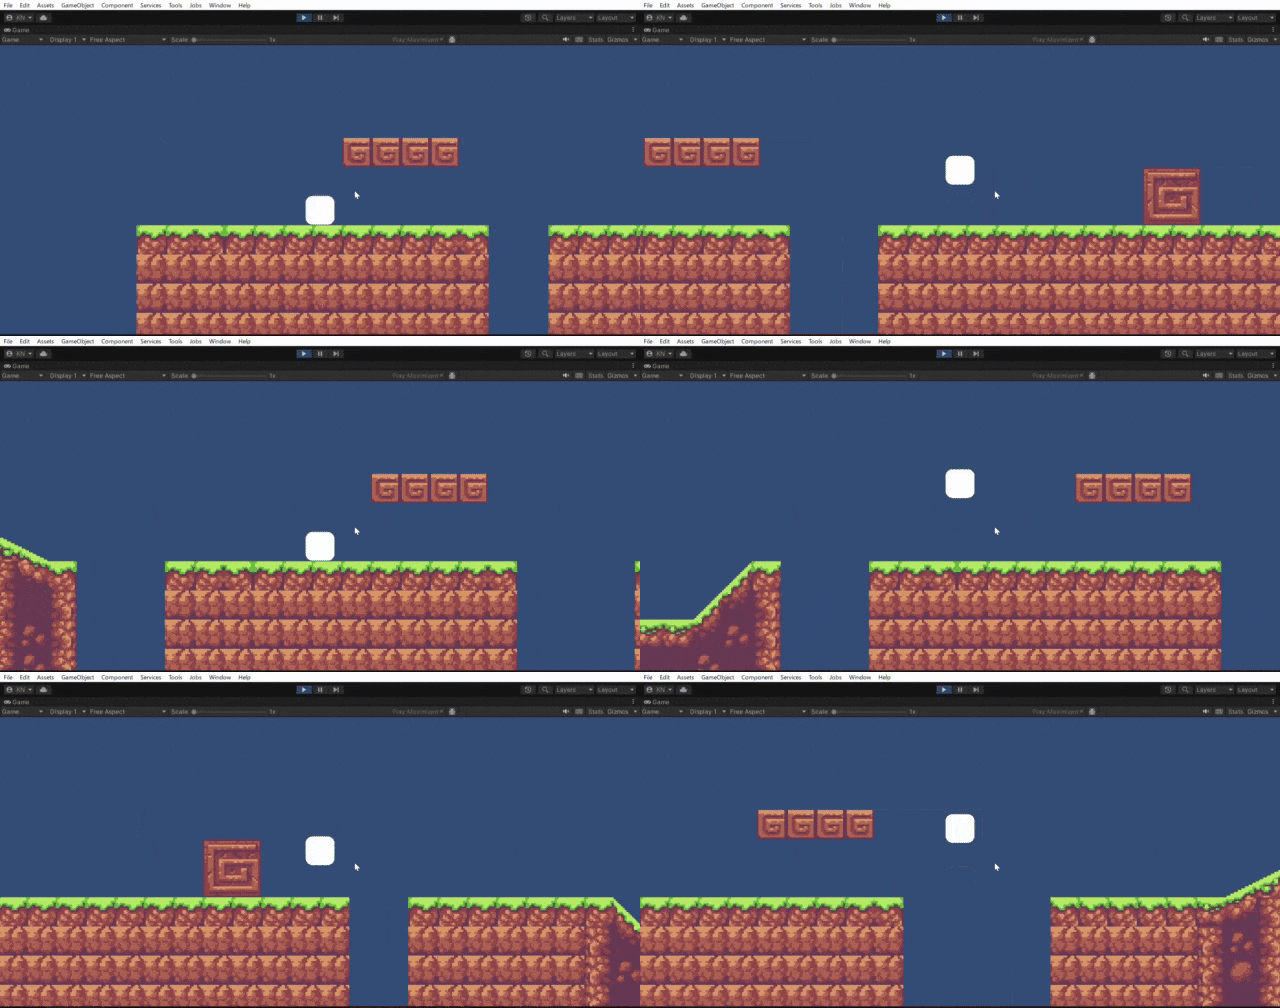
完成図
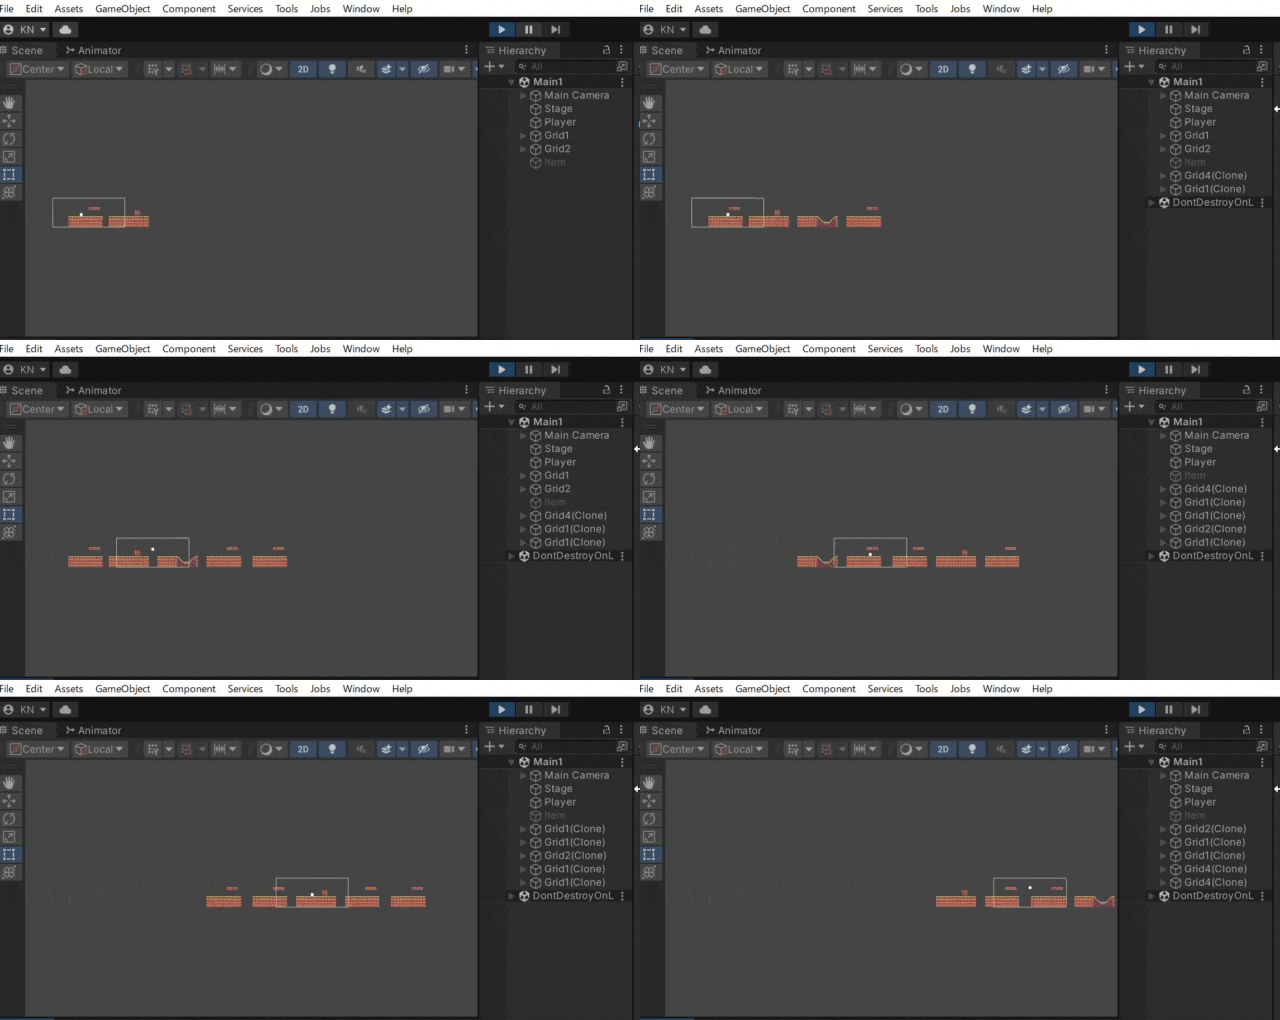
キャラクターが移動するごとにランダムにステージが作成されている様子です。
2D横スクロールのエンドレスゲームに用いることができます。
(前準備)プレイヤーの動き実装
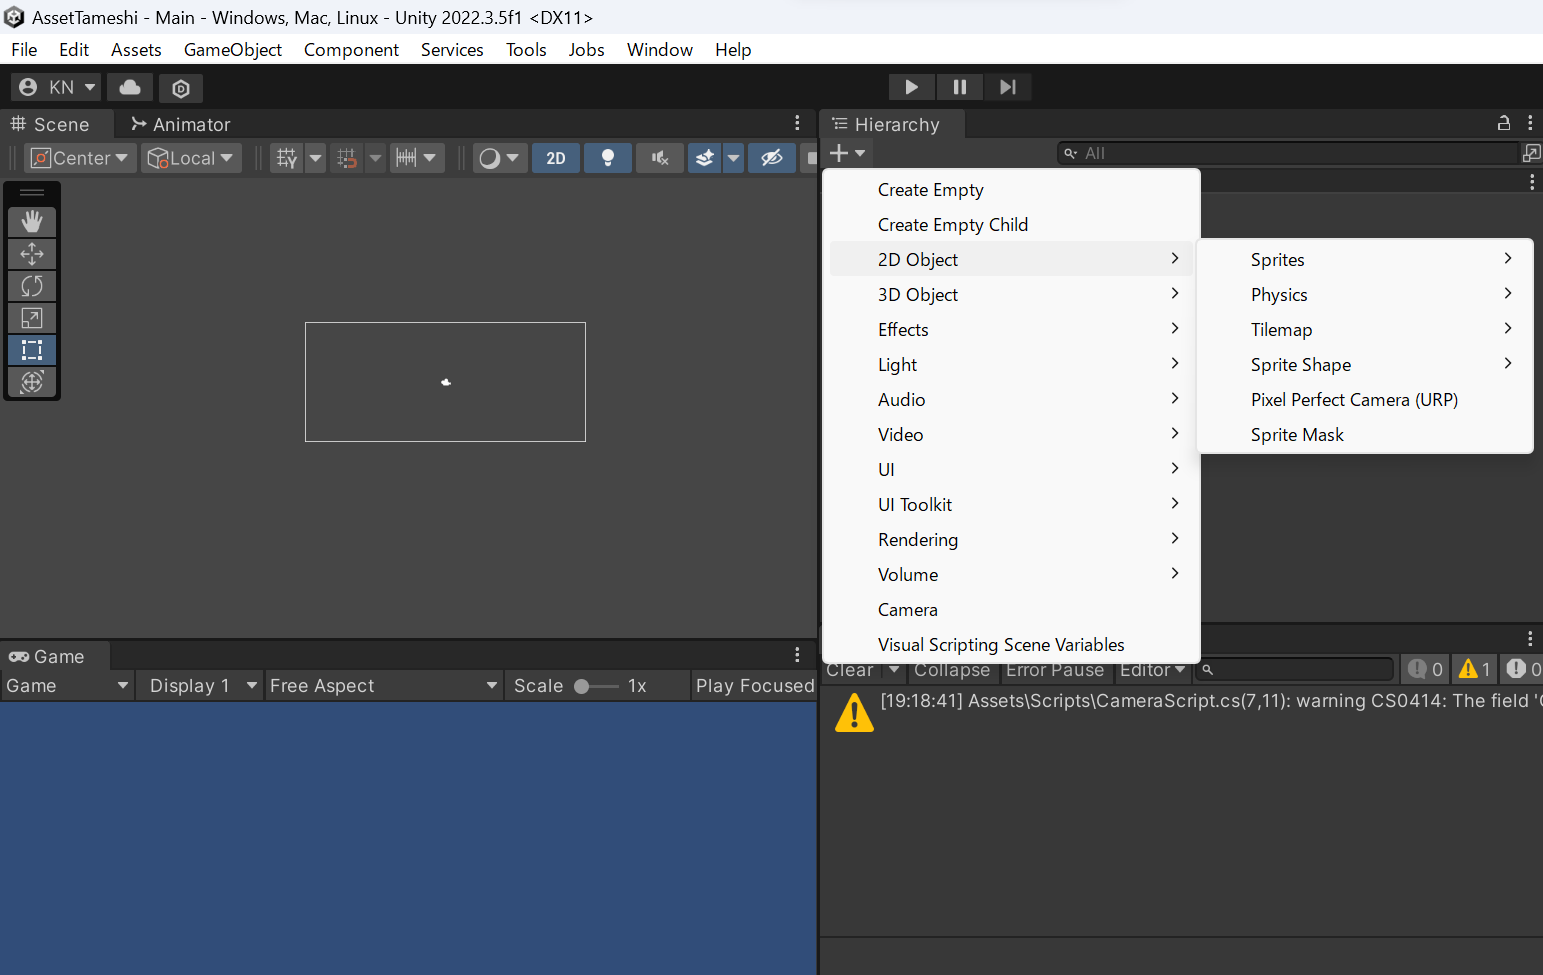
前準備として左右に動くGameObjectを作ります。[Hierarchy]の+ボタンから[2D Object]を選択します。今回は[Sprites]から[9-Sliced]を選択しました。
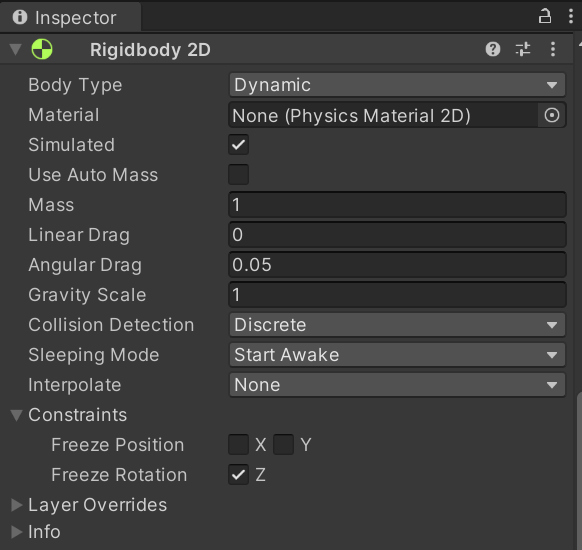
作成したGameObjectの[Inspector]から[Add Component]で Rigidbody2Dと BoxCollider2Dを付け、以下のように設定します。
次に[Project]の+ボタンから[C# Script]でスクリプトを作成し、 PlayerScriptと名前を付けます。
今回は以下のコードで左右移動とジャンプの実装をします。
using System.Collections;
using System.Collections.Generic;
using UnityEngine;

public class PlayerScript : MonoBehaviour
{
    public float speed = 5.0f;

    int jumpCount;
    public float jumpPower = 5.0f;

    // Start is called before the first frame update
    void Start()
    {

    }

    // Update is called once per frame
    void Update()
    {
        if(Input.GetKey("right") == true)
        {
            this.transform.position += new Vector3(speed * Time.deltaTime, 0, 0);
        }
        if(Input.GetKey("left") == true)
        {
            this.transform.position -= new Vector3(speed * Time.deltaTime, 0, 0);
        }

        //ジャンプのコードを書き変える
        if (Input.GetKeyDown("space") == true && jumpCount < 1)
        {
            this.GetComponent<Rigidbody2D>().velocity = new Vector3(0, jumpPower, 0);
            jumpCount += 1;
        }

    }

    private void OnCollisionEnter2D(Collision2D collision)
    {
        //地面に当たった時にjumpCountを0に戻す
        if (collision.gameObject.tag == "Ground")
        {
            jumpCount = 0;
            Debug.Log(jumpCount);
        }
    }
PlayerScriptをUnity上でGameObjectにアタッチしたら、前準備は完了です。
1.複数のTilemapをPrefab化する
次にTilemapでステージを作っていきます。タイルマップの詳しい使い方は省略しますので、わからない方は この記事 を参考にすると良いと思います。
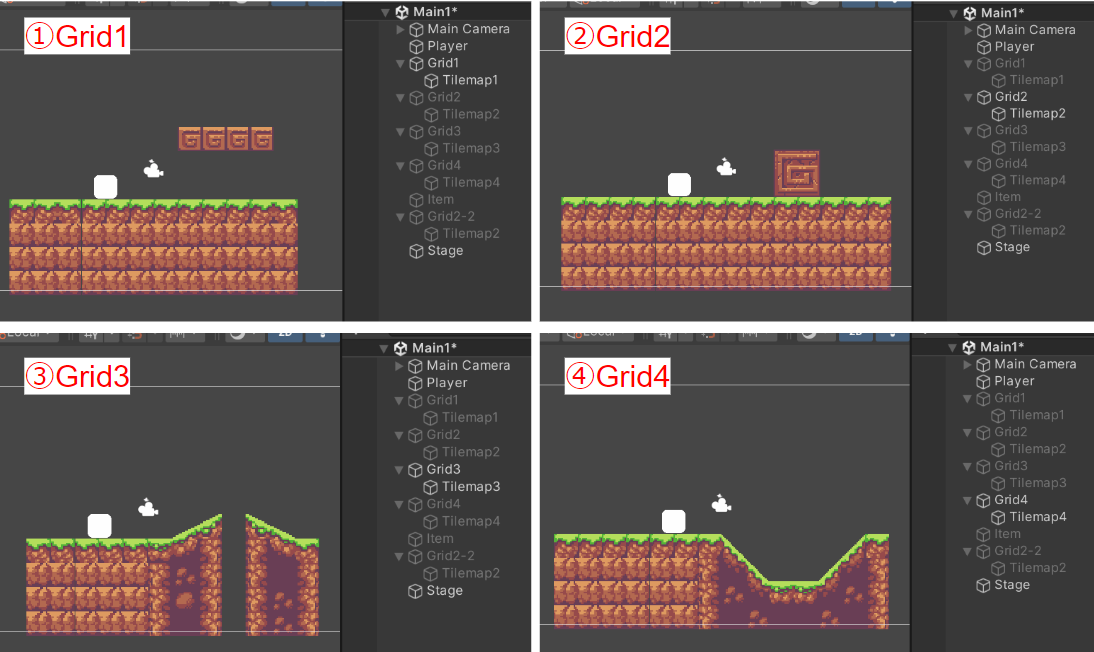
今回は以下のように同じ幅の4種類のステージを Grid別に作成しました。
(座標は全て(0,0,0)です。素材はAssetStoreからSunny Landを使わせていただきました。)
TilemapにはTilemapCollider2Dを付けており、タグは"Ground"に設定する。
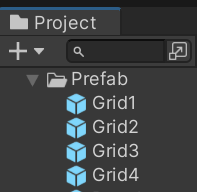
同じ幅で同じ座標にあるステージが複数作れたら、それぞれ Gridごと[Project]にドラッグアンドドロップしてPrefabにしてください。
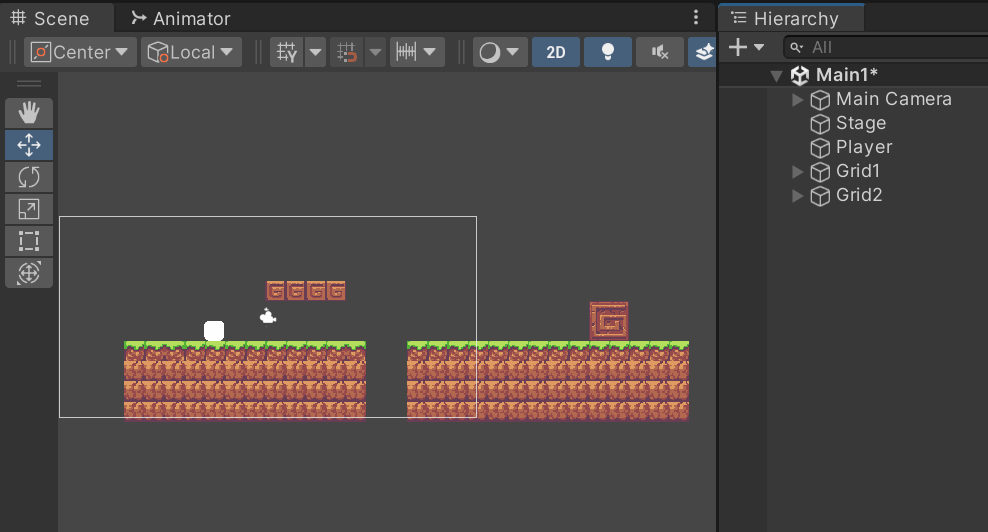
[Hierarchy]に存在するGrid1~4から2つを削除し、残した2つをx軸に正の方向へと並べます。
2.スクリプトを作成する
次に[Project]の+ボタンから[C# Script]でスクリプトを作成し、 StageScriptと名前を付けます。
以下のコードを記入します。
using System.Collections;
using System.Collections.Generic;
using UnityEngine;

public class StageScript : MonoBehaviour
{
    //int型を変数StageTipSizeで宣言します。ここの数値は自動生成したいオブジェクトの端から端までの座標の大きさ
    const int StageTipSize = 16;
    //int型を変数currentTipIndexで宣言します。
    int currentTipIndex;
    //ターゲットキャラクターの指定が出来る様にするよ
    public Transform character;
    //ステージチップの配列
    public GameObject[] stageTips;
    //自動生成する時に使う変数startTipIndex
    public int startTipIndex;
    //ステージ生成の先読み個数
    public int preInstantiate;
    //作ったステージチップの保持リスト
    public List<GameObject> generatedStageList = new List<GameObject>();

    // Start is called before the first frame update
    void Start()
    {
        //初期化処理
        currentTipIndex = startTipIndex - 1;
        UpdateStage(preInstantiate);

    }

    // Update is called once per frame
    void Update()
    {
        //キャラクターの位置から現在のステージチップのインデックスを計算します
        int charaPositionIndex = (int)(character.position.x / StageTipSize);
        //次のステージチップに入ったらステージの更新処理を行います。
        if (charaPositionIndex + preInstantiate > currentTipIndex)
        {
            UpdateStage(charaPositionIndex + preInstantiate);
        }
    }

    //指定のインデックスまでのステージチップを生成して、管理下におく
    void UpdateStage(int toTipIndex)
    {
        if (toTipIndex <= currentTipIndex) return;
        //指定のステージチップまで生成するよ
        for (int i = currentTipIndex + 1; i <= toTipIndex; i++)
        {
            GameObject stageObject = GenerateStage(i);
            generatedStageList.Add(stageObject);
        }
        while (generatedStageList.Count > preInstantiate + 2) DestroyOldestStage();
        currentTipIndex = toTipIndex;

    }

    //指定のインデックス位置にstageオブジェクトをランダムに生成
    GameObject GenerateStage(int tipIndex)
    {
        int nextStageTip = Random.Range(0, stageTips.Length);

        GameObject stageObject = (GameObject)Instantiate(
            stageTips[nextStageTip],
            new Vector3(tipIndex * StageTipSize, 0, 0), //今回はx軸方向に無限生成するのでこの書き方をしている
            Quaternion.identity) as GameObject;
        return stageObject;
    }

    //一番古いステージを削除します
    void DestroyOldestStage()
    {
        GameObject oldStage = generatedStageList[0];
        generatedStageList.RemoveAt(0);
        Destroy(oldStage);
    }
}
※//以降の日本語の文章はコメントといってスクリプトに直接関係しません。
<スクリプト注意点>
ステージのサイズに合わせてStageTipSizeを変更します。今回はGridの左端から右端の距離(x軸)が16であるため16と記入しています。
作成したステージの幅に合わせて書き換えてください。
const int StageTipSize = 16;
3.Unity側でスクリプトをアタッチする
スクリプトに上記のコードが書けたら、Unityに戻って以下の手順で設定しましょう。
- [Hierarchy]から[CreatEmpty]で空のGameObjectを作ってスクリプトを貼りつけましょう。今回は Stageと名前を付けておきます。
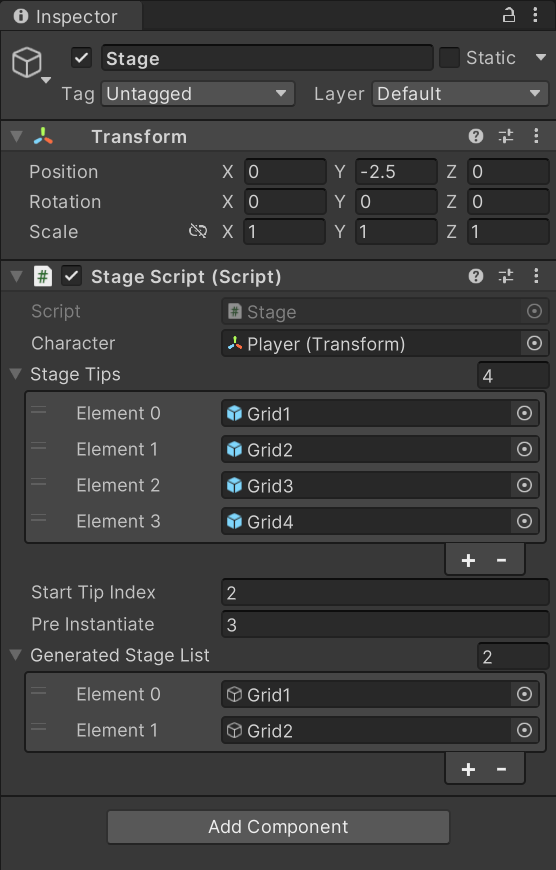
- スクリプトをアタッチし、次の画像のように設定しましょう。
<Inspectorの詳細>
- Character:ターゲットとなるGameObjectのTransform(今回はPlayerの動きに合わせてステージを自動生成している)
- StageTips:生成するステージ種類(今回は4つ)
- StartTipIndex:最初の時点で画面上に存在するステージの数(今回は[Hierarchy]にGrid1とGrid2があらかじめ置かれているので2)
- PreInstantiate:1回に生成するステージの数(今回は3としているので毎回3ステージ分生成されていく)
- GeneratedStageList:現在存在しているステージを格納するList(最初はGrid1とGrid2があるので2)
説明は以上となります。実際に実行してPlayerを動かしてみましょう。
このようにPlayerが進むにつれてステージが生成されていたら成功です。
最後に
Unityを使ったステージ無限生成のやり方はいくつか記事がありますが、2DゲームのTilemapを使ってステージを作った場合の方法はなかったので今回書かせていただきました。初めて書いたので、わかりにくいところもたくさんあったと思いますが、ここまでお読みいただきありがとうございました。
