はじめに
あるプロジェクトでファイル添付の際は、共通パスワードを使うというルールがあり、毎度、Pass付きで圧縮するのが面倒だったので、ファイルを右クリックすると自動的に圧縮できるようにしたので、その備忘です。
正直、使うシーンはあまりないかも。
環境
- Windows 10
手順
①Lhaplusを下記のディレクトリにインストールする
C:\Program Files (x86)\Lhaplus
【参考】入手元:https://forest.watch.impress.co.jp/library/software/lhaplus/
②バッチファイルを作成する
パスワードをhogefugaで設定する場合の例
zip.bat
@echo off

:check
if %1=="" goto final
"C:\Program Files (x86)\Lhaplus\Lhaplus.exe" /c:zip /o:.\ /p:hogefuga %1
shift
goto check
:final
ちなみにhoge[yyyyMMdd]にしたい場合はこんな感じ。
"C:\Program Files (x86)\Lhaplus\Lhaplus.exe" /c:zip /o:.\ /p:hoge%date:/=% %1
※インストール時にインストールフォルダを変更した場合は、「"C:\Program Files (x86)\Lhaplus\Lhaplus.exe"」を変更。
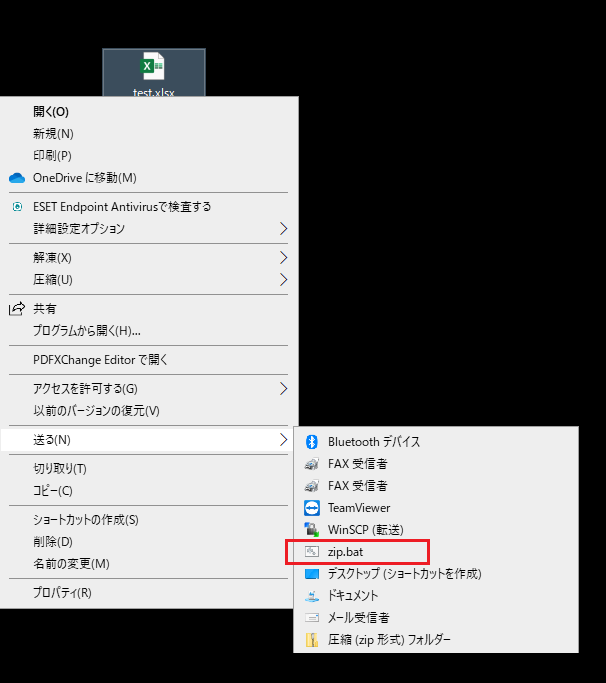
③zip.batを下記のディレクトリに追加する
ファイルを右クリックして実行できるようにします。今回は「送る」の中にいれました。
C:\Users\[ユーザ名]\AppData\Roaming\Microsoft\Windows\SendTo
【補足】Lhaplusのコマンドラインオプション
| オプション | 説明 |
|---|---|
| /c:[拡張子] | [拡張子]の形式で圧縮する |
| /o:[ディレクトリ] | 出力先として[ディレクトリ]を指定する |
| /p:[パスワード] | zip圧縮時に[パスワード]を指定する |
スクリーンショット
対象ファイルを右クリックし、「送る > zip.bat」から実行可能。