この記事は Azure DevOps Advent Calendar 2020 の 2 日目の記事です。
MS Hosted Agent と azure-pipelines.yml を使って動かす方法です。 Self Hosted Agent を使うものは参考にリンクとして記載してあります。
前提条件
- 管理対象サーバー (デプロイ対象サーバー) に SSH キーなどの認証情報が適切に設定されていること。
- Azure Pipelines Library に Private SSH キーがアップロードされていること。

実装
軽量版と推奨版の 2 つに分けてあります。どちらでも実装可能です。 MS Hosted Agent の ubuntu-latest には Ansible が built-in されているため、そのまま Ansible コマンドの実行が可能です。トリガーや変数グループなどはプロジェクトに応じて追加してください。
軽量版
一つのファイルで完結しています。必要に応じてビルドやテストステップを追加してください。
azure-pipelines.yml
trigger:
- none

pool:
  vmImage: 'ubuntu-latest'

steps:
- task: DownloadSecureFile@1
  displayName: 'Download ansible key file'
  name: ansibleKey
  inputs:
    secureFile: private_key

- script: |
    chmod 600 $(ansibleKey.secureFilePath)
    export ANSIBLE_HOST_KEY_CHECKING=False
    ansible-playbook ansible.yml -i inventory --private-key=$(ansibleKey.secureFilePath) -vvv
  displayName: 'Run ansible'
推奨版
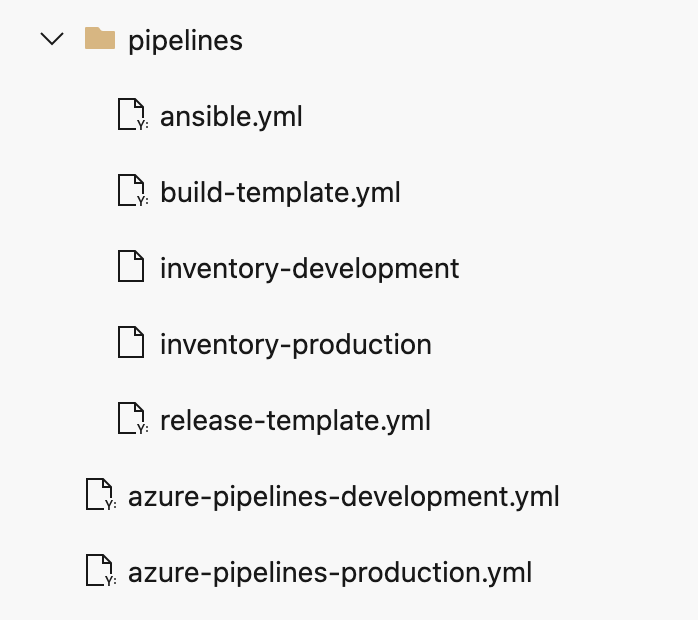
ビルドとリリースにステージを分けているのと、開発環境と本番環境に YAML を分けています。こちらも必要に応じてビルドやテストステップを追加してください。
azure-pipelines-production.yml
trigger:
- none

stages:
- stage: Build
  jobs:
  - job: Build
    pool:
      vmImage: 'ubuntu-latest'
    steps:
    - template: pipelines/build-template.yml

- stage: Release
  dependsOn:
  - Build
  condition: succeeded()
  jobs:
  - deployment: Deploy
    pool:
      vmImage: 'ubuntu-latest'
    environment: production
    strategy:
      runOnce:
        deploy:
          steps:
          - template: pipelines/release-template.yml
            parameters:
              SERVER_ENV: production
azure-pipelines-development.yml
trigger:
- none

stages:
- stage: Build
  jobs:
  - job: Build
    pool:
      vmImage: 'ubuntu-latest'
    steps:
    - template: pipelines/build-template.yml

- stage: Release
  dependsOn:
  - Build
  condition: succeeded()
  jobs:
  - deployment: Deploy
    pool:
      vmImage: 'ubuntu-latest'
    environment: development
    strategy:
      runOnce:
        deploy:
          steps:
          - template: pipelines/release-template.yml
            parameters:
              SERVER_ENV: development
pipelines/build-template.yml
steps:
- script: |
    tar zvcf app.tar.gz \
      --exclude='app.tar.gz' \
      --exclude='.git' \
      --warning=no-file-changed \
      . || [[ $? == 1 ]]
  displayName: 'compress code'

- publish: app.tar.gz
  artifact: app
  displayName: 'Publish Build artifact'

- publish: pipelines
  artifact: pipelines
  displayName: 'Publish pipelines artifact'
pipelines/release-template.yml
parameters:
  SERVER_ENV: ''

steps:
- task: DownloadSecureFile@1
  displayName: 'Download ansible key file'
  name: ansibleKey
  inputs:
    secureFile: private_key

- task: DownloadPipelineArtifact@2
  displayName: 'Download app'
  inputs:
    artifact: 'app'
    path: ./

- task: DownloadPipelineArtifact@2
  displayName: 'Download pipelines'
  inputs:
    artifact: 'pipelines'
    path: ./pipelines

- script: |
    chmod 600 $(ansibleKey.secureFilePath)
    export ANSIBLE_HOST_KEY_CHECKING=False
    ansible-playbook pipelines/ansible.yml -i pipelines/inventory-${{ parameters.SERVER_ENV }} --private-key=$(ansibleKey.secureFilePath) -vvv
  displayName: 'Run ansible'
トラブルシューティング
管理対象サーバーに SSH の IP フィルタリングがされているとき
MS Hosted Agent の IP は可変なのでデプロイ前に IP フィルタリングを許可して、デプロイ後に許可した IP フィルタリングを削除する必要があります。
仮想マシンは SSH を IP フィルタリングしていることが当たり前なので、めんどくさい場合は踏み台サーバーを構築して、そこに Self Hosted Agent を導入するのがよいと思います。
Azure VM にデプロイするときはこのコマンドとステップになります。パラメーターは必要に応じて設定してください。 AWS の場合も同じように AWS CLI を使用して許可、削除をすれば対応可能です。
- script: |
    GIP=$(curl inet-ip.info)
    echo "##vso[task.setvariable variable=AgentMachineGIP]${GIP}"
  displayName: 'Get agent global IP'

- task: AzureCLI@1
  displayName: 'Allow network security group'
  inputs:
    azureSubscription: 'azureSubscription'
    scriptLocation: inlineScript
    inlineScript: |
      az network nsg rule create \
        -g ${{ parameters.RG_NAME }} \
        -n allow-AzureDevOpsAgent-inbound \
        --nsg-name ${{ parameters.NSG_NAME }} \
        --priority 2222 \
        --access Allow \
        --direction Inbound \
        --protocol "*" \
        --destination-port-ranges "*" \
        --source-address-prefixes "$(AgentMachineGIP)"

# NSG への設定反映は即時ではないため、 ansible コマンドに --timeout=180 を設定して SSH 接続を待つ必要があります。
# ansible-playbook ansible.yml -i inventory --private-key=$(ansibleKey.secureFilePath) --timeout=180 -vvv

- task: AzureCLI@1
  displayName: 'Delete network security group'
  condition: always()
  inputs:
    azureSubscription: 'azureSubscription'
    scriptLocation: inlineScript
    inlineScript: |
      az network nsg rule delete \
        -g ${{ parameters.RG_NAME }} \
        -n allow-AzureDevOpsAgent-inbound \
        --nsg-name ${{ parameters.NSG_NAME }}
参考
Self Hosted Agent を利用する場合はこちらを参考ください。