Ktorの認証処理のためのAuth featureを少し触ってみたので書いていきます。
FormをPOSTして認証するパターンと、OAuthのパターンを書こうと思ったけど、思ったより長くなりそうなので分けます。
KotlinのVersionは1.2.0、KtorのVersionは0.9.0です。
Authの他に、Html builderを使用します。
KtorでのHello worldまではこの記事に書きましたので、アプリケーションの起動まではそっちを見てください。
事前準備
build.gradleに依存関係を追加します。
今回追加するのは、Ktorの提供するAuth, Html builderです。
repositories {
    ....
    jcenter()
}

dependencies {
    ....
    compile "io.ktor:ktor-auth:$ktor_version"
    compile "io.ktor:ktor-html-builder:$ktor_version"
    ....
}
jcenterは、Html builderを依存関係に追加する時に必要となります。Html builderを使わない場合は、必要ありません。
installもしておきます。
import io.ktor.application.Application
import io.ktor.application.install
import io.ktor.routing.Routing

fun Application.main() {
    ...
    install(Routing) {}
}
FormをPostして認証する
メールアドレスとパスワードで認証する簡単なページを作ります。
URLは/form/loginとし、FormPost.ktというファイルを作って書いていきます。
Routeを作る
io.ktor.routing.Routeの拡張関数を書いていきます。
import io.ktor.routing.Route
import io.ktor.routing.route

fun Route.formPost() {
    route("/form/login") {

    }
}
Application.main()で呼び出します。
fun Application.main() {
    ...
    install(Routing) {
        formPost()
    }
}
GET時の処理を書く
import io.ktor.application.call
import io.ktor.html.respondHtml
import io.ktor.routing.get
import kotlinx.html.*

fun Route.formPost() {
    route("/form/login") {
        get {
            call.respondHtml {
                body {
                    form(action = "/form/login", method = FormMethod.post) {
                        p {
                            +"Email: "
                            textInput(name = "email") { value = "" }
                        }
                        p {
                            +"Password: "
                            passwordInput(name = "password") { value = "" }
                        }
                        p {
                            submitInput { value = "Login" }
                        }
                    }
                }
            }
        }
    }
}
Htmlを組み立てているので見慣れないとちょっと気持ち悪いかもですが、フォームを作っているだけです。
メールアドレスのinputをemail、パスワードのinputをpasswordとします。POST先は同じく/form/loginです。
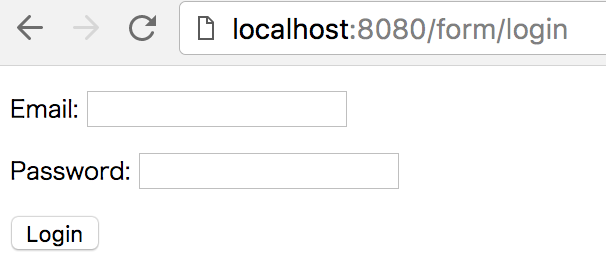
/form/loginにアクセスすると以下のようなページが表示されます。

認証の処理を書く
認証の処理を書く前にログイン可能なユーザーを定義しておきます。
データベースを使うのは面倒なので、今回は簡単なユーザークラスのリストで代用します。
fun Route.formPost() { ... }

data class FormPostUser(val name: String, val email: String, val password: String)

// ログイン可能なユーザーリスト
val userList = listOf(
    FormPostUser("hoge", "hoge@example.com", "hoge"),
    FormPostUser("piyo", "piyo@example.com", "piyopiyo")
)
POSTされたemailとpasswordが正しいかを検証する処理を追加します。
import io.ktor.auth.*
import io.ktor.http.HttpMethod
import io.ktor.routing.method

fun Route.formPost() {
    route("/form/login") {
        get { ... }

        method(HttpMethod.Post) {
            authentication {
                formAuthentication(userParamName = "email") { upc: UserPasswordCredential ->
                    userList.find { it.email == upc.name && it.password == ucp.password }?.let { UserIdPrincipal(it.name) }
                }
            }

            handle { TODO() }
        }
    }
}
authenticationというパイプラインを追加することで、リクエストを処理する前に認証処理を挟むことができます。
一般的なFormを使った一意なデータ(email)とパスワードの組み合わせでの認証ですのでformAuthenticationを使用します。
formAuthenticationの定義は、
fun AuthenticationPipeline.formAuthentication(userParamName: String = "user",
                                              passwordParamName: String = "password",
                                              challenge: FormAuthChallenge = FormAuthChallenge.Unauthorized,
                                              validate: (UserPasswordCredential) -> Principal?) { ... }
となっており、
-
userParamName:一意なデータのパラメータ名 -
passwordParamName:パスワードのパラメータ名 -
challenge:認証失敗時の処理 -
validate:認証の処理
を渡すことができます。
今回は一意なデータのパラメータ名はデフォルト引数のuserではなくemailなので、formAuthentication(userParamName = "email")と指定する必要があります。
validateは、パラメータをマッピングしたnameとpasswordフィールドを持つUserPasswordCredentialクラスを引数とする関数で、ここに認証処理を書いていきます。
Auth featureでは、認証情報をPrincipalインターフェースを実装したクラスで扱うので、リクエストされたemailとpassword一致するユーザーを探し、UserIdPrincipalというクラスを返しています。
認証失敗時は、nullを返します。
authenticationパイプラインの中では、formAuthenticationの他に、basicAuthenticationやoatuhAtLocationなどが定義されています。また、独自の認証処理を追加することもできます。(後述)
POST時の処理を書く
fun Route.formPost() {
    route("/form/login") {
        get { ... }

        method(HttpMethod.Post) {
            authentication { ... }

            handle {
                val principal = call.principal<UserIdPrincipal>()?: throw IllegalStateException("Principal is null.")

                call.respondHtml {
                    body {
                        h1 {
                            +"Hello, ${principal.name}"
                        }
                    }
                }
            }
        }
    }
}
POST時の本処理はhandleの中に書いていきます。
ApplicationCall.principal<T : Principal>()でformAuthenticationのvalidで返した認証情報を取得することができます。
UserIdPrincipalはコンスタラクタで渡されるnameだけを持つdata classなので、それを使ってHtmlを返しています。
ちなみに、ここでApplicationCall.principal<T : Principal>()がnullを返すパターンはないはず。
認証が失敗してvalidでnullを返した場合、formAuthenticationがレスポンスを返してしまいます。
POST時は
method(HttpMethod.Post){ handle { ... } }
としないといけないのが面倒に見えると思いますがこれは認証処理を挟むためで、io.ktor.routing.getは
fun Route.get(body: PipelineInterceptor<Unit, ApplicationCall>): Route {
    return method(HttpMethod.Get) { handle(body) }
}
となっており、やってることは同じです。ただ、authenticationや他のinterceptなどを挟むことができません。
認証してみる
適切なメールアドレスとパスワードを入力しLoginすると、以下のように表示されます。
 別ページにリダイレクトさせる場合は`call.respondRedirect()`を使うのかもしれません。
セッションまわりは`Sessions`というfeatureがあるのでそちらでやるのだろうなぁと思っています。
今の実装だと、認証に成功した場合は問題ないですが、認証に失敗すると401 unauthorizedを返すだけで、空白のページに遷移してしまいます。
これを少し修正して、失敗したときはログインページに戻してエラーメッセージを表示するようにします。
認証失敗時の処理を書く
AuthenticationPipeline.formAuthenticationにはchallengeという引数があり、これで失敗時の処理を指定できます。
fun Route.formPost() {
    route("/form/login") {
        ...

        method(HttpMethod.Post) {
            authentication {
                formAuthentication(userParamName = "email",
                                   challenge = FormAuthChallenge.Redirect { call, _ ->
                                       call.request.uri + "?error=Invalid credential"
                                   }) {
                     ...
                 }
            }

                        ...
        }
    }
}
デフォルトでは401 unauthorizedを返すようになっていますが、ログインページにerrorというパラメータをつけてリダイレクトするようにしました。
あとはGET時にerrorパラメータはある時に、エラーメッセージを表示するように変更するだけです。
fun Route.formPost() {
    route("/form/login") {
        get {
            // 追加
            val error = call.parameters["error"]

            call.respondHtml {
                body {
                    form(action = "/form/login", method = FormMethod.post) {
                        // 追加
                        if (error != null) {
                            p {
                                +"Error: $error"
                            }
                        }

                        p {
                            +"Email: "
                            textInput(name = "email") { value = "" }
                        }
                        p {
                            +"Password: "
                            passwordInput(name = "password") { value = "" }
                        }
                        p {
                            submitInput { value = "Login" }
                        }
                    }
                }
            }
        }

        ...
    }
}
誤った情報でログインしようとするとこのような表示になります。

ちなみに、challengeはFormAuthChallenge型となっており、FormAuthChallengeは、
sealed class FormAuthChallenge {
    class Redirect(val url: (ApplicationCall, UserPasswordCredential?) -> String) : FormAuthChallenge()
    object Unauthorized : FormAuthChallenge()
}
と定義されているため、401 unauthorizedを返すかリダイレクトするかの2択のようです。
次はGItHubのAPIを使ってOAuth認証するのを書きます。
Sessionsは現状さわる予定なし。