Introduction
Gitをローカルのみで使う時に必要な操作についての個人的メモ.
ターミナルでのコマンド操作とVSCodeでのGUI操作の両方まとめる.
環境はWindows
バージョンの確認
Gitがインストールされているかをまずは確認
git version
git version 2.38.0.windows.1
ユーザー設定
まずはユーザー名とメールアドレスを設定
この作業はgitインストール後に一度だけ実行すればよい
git config --global user.name "ユーザー名"
git config --global user.email "メールアドレス"
正しく設定できたか一応確認
git config --global --list
user.name=ユーザー名
user.email=メールアドレス
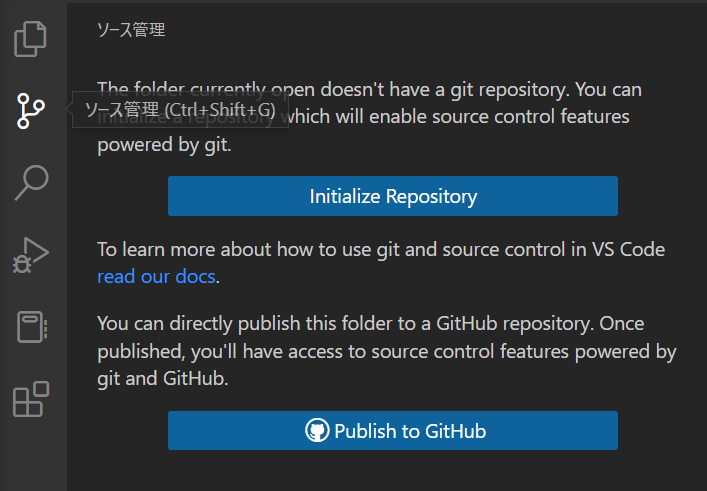
ローカルリポジトリの作成
フォルダ内に隠しファイル.gitが作成される
git init
Initialized empty Git repository in フォルダの場所
vscodeではソース管理タブの"initialize Repository"をクリック
ステータスの確認
git status
On branch master

No commits yet

Untracked files:
  (use "git add <file>..." to include in what will be committed)
        sample.md

nothing added to commit but untracked files present (use "git add" to track)
vscodeではまだgitの管理下にないためsample.mdの横にU(Utracked)と表示される
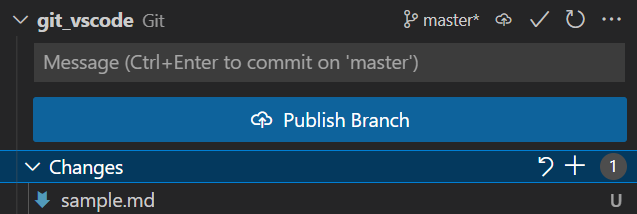
ステージング
git管理下のすべてのファイルをステージング
git add .
ソース管理タブChanges内の+マークをクリック

ステージングの取り消し
ステージングの取り消し
git reset .
ソース管理タブStaged Changes内にカーソルを合わせると出現するーマークをクリック
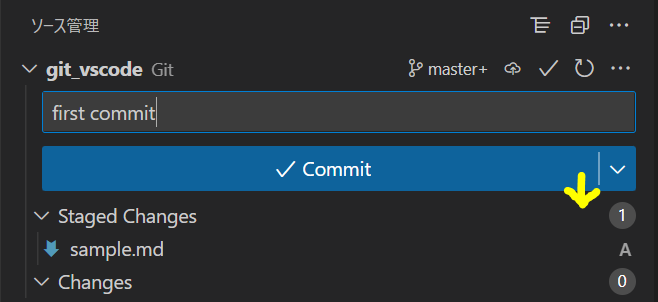
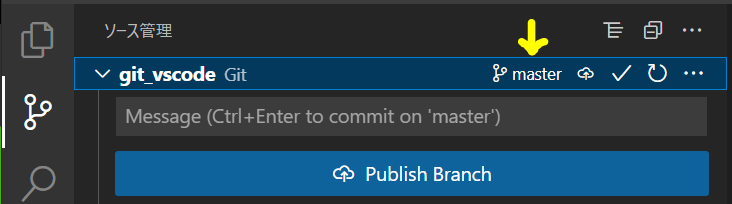
コミット
コミットメッセージを"first commit"としてコミット
git commit -m "first commit"
[master (root-commit) e1c3610] first commit
 1 file changed, 1 insertion(+)
 create mode 100644 sample.md
ソース管理タブ内のメッセージ入力バーにコミットメッセージを入力してCommitをクリック

ブランチの作成
基本的にファイルの修正などはmasterブランチではなく新しいブランチを作成して行う.
git branch edit-file
- masterをクリック
- ポップアップが表示されその中のCreate new branchをクリック
- ブランチ名を入力しエンターキー
1
2
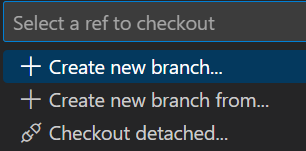
3
ブランチの確認
現在選択されているブランチに*マークがつく
git branch
  edit-file
* master
ソース管理内に表示されているブランチが現在の選択されているもの
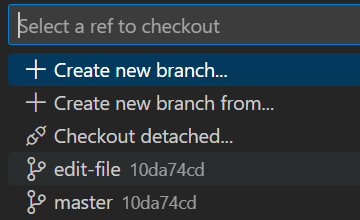
ブランチ名をクリックすると作成済みのブランチ一覧がポップアップする

ブランチの切り替え
git checkout edit-file
  edit-file
Switched to branch 'edit-file'
ブランチ名をクリックしポップアップした中から移動先のブランチを選択すればよい
マージ
edit-fileブランチでファイルを修正しコミットした後masterブランチにマージする.
ターミナルではmasterブランチに移動した後以下のコマンドを実行
git merge edit-file
Updating e1c3610..24d49ef
Fast-forward
 sample.md | 3 ++-
 1 file changed, 2 insertions(+), 1 deletion(-)
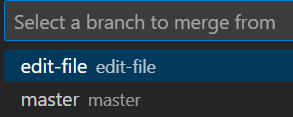
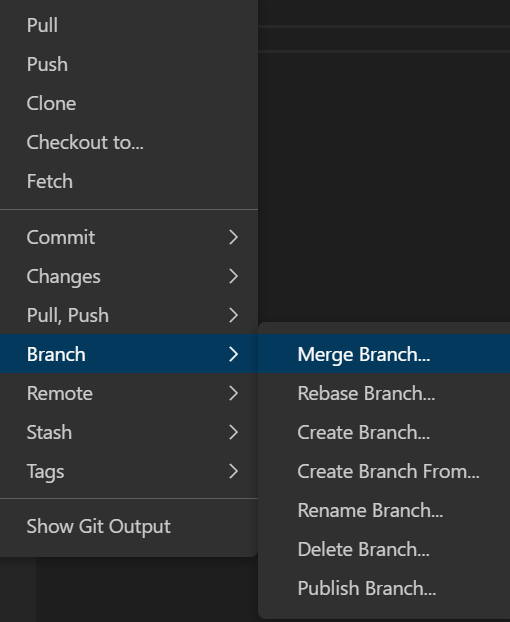
- masterブランチに移動した後・・・をクリック
- ポップアップからBranch→Merge Branchをクリック
- ブランチ一覧が表示されるのでマージしたいブランチを選択
1

2
3

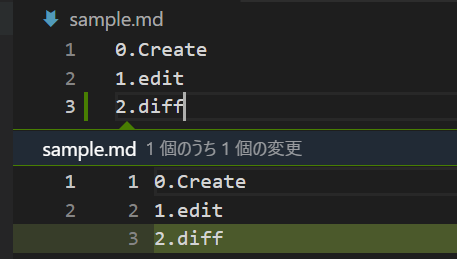
差分の確認
git diff
vscode上では変更点が緑で表示され,緑の部分をクリックすると差分が見れる
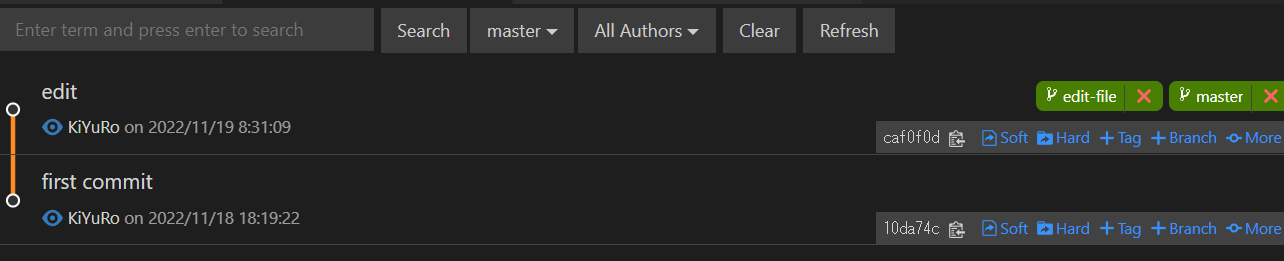
ログの確認
git log
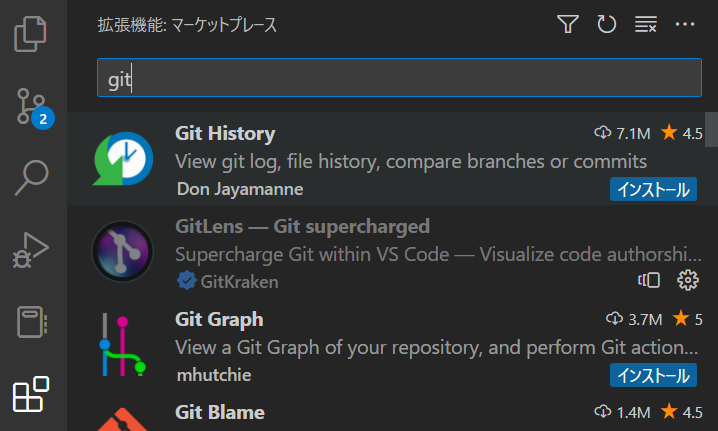
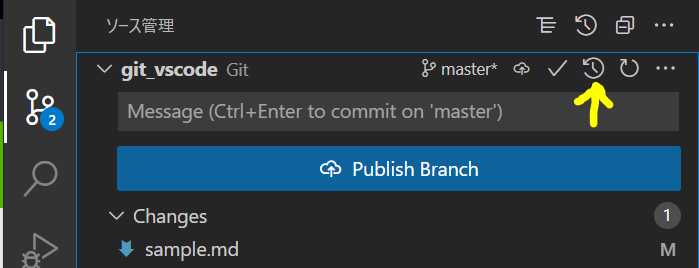
vscodeではログの確認をする機能がデフォルトでは見つからなかった
なので拡張機能のGit Historyを入れることにした
するとソース管理内に時計マークが表示されるようになるのでそれをクリックすることでログが確認可能
Conclusion
Vscodeで作業するときはターミナルを使用しないGUI操作がやり易いと感じた.
次回はGitHubとの連携をまとめようと思う.