Vueコンポーネント同士を連携する。
〜contents〜
- v-model
- Emit(引数付)
TextBoxコンポーネントから学ぶv-modelディレクティブ
<template>
  <div>
    <TextBox placeholder="山田 太郎" :message="message" @updatedInputValue="checkInputValue" />
    <Button value="決定" :disabled="disabled" @Clicked="click"/>
  </div>
</template>

<script lang="ts">
import { Component, Vue } from 'vue-property-decorator';
import TextBox from '@/components/TextBox.vue'
import Button from '@/components/Button.vue'

@Component({
  components:{
    TextBox,
    Button,
    RadioButton
  }
})
export default class Form extends Vue {
  private name: string = ""
  private disabled: boolean = false
  private message: string = ""

  private click(): void{
    this.disabled = true
    console.log("I'm parent")
  }

  private checkInputValue(val: string){
    this.name = val
    console.log("入力:" + this.name)
    if (this.name.length > 10 || this.name.length < 1){
      this.message = "ユーザ名は1〜10文字です。"
      this.disabled = true
    } else {
      this.message = ""
      this.disabled = false
    }
  }
}
</script>
<template>
  <div>
    <input type="text" :placeholder="placeholder" v-model="inputValue">
  </div>
</template>

<script lang="ts">
import { Component, Prop, Vue } from 'vue-property-decorator';

@Component
export default class TextBox extends Vue {
  private inputValue: string = ""

  @Prop()
  private placeholder: string

</script>
v-model
双方向バインディング。v-modelとは、v-bindとv-onをまとめて記述した糖衣構文(まとめただけで等価であるということ)である。すなわち、v-modelに指定したvalueは、<script>で定義された変数と連動する。
今回のようにで使用すると、<script>内で受けたvalueの変更は入力欄へも反映され、逆に入力欄への入力は<script>の変数valueにも変更を与える。
<input type="text" v-model="inputValue">

<input type="text" v-bind:value="inputValue" v-on:input="inputValue = $event.target.value">
今回のようにテキスト入力された情報を子コンポーネントだけで持っていてもしょうがないので、変更とともに随時親コンポーネントに通知するようにしたい。ここで、v-onの方は式であり自由に書き換えられることに着目する。
inputイベントを受けて親コンポーネントへEmitする関数をコールし、引数として親へ入力内容を渡そう。
ただし、typescriptではjsのように$event.target.valueで入力を拾おうとするとエラーがでる。次のように1step踏んで解決*1。ちなみに、event!としているのはそうしないとundefindの可能性があるよとエラーが出る(?)ので*2
参考1) https://yuutookun.hatenablog.com/entry/2018/07/21/084912
参考2) https://teratail.com/questions/130598
Emitする際に引数を渡す。
<template>
  <div>
    <TextBox @updatedInputValue="checkInputValue" />
    <Button value="決定" :disabled="disabled" @Clicked="click"/>
  </div>
</template>

<script lang="ts">
import { Component, Vue } from 'vue-property-decorator';
import TextBox from '@/components/TextBox.vue'
import Button from '@/components/Button.vue'

@Component({
  components:{
    TextBox,
    Button
  }
})
export default class Form extends Vue {
  private inputValue: string = ""

  private checkInputValue(val: string){
    this.inputValue = val
    console.log("入力:" + this.inputValue)
  }
}
</script>
<template>
  <div>
    <input type="text" :value="inputValue" @input="updateValue" >
  </div>
</template>

<script lang="ts">
import { Component, Vue, Emit } from 'vue-property-decorator';

@Component
export default class TextBox extends Vue {
  private inputValue: string = ""

  // 同名のイベント名でもここは省略不可。
  //ここでイベント名を指定しないと、親コンポーネントでイベント名は'updatedInputValue'ではなく、
  //'updatedinputvalue'または'updated-input-value'に変わられてしまうそうです。
  //詳細はVUEガイドの「カスタムイベント・イベント名」を参照してください。
  @Emit('updatedInputValue')
  private updatedInputValue(val: string): void{
  }

  private updateValue():void{
    if (event!.target instanceof HTMLInputElement) {
      this.inputValue = event!.target.value;
      this.updatedInputValue(this.inputValue);
    }
  }
}
</script>
親コンポーネントはEmitで指定したイベントにコールする関数を紐づけることで連携できる。
上記の流れで、<input>に入力されるとinputイベントが発火し、続いてEmitで指定するイベントが発火、親コンポーネントの関数がコールされるといった流れ。
各コンポーネントを結合する。
最後に2つのコンポーネントを連携する。
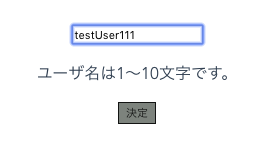
TextBoxへの入力のバリデーションチェックを行い、決定不可のケースではdisabledフラグをtrueにし、Buttonを使用不可な状態に切り替える。
<template>
  <div>
    <TextBox placeholder="ユーザ名" :message="message" @updatedInputValue="checkInputValue" />
    <Button value="決定" :disabled="disabled" @Clicked="click"/>
  </div>
</template>

<script lang="ts">
import { Component, Vue } from 'vue-property-decorator';
import TextBox from '@/components/TextBox.vue'
import Button from '@/components/Button.vue'

@Component({
  components:{
    TextBox,
    Button
  }
})
export default class Form extends Vue {
  private inputValue: string = ""
  private disabled: boolean = false
  private message: string = ""
  private click(): void{
    this.disabled = true
    console.log("I'm parent")
  }

  private checkInputValue(val: string){
    this.inputValue = val
    console.log("入力:" + this.inputValue)
    if (this.inputValue.length > 10 || this.inputValue.length < 1){
      this.message = "ユーザ名は1〜10文字です。"
      this.disabled = true
    } else {
      this.message = ""
      this.disabled = false
    }
  }
}
</script>
<template>
  <div>
    <input type="text" :placeholder="placeholder" :value="inputValue" @input="updateValue" >
    <p>{{message}}</p>
  </div>
</template>

<script lang="ts">
import { Component, Prop, Vue, Emit } from 'vue-property-decorator';

@Component
export default class TextBox extends Vue {
  private inputValue: string = ""

  @Prop()
  private placeholder: string

  @Prop()
  private message: string

  @Emit('updatedInputValue')
  private updatedInputValue(val: string): void{
  }

  private updateValue():void{
    if (event!.target instanceof HTMLInputElement) {
      this.inputValue = event!.target.value;
      this.updatedInputValue(this.inputValue);
    }
  }
}
</script>
<template>
  <div>
    <button class="button" :class="{disabled}" @click="onClick">{{value}}</button>
  </div>
</template>

<script lang="ts">
import { Component, Prop, Vue, Emit } from 'vue-property-decorator';

@Component
export default class Button extends Vue {
  @Prop()
  private value: string

  @Prop()
  private disabled: boolean

  private onClick():void {
    if (!(this.disabled)){
      this.Clicked()
    }
  }
  //Emitの引数のイベント名はメソッド名と同じ場合は省略可能。この場合省可能
  @Emit('Clicked')
  private Clicked():void {
    console.log("I'm child")
  }

}
</script>

<style scoped lang="scss">
.button{
  text-align : center;
  background-color : #f0b434;
  cursor : pointer;
  border : solid 1px;
  float : center;
}
.disabled{
  background-color : #7d837d;
}
</style>
完成品