はじめに
- 家族間で使えるchatgpt botをDiscordに導入する
- その時のログ
- エンジニア初学者の備忘録(クソ適当)
構成
- Ubuntu 22.04 オンプレ鯖
- Gitでの管理がクソ楽なのでdockerコンテナで起動する
やっていく
Botのアカウント作成
Discord Developer partalのアカウントが必要らしい
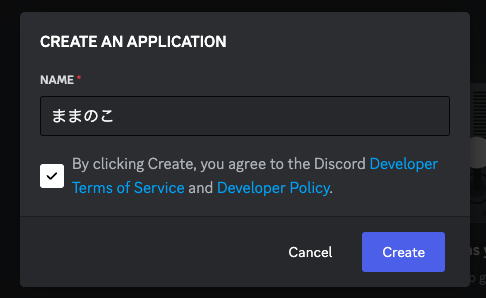
右上のnew Applicationからbot名を入力
bot名は適当
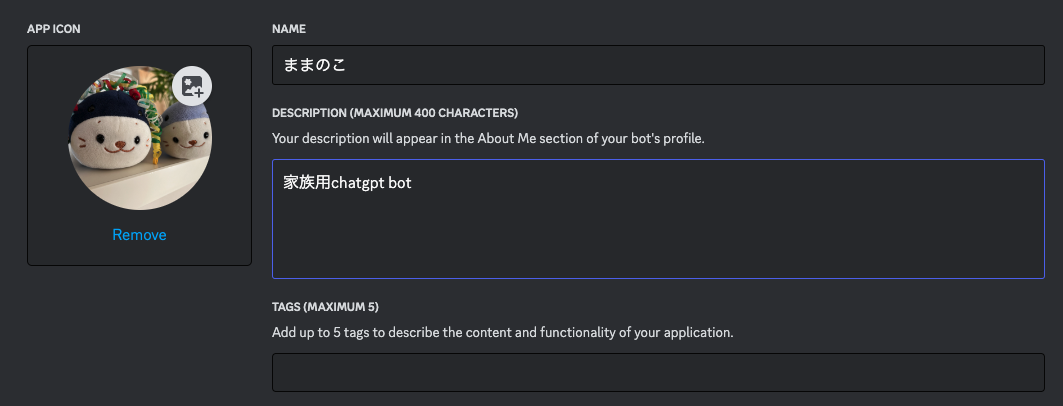
家族の相棒の人形をbotの写真に設定
ちなみにのこたん(しろたんの亜種)という人形、かわいい(どうでもいい)
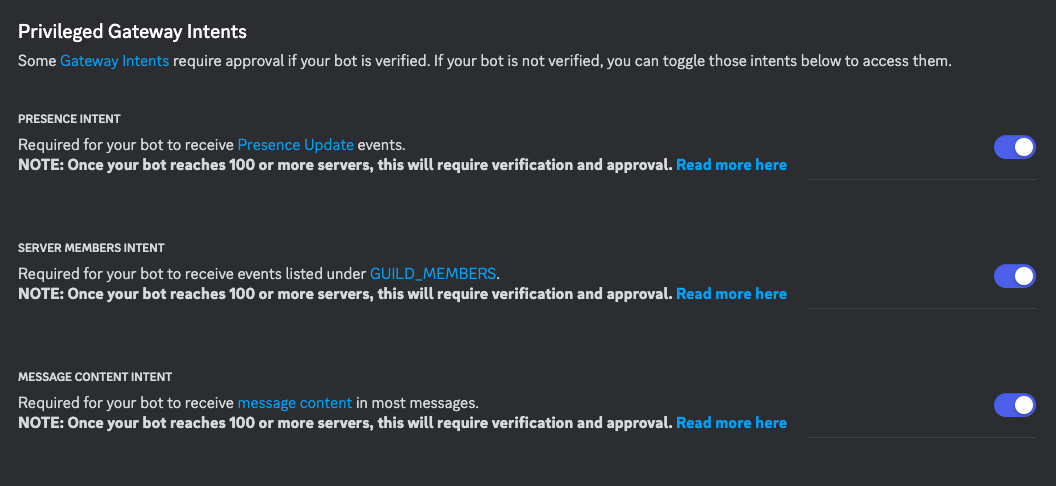
ついでにこれら権限を許可しといてください
botをサーバーに参加させてみよう
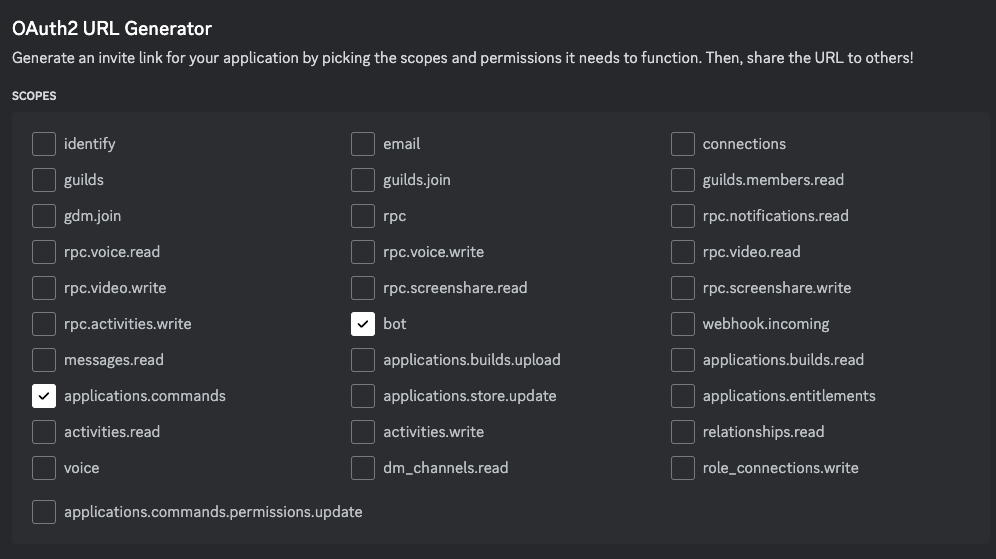
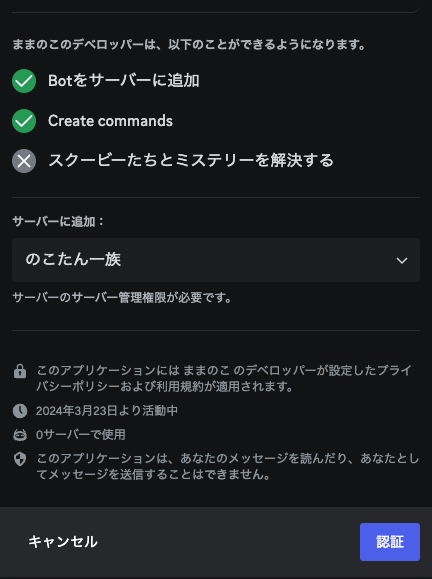
OAuth2 → bot, applications.commandsにチェックを入れます
これはbotとして動作させる、コマンドをサーバーで利用するために必須。
絶対やっておきましょう
下の方に行くと、GENERATED URLというものがあります。これをコピペして開く
参加させたいサーバーを選んで参加させます〜
参加してそう!ok
あとは適当にロールを管理者権限で付けておきましょう〜
Botの構築(環境構築編)
とりあえず以下がドキュメント
軽く読んでみると、
- python3.8で動作する
-
python3 -m pip install -U discord.pyでライブラリは入る - 依存関係にあるライブラリが必要
これらをコンテナの起動時に実行してあげる必要があるわけですな(小並感)
じゃあこれをdocker-compose.yamlとDockerfileに書いてあげます
docker-compose.yaml
version: '3.8'
services:
  bot:
    build: .
    env_file:
      - .env
    volumes:
      - .:/bot
    command: python3 bot.py
Dockerfile
# Pythonイメージの使用
FROM python:3.8-slim

# 必要なシステム依存関係のインストール
RUN apt-get update && apt-get install -y \
    python3-dev \
    libnacl-dev \
    libffi-dev \
    && rm -rf /var/lib/apt/lists/*

# python-dotenvのインストール
RUN python3 -m pip install -U python-dotenv

# 作業ディレクトリの設定
WORKDIR /bot

# discord.pyのインストール
RUN python3 -m pip install -U discord.py

# Botのコードをコピー
COPY . .

# Botを実行
CMD ["python3", "./bot.py"]
では、早速環境構築の儀を行う
$ docker-compose build
$ docker-compose up
docker「bot.py」がねえぞ!!!!ばか!!!!!!!って出たら完了
botの構築(本体制作)
やる前にドキュメントの最小構成試してみるか〜
ディレクトリにbot.pyを作ります
bot.py
import discord
import os
from dotenv import load_dotenv

load_dotenv()  # .envファイルから環境変数を読み込む

intents = discord.Intents.default()
intents.message_content = True

client = discord.Client(intents=intents)

@client.event
async def on_ready():
    print(f'We have logged in as {client.user}')

@client.event
async def on_message(message):
    if message.author == client.user:
        return

    if message.content.startswith('$hello'):
        await message.channel.send('Hello!')

client.run(os.getenv('DISCORD_TOKEN'))
少し改造して.envから読み込むようにしてあります。.envというファイルを作って、Discordのトークンを入れてあげましょう
では早速
$ docker-compose up
立ち上げて、Shard ID None has connected to Gateway何ちゃら何ちゃらみたいなの出たら成功
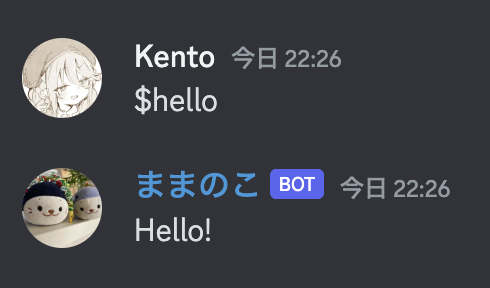
この時点でbotは動作しているので、discordでチェックしてみましょう!
おk ちゃんと動いているみたいで安心。
早速OpenAIのChatGPT - APIを組み入れていくぅ!!!!
まずはAPIを発行(以下からどうぞ)
プラスでChatGPT-API使用するにはクライアントライブラリが必要なのでDockerfileにopenaiを追加します。
Dockerfile (以下を追加)
# OpenAIライブラリのインストール
RUN python3 -m pip install -U openai
それでは実際にbot.pyを書いていきます。
import discord
import os
from dotenv import load_dotenv
from openai import OpenAI

# .envファイルから環境変数を読み込む
load_dotenv()

# 環境変数からDiscord Botのトークンを設定
TOKEN = os.getenv('DISCORD_TOKEN')

# Discord Botのクライアントを作成
client = discord.Client(intents=discord.Intents.all())

# Discord Bot起動時
@client.event
async def on_ready():
    print(f'{client.user} has connected to Discord!')

@client.event
async def on_message(message):
    if message.author == client.user:
        return

    # noko_data.txtからプロンプトテンプレートを読み込む
    with open('noko_data.txt', 'r') as file:
        prompt_template = file.read().strip()

    openai_clent = OpenAI(api_key=os.getenv('OPENAI_API_KEY'))

    messages = [
        {"role": "system", "content": prompt_template},
        {"role": "user", "content": message.content}
    ]

    completion = openai_clent.chat.completions.create(
        model="gpt-3.5-turbo",
        messages=messages,
        temperature=0.7,
        max_tokens=150
    )

    response = completion.choices[0].message.content

    # 応答を送信する
    await message.channel.send(response)

# Discord Botを起動する
client.run(TOKEN)
参考:chatgptのドキュメント
それでは一度buildしなおして起動してみます(.envファイルにopenaiのkeyを追加するのを忘れずに)
また、prompt_templateとしてキャラデータを読み込んでいます。要らなければ消してもらっておk
よしレスポンスもおk
完成(みんなはbotの権限周りの設定しっかりやろうね)
