環境構築
①AWS CLI(Homebrewを使います)
②Terraform をインストールしていきます。
①次のコマンドでAWS-CLIをインストールします。
$ brew install awscli
下記のコマンドでAWS-CLIの設定を入れていきます。
mbp:terraform kentaroyoshizumi$ aws configure
AWS Access Key ID [****************7234]: ********
AWS Secret Access Key [****************7234]: ********
Default region name [us-east-1]: ap-northeast-1
Default output format [None]: json
次に下記のコマンドでtfenvをインストールしていきます。
$ brew install tfenv
インストールが完了したらTerraform本体をインストールします。
まずはインストール可能なTerraformのverを表示します。
$ tfenv list-remote
実行結果
1.2.0-beta1
1.2.0-alpha20220413
1.2.0-alpha
1.1.9
1.1.8
1.1.7
1.1.6
1.1.5
1.1.4
1.1.3
1.1.2
1.1.1
1.1.0
1.1.0-rc1
1.1.0-beta2
1.1.0-beta1
1.1.0-alpha20211029
1.1.0-alpha20211020
1.1.0-alpha20211006
1.1.0-alpha20210922
1.1.0-alpha20210908
1.1.0-alpha20210811
1.1.0-alpha20210728
1.1.0-alpha20210714
1.1.0-alpha20210630
1.1.0-alpha20210616
1.0.11
1.0.10
1.0.9
1.0.8
1.0.7
1.0.6
1.0.5
1.0.4
1.0.3
1.0.2
1.0.1
1.0.0
0.15.5
0.15.4
0.15.3
0.15.2
0.15.1
0.15.0
0.15.0-rc2
0.15.0-rc1
0.15.0-beta2
0.15.0-beta1
0.15.0-alpha20210210
0.15.0-alpha20210127
0.15.0-alpha20210107
0.14.11
0.14.10
0.14.9
0.14.8
0.14.7
0.14.6
0.14.5
0.14.4
0.14.3
0.14.2
0.14.1
0.14.0
0.14.0-rc1
0.14.0-beta2
0.14.0-beta1
0.14.0-alpha20201007
0.14.0-alpha20200923
0.14.0-alpha20200910
0.13.7
0.13.6
0.13.5
0.13.4
0.13.3
0.13.2
0.13.1
0.13.0
0.13.0-rc1
0.13.0-beta3
0.13.0-beta2
0.13.0-beta1
0.12.31
0.12.30
0.12.29
0.12.28
0.12.27
0.12.26
0.12.25
0.12.24
0.12.23
0.12.22
0.12.21
0.12.20
0.12.19
0.12.18
0.12.17
0.12.16
0.12.15
0.12.14
0.12.13
0.12.12
0.12.11
0.12.10
~中略~
今回はver0.12.28を使用します。
$ tfenv install 0.12.28
下記が表示されたら成功しています。
mbp:terraform kentaroyoshizumi$ tfenv install 0.12.28
Installing Terraform v0.12.28
Downloading release tarball from https://releases.hashicorp.com/terraform/0.12.28/terraform_0.12.28_darwin_amd64.zip
###################################################################################################### 100.0%
Downloading SHA hash file from https://releases.hashicorp.com/terraform/0.12.28/terraform_0.12.28_SHA256SUMS
No keybase install found, skipping OpenPGP signature verification
Archive:  /var/folders/9c/y4p551tj63x6rcc0fjdlcllc0000gn/T/tfenv_download.XXXXXX.gVMLHrMK/terraform_0.12.28_darwin_amd64.zip
  inflating: /usr/local/Cellar/tfenv/2.2.3/versions/0.12.28/terraform
Installation of terraform v0.12.28 successful. To make this your default version, run 'tfenv use 0.12.28'
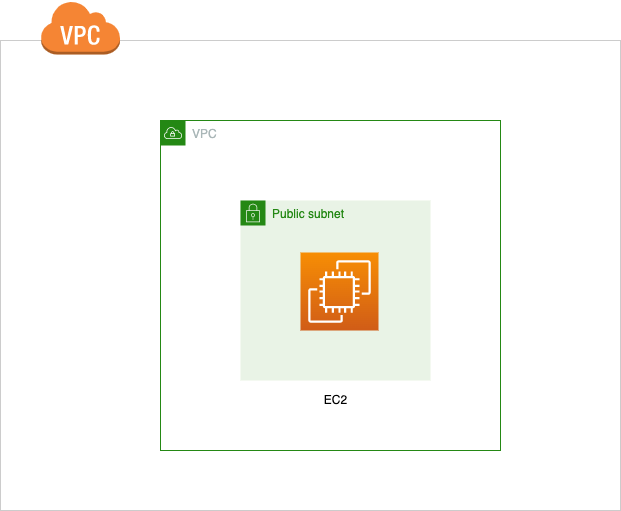
インストールが完了したら、このシンプルな構成を実現します。
①まずはAWSの東京リージョンを使用しますという宣言をします。
provider.tf
provider "aws" {
  region = "ap-northeast-1"
}
②VPCとパブリックサブネットを作成します。
vpc.tf
resource "aws_vpc" "main" {
  cidr_block           = "10.0.0.0/16"
  enable_dns_hostnames = "true"

  tags = {
    Name = "aws-terraform-vpc"
  }
}

resource "aws_subnet" "public-a" {
  vpc_id                  = aws_vpc.main.id
  availability_zone       = "ap-northeast-1a"
  cidr_block              = "10.0.0.0/24"
  map_public_ip_on_launch = true     #サブネットで起動したインスタンスにパブリックIPを許可する

  tags = {
    Name = "public-a"
  }
}

resource "aws_internet_gateway" "gw" {
  vpc_id = aws_vpc.main.id

  tags = {
    Name = "aws-terraform-igw"
  }
}

resource "aws_route_table" "public" {
  vpc_id = aws_vpc.main.id

  route {
    cidr_block = "0.0.0.0/0"
    gateway_id = aws_internet_gateway.gw.id
  }

  tags = {
    Name = "public"
  }
}

resource "aws_route_table_association" "public-a" {
  subnet_id      = aws_subnet.public-a.id
  route_table_id = aws_route_table.public.id
}
③セキュリティグループを作成します。
sg.tf
resource "aws_security_group" "allow" {
  name        = "allow"
  description = "Allow inbound traffic"
  vpc_id      = aws_vpc.main.id

  egress {
    from_port   = 0
    to_port     = 0
    protocol    = "-1"
    cidr_blocks = ["0.0.0.0/0"]
  }

  tags = {
    Name = "allow_http"
  }
}

resource "aws_security_group_rule" "inbound_http" {
  type      = "ingress"
  from_port = 80
  to_port   = 80
  protocol  = "tcp"
  cidr_blocks = [
    "0.0.0.0/0"
  ]

  security_group_id = aws_security_group.allow.id
}

resource "aws_security_group_rule" "inbound_ssh" {
  type      = "ingress"
  from_port = 22
  to_port   = 22
  protocol  = "tcp"
  cidr_blocks = [
    "0.0.0.0/0"
  ]

  security_group_id = aws_security_group.allow.id
}
④作成するEC2の.tfファイルを作成します。
ec2.tf
resource "aws_instance" "hello-world" {
    ami = "ami-0218d08a1f9dac831"
    instance_type = "t2.micro"

    tags = {
        Name = "HelloWorld"
    }

}
⑤ファイルを保存したのちterraform apply を実行します。
$ terraform apply
下記のような表示がされます。
mbp:terraform kentaroyoshizumi$ terraform apply

An execution plan has been generated and is shown below.
Resource actions are indicated with the following symbols:
  + create

Terraform will perform the following actions:

  # aws_instance.hello-world will be created
  + resource "aws_instance" "hello-world" {
      + ami                          = "ami-0218d08a1f9dac831"
      + arn                          = (known after apply)
      + associate_public_ip_address  = (known after apply)
      + availability_zone            = (known after apply)
      + cpu_core_count               = (known after apply)
      + cpu_threads_per_core         = (known after apply)
      + get_password_data            = false
      + host_id                      = (known after apply)
      + id                           = (known after apply)
      + instance_state               = (known after apply)
      + instance_type                = "t2.micro"
      + ipv6_address_count           = (known after apply)
      + ipv6_addresses               = (known after apply)
      + key_name                     = (known after apply)
      + outpost_arn                  = (known after apply)
      + password_data                = (known after apply)
      + placement_group              = (known after apply)
      + primary_network_interface_id = (known after apply)
      + private_dns                  = (known after apply)
      + private_ip                   = (known after apply)
      + public_dns                   = (known after apply)
      + public_ip                    = (known after apply)
      + secondary_private_ips        = (known after apply)
      + security_groups              = (known after apply)
      + source_dest_check            = true
      + tags                         = {
          + "Name" = "HelloWorld"
        }
      + tenancy                      = (known after apply)
      + vpc_security_group_ids       = (known after apply)

      + ebs_block_device {
          + delete_on_termination = (known after apply)
          + device_name           = (known after apply)
          + encrypted             = (known after apply)
          + iops                  = (known after apply)
          + kms_key_id            = (known after apply)
          + snapshot_id           = (known after apply)
          + tags                  = (known after apply)
          + throughput            = (known after apply)
          + volume_id             = (known after apply)
          + volume_size           = (known after apply)
          + volume_type           = (known after apply)
        }

      + enclave_options {
          + enabled = (known after apply)
        }

      + ephemeral_block_device {
          + device_name  = (known after apply)
          + no_device    = (known after apply)
          + virtual_name = (known after apply)
        }

      + metadata_options {
          + http_endpoint               = (known after apply)
          + http_put_response_hop_limit = (known after apply)
          + http_tokens                 = (known after apply)
        }

      + network_interface {
          + delete_on_termination = (known after apply)
          + device_index          = (known after apply)
          + network_interface_id  = (known after apply)
        }

      + root_block_device {
          + delete_on_termination = (known after apply)
          + device_name           = (known after apply)
          + encrypted             = (known after apply)
          + iops                  = (known after apply)
          + kms_key_id            = (known after apply)
          + tags                  = (known after apply)
          + throughput            = (known after apply)
          + volume_id             = (known after apply)
          + volume_size           = (known after apply)
          + volume_type           = (known after apply)
        }
    }

Plan: 1 to add, 0 to change, 0 to destroy.

Do you want to perform these actions?
  Terraform will perform the actions described above.
  Only 'yes' will be accepted to approve.

  Enter a value:
yesと入力しEnterを押します。
  Enter a value: yes

aws_instance.hello-world: Creating...
aws_instance.hello-world: Still creating... [10s elapsed]
aws_instance.hello-world: Still creating... [20s elapsed]
aws_instance.hello-world: Still creating... [30s elapsed]
aws_instance.hello-world: Creation complete after 33s [id=i-0f5831fcdff783fa9]

Apply complete! Resources: 1 added, 0 changed, 0 destroyed.
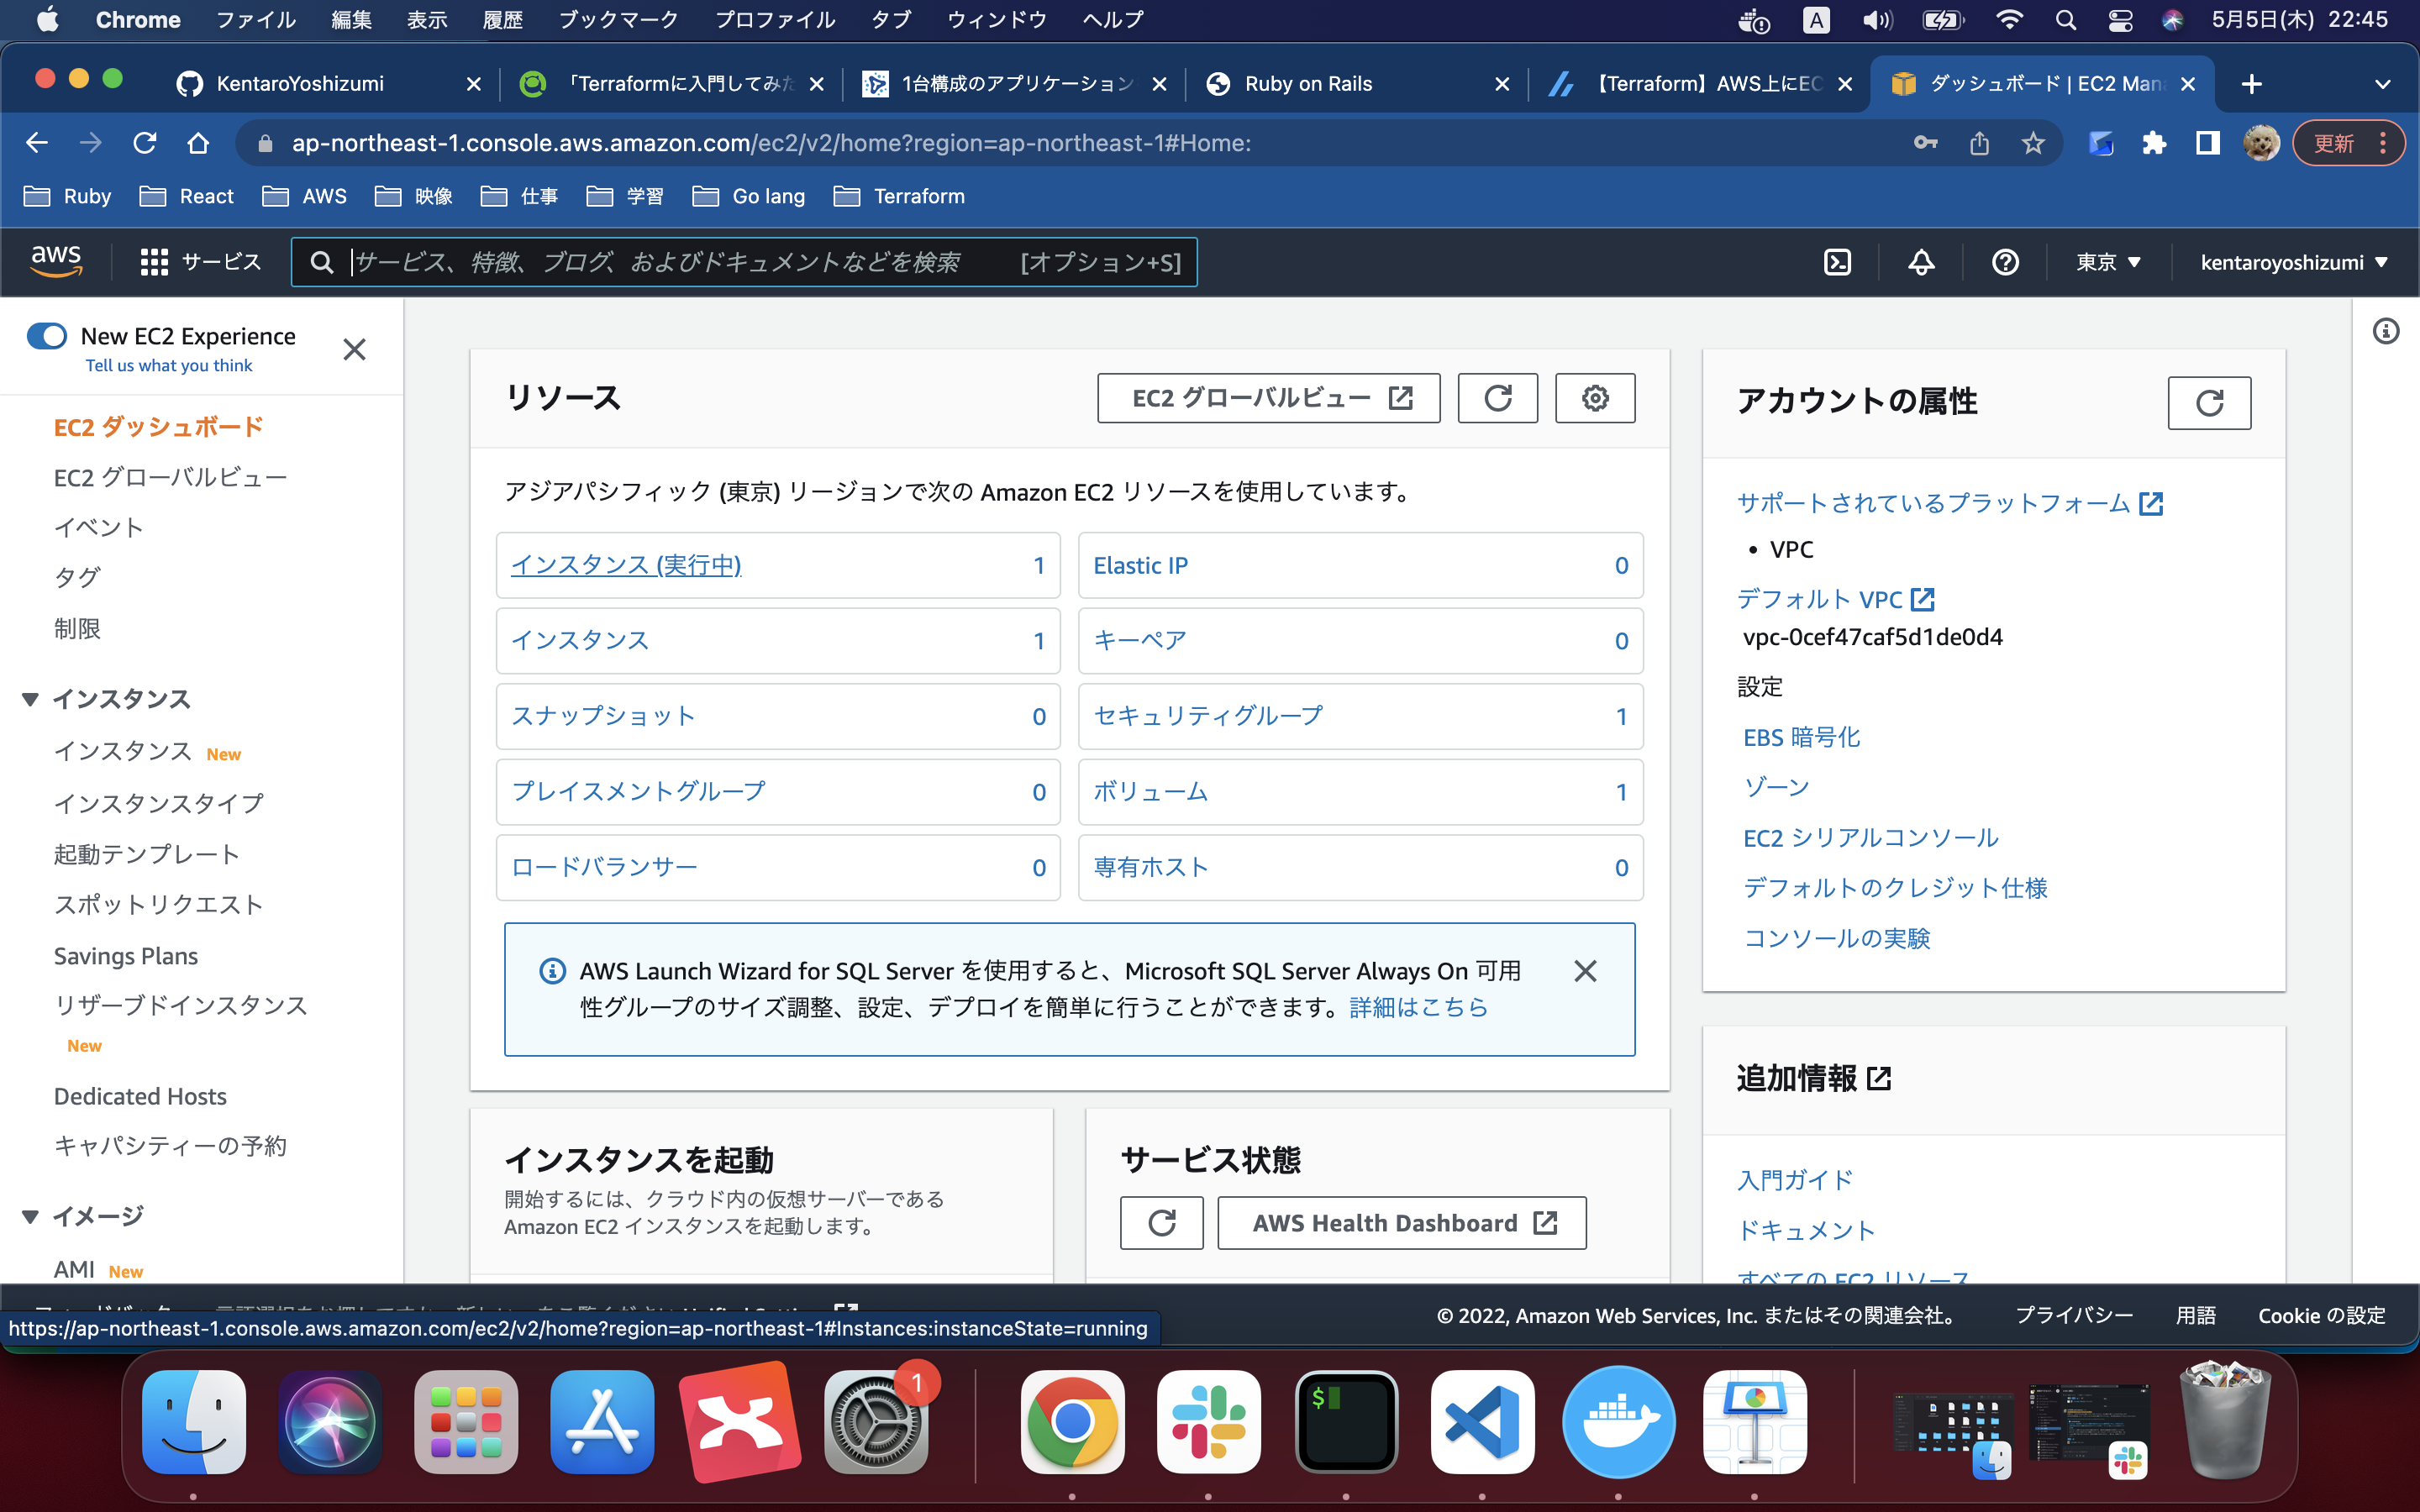
無事にインスタンスが作成されていることが分かります!!
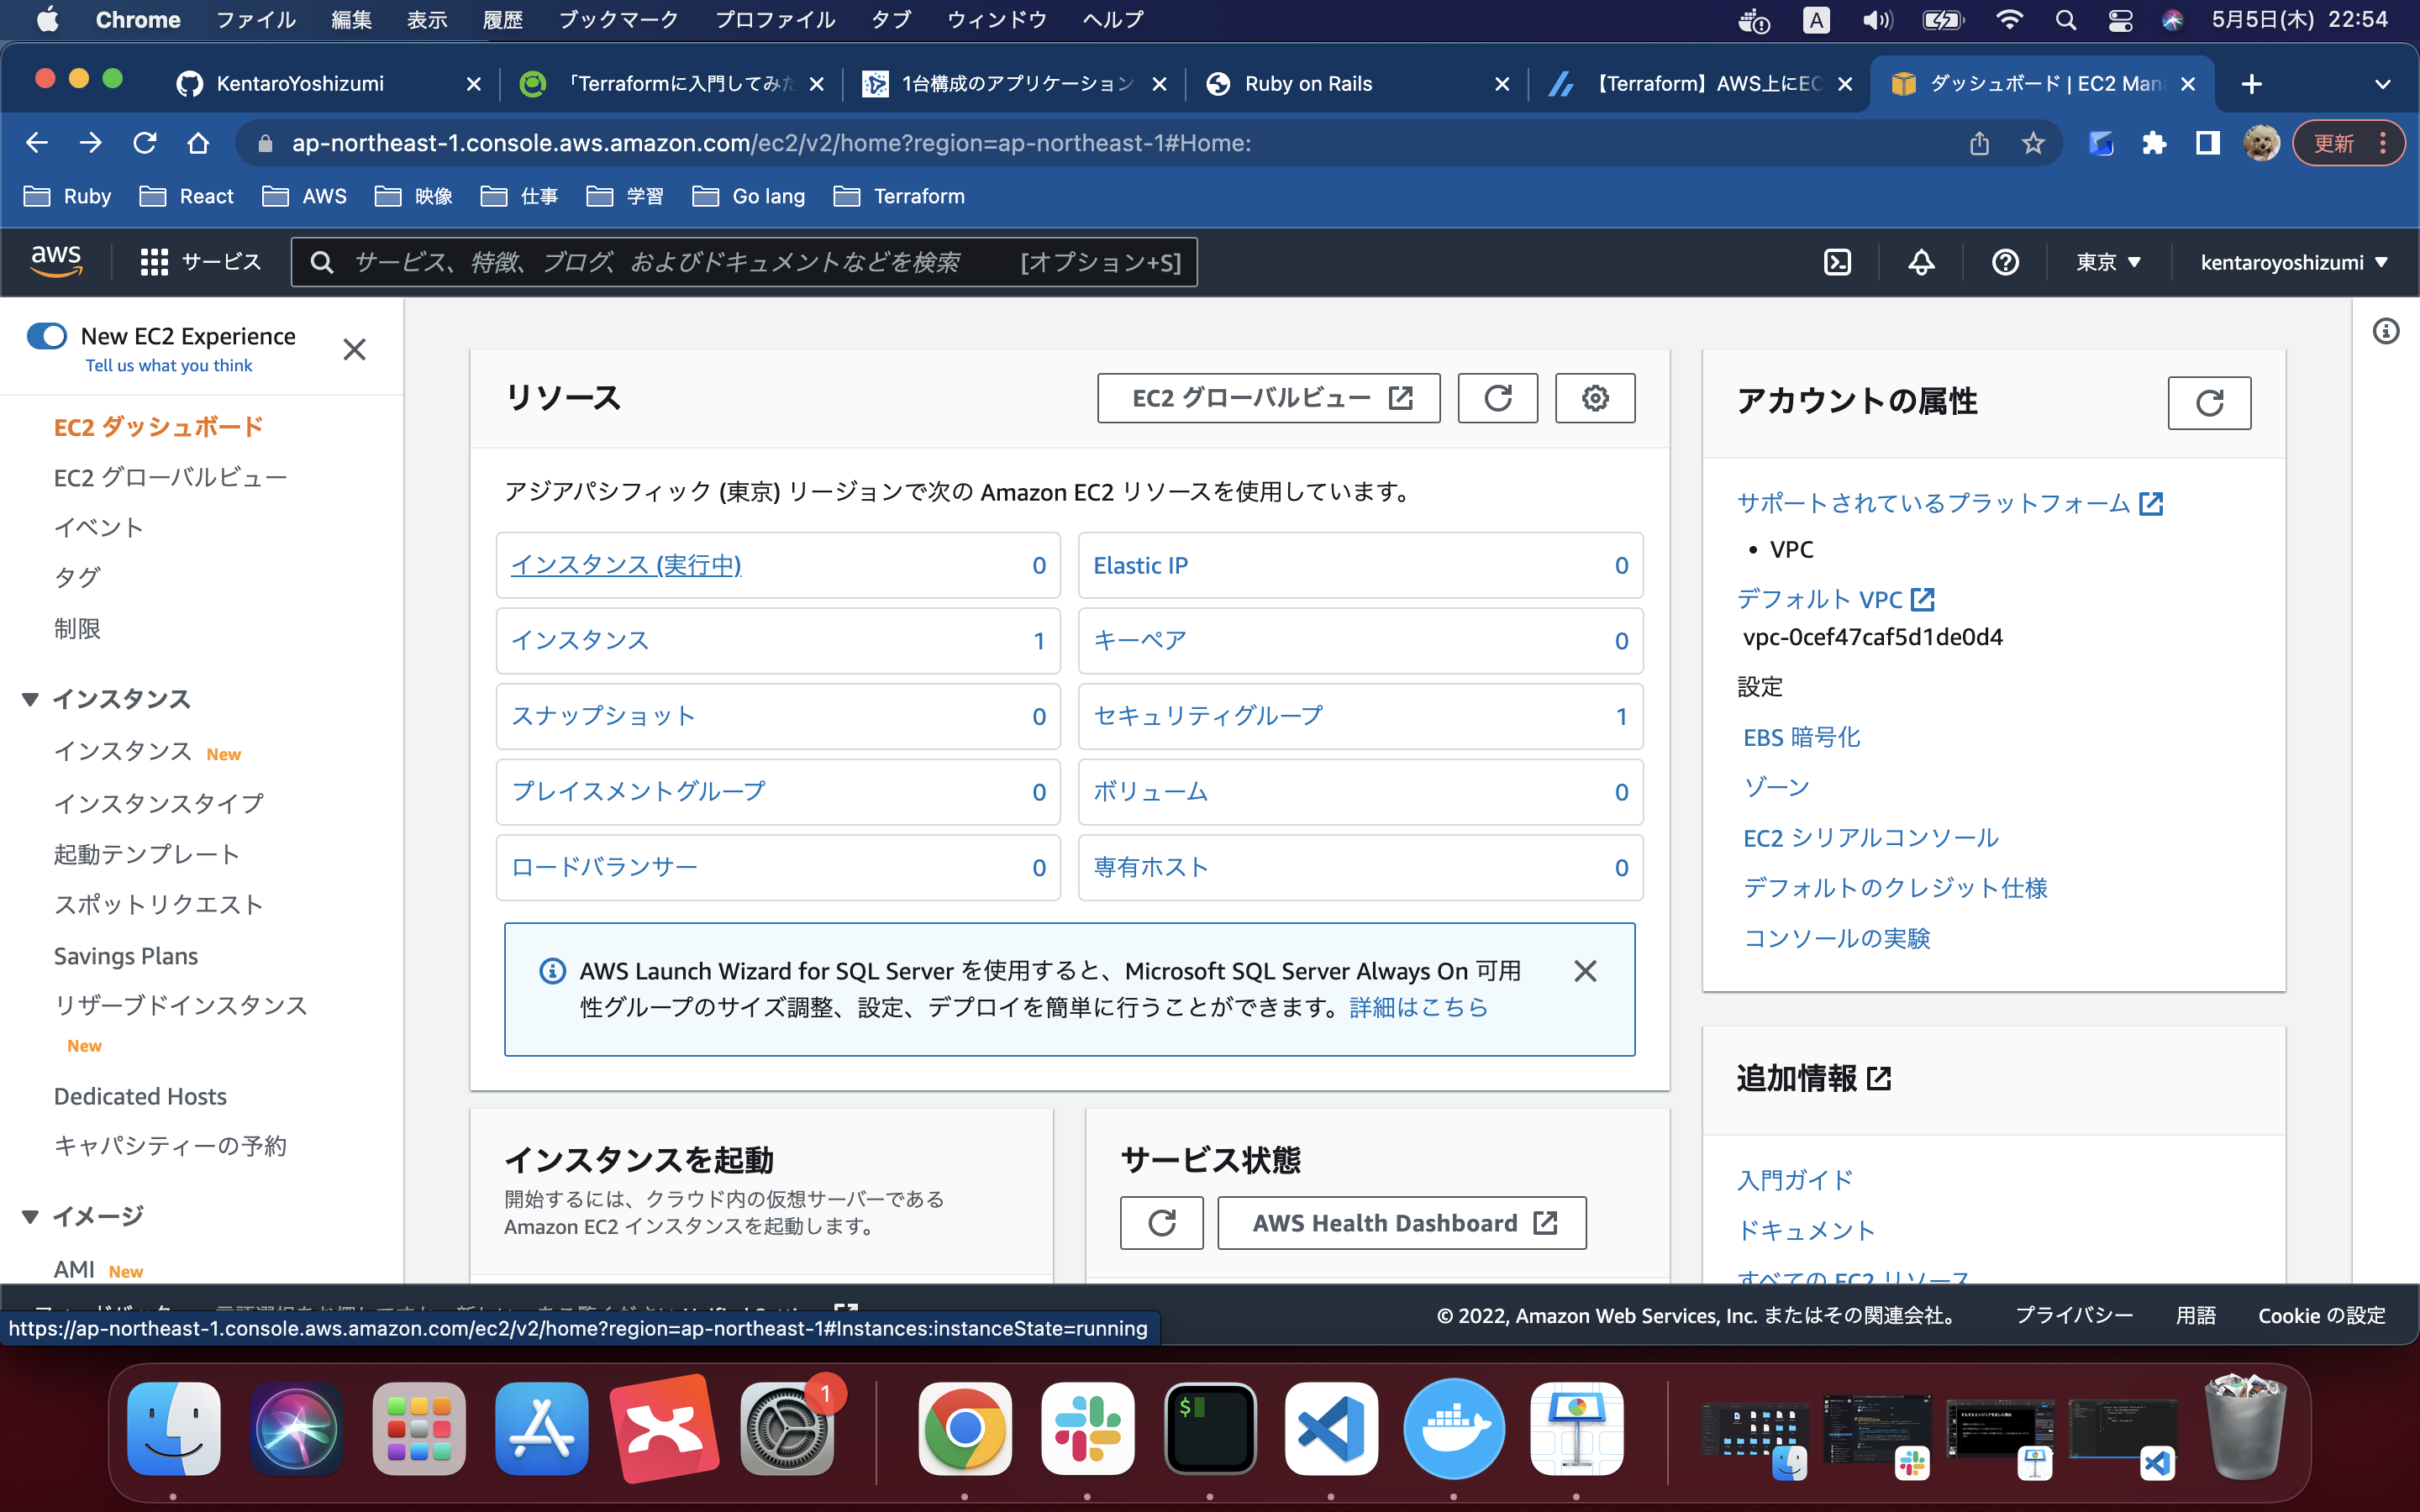
今度はインスタンスを削除していきます。
$ terraform destroy
aws_instance.hello-world: Refreshing state... [id=i-0f5831fcdff783fa9]

An execution plan has been generated and is shown below.
Resource actions are indicated with the following symbols:
  - destroy

Terraform will perform the following actions:

  # aws_instance.hello-world will be destroyed
  - resource "aws_instance" "hello-world" {
      - ami                          = "ami-0218d08a1f9dac831" -> null
      - arn                          = "arn:aws:ec2:ap-northeast-1:071667546372:instance/i-0f5831fcdff783fa9" -> null
      - associate_public_ip_address  = true -> null
      - availability_zone            = "ap-northeast-1c" -> null
      - cpu_core_count               = 1 -> null
      - cpu_threads_per_core         = 1 -> null
      - disable_api_termination      = false -> null
      - ebs_optimized                = false -> null
      - get_password_data            = false -> null
      - hibernation                  = false -> null
      - id                           = "i-0f5831fcdff783fa9" -> null
      - instance_state               = "running" -> null
      - instance_type                = "t2.micro" -> null
      - ipv6_address_count           = 0 -> null
      - ipv6_addresses               = [] -> null
      - monitoring                   = false -> null
      - primary_network_interface_id = "eni-0304b18775c89d48d" -> null
      - private_dns                  = "ip-172-31-0-185.ap-northeast-1.compute.internal" -> null
      - private_ip                   = "172.31.0.185" -> null
      - public_dns                   = "ec2-52-197-88-231.ap-northeast-1.compute.amazonaws.com" -> null
      - public_ip                    = "52.197.88.231" -> null
      - secondary_private_ips        = [] -> null
      - security_groups              = [
          - "default",
        ] -> null
      - source_dest_check            = true -> null
      - subnet_id                    = "subnet-0e19fa6f0aa99b6d4" -> null
      - tags                         = {
          - "Name" = "HelloWorld"
        } -> null
      - tenancy                      = "default" -> null
      - vpc_security_group_ids       = [
          - "sg-02244ceda0488c0d8",
        ] -> null

      - credit_specification {
          - cpu_credits = "standard" -> null
        }

      - enclave_options {
          - enabled = false -> null
        }

      - metadata_options {
          - http_endpoint               = "enabled" -> null
          - http_put_response_hop_limit = 1 -> null
          - http_tokens                 = "optional" -> null
        }

      - root_block_device {
          - delete_on_termination = true -> null
          - device_name           = "/dev/xvda" -> null
          - encrypted             = false -> null
          - iops                  = 100 -> null
          - tags                  = {} -> null
          - throughput            = 0 -> null
          - volume_id             = "vol-043a5d6714db45fe8" -> null
          - volume_size           = 8 -> null
          - volume_type           = "gp2" -> null
        }
    }

Plan: 0 to add, 0 to change, 1 to destroy.

Do you really want to destroy all resources?
  Terraform will destroy all your managed infrastructure, as shown above.
  There is no undo. Only 'yes' will be accepted to confirm.

  Enter a value: yes

aws_instance.hello-world: Destroying... [id=i-0f5831fcdff783fa9]
aws_instance.hello-world: Still destroying... [id=i-0f5831fcdff783fa9, 10s elapsed]
aws_instance.hello-world: Still destroying... [id=i-0f5831fcdff783fa9, 20s elapsed]
aws_instance.hello-world: Still destroying... [id=i-0f5831fcdff783fa9, 30s elapsed]
aws_instance.hello-world: Destruction complete after 30s

Destroy complete! Resources: 1 destroyed.


