こんにちは。スマートテック・ベンチャーズ1日目担当します工藤です。
初めてQiitaに投稿したのが去年のAdvent Calendarなので、ちょうど1年前ということになります。
早いですね。。
さて、今日はProtocol Buffersについてです。
Protocol Buffersとは
JSONやXMLのようにデータ構造をシリアライズする形式です。
Googleにより2008年の夏にオープンソースとして公開されました。
以下のような流れで違うプラットフォーム・言語間のデータのやりとりができます。
データ構造
↓(Protocol Buffers でシリアライズ)
バイナリデータ
⇅(通信)
バイナリデータ
↓(Protocol Buffers でデシリアライズ)
(元と違う言語とかの)データ構造
Protocol Buffersに関する詳細はGoogleのドキュメントに記されています。
特徴
JSONやXMLを使用する場合と比べ、Protocol Buffersは以下のような特徴を持ちます。
・テキストではなくバイナリに変換するため、サイズが小さくなる。速い。
・型情報がつくから安全。
Protocol BuffersのメリットやJSONとの比較はこちらに詳しく載っています。
Protocol Buffers と Swift
Appleが今年(2016年)の9月にapple/swift-protobufを公開しました。
また、alexeyxo/protobuf-swiftというライブラリが2014年から存在します。
他にもいくつか実装はあるようですが、この二つが主だったところです。
apple/swift-protobufとSwiftの型
apple/swift-protobufにおける型とSwiftの型は以下のように対応しています。
| Proto type | Swift Type |
|---|---|
| int32 | Int32 |
| sint32 | Int32 |
| sfixed32 | Int32 |
| uint32 | UInt32 |
| fixed32 | UInt32 |
| int64 | Int64 |
| sint64 | Int64 |
| sfixed64 | Int64 |
| uint64 | UInt64 |
| fixed64 | UInt64 |
| bool | Bool |
| float | Float |
| double | Double |
| string | String |
| bytes | Data |
Protocol Buffers サンプル
サーバーサイドはKitura、クライアントサイドはiOSアプリで実際にProtocol Buffersを使った通信をしてみたいと思います。
.protoファイルの定義
初めに、.protoファイルを以下のように定義します。
syntax = "proto3";

message Member {
    int64 id = 1;
    string name = 2;

    enum Instrument {
        VOCAL  = 0;
        GUITAR = 1;
        BASS   = 2;
        DRUMS  = 3;
    }

    Instrument instrument = 3;
}

message RockBand {
    int64 id = 1;
    string name = 2;
    repeated Member members = 3;
}
コンパイル
次にこの.protoファイルを.swiftファイルにコンパイルします。
Googleが公開しているコンパイラではswiftへのコンパイルができないので、apple/swift-protobufのプラグインを使い.swiftファイルに変換します。
導入の手順は、
にも詳しく紹介されています。
1.コンパイラをインストール
brew install protobuf
2.apple/swift-protobufを導入。
$ git clone https://github.com/apple/swift-protobuf.git
$ cd swift-protobuf
3.最新のダグをcheckoutし、プラグインをビルド
$ git checkout tags/0.9.24
$ swift build
4.作成されたプラグインを指定して、.protoファイルをコンパイル
$ protoc --plugin=protoc-gen-swift=.build/debug/protoc-gen-swift --swift_out=. path/to/file/RockBand.proto
(補足)
プラグインのPATHを通しておくと便利です。
$ mkdir ~/.protoc
$ cp .build/debug/protoc-gen-swift ~/.protoc/protoc-gen-swift
$ echo 'export PATH=$PATH:$HOME/.protoc' >> ~/.bash_profile
$ source ~/.bash_profile
$ protoc --swift_out=. path/to/file/RockBand.proto
(これから始める Protocol Buffers 導入より)
サーバーサイド
次にサーバーサイドでProtocol Buffersを送信するコードを作成します。
プロジェクトの作成はKituraでHello Worldを表示させるが参考になります。
1.Package.swift
Package.swiftにプラグインを作成したものと同じバージョンのapple/swift-protobufを指定します。
import PackageDescription

let package = Package(
    name: "Server",
    dependencies: [
        .Package(url: "https://github.com/apple/swift-protobuf-runtime.git", Version(0,9,24)),
        .Package(url: "https://github.com/IBM-Swift/Kitura", Version(1,2,0))
    ]
)
2.コンパイルによって生成されたRockBand.pb.swiftファイルをmain.swiftと同じフォルダに配置
3.main.swift
シリアライズには serializeProtobuf メソッドを使います。
またJSONに変換することもでき、その場合は serializeJSON メソッドを使います。
Content-Typeに指定する値は特に決まっておらず、
application/octet-stream
application/protobuf
application/x-protobuf
などが使われているようです。
(Google Protocol Buffers and HTTP)
main.swiftには以下のように記述しておきます。
import Kitura
import SwiftProtobuf

let router = Router()

var oasis = RockBand(id: 1, name: "Oasis", members: [
    Member(id: 1, name: "Liam Gallagher", instrument: .vocal),
    Member(id: 2, name: "Noel Gallagher", instrument: .guitar),
    Member(id: 3, name: "Gem Archer",     instrument: .guitar),
    Member(id: 4, name: "Andy Bell",      instrument: .bass),
    Member(id: 5, name: "Chris Sharrock", instrument: .drums)
])

router.get("/") { request, response, next in

    let acceptType = request.headers["Accept"]

    if acceptType == "application/octet-stream" {
        response.headers["Content-Type"] = "application/octet-stream"
        response.send(data: try oasis.serializeProtobuf())
    } else {
        response.headers["Content-Type"] = "application/json; charset=UTF-8"
        response.send(try oasis.serializeJSON())
    }

    next()
}


Kitura.addHTTPServer(onPort: 8090, with: router)
Kitura.run()
この状態でサーバーを起動し、アクセスすると次のJSONが得られます。
{
    "id": "1",
    "members": [
        {
            "id": "1",
            "name": "Liam Gallagher"
        },
        {
            "id": "2",
            "instrument": "GUITAR",
            "name": "Noel Gallagher"
        },
        {
            "id": "3",
            "instrument": "GUITAR",
            "name": "Gem Archer"
        },
        {
            "id": "4",
            "instrument": "BASS",
            "name": "Andy Bell"
        },
        {
            "id": "5",
            "instrument": "DRUMS",
            "name": "Chris Sharrock"
        }
    ],
    "name": "Oasis"
}
クライアント
クライアントでもapple/protobuf-swiftをインポートし、RockBand.pb.swiftファイルをプロジェクトに追加します。
デシリアライズは
let rockBand = try! RockBand(protobuf: data!)
により行います。
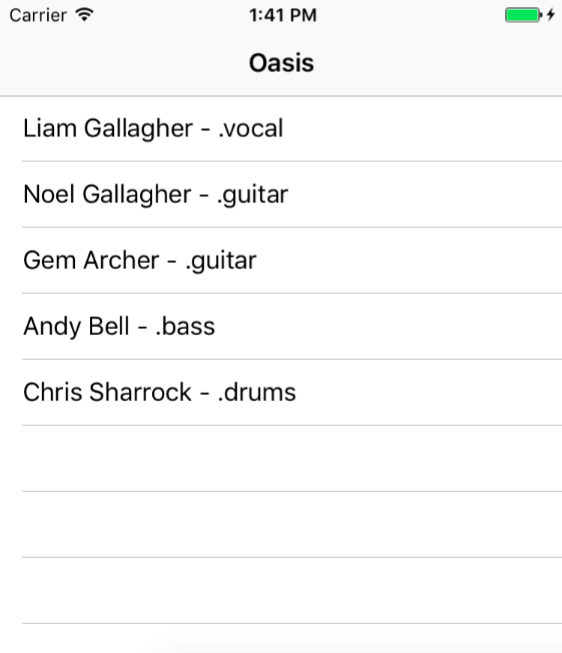
クライアントでは以下のようにデータをテーブル表示しました。
import UIKit

class ViewController: UIViewController {

    @IBOutlet weak var tableView: UITableView!

    fileprivate var members = [Member]()

    override func viewDidLoad() {
        super.viewDidLoad()

        var request = URLRequest(url: URL(string: "http://localhost:8090/")!)
        request.httpMethod = "GET"
        request.setValue("application/octet-stream", forHTTPHeaderField: "Accept")
        URLSession.shared.dataTask(with: request) { (data, response, error) in
            let rockBand = try! RockBand(protobuf: data!)
            self.members = rockBand.members
            DispatchQueue.main.async {
                self.title = rockBand.name
                self.tableView.reloadData()
            }
        }.resume()
    }
}

extension ViewController: UITableViewDataSource {

    func numberOfSections(in tableView: UITableView) -> Int {
        return 1
    }

    func tableView(_ tableView: UITableView, numberOfRowsInSection section: Int) -> Int {
        return members.count
    }

    func tableView(_ tableView: UITableView, cellForRowAt indexPath: IndexPath) -> UITableViewCell {
        let cell = UITableViewCell()
        cell.textLabel?.text = members[indexPath.row].name
            + " - "
            + members[indexPath.row].instrument.debugDescription

        return cell
    }
}
表示結果
所感
実際使ってみた感想は、
○API仕様書がいらない
.protoファイルさえ共有すればあとは各々(サーバー・クライアント)好きな言語にコンパイルするだけなので、API仕様書がいらなくなります。
またJSONでよくある、「マッピング失敗するなーと思ったらキーをタイプミスしてた」というバグがなくせるのは大変嬉しいです。
○型安全
これもあるあるな、「ここ仕様書では数値で指定されてるのに数値の文字列で返ってきてます」といった不都合がなくなるのは嬉しいなと思いました。
×導入が手間
プラグインを用意したり、コンパイルしたりといった手間がかかるのは仕方ないですが面倒です。
×swiftらしいクラス定義ができない
Himotokiのような美しさに比べると変数がvarであったり、どうしてもswiftらしさに欠けてしまうのが気になります。
またproto2であった optional required がproto3では廃止されてしまったのも少々残念に感じます。
(Why required and optional is removed in Protocol Buffers 3)
まとめ
手軽さに欠けるためJSONやXMLを置き換える技術になるのは難しいと思いますが、
サーバとクライアントでチームが別れている場合ではコミュニケーションコストを減らせるメリットは大きいのではないかと思います。
機会があれば積極的に使っていきたいと思います。
コード全体はKentaKudo/ProtobufSampleに置いてあります。
最後に
スマートテックベンチャーズは未経験者や、経験者だけどもSwift&iOSやってみたいという人を大募集しています。
このエントリーを見ている方は経験者かつswiftを使っている人だと思うので、ターゲット層ではないかもしれませんが、
もし身近にそういう方がいたら「そういえばこんな会社があったよ」と伝えていただければ幸いです。
あとOasisが好きな人は個人的に熱く語りましょう。
明日は田口さんによる心暖まる話です!
参考
Googleのドキュメント
複雑なデータをXMLより効率よく送る!~Protocol Buffers編
apple/swift-protobuf
これから始める Protocol Buffers 導入
Protocol Buffers in your Kitura Apps