前回の記事でOptionSetについて紹介したので、今回は実践編ということで、
OptionSetを使ってUIViewに枠線をつけたいと思います。
UIViewの各辺を指定してborderをつけるExtension
こちらのエントリーと内容が被っていますが、ここではOptionSetに重点を置いているということで、
ご容赦いただければと思います。
ExBorderView
class ExBorderView: UIView {

    // 枠線位置のオプション
    struct BorderOption: OptionSetType {

        let rawValue: Int
        init(rawValue: Int) { self.rawValue = rawValue }

        static let NONE   = BorderOption(rawValue: 0)
        static let TOP    = BorderOption(rawValue: 1 << 0)
        static let BOTTOM = BorderOption(rawValue: 1 << 1)
        static let LEFT   = BorderOption(rawValue: 1 << 2)
        static let RIGHT  = BorderOption(rawValue: 1 << 3)

        static let ALL: BorderOption = [.TOP, .BOTTOM, .LEFT, .RIGHT]
    }

    // 描画メソッド
    func drawBorder(width: Float, color: UIColor, borderOption: BorderOption) {

        self.borderWidth   = CGFloat(width)
        self.borderColor   = color
        self.borderOptions = borderOption

        self.setNeedsDisplay()
    }

    override func drawRect(rect: CGRect) {

        let contextRef = UIGraphicsGetCurrentContext()
        CGContextSetLineWidth(contextRef, self.borderWidth)
        CGContextSetStrokeColorWithColor(contextRef, self.borderColor.CGColor)

        if self.borderOptions.contains(.TOP) {
            CGContextMoveToPoint(contextRef, 0, 0)
            CGContextAddLineToPoint(contextRef, self.frame.size.width, 0)
            CGContextStrokePath(contextRef)
        }

        if self.borderOptions.contains(.BOTTOM) {
            CGContextMoveToPoint(contextRef, 0, self.frame.size.height)
            CGContextAddLineToPoint(contextRef, self.frame.size.width, self.frame.size.height)
            CGContextStrokePath(contextRef)
        }

        if self.borderOptions.contains(.LEFT) {
            CGContextMoveToPoint(contextRef, 0, 0)
            CGContextAddLineToPoint(contextRef, 0, self.frame.size.height)
            CGContextStrokePath(contextRef)
        }

        if self.borderOptions.contains(.RIGHT) {
            CGContextMoveToPoint(contextRef, self.frame.size.width, 0)
            CGContextAddLineToPoint(contextRef, self.frame.size.width, self.frame.size.height)
            CGContextStrokePath(contextRef)
        }
    }

    /** 枠線幅 */
    private var borderWidth: CGFloat = 0.0
    /** 枠線色 */
    private var borderColor: UIColor = UIColor.clearColor()
    /** 枠線位置 */
    private var borderOptions: BorderOption = .NONE
}
使い方
Playground
let borderedView = ExBorderView(frame: CGRectMake(0, 0, 400, 200))
borderedView.backgroundColor = UIColor.whiteColor()

borderedView.drawBorder(5.0, color: UIColor.redColor(), borderOption: [.TOP, .BOTTOM])
borderedView.drawBorder(2.0, color: UIColor.blueColor(), borderOption: [.LEFT, .RIGHT])
borderedView.drawBorder(10.0, color: UIColor.greenColor(), borderOption: .ALL)
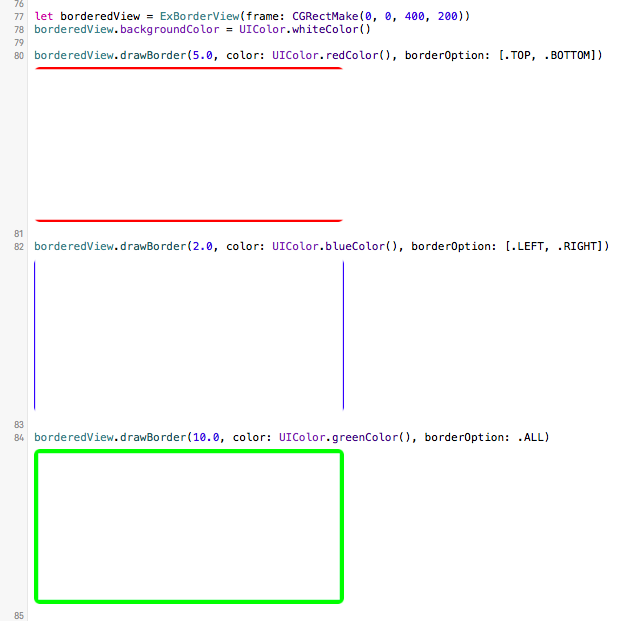
こんな感じで自在に枠線をつけることができます!
参考
一辺ごとに枠線の表示指定が可能なUIViewを作る
http://blog.livedoor.jp/melodybox/archives/44144560.html
おわりに
え、そんなとこに枠線つけるの!?ってときはこれで解決!