WildFly は、Java で書かれ、Red Hat によって開発されたフリーのオープンソースでクロスプラットフォームなアプリケーションです。
本ブログは英語版からの翻訳です。オリジナルはこちらからご確認いただけます。一部機械翻訳を使用しております。翻訳の間違いがありましたら、ご指摘いただけると幸いです。
必要条件
- Ubuntu 18.04デスクトップがインストールされた新鮮なAlibaba Cloudインスタンス。
- インスタンスにrootパスワードが設定されています。
Alibaba Cloud ECSインスタンスを起動
新しいECSインスタンスを作成し、少なくとも4GB RAMを搭載したオペレーティングシステムとしてUbuntu 18.04を選択し、rootユーザーとしてインスタンスに接続します。
Ubuntu 18.04デスクトップインスタンスにログインしたら、以下のコマンドを実行して、ベースシステムを最新の利用可能なパッケージで更新します。
apt-get update -y
アカウントが利用できるようになったら、非rootユーザーでログインして開始します。
Javaのインストール
WildFlyを使用するには、サーバにJavaバージョン8がインストールされている必要があります。デフォルトでは、Ubuntu 18.04のデフォルトリポジトリではJava 8は利用できません。そのため、同社の公式サイトからダウンロードする必要があります。
Java 8をダウンロードしたら、/usr/lib/jvmディレクトリに解凍します。
mkdir /usr/lib/jvm/
tar -zxvf jdk-8u221-linux-x64.tar.gz -C /usr/lib/jvm/
次に、以下のコマンドでJavaのデフォルトバージョンを設定します。
update-alternatives --install /usr/bin/java java /usr/lib/jvm/jdk1.8.0_221/bin/java 1
次に、以下のコマンドでJavaを検証します。
java -version
出力:
java version "1.8.0_221"
Java(TM) SE Runtime Environment (build 1.8.0_221-b11)
Java HotSpot(TM) 64-Bit Server VM (build 25.221-b11, mixed mode)
WildFly のインストール
WildFlyをインストールする前に、WildFly用のユーザーとグループを作成する必要があります。以下のコマンドで作成できます。
groupadd -r wildfly
useradd -r -g wildfly -d /opt/wildfly -s /sbin/nologin wildfly
次に、以下のコマンドで最新版のWildFlyをダウンロードします。
wget https://download.jboss.org/wildfly/17.0.1.Final/wildfly-17.0.1.Final.zip
ダウンロードしたら、ダウンロードしたファイルを解凍し、以下のコマンドで/opt/wildflyディレクトリに移動します。
unzip wildfly-17.0.1.Final.zip
mv wildfly-17.0.1.Final /opt/wildfly
次に、以下のコマンドでワイルドフライのディレクトリに適切な権限を与えます。
chown -RH wildfly: /opt/wildfly
WildFly用のSystemdファイルの設定
WildFlyの設定に必要なファイルをコピーします。
次にWildFlyの設定ファイルを/etc/directoryにコピーします。
mkdir -p /etc/wildfly
cp /opt/wildfly/docs/contrib/scripts/systemd/wildfly.conf /etc/wildfly/
次に、WildFly launch.shファイルを/opt/wildfly/bin/ディレクトリに移動します。
cp /opt/wildfly/docs/contrib/scripts/systemd/launch.sh /opt/wildfly/bin/
sh -c 'chmod +x /opt/wildfly/bin/*.sh'
次に、以下のコマンドでWildFlyのsystemdファイルをコピーします。
cp /opt/wildfly/docs/contrib/scripts/systemd/wildfly.service /etc/systemd/system/
以下のコマンドで設定ファイルをリロードします。
systemctl daemon-reload
次に、WildFlyサービスを起動し、以下のコマンドで起動時に起動できるようにします。
systemctl start wildfly
systemctl enable wildfly
これで、以下のコマンドでWildFlyの状態を確認できるようになりました。
systemctl status wildfly
出力:
● wildfly.service - The WildFly Application Server
   Loaded: loaded (/etc/systemd/system/wildfly.service; disabled; vendor preset: enabled)
   Active: active (running) since Sat 2019-08-03 09:10:00 UTC; 7s ago
 Main PID: 15938 (launch.sh)
    Tasks: 52 (limit: 1098)
   CGroup: /system.slice/wildfly.service
           ├─15938 /bin/bash /opt/wildfly/bin/launch.sh standalone standalone.xml 0.0.0.0
           ├─15943 /bin/sh /opt/wildfly/bin/standalone.sh -c standalone.xml -b 0.0.0.0
           └─16003 java -D[Standalone] -server -Xms64m -Xmx512m -XX:MetaspaceSize=96M -XX:MaxMetaspaceSize=256m -Djava.net.preferIPv4Stack=true

Aug 03 09:10:00 hitesh systemd[1]: Started The WildFly Application Server.
WildFly認証の設定
次に、WildFlyの管理コンソールにアクセスするための管理者ユーザーを作成する必要があります。以下のコマンドで追加することができます。
/opt/wildfly/bin/add-user.sh
以下のような出力が表示されるはずです。
What type of user do you wish to add?
 a) Management User (mgmt-users.properties)
 b) Application User (application-users.properties)
(a): a

Enter the details of the new user to add.
Using realm 'ManagementRealm' as discovered from the existing property files.
Username : letscloud
Password recommendations are listed below. To modify these restrictions edit the add-user.properties configuration file.
 - The password should be different from the username
 - The password should not be one of the following restricted values {root, admin, administrator}
 - The password should contain at least 8 characters, 1 alphabetic character(s), 1 digit(s), 1 non-alphanumeric symbol(s)
Password :
Re-enter Password :
What groups do you want this user to belong to? (Please enter a comma separated list, or leave blank for none)[  ]:
About to add user 'letscloud' for realm 'ManagementRealm'
Is this correct yes/no? yes
Added user 'letscloud' to file '/opt/wildfly/standalone/configuration/mgmt-users.properties'
Added user 'letscloud' to file '/opt/wildfly/domain/configuration/mgmt-users.properties'
Added user 'letscloud' with groups  to file '/opt/wildfly/standalone/configuration/mgmt-groups.properties'
Added user 'letscloud' with groups  to file '/opt/wildfly/domain/configuration/mgmt-groups.properties'
Is this new user going to be used for one AS process to connect to another AS process?
e.g. for a slave host controller connecting to the master or for a Remoting connection for server to server EJB calls.
yes/no? yes
To represent the user add the following to the server-identities definition <secret value="YWRtaW5AMTIz" />
リモートロケーションからアクセスするためのWildFlyの設定
デフォルトでは、WildFly は localhost からしかアクセスできません。そのため、リモートからアクセスできるように WildFly を設定する必要があります。これは /etc/wildfly/wildfly.conf ファイルを編集することで行うことができます。
nano /etc/wildfly/wildfly.conf
次の行を追加します。
WILDFLY_CONSOLE_BIND=0.0.0.0
保存してファイルを閉じます。その後、/opt/wildfly/bin/launch.shファイルを開きます。
nano /opt/wildfly/bin/launch.sh
以下のようにファイルを変更します。
if [ "x$WILDFLY_HOME" = "x" ]; then
    WILDFLY_HOME="/opt/wildfly"
fi

if [[ "$1" == "domain" ]]; then
    $WILDFLY_HOME/bin/domain.sh -c $2 -b $3 -bmanagement $4
else
    $WILDFLY_HOME/bin/standalone.sh -c $2 -b $3 -bmanagement $4
fi
ファイルを保存して閉じます。The, /etc/systemd/system/wildfly.serviceファイルを開きます。
nano /etc/systemd/system/wildfly.service
次のように変更してください。
[Unit]
Description=The WildFly Application Server
After=syslog.target network.target
Before=httpd.service

[Service]
Environment=LAUNCH_JBOSS_IN_BACKGROUND=1
EnvironmentFile=-/etc/wildfly/wildfly.conf
User=wildfly
LimitNOFILE=102642
PIDFile=/var/run/wildfly/wildfly.pid
ExecStart=/opt/wildfly/bin/launch.sh $WILDFLY_MODE $WILDFLY_CONFIG $WILDFLY_BIND $WILDFLY_CONSOLE_BIND
StandardOutput=null

[Install]
WantedBy=multi-user.target
保存してファイルを閉じます。
次に、/var/run/wildflyディレクトリを作成し、正しいパーミッションを設定します。
mkdir /var/run/wildfly/
chown wildfly:wildfly /var/run/wildfly/
最後に、systemd デーモンをリロードし、変更が有効になるようにサービスを再起動します。
systemctl daemon-reload
systemctl restart wildfly
WidFlyウェブコンソールへのアクセス
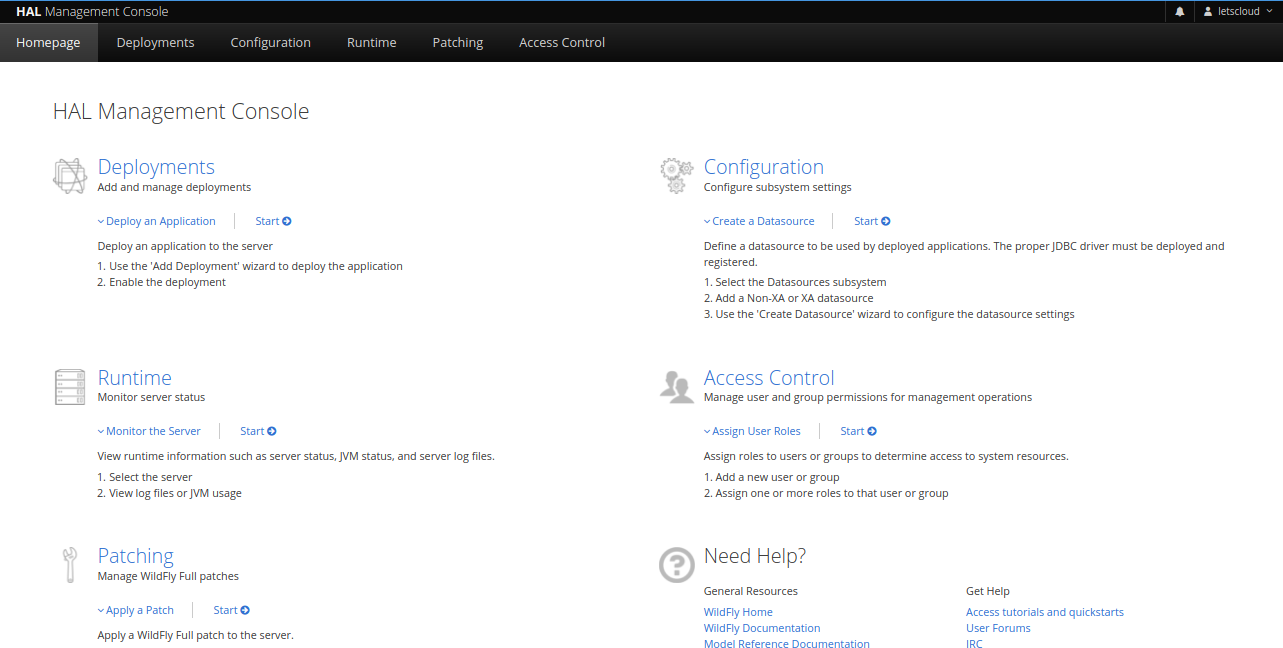
今、あなたのWebブラウザを開き、URLを入力してください http://your-server-ip:9990/console。次のページにリダイレクトされます。

ユーザー名とパスワードを入力します。次に、[Sign IN] ボタンをクリックします。以下のページにWildFlyのデフォルトダッシュボードが表示されるはずです。
結論
おめでとうございます!これでWidFlyがインストールされ、すぐに使えるようになりました。これでWidFlyがインストールされ、すぐに使えるようになりました。詳細はこちらをご覧ください: https://wildfly.org/
このガイドにご協力いただいた Hosting Canada の CTO、Gary Stevens 氏に感謝します。
アリババクラウドは日本に2つのデータセンターを有し、世界で60を超えるアベラビリティーゾーンを有するアジア太平洋地域No.1(2019ガートナー)のクラウドインフラ事業者です。
アリババクラウドの詳細は、こちらからご覧ください。
アリババクラウドジャパン公式ページ