はじめに
Ionic + Cordovaでiosアプリのuniversal linkが実装できるか試してみました。universal linkは、URLを使ってアプリを起動するものです。
Ionic + Cordova環境でuniversal linkのプラグインは、検索するといくつか出てきて、どれを使うか迷いました。cordova-universal-links-pluginやcordova-universal-links-plugin-deluxeが検索されたのですが、廃止予定(DEPRECATED)のようです。
今回は、Ionicから出されているDeeplinksを使ってみました。Deeplinksの導入手順を実行しましたが、引数等のパラメータがわからないところがあり、試行錯誤しました。以下では、うまくいった方法を書いていきます。
環境
- Ionic 4.12.0
- Cordova 9.0.0
- Xcode 10.2.1
- Ionic Deeplink Plugin 1.0.19
手順
-
universal linkを実装するアプリフォルダに移動します。アプリを新規に作成するときは
ionic startで作成します。$ cd myApp -
Deeplinkプラグインをインストールします。オプション引数の順番が違うとエラーが起きたので、順番もドキュメントに書かれている通りに入れる必要があります。
-
URL_SCHEME : カスタムURLスキーム。今回は使いませんが、これを指定しないとインストールできませんでした。
-
DEEPLINK_SCHEME : universal linkのスキーム。通常は
https。 -
DEEPLINK_HOST : universal linkのホスト名。ここでは、
example.comを指定
$ ionic cordova plugin add ionic-plugin-deeplinks --variable URL_SCHEME='example' --variable DEEPLINK_SCHEME=https --variable DEEPLINK_HOST='example.com'
package.jsonに以下の設定が入るようです。
"plugins": {
  "ionic-plugin-deeplinks": {
    "URL_SCHEME": "example",
    "DEEPLINK_SCHEME": "https",
    "DEEPLINK_HOST": "example.com"
  }
}
- ionic nativeをインストールします。
$ npm install @ionic-native/deeplinks
- アプリのパッケージ名を指定します。iosの場合は、Bundle Identifierにこの値が入ります。
config.xmlのidフィールドを書き換えます。最初は、io.ionic.starterとなっているので、
例えば、com.exampleに書き換えます。
<widget id="io.ionic.starter" version="0.0.1">
<widget id="com.example" version="0.0.1">
- iosプラットフォームを追加します。
$ ionic cordova platform add ios
-
src/app/app.module.tsに以下の2つを追加します。
import及びprovidersにDeeplinksを追加します。
 import { Deeplinks } from '@ionic-native/deeplinks/ngx';

   providers: [
     StatusBar,
     Deeplinks,
   ]
-
src/app/app.component.tsに以下を追加します。 - import文
- constructorにDeeplinks
- initializeAppにDeeplinksの処理を追加します。この例は、https://example.com/home で起動された場合に、
HomePageを表示します。HomePageの部分は、
import { Deeplinks } from '@ionic-native/deeplinks/ngx';
import { HomePage } from './home/home.page';

constructor(
   private statusBar: StatusBar,
   private deeplinks: Deeplinks
)

  initializeApp() {
    this.platform.ready().then(() => {
      // 他のコード
      this.deeplinks.route({
         '/home': HomePage
      }).subscribe(match => {
         console.log('Success', match);
      }, nomatch => {
         console.error('Fail', nomatch);
      });
    });
  }
- Xcodeを立ち上げのプロジェクト設定を変更します。
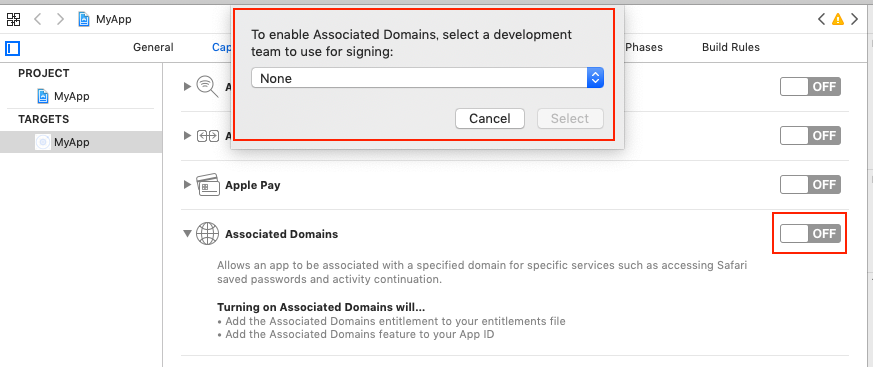
プロジェクトファイルは、platform/ios/MyApp.xcodeprojです。TARGETのCapabilitiesを選び、Associated DomainsをONにします。このときに署名を選択する画面が出たときには、署名を選びます。+ボタンを押してapplinks:example.comを追加します。


- アプリを端末/シミュレータに配置します。
これでuniversal linkによっって起動されるアプリができました。別のアプリからuniversal linkを使ってこのアプリを起動することができます。
$ ionic cordova run ios