Introduction
This article shares my experience creating and deploying a personal website that displays a list of my Qiita articles, using Cursor, a next-generation AI-powered editor, integrated with GitHub and Vercel. Even those with little or no development experience can build a product quickly and easily—this is the main point of the post.
The tools and services used in this project are:
- Cursor: An AI-powered editor that supports natural language programming
- GitHub: Source code management
- Vercel: Deployment and hosting
- Qiita API: To fetch article data from Qiita
Development Workflow
- Create a Next.js project using Cursor
- Generate code that fetches articles using the Qiita API
- Implement design, search, and pagination features
- Push the code to GitHub
- Auto-build and publish using Vercel
Step 1: Creating the Project
First, create a Next.js project using the following command:
npx create-next-app@latest .
With Cursor, even this step can be done using natural language: just type something like "Create a new Next.js project," and Cursor will take care of the rest.
In this article, we are updating an existing project. The initial setup process will be described in another post.
Here’s a screenshot of the personal website I’m building experimentally:

Step 2: Connecting to the Qiita API
I used Qiita’s official API to retrieve articles from my account. I simply asked Cursor:
Write an API client that uses my Qiita access token to fetch my posted articles.
Cursor generated the code in a file like lib/qiita.ts.
Getting Your Qiita Access Token
- Log in to Qiita
- Go to the Access Token Creation Page
- Specify the required scopes and generate a token
- Add the token to
.env.local. The key name can be anything you prefer:
QIITA_ACCESS_TOKEN=your_token_here
Step 3: Building and Styling the Article List
Create a new file pages/articles.tsx to display the article title, tags, and post date. Tailwind CSS was used for styling.
- Podcast-style card layout for each article
- Search feature by title and tag
- Pagination (10 articles per page)
- Responsive design for mobile devices
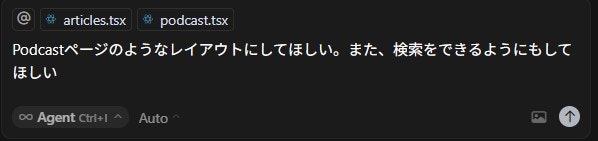
You can implement all of these just by telling Cursor what you want.
In this case, I asked for a layout and search feature similar to my existing podcast page. ":
"Please change the layout and embed a search function like 'Podcast page'
After the changes, I checked the local development environment using:
npm run dev
Here’s the updated UI:

Step 4: Publishing with GitHub and Vercel
Once development is complete, push your code to GitHub. Be sure not to include sensitive files like .env.local.
Instead, register the environment variable on Vercel:
- Open your Vercel project page
- Navigate to "Settings" → "Environment Variables"
- Add
QIITA_ACCESS_TOKEN
This will trigger Vercel to build and deploy your site automatically after each push to GitHub.
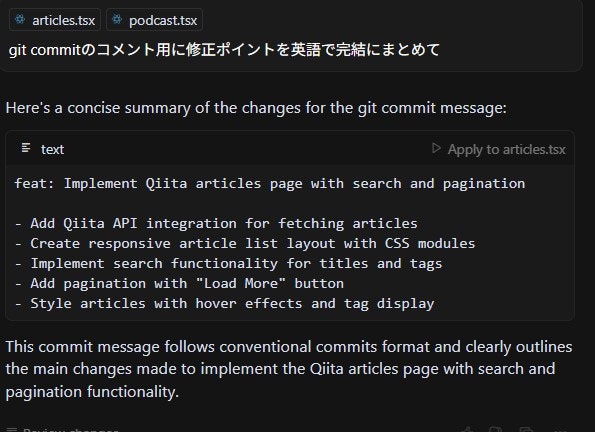
By the way, you can even let AI summarize your changes for Git commit messages:
When Errors Occur
If the articles don’t show up, it’s likely that the environment variable wasn’t set on Vercel. Check the error messages and trigger a rebuild after setting the variable.
Step 5: Auto-Updates and Notes
- Use
getStaticPropsto update articles every hour (ISR) - Qiita API requires an access token
- Make sure
.env.localis included in.gitignore
Conclusion
With Cursor, even beginners can build web apps through natural language conversations. Integration with the Qiita API is simple, and the CI/CD flow with GitHub and Vercel is smooth and seamless.
Thanks to generative AI, web development has become truly effortless.