【Flutter】FirebaseのAuthでメアド&パスワード認証を実装する(前半)
https://qiita.com/iketeruhiyoko/items/062ca43e1a4c474304bb
こちらの記事の続きです。
Firebaseの設定
codelab: https://codelabs.developers.google.com/codelabs/flutter-firebase/
こちらのチュートリアルをやってもらえれば大体の感じは掴めると思いますが、一応手順だけ自分なりにまとめた方法でご紹介します。
- https://firebase.google.com/ へ行き、[Getstarted]をクリック。
- その後[プロジェクトを追加]をクリックし、プロジェクトの名前を入力。
- Firebaseコンソールに入れたらAndroidのアイコンをクリックし、Androidの設定に入る。
- エディタへ移動。android/app/build.gradleにあるdefaultConfig内にあるapplicationIDをコピーする。
- Firebaseへ戻り、コピーしたIDを[Android パッケージ名]フィールドに入力。その後、[アプリの登録]をクリック。
- [Download google-services.json] をクリックして、Firebase Android 構成ファイル(google-services.json)を取得。
- 取得したファイルをandroid/appに移動する。参照:(https://gurutaka-log.com/flutter-firebase-setup)
- flutter_line_clone/build.gradle(ファイル名が同じものが二つあるので注意)にコードを追記。
参照: (https://firebase.google.com/docs/android/setup?hl=ja) - 次はflutter_line_clone/app/build.gradleにコードを追記。
参照: (https://firebase.google.com/docs/android/setup?hl=ja) - Firebaseコンソールに戻り、iosのアイコンをクリック。iosの設定に入る。
- ターミナルでflutter_line_cloneディレクトリへ行く。
-
open ios/Runner.xcworkspaceコマンドを入力し、xcodeを設定する。 - 一番上のRunnerをクリックし、GeneralタブのIdentityの欄のBundle Identifierをコピーする。
- Firebaseに戻って、iOS bundle IDにコピーしたIDを入力し、[登録]をクリック。
- [Download GoogleService-Info.plist] をクリックして、Firebase ios 構成ファイル(GoogleService-Info.plist)を取得。
- xcodeに移動。GoogleService-Info.plistをRunner/Runnerにドラッグ。
- [Finish]をクリック。
- Firebaseに戻り、あとは全部スキップして終了。
かなり見にくくて申し訳ないですが、設定に困っている人はこちらを参考にしていただければほぼ確実にできると思います。
loginフォームをsubmitする
bool validateAndSave() {
    final form = formKey.currentState;
    if(form.validate()) {
      form.save();
      return true;
    }
      return false;
  }

void validateAndSubmit() async {
    if(validateAndSave()){
      try {
        FirebaseUser user = (await FirebaseAuth.instance.signInWithEmailAndPassword(email: _email, password: _password)).user;
        print('Singed in: ${user.uid}');
      }
      catch(e) {
        print('Error: $e');
      }
    }
  }
validateAndSubmitの処理はloginフォームが入力され、validateAndSaveが発動した場合、signInWithEmailAndPasswordでFirebaseAuthのインスタンスをFirebaseUserとして作成します。
サインアップボタン作成
new FlatButton(
                onPressed: moveToRegister,
                child: new Text('Create an Account', style: new TextStyle(fontSize: 20.0)),
              ),
RaisedButtonの下にこのコードを記述し、
//追加
enum FormType {
  login,
  register
}

class _LoginPageState extends State<LoginPage> {

  final formKey = new GlobalKey<FormState>();

  String _email;
  String _password;
  //追加
  FormType _formType = FormType.login;

  bool validateAndSave() {
    final form = formKey.currentState;
    if(form.validate()) {
      form.save();
      return true;
    }
      return false;
  }

  void validateAndSubmit() async {
    if(validateAndSave()){
      try {
        FirebaseUser user = (await FirebaseAuth.instance.signInWithEmailAndPassword(email: _email, password: _password)).user;
        print('Singed in: ${user.uid}');
      }
      catch(e) {
        print('Error: $e');
      }
    }
  }

  //追加
  void moveToRegister() {
    setState(() {
      _formType = FormType.register;
    });
  }
急にenumというクラスなのか定数なのか良くわからんものが出てきたと思いますが、一定数の定数値を表すために使用される特別な種類のクラスのことのようです。
「Enumで定義している値以外は引数時点で弾く」といった安全な実装にすることができます。
参照: https://qiita.com/arthur_foreign/items/b40820c5f3a0f06ffe08
moveToRegisterで先ほど記述したFlattButtonを押した時のユーザー登録する処理を記述しています。
フォームとボタンのリファクタリング
List<Widget> buildInputs() {
    return [
      new TextFormField(
        decoration: new InputDecoration(labelText: 'Email'),
        validator: (value) => value.isEmpty ? 'Email can\'t be empty' : null,
        onSaved: (value) => _email = value,
      ),
      new TextFormField(
        decoration: new InputDecoration(labelText: 'Password'),
        obscureText: true,
        validator: (value) => value.isEmpty ? 'Password can\'t be empty' : null,
        onSaved: (value) => _password = value,
      ),
    ];
  }

  List<Widget> buildSubmitButtons() {
    return [
      new RaisedButton(
        onPressed: validateAndSubmit,
        child: new Text('Login', style: new TextStyle(fontSize: 20.0)),
      ),
      new FlatButton(
        onPressed: moveToRegister,
        child: new Text('Create an Account', style: new TextStyle(fontSize: 20.0)),
      ),
    ];
  }
}
二つのList<Widget>を追加し、そこにフォームとボタンの記述をそのまま移し替えます。
@override
  Widget build(BuildContext context) {
    return new Scaffold(
      appBar: new AppBar(
        title: new Text('Flutter auth'),
      ),
      body: new Container(
        padding: EdgeInsets.all(16.0),
        child: new Form(
          key: formKey,
          child: new Column(
            crossAxisAlignment: CrossAxisAlignment.stretch,
            //変更
            children: buildInputs() + buildSubmitButtons(),
          )
        )
      ),
    );
  }
リファクタリングできてるはずなのでエミュレーターには何にも変化はないと思います。
ログインとサインアップの切替
List<Widget> buildSubmitButtons() {
    if(_formType == FormType.login) {
      return [
        new RaisedButton(
          onPressed: validateAndSubmit,
          child: new Text('Login', style: new TextStyle(fontSize: 20.0)),
        ),
        new FlatButton(
          onPressed: moveToRegister,
          child: new Text('Create an account', style: new TextStyle(fontSize: 20.0)),
        ),
      ];
    } else {
      return [
        new RaisedButton(
          onPressed: validateAndSubmit,
          child: new Text('Create an account', style: new TextStyle(fontSize: 20.0)),
        ),
        new FlatButton(
          onPressed: moveToLogin,
          child: new Text('Have an Account? Login', style: new TextStyle(fontSize: 20.0)),
        ),
      ];
    }
  }
フォームがloginの場合ログインのボタンを返して、違う場合はサインアップのボタンを返すという簡単な条件分岐をします。
moveToLoginが定義されていない!と言われると思うので、大人しく定義してあげます。
書き方はmoveToRegisterとほとんど変わらないです。
void moveToRegister() {
    formKey.currentState.reset();
    setState(() {
      _formType = FormType.register;
    });
  }

//追加
void moveToLogin() {
    formKey.currentState.reset();
    setState(() {
      _formType = FormType.login;
    });
  }
切り替えられるようになったでしょうか?
formKey.currentState.reset();はログインとサインアップを切り替えた時に途中まで入力していた文字をリセットするコードです。
Submitする時の条件分岐
void validateAndSubmit() async {
    if(validateAndSave()){
      try {
        //追加
        if(_formType == FormType.login) {
          FirebaseUser user = (await FirebaseAuth.instance.signInWithEmailAndPassword(email: _email, password: _password)).user;
          print('Singed in: ${user.uid}');
        } else {
          FirebaseUser user = (await FirebaseAuth.instance.createUserWithEmailAndPassword(email: _email, password: _password)).user;
          print('Registered User: ${user.uid}');
        }
      }
      catch(e) {
        print('Error: $e');
      }
    }
  }
これでユーザー登録ができるようになったと思います!
適当なEmailとPasswordを入力してDEBUG CONSOLEで確認して見ましょう。
サインアップした時にRegistered user: xxxxxxxxxxが
ログインした時にはSigned in: xxxxxxxxxxxxと同じ文字列が表示されたでしょうか?
最後にFirebaseも確認してみます。(AppBarの色だけ違うと思いますが気にしないでください)
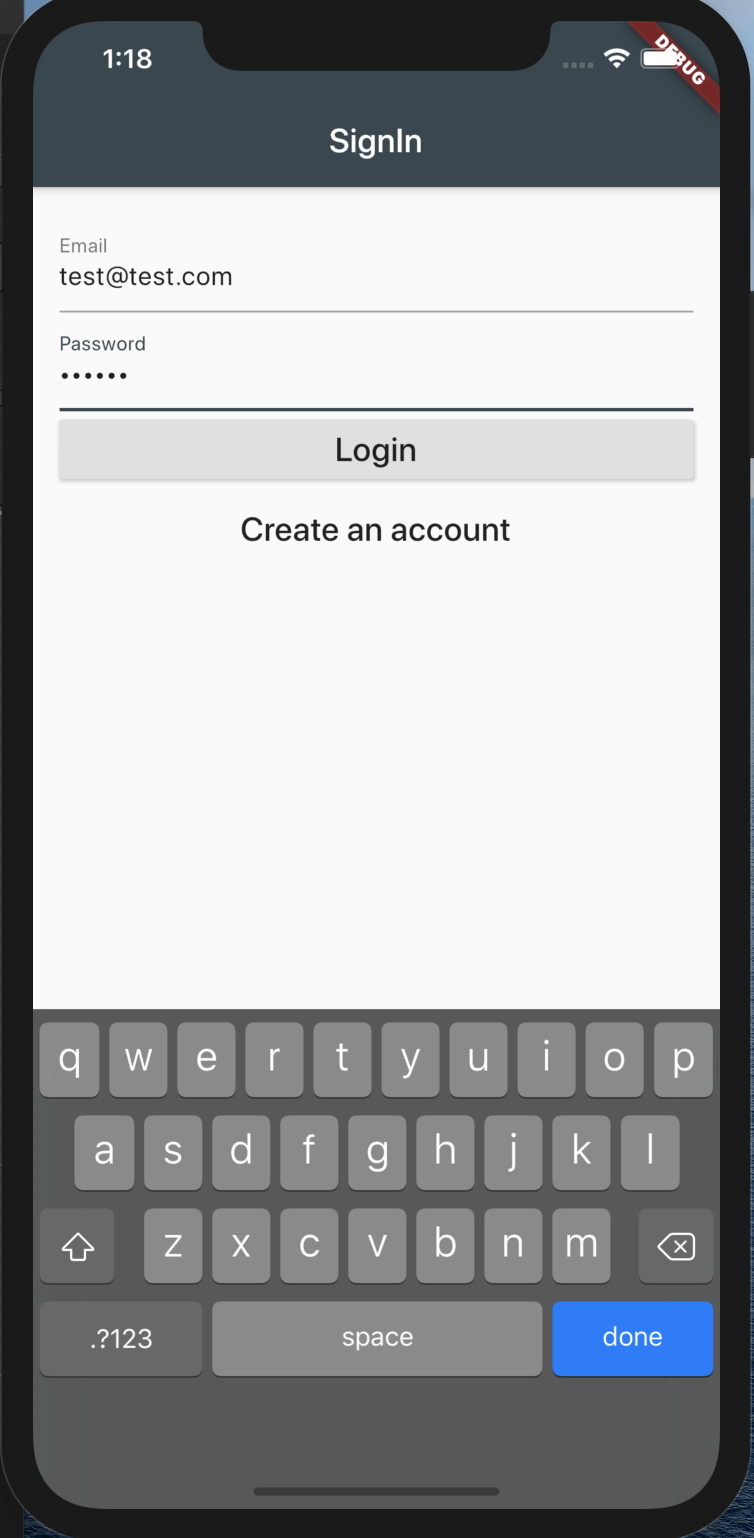
これが
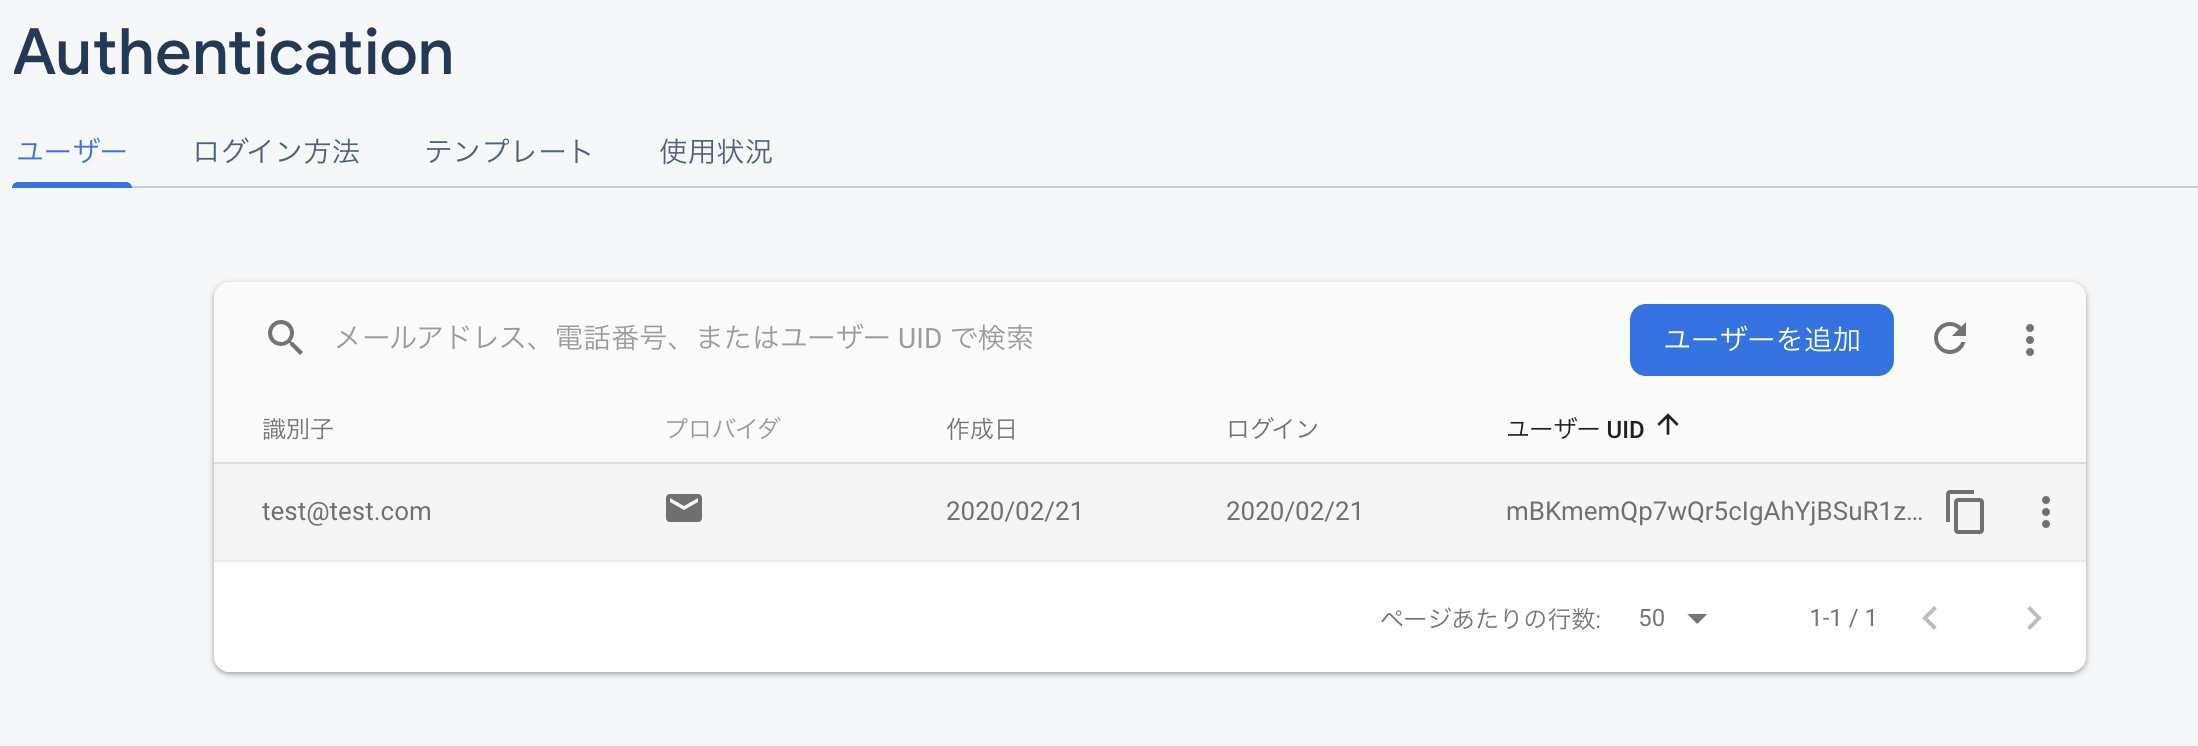
こうなれば成功です! Firebaseを使いこなしてしまいました![]()
感想
Firebaseを使えるようになると夢が広がりますね。
初めてユーザーをFirebaseに登録できた時は興奮しました。
プライベートでもガンガン使っていろんなプロダクトを作っていきたいですな![]()
参考
Flutter & Firebase Auth 03 - Add Firebase registration form + State management
https://www.youtube.com/watch?v=aaKef60iuy8