この記事でFirebaseのAuthを使って、ユーザー登録することはできたのですが、Authで登録ができてもDBに保存されるわけではないということに気付きました。
ユーザー一覧を描画する時などにDBがないときついので、登録をした瞬間にDBに保存できるようにしていきます。
全体的に参考にしたのは下記の記事です。
FirebaseとFlutterの統合
Firebaseの設定はこちらの記事の最初のセクションを参考にしてください。
dependencies:
  flutter:
    sdk: flutter
  firebase_auth: ^0.15.4
import 'package:firebase_auth/firebase_auth.dart';
ライブラリを追加してファイルにインポートすれば完了です。
遷移ページの追加
class MyApp extends StatelessWidget {
  @override
  Widget build(BuildContext context) {
    return MaterialApp(
      title: 'LINE Clone',
      theme: ThemeData(
        primaryColor: Colors.blueGrey[800],
      ),
      home: RootPage(),
      routes: <String,WidgetBuilder>{
        '/home':(BuildContext context) => HomePage(),
        '/register':(BuildContext context) => RegisterPage(),
        '/login':(BuildContext context) => LoginPage(),
      }
    );
  }
}
Rootページも含め、ここで記入した4つのページを作成していきます。
先に何か適当なテキストだけを返すHome_page.dartファイルを作ります。
Rootページでログインの有無を確認する
One of the most common methods is to check the authentication status of the user in a Splash page. Then, depending on the status, we direct the user to the authentication flow (Login) or the main app flow (Home).
一般的な方法の一つにログインの有無をSplashページ(この記事ではRootページ)でチェックするという方法があります。その後、ログインの有無によってLoginページか、Homeページを返します。
import 'package:flutter/material.dart';
import 'package:firebase_auth/firebase_auth.dart';
import 'package:cloud_firestore/cloud_firestore.dart';
import 'home.dart';

class RootPage extends StatefulWidget {
  RootPage({Key key}) : super(key: key);

  @override
  _RootPageState createState() => _RootPageState();
}

class _RootPageState extends State<RootPage> {
  @override
  initState() {
    FirebaseAuth.instance
        .currentUser()
        .then((currentUser) => {
              if (currentUser == null)
                {Navigator.pushReplacementNamed(context, "/login")}
              else
                {
                  Firestore.instance
                      .collection("users")
                      .document(currentUser.uid)
                      .get()
                      .then((DocumentSnapshot result) =>
                          Navigator.pushReplacement(
                              context,
                              MaterialPageRoute(
                                  builder: (context) => HomePage(
                                        uid: currentUser.uid,
                                      ))))
                      .catchError((err) => print(err))
                }
            })
        .catchError((err) => print(err));
    super.initState();
  }

  @override
  Widget build(BuildContext context) {
    return Scaffold(
      body: Center(
        child: Container(
          child: Text("Loading..."),
        ),
      ),
    );
  }
}
まず、ログインの有無の確認、つまり、Firebase.instance.currentUserでログインユーザーを取って来させる。
その後、currnetUserを取って来れなかったらLoginページへ遷移する。
  FirebaseAuth.instance
        .currentUser()
        .then((currentUser) => {
              if (currentUser == null)
                {Navigator.pushReplacementNamed(context, "/login")}
というコードになっています。
Flutterでは主にNavigatorを利用して画面遷移を実装するのですが、pushReplacementNamedはRootページのように一方通行、つまり、戻ることを想定していない時に利用します。
 else
  {
    Firestore.instance
      .collection("users")
      .document(currentUser.uid)
      .get()
      .then((DocumentSnapshot result) =>
          Navigator.pushReplacement(
              context,
               MaterialPageRoute(
                 builder: (context) => HomePage(
                 uid: currentUser.uid,
                      ))))
                  .catchError((err) => print(err))
                }
            })
        .catchError((err) => print(err));
    super.initState();
  }
currentUserを取って来れたらFirestoreからusers collectionのcurrentUser.uidを取ってくる。
これはそのuserの全てのデータが入っているオブジェクトです。その後、Homeページへ遷移します。
Loginページの遷移と違い、MaterialPageRouteでの遷移になりますがこれはios風な遷移を実現するものとなっています。
サンプルコードでは、pushメソッドの引数としてMaterialPageRouteを指定しています。これは、遷移時にMaterialDesignに則ったアニメーションを行うための指定です。
MaterialPageRouteをCupertinoPageRouteと書き換えれば、iOS風のアニメーションで遷移します。
参考: FlutterのNavigatorの使い方と仕組み
UIは遷移までの少しの時間Loading...というテキストを返すだけのものとしています。
Registerページの作成
import 'package:cloud_firestore/cloud_firestore.dart';
import 'package:firebase_auth/firebase_auth.dart';
import 'package:flutter/material.dart';
import 'home_page.dart';

class RegisterPage extends StatefulWidget {
  RegisterPage({Key key}) : super(key: key);

  @override
  _RegisterPageState createState() => _RegisterPageState();
}

class _RegisterPageState extends State<RegisterPage> {

  final GlobalKey<FormState> _registerFormKey = GlobalKey<FormState>();

  TextEditingController nameInputController;
  TextEditingController emailInputController;
  TextEditingController pwdInputController;

  @override
  initState() {
    nameInputController = new TextEditingController();
    emailInputController = new TextEditingController();
    pwdInputController = new TextEditingController();
    super.initState();
  }

  String emailValidator(String value) {
    Pattern pattern =
        r'^(([^<>()[\]\\.,;:\s@\"]+(\.[^<>()[\]\\.,;:\s@\"]+)*)|(\".+\"))@((\[[0-9]{1,3}\.[0-9]{1,3}\.[0-9]{1,3}\.[0-9]{1,3}\])|(([a-zA-Z\-0-9]+\.)+[a-zA-Z]{2,}))$';
    RegExp regex = new RegExp(pattern);
    if (!regex.hasMatch(value)) {
      return '正しいEmailのフォーマットで入力してください';
    } else {
      return null;
    }
  }

  String pwdValidator(String value) {
    if (value.length < 8) {
      return 'パスワードは8文字以上で入力してください';
    } else {
      return null;
    }
  }

  @override
  Widget build(BuildContext context) {
    return Scaffold(
        appBar: AppBar(
          title: Text("アカウント作成"),
        ),
        body: registerscreen(),
      );
  }

  Widget registerscreen() {
   return Container(
            padding: const EdgeInsets.all(20.0),
            child: SingleChildScrollView(
                child: Form(
              key: _registerFormKey,
              child: Column(
                children: <Widget>[
                  TextFormField(
                    decoration: InputDecoration(
                        labelText: 'Name*', hintText: "Lebron"),
                    controller: nameInputController,
                    validator: (value) {
                      if (value.length < 3) {
                        return "名前は3文字以上で入力してください";
                      }
                    },
                  ),
                  TextFormField(
                    decoration: InputDecoration(
                        labelText: 'Email*', hintText: "lebron.james@gmail.com"),
                    controller: emailInputController,
                    keyboardType: TextInputType.emailAddress,
                    validator: emailValidator,
                  ),
                  TextFormField(
                    decoration: InputDecoration(
                        labelText: 'Password*', hintText: "********"),
                    controller: pwdInputController,
                    obscureText: true,
                    validator: pwdValidator,
                  ),
                  Padding(
                    padding: EdgeInsets.all(10.0)
                  ),
                  RaisedButton(
                    child: Text(
                      "アカウント作成",
                      style: TextStyle(
                        fontSize: 20.0,
                      ),
                    ),
                    color: Theme.of(context).primaryColor,
                    textColor: Colors.white,
                    onPressed: () {
                      if (_registerFormKey.currentState.validate()) {
                          FirebaseAuth.instance
                            .createUserWithEmailAndPassword(
                              email: emailInputController.text,
                              password: pwdInputController.text)
                            .then((currentUser) => Firestore.instance
                              .collection("users")
                              .document(currentUser.user.uid)
                              .setData({
                                "uid": currentUser.user.uid,
                                "name": nameInputController.text,
                                "email": emailInputController.text,
                              })
                            .then((result) => {
                              Navigator.pushAndRemoveUntil(
                                  context,
                                  MaterialPageRoute(
                                      builder: (context) => HomePage(
                                            uid: currentUser.user.uid,
                                          )),
                                  (_) => false),
                                    nameInputController.clear(),
                                    emailInputController.clear(),
                                    pwdInputController.clear(),
                                  })
                              .catchError((err) => print(err)))
                          .catchError((err) => print(err));
                      }
                    },
                  ),
                  FlatButton(
                    child: Text(
                      "ログイン",
                      style: TextStyle(
                        fontSize: 20.0,
                        color: Colors.blue
                      ),
                    ),
                    onPressed: () {
                      Navigator.pop(context);
                    },
                  )
                ],
              ),
            )
          )
        );
  }
}
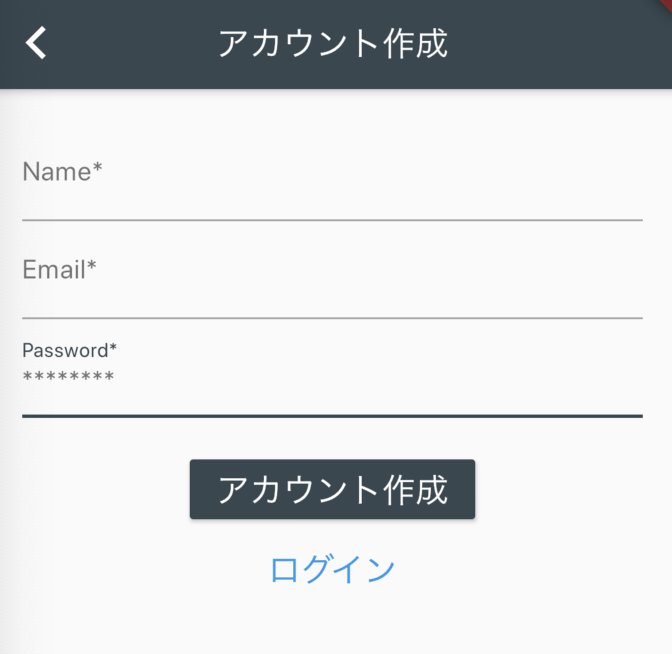
UIはこんな感じになります。
RegisterPage({Key key}) : super(key: key);
これが何を意味しているか分からなかったので調べていたのですが、
・MyHomePage({Key key, this.title})
ここは名前付き引数でコンストラクタを設定しています
またAutomatic field initializationを利用しているのでtitleに入ってくる値は自動でフィールドに代入してくれます。
・: super(key: key);
これはMyHomePageのコンストラクタを呼び出す際のリダイレクト先を設定しています。
つまり、Redirecting Constructorsの利用です。
リダイレクト先はsuper(Key:key)となっているため、継承元のコンストラクタを設定(super()という呼び出しが継承元のコンストラクタを呼び出していること)しているということになります。
【初心者向け】FlutterサンプルコードのMyHomePage({Key key, this.title}) : super(key: key);って何?
うーん、分かるようで分からない...
記事で詳しく説明してくれているので参考にしてみてください。
class _RegisterPageState extends State<RegisterPage> {

  final GlobalKey<FormState> _registerFormKey = GlobalKey<FormState>();

  TextEditingController nameInputController;
  TextEditingController emailInputController;
  TextEditingController pwdInputController;

  @override
  initState() {
    nameInputController = new TextEditingController();
    emailInputController = new TextEditingController();
    pwdInputController = new TextEditingController();
    super.initState();
  }
KeyはWidgetが動き回る時にステートを保持するもので、GlobalKeyはアプリ内の階層を問わずステートを保ったまま、ウィジェットに親を変更させることが出来ます。
そしてTextEditingControllerによってフォームの入力を管理し、入力したものをそのままDBに保存したりできるようになります。
String emailValidator(String value) {
    Pattern pattern =
        r'^(([^<>()[\]\\.,;:\s@\"]+(\.[^<>()[\]\\.,;:\s@\"]+)*)|(\".+\"))@((\[[0-9]{1,3}\.[0-9]{1,3}\.[0-9]{1,3}\.[0-9]{1,3}\])|(([a-zA-Z\-0-9]+\.)+[a-zA-Z]{2,}))$';
    RegExp regex = new RegExp(pattern);
    if (!regex.hasMatch(value)) {
      return '正しいEmailのフォーマットで入力してください';
    } else {
      return null;
    }
  }

  String pwdValidator(String value) {
    if (value.length < 8) {
      return 'パスワードは8文字以上で入力してください';
    } else {
      return null;
    }
  }
ここでemailとpasswordそれぞれバリデーションの実装をします。
RegExp regex = new RegExp(pattern);は正規表現を作成しています。
*正規表現とは?
様々な文字列を一つの文字列で表現する表記法。
参考: https://qiita.com/soarflat/items/2b50c1efe2ea54a762d7
その後、各フォームで先ほど定義したcontrollerやvalidationを指定していきます。
onPressed: () {
      if (_registerFormKey.currentState.validate()) {
         FirebaseAuth.instance
            .createUserWithEmailAndPassword(
              email: emailInputController.text,
              password: pwdInputController.text)
            .then((currentUser) => Firestore.instance
              .collection("users")
              .document(currentUser.user.uid)
              .setData({
                 "uid": currentUser.user.uid,
                  "name": nameInputController.text,
                  "email": emailInputController.text,
                   })
            .then((result) => {
               Navigator.pushAndRemoveUntil(
                  context,
                  MaterialPageRoute(
                     builder: (context) => HomePage(
                     uid: currentUser.user.uid,
                        )),
                 (_) => false),
                     nameInputController.clear(),
                     emailInputController.clear(),
                     pwdInputController.clear(),
                    })
                 .catchError((err) => print(err)))
             .catchError((err) => print(err));
          }
        },
      ),
ボタンを押した時の処理です。
アカウント作成ボタンを押した時、フォームは入力された値がvalidationを通っているかを確認します。
通っていなかった場合には警告がユーザーに表示されます。
If they do match, the method
createUserWithEmailAndPasswordof theFirebaseAuthinstance is used to signup a new user.
validationを通過した場合、FirebaseAuth instanceのcreateUserWithEmailAndPasswordメソッドが新しいユーザーをサインアップするために使われます。
(参考記事と全く同じ実装をしているわけではないので訳を上述のコードと対応させています)
If the user is successfully signed up, a new document is created containing their first and last names, email, and uid (the same mentioned above in the Splash page). To make it easier to get this new object from Cloud Firestore, the document ID is the user’s uid.
ユーザーのサインアップが成功した場合、名前とemail、パスワード、そしてuidを含んだ新しいドキュメントが作成されます。
この新しいオブジェクトをCloud Firestoreから取得することは簡単にするためにドキュメントのIDはユーザーのuidとなっています。
そして全てのアクションが成功するとユーザーはホームページに遷移します。
Loginページの作成
import 'package:flutter/material.dart';
import 'package:firebase_auth/firebase_auth.dart';
import 'package:cloud_firestore/cloud_firestore.dart';
import 'home_page.dart';

class LoginPage extends StatefulWidget {
  LoginPage({Key key}) : super(key: key);

  @override
  _LoginPageState createState() => _LoginPageState();
}

class _LoginPageState extends State<LoginPage> {
  final GlobalKey<FormState> _loginFormKey = GlobalKey<FormState>();
  TextEditingController emailInputController;
  TextEditingController pwdInputController;

  @override
  initState() {
    emailInputController = new TextEditingController();
    pwdInputController = new TextEditingController();
    super.initState();
  }

  String emailValidator(String value) {
    Pattern pattern =
        r'^(([^<>()[\]\\.,;:\s@\"]+(\.[^<>()[\]\\.,;:\s@\"]+)*)|(\".+\"))@((\[[0-9]{1,3}\.[0-9]{1,3}\.[0-9]{1,3}\.[0-9]{1,3}\])|(([a-zA-Z\-0-9]+\.)+[a-zA-Z]{2,}))$';
    RegExp regex = new RegExp(pattern);
    if (!regex.hasMatch(value)) {
      return '正しいEmailのフォーマットで入力してください';
    } else {
      return null;
    }
  }

  String pwdValidator(String value) {
    if (value.length < 8) {
      return 'パスワードは8文字以上で入力してください';
    } else {
      return null;
    }
  }

  @override
  Widget build(BuildContext context) {
    return Scaffold(
        appBar: AppBar(
          title: Text("ログイン"),
        ),
        body: loginscreen()
    );
  }

  Widget loginscreen() {
    return Container(
            padding: const EdgeInsets.all(20.0),
            child: SingleChildScrollView(
                child: Form(
              key: _loginFormKey,
              child: Column(
                children: <Widget>[
                  TextFormField(
                    decoration: InputDecoration(
                        labelText: 'Email*', hintText: "lebron.james@gmail.com"),
                    controller: emailInputController,
                    keyboardType: TextInputType.emailAddress,
                    validator: emailValidator,
                  ),
                  TextFormField(
                    decoration: InputDecoration(
                        labelText: 'Password*', hintText: "********"),
                    controller: pwdInputController,
                    obscureText: true,
                    validator: pwdValidator,
                  ),
                  Padding(
                    padding: EdgeInsets.all(10.0)
                  ),
                  RaisedButton(
                    child: Text(
                      "ログイン",
                      style: TextStyle(
                        fontSize: 20.0
                      ),
                    ),
                    color: Theme.of(context).primaryColor,
                    textColor: Colors.white,
                    onPressed: () {
                      if (_loginFormKey.currentState.validate()) {
                        FirebaseAuth.instance
                            .signInWithEmailAndPassword(
                              email: emailInputController.text,
                              password: pwdInputController.text)
                            .then((currentUser) => Firestore.instance
                              .collection("users")
                              .document(currentUser.user.uid)
                              .get()
                              .then((DocumentSnapshot result) =>
                                Navigator.pushReplacement(
                                    context,
                                    MaterialPageRoute(
                                        builder: (context) => HomePage(
                                              uid: currentUser.user.uid,
                                            ))))
                                .catchError((err) => print(err)))
                            .catchError((err) => print(err));
                      }
                    },
                  ),
                  FlatButton(
                    child: Text(
                      "アカウントを作成する",
                      style: TextStyle(
                        fontSize: 20,
                        color: Colors.blue
                      ),
                    ),
                    onPressed: () {
                      Navigator.pushNamed(context, "/register");
                    },
                  )
                ],
              ),
            )));
  }
}
Both
TextFormFieldshave their own controllers and validation methods, like the Register page. However, theRaisedButtonWidget is used to log in the user. TheFlatButtonWidget included redirects the user to the Register page if they don’t have an account. The form has its ownGlobalKey, to keep track of the forms state.
Registerページと同じようにemailとpasswordのTextFormFieldsはそれぞれのcontrollerとvalidationメソッドを持っています。
しかし、RaisedButtonはloginユーザーを使用し、FlatButtonはユーザーがアカウントを持っていなかった場合、Registerページへ遷移させます。
これは各フォームがそれぞれのGlobalKeyを持ち、フォームの状態を持っているためです。
後はほとんどRegisterページと同じ実装になります。
Firebaseを確認する

各フォームの項目をそれぞれ入力して、Homeページに遷移されることを確認します。
その後、Firebaseに移動して、下記のようにDBが作成され、入力した値が反映されていれば成功です。
