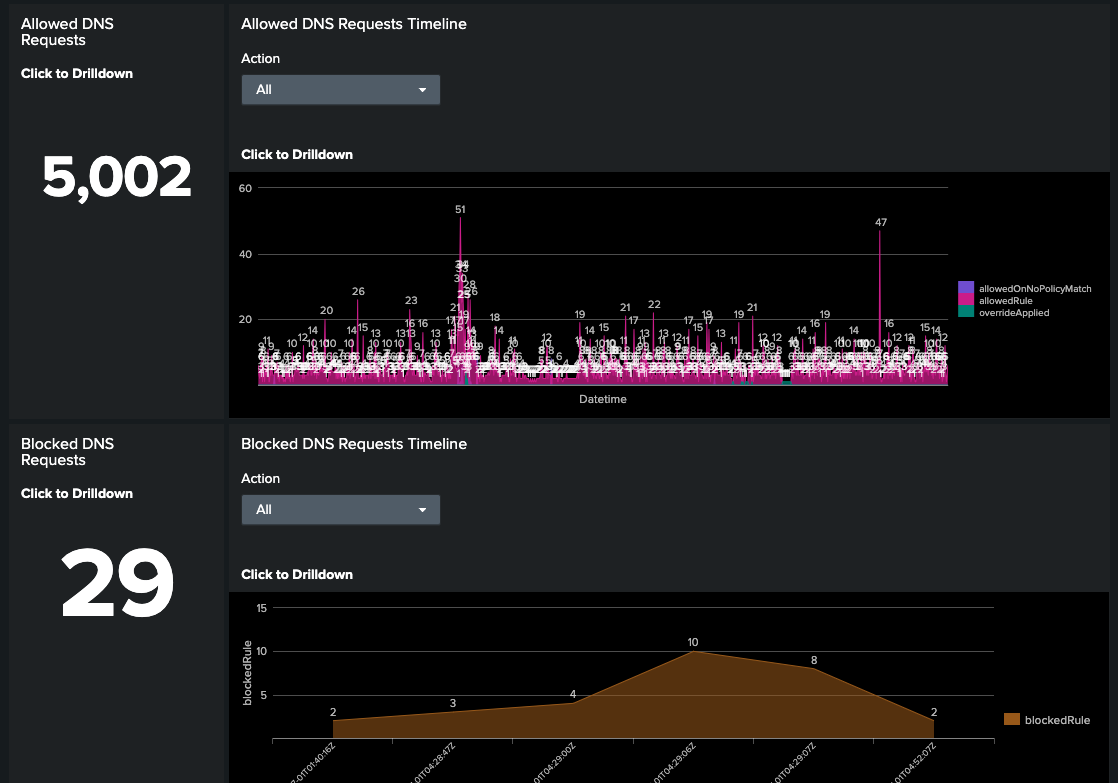
やっていること
ある組織からインターネットへの通信を Cloudflare Gateway で管理し、その ログ を、Splunk Cloud Platformで可視化。
構成
今回は Magic WAN を使った IPSec 接続で試した。
環境
Splunk Cloud Platform
- 無料トライアル版 15日... → Splunk Cloud Platform
- Cloudflare テンプレート → Cloudflare App for Splunk
対応中のログ一覧 (↑の Details タブに記載)
| Log Type | Source Type |
|---|---|
| HTTP Request (WAF や CDN など) | cloudflare:json |
| Gateway Network logs | cloudflare:network |
| Gateway HTTP logs | cloudflare:http |
| Gateway DNS logs | cloudflare:dns |
| Access requests logs | cloudflare:access |
| CASB Findings logs | cloudflare:casb |
| Audit logs | cloudflare:audit |
今回の対象は下記3つ。
-
cloudflare:network, 各デバイスからの IP/TCP/UDP/TLS 通信(Stateful Firewall) -
cloudflare:http, 各デバイスからの HTTP/HTTPS 通信(Forward Proxy) -
cloudflare:dns, 各デバイスからの DNS 通信(Full Resolver)
Splunk Cloud の申込みと Cloudflare App の追加
- Splunk Cloud Platform の開始
-
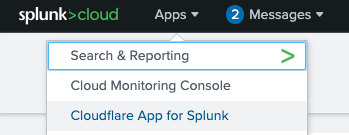
Cloudflare App for Splunk のインストール
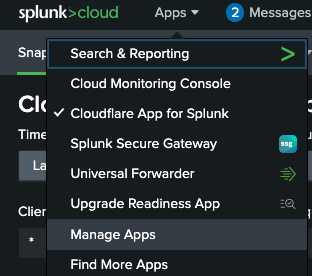
Apps > Find More Apps
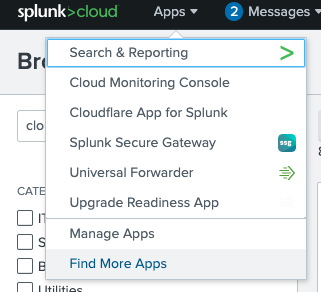

cloudflare を入れて Cloudflare App for Splunk を見つける
Install (↑はインストール後のため Open App になっている)
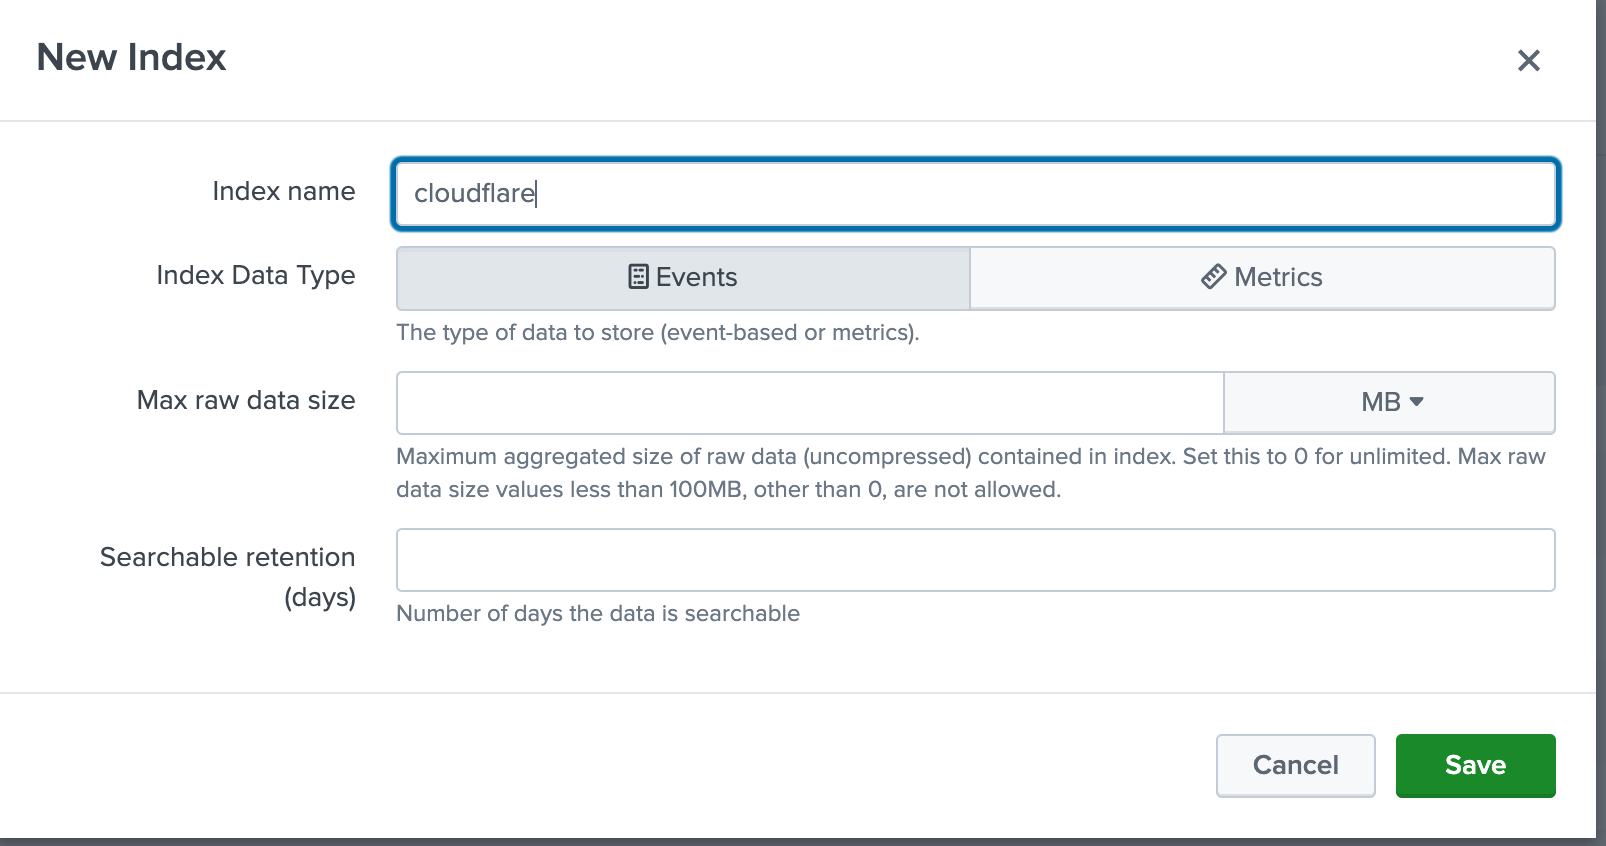
Index の追加
Index name: cloudflare
Index Data Type: Events
Max raw data size: 適当 (0 MB)
Serchable retention (days): 適当 (30 Days)
Index name
App の各マクロはデフォルトでcloudflareを参照しているので、それに合わせている。別の名前にする際はマクロcloudflare_zt_indexが参照するIndex名も変える。
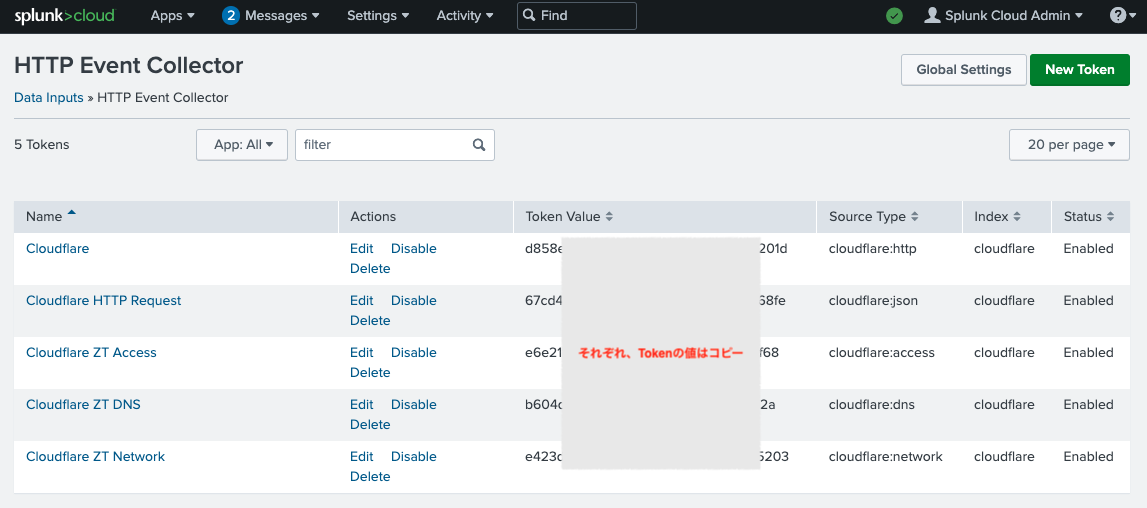
Data Inputs の追加
HTTP Event Collector (HEC)
Source type > Select > cloudflare:network
Index > cloudflare
Source typeは Automatic でもいいかも
HTTP と DNS も同じように追加
Source type > Select > cloudflare:http
Index > cloudflare
Source type > Select > cloudflare:dns
Index > cloudflare
Source Types の編集
- Settings > Source Types
Show only popularのチェックを外す
searchcloudflare

- それぞれの Source Type で Regex Expression を編集
Pattern:
([\r\n]+)\{\"\w+\"
を
([\r\n]+)
Splunk の解説
- Specifies a regex that determines how the raw text stream is broken into initial events, before line merging takes place.
*This sets SHOULD_LINEMERGE = false and LINE_BREAKER to the user-provided regular expression. - Defaults to ([\r\n]+), meaning data is broken into an event for each line, delimited by any number of carriage return or newline characters.
- The regex must contain a capturing group -- a pair of parentheses which defines an identified subcomponent of the match.
- Wherever the regex matches, Splunk considers the start of the first capturing group to be the end of the previous event, and considers the end of the first capturing group to be the start of the next event.
- The contents of the first capturing group are discarded, and will not be present in any event. You are telling Splunk that this text comes between lines.
Cloudflare
Logpush (Account)
- 分析とログ > Logs > Logpush ジョブを追加する > Gateway network

- すべてのフィールドを選択 (とりあえず全部。パフォーマンスへの悪影響はない。後で取捨できる)

- プッシュ先は Splunk

- Splunk HEC の接続情報を入力

- 証明書のエラーが出たら、skip verify は
はいに。

- 設定内容
| 項目 | 設定値 | 補足 |
|---|---|---|
| Splunk raw HTTP イベント コレクタのURL | <Splunk Cloud Platform管理ダッシュボードのホスト名>:8088/services/collector/raw | Settings > Data Inputs >HTTP Event Collector > Global Settings にポート番号あり 
|
| チャネルID | GUIDジェネレータなどで自作 |
ジェネレータ や python -c 'import uuid; print(uuid.uuid4())'
|
| 認証トークン | Splunk%20<トークンの値> | トークンは HTTP Event Collector から見れる。Splunk%20を頭に。 |
| ソースタイプ | cloudflare:network | タイプごとに個別の Logpush ジョブを作成 |
| Insecure skip verify | はい | HEC が検査不合格の証明書を使っていたので true |
作成したジョブの確認や変更は API で
curl -Ls "https://api.cloudflare.com/client/v4/accounts/$ACCOUNTID/logpush/jobs" \
-H "Authorization: Bearer $TOKEN" \
-H "Content-Type: $CTYPE" | jq '.result[]|select (.destination_conf|startswith("splunk"))'
{
"id": 258376,
"dataset": "gateway_network",
"frequency": "high",
"kind": "",
"enabled": true,
"name": null,
"logpull_options": "fields=AccountID,Action,Datetime,DestinationIP,DestinationPort,DetectedProtocol,DeviceID,DeviceName,Email,OverrideIP,OverridePort,PolicyID,PolicyName,SNI,SessionID,SourceIP,SourceInternalIP,SourcePort,Transport,UserID×tamps=rfc3339&CVE-2021-44228=false",
"destination_conf": "splunk://***.splunkcloud.com:8088/services/collector/raw?channel=***&header_Authorization=Splunk%20***&sourcetype=cloudflare:network&insecure-skip-verify=true",
"last_complete": "2023-07-01T12:02:55Z",
"last_error": null,
"error_message": null,
"time_created": "2023-07-01T00:54:41Z"
}
HTTP と DNS も同じように追加
- チャネルID
- 認証トークン
- ソースタイプ
が別。後は共通。
動作確認
カスタマイズ
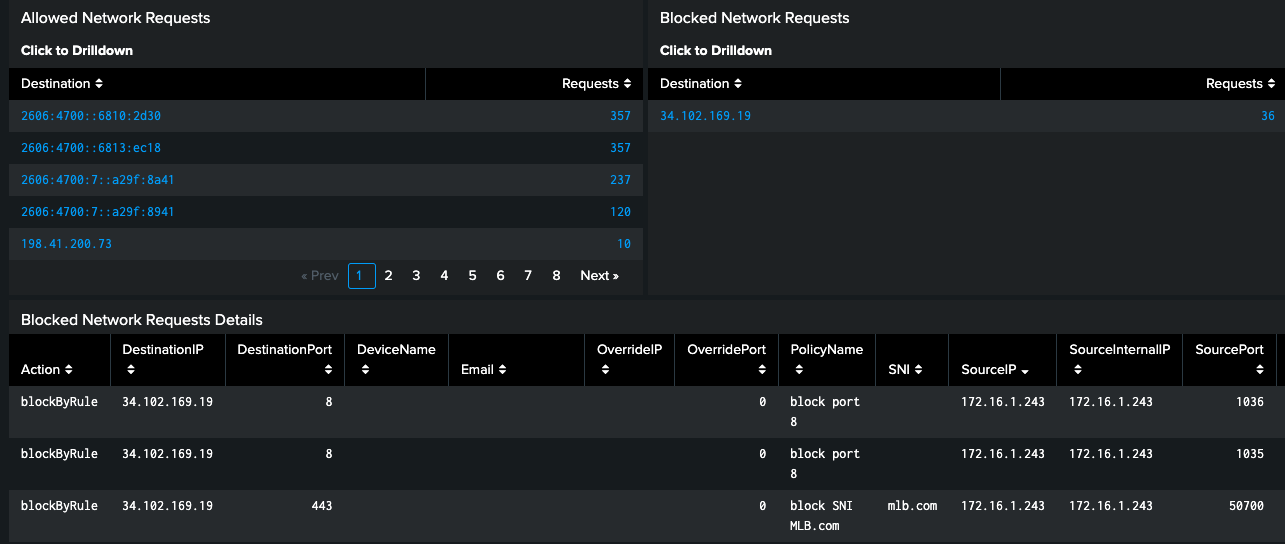
Network はデフォルトでは思うような表示とならなかった。
下記のようにホスト名で表示され、実際にブロックしていたポート宛の通信が Blocked にあらわれていない。
ソースの編集
パッチ
--- Splunk.Cloudflare.app.origin.txt	2023-07-01 12:49:07
+++ Splunk.Cloudflare.app.origin.txt.new	2023-07-01 15:28:54
@@ -13,7 +13,7 @@
     <query>search ResolverDecision="*block*"</query>
   </search>
   <search id="network_base_search">
-    <query>`cloudflare_zt_index` sourcetype="cloudflare:network" SNI!="" | where isnotnull(SNI) | fields *</query>
+    <query>`cloudflare_zt_index` sourcetype="cloudflare:network" DestinationIP!="" | where isnotnull(DestinationIP) | fields *</query>
     <earliest>$earliest$</earliest>
     <latest>$latest$</latest>
     <sampleRatio>1</sampleRatio>
@@ -266,7 +266,7 @@
         <title>Click to Drilldown</title>
         <search base="network_base_search">
           <query>search action="*allow*" |stats count as Requests by
-                        SNI | rename SNI as Domain |sort - Requests</query>
+                        DestinationIP | rename DestinationIP as Destination |sort - Requests</query>
         </search>
         <option name="count">5</option>
         <option name="drilldown">row</option>
@@ -274,7 +274,7 @@
         <option name="totalsRow">false</option>
         <option name="wrap">true</option>
         <drilldown>
-          <set token="allow_network_domain">$row.Domain$</set>
+          <set token="allow_network_domain">$row.Destination$</set>
           <set token="allow_network_domain_hidden"></set>
         </drilldown>
       </table>
@@ -285,14 +285,14 @@
         <title>Click to Drilldown</title>
         <search base="network_base_search">
           <query>search action="*block*" |stats count as Requests by
-                        SNI | rename SNI as Domain|sort - Requests</query>
+                        DestinationIP | rename DestinationIP as Destination|sort - Requests</query>
         </search>
         <option name="count">5</option>
         <option name="drilldown">row</option>
         <option name="percentagesRow">false</option>
         <option name="totalsRow">false</option>
         <drilldown>
-          <set token="block_network_domain">$row.Domain$</set>
+          <set token="block_network_domain">$row.Destination$</set>
           <set token="block_network_domain_hidden"></set>
         </drilldown>
       </table>
@@ -304,7 +304,7 @@
       <table>
         <search base="network_base_search">
           <query>search action="*allow*"
-                        SNI="$allow_network_domain$"| table
+                        DestinationIP="$allow_network_domain$"| table
                         Action,DestinationIP,DestinationPort,DeviceName,Email,OverrideIP,OverridePort,PolicyName,SNI,SourceIP,SourceInternalIP,SourcePort,Transport
                     </query>
         </search>
@@ -319,7 +319,7 @@
       <table>
         <search base="network_base_search">
           <query>search action="*block*"
-                        SNI="$block_network_domain$"| table
+                        DestinationIP="$block_network_domain$"| table
                         Action,DestinationIP,DestinationPort,DeviceName,Email,OverrideIP,OverridePort,PolicyName,SNI,SourceIP,SourceInternalIP,SourcePort,Transport</query>
         </search>
         <option name="count">5</option>
トラブルシューティング
Splunk 素人なので遠回りしてるかもしれないが、やったことは下記。
- なんか表示されない。

- マウスホバーで出てくる虫眼鏡 (Open in Search) をクリック

- マッチするログが出てくるところまで、絞り込みを緩める

- 出てきたログの中身から、どこのフィルタで漏れているか調べる
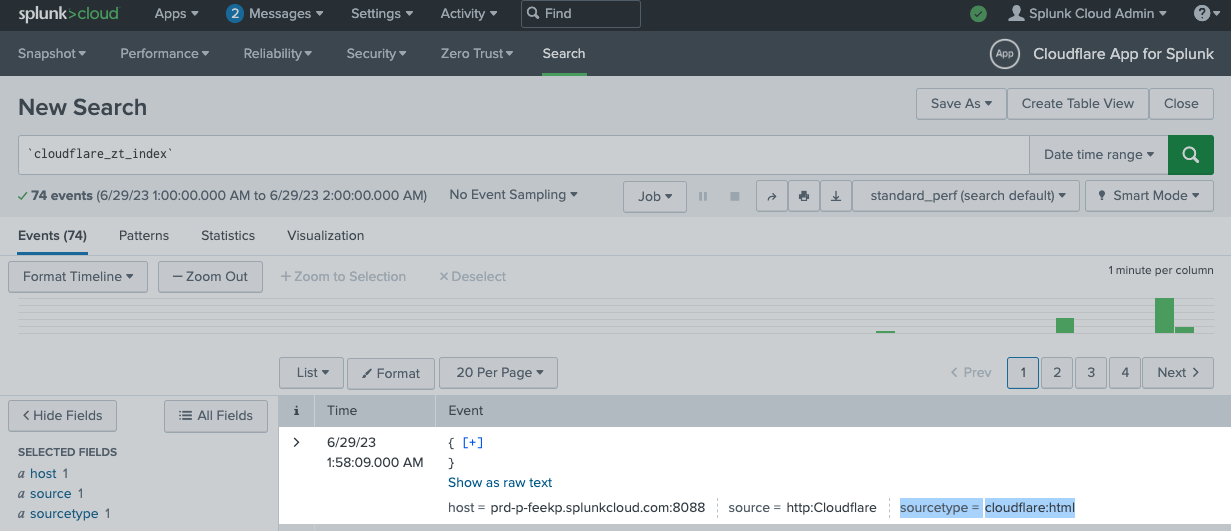
この場合はログの sourucetype =cloudflare.htmlということで、フィルタ条件のcloudflare.httpとマッチしない。Logpush 設定のタイポだったので、直した。
感想
いい点
公開 Web App に対するパフォーマンスやセキュリティのログも同じように取れるので、

-
組織ネットワークからの、インターネットへの接続
例)マルウェアに感染したサーバーの外向けの活動 -
組織ネットワークへの、インターネットからの接続
例)公開サービスの脆弱性を利用したサーバーへの攻撃
という、2方向の情報のやり取りを
- Cloudflare で一括制御し、Splunk で一括監視
と一元化できるのは、効率がいい。
下図の
- 1、2 両方とも
- 双方向に管理
できるので、アタックサーフェスってやつを減らせるんじゃないだろか。
悪い点
悪い点というか、Gateway の部分は Logpush の項目自体は豊富なので、さらに役立つアナリティクス画面が作れると思う。HTTP Request のように Gateway の方も今後の機能拡張を期待。
ただ、カスタマイズの例を書いたように、Cloudflare App を利用者側でカスタマイズできそうなので、バージョンアップを待たずに、用途に応じて柔軟にセルフサーブできるのは良いと感じる。
Splunk Cloud Platform が欲しくなった。。。
余談
余談だが、Cloudflare のプラットフォームを使う利点は、Innovating at the Edge にあると思う。
上の絵では表現できないが、
たとえば、
- WAF/CDN に関しては、利用者や攻撃者(ユーザーの属する ISP)に近い PoP でサービスを提供
- Gateway に関しては、利用者(My Network の属する ISP)に近い PoP でサービスを提供
できる。
言い換えると、
- あなたの Web App を加速、保護する機能はサービス利用者の目の前で稼働
- 組織の Internet 利用を加速、保護する機能は組織ユーザーの目の前で稼働
するよう、地球上にプロダクトをデプロイしてる。
そもそも、パフォーマンスとセキュリティを両立するのが目的なので、そういう作りになっている。
会社の考えがプロダクトに影響。
The Network is The Computer ™ や Supercloud。
リンク
https://www.splunk.com/ja_jp/products/splunk-cloud-platform.html
https://splunkbase.splunk.com/app/4501
https://developers.cloudflare.com/fundamentals/data-products/analytics-integrations/splunk/
https://developers.cloudflare.com/logs/get-started/enable-destinations/splunk/

