はじめに
この投稿はCyberAgent Developers Advent Calendar 2019 4日目の記事です!
本日はTapple iOSチームに今年加入した、19新卒の @Kazuma_Nagano が担当します。
今回はTappleのiOSアプリのCIのワークフローをキャッシュをなるべく生かす設定に変えることで、
Bitriseのワークフローを 40%〜50% ほどの高速化に成功した話を書きたいと思います。
高速化前後のワークフロー
現在チームではBitrise上でテストを自動化しています。
ざっくり下記のようなワークフローです。
- リポジトリのクローン
- Homebrewパッケージのインストール(Xcodegen, Linterなど)
- Gemパッケージのインストール(xcov, CocoaPods, danger, fastlaneなど)
- Cocoapodsのインストール
- テストの実行
下記は高速化前のワークフローの実際のサマリー(最後に表示される実行時間)です。
+------------------------------------------------------------------------------+
|                               bitrise summary                                |
+---+---------------------------------------------------------------+----------+
|   | title                                                         | time (s) |
+---+---------------------------------------------------------------+----------+
| ✓ | activate-ssh-key                                              | 11.26 sec|
+---+---------------------------------------------------------------+----------+
| ✓ | git-clone                                                     | 1.5 min  |
+---+---------------------------------------------------------------+----------+
| ✓ | Set Env Path                                                  | 5.94 sec |
+---+---------------------------------------------------------------+----------+
| ✓ | cache-pull                                                    | 4.0 min  |
+---+---------------------------------------------------------------+----------+
| ✓ | Bundle Install                                                | 50.90 sec|
+---+---------------------------------------------------------------+----------+
| ✓ | Brew Install                                                  | 1.1 min  |
+---+---------------------------------------------------------------+----------+
| ✓ | XcodeGen                                                      | 15.0  sec|
+---+---------------------------------------------------------------+----------+
| ✓ | CocoaPods Install                                             | 4.1 min  |
+---+---------------------------------------------------------------+----------+
| ✓ | cache-push                                                    | 25.18 sec|
+---+---------------------------------------------------------------+----------+
| ✓ | github-status                                                 | 5.69 sec |
+---+---------------------------------------------------------------+----------+
| ✓ | Fastlane Test                                                 | 19.0 min |
+---+---------------------------------------------------------------+----------+
| ✓ | cache-push                                                    | 15.52 sec|
+---+---------------------------------------------------------------+----------+
| ✓ | github-status                                                 | 5.19 sec |
+---+---------------------------------------------------------------+----------+
| Total runtime: 31.9 min                                                      |
+------------------------------------------------------------------------------+
この中で特に、 Homebrew , Gem , Cocoapods (アプリビルド)のそれぞれの設定を見直し、
よりキャッシュを生かすことで、下記のようにワークフローの合計時間を40%〜50%ほど高速化することができました。
+------------------------------------------------------------------------------+
|                               bitrise summary                                |
+---+---------------------------------------------------------------+----------+
|   | title                                                         | time (s) |
+---+---------------------------------------------------------------+----------+
| ✓ | activate-ssh-key                                              | 10.15 sec|
+---+---------------------------------------------------------------+----------+
| ✓ | Git Config                                                    | 3.17 sec |
+---+---------------------------------------------------------------+----------+
| ✓ | git-clone                                                     | 29.22 sec|
+---+---------------------------------------------------------------+----------+
| ✓ | Set Env Path                                                  | 4.44 sec |
+---+---------------------------------------------------------------+----------+
| ✓ | cache-pull                                                    | 31.66 sec|
+---+---------------------------------------------------------------+----------+
| ✓ | Brew install                                                  | 8.13 sec |
+---+---------------------------------------------------------------+----------+
| ✓ | XcodeGen                                                      | 11.53 sec|
+---+---------------------------------------------------------------+----------+
| ✓ | rbenv Install                                                 | 4.48 sec |
+---+---------------------------------------------------------------+----------+
| ✓ | Bundle Install                                                | 5.07 sec |
+---+---------------------------------------------------------------+----------+
| ✓ | CocoaPods Install                                             | 38.11 sec|
+---+---------------------------------------------------------------+----------+
| ✓ | cache-push                                                    | 9.71 sec |
+---+---------------------------------------------------------------+----------+
| ✓ | github-status                                                 | 6.70 sec |
+---+---------------------------------------------------------------+----------+
| ✓ | Fastlane Test                                                 | 13.6 min |
+---+---------------------------------------------------------------+----------+
| ✓ | github-status                                                 | 7.55 sec |
+---+---------------------------------------------------------------+----------+
| Total runtime: 16.4 min                                                      |
+------------------------------------------------------------------------------+
※bitrise summaryのTotal runtimeには時間帯、環境によって増減します。
記事内のものは同時刻帯のものを選んで比較していますが、他の要因も影響もあるかもしれません
### 補足 上記の高速化前のワークフローでは、 1. `./Pod`(Podfile.lockに変更があった場合) 2. `/Users/vagrant/Library/Caches/Homebrew` 3. `~/Library/Developer/Xcode/DerivedData` がキャッシュされていました。 高速化後のワークフローでは、2, 3 を効果がみられなかったため、削除しています。
Bitriseでのキャッシュ機能について
Bitriseの公式のドキュメントにはキャッシュの機能についての記述があります。
いくつか抜粋すると
- キャッシュは全てのキャッシュされたディレクトリや依存性をtarし、Amazon S3内に安全に保存される
-
a/path/to/cacheを指定した場合、/path/to/cache/.ignore-meもキャッシュされる - キャッシュはブランチ単位で管理される
- PR内ではcache-pushは行われない
- そのブランチ上で新しいビルドが行われなかった場合、7日後に有効期限が切れて削除される
利用方法
利用方法は、2つのステップを追加することで利用できます。
Bitrise.io Cache:Pull step to download the previous cache (if any).
Bitrise.io Cache:Push step to check the state of the cache and upload it if required.
bitriseのワークフローに下記のように記述することで、選択したディレクトリ以下をキャッシュすることができます。
workflows:
    workflow-a:
        steps:
        # 他のワークフロー
        - cache-pull: {} #pullはこれだけ
        # 他のワークフロー
        - cache-push:
        inputs:
        - cache_paths: |-
            $BITRISE_CACHE_DIR
       MyProject/Cache  #キャッシュしたいパス
            ./Pods -> ./Podfile.lock #Podfile.lockに変更があれば./Podsをキャッシュ
Podfike.lockの例のように変更を監視するファイルを指定することができますが、これはdiffを見ていないわけではなく、
Cleaning paths
Done in 1.32941661s
Checking previous cache status
Previous cache info found at: /tmp/cache-info.json
Done in 171.741223ms
Checking for file changes
0 files needs to be removed
0 files has changed
0 files added
No files found in 37.785423ms
Total time: 1.539638885s
|                                                                              |
+---+---------------------------------------------------------------+----------+
| ✓ | cache-push                                                    | 8.99 sec |
+---+---------------------------------------------------------------+----------+
ログを確認すると、削除、変更、追加のそれぞれを確認していることがわかります。
なので、変更を監視するファイルを指定することで、このフローを簡略化することができます。
効果があったキャッシュ設定
以降で効果的だったキャッシュ方法を紹介します。
Homebrewのキャッシュ
公式ドキュメント -Caching Homebrew installersでは下記のような方法の記載があります。
The Brew install Step supports caching: if the option is enabled, any downloaded brew installers will be cached from the location of brew --cache. The cache path is ~/Library/Caches/Homebrew/.
To enable caching of brew installers:
- Go to the Workflow in which you want to cache brew installs and select the Brew install Step.
- Set the Cache option to yes.
- As always, click Save.
公式では、Homebrewの --cache オプションを指定していますが、これでは毎回インストールが走ることは避けられません。
これはバイナリを直接リンクする方法で、インストール済みのfomulaの再インストールを回避することができます。
(~/Library/Caches/Homebrew はキャッシュする必要ないため、公式のStepは使わない)
- script:
        inputs:
        - content: |-
            # キャッシュするディレクトリを環境変数に追加
            envman add --key BREW_XCODEGEN --value "$(brew --cellar)/xcodegen" #パッケージ名を指定
            envman add --key BREW_OPT_XCODEGEN --value "/usr/local/opt/xcodegen"  #パッケージ名を指定
        title: Set Env Path
- script:
        inputs:
        - content: |-
            #インストールは以下のコマンドを実行
            brew install xcodegen
            brew link xcodegen
        title: Brew install
- cache-push:
        inputs:
        - cache_paths: |-
           $BITRISE_CACHE_DIR

           #以下の二つをcache_pathに追加
           $BREW_XCODEGEN
           $BREW_OPT_XCODEGEN
+ brew install xcodegen
Warning: xcodegen 2.10.1 is already installed, it's just not linked
You can use `brew link xcodegen` to link this version.
+ brew link xcodegen
Linking /usr/local/Cellar/xcodegen/2.10.1... 2 symlinks created
これにより brew install ステップを80%ほど短縮することができました。
+---+---------------------------------------------------------------+----------+
| ✓ | Brew Install                                                  | 1.1 min  |
+---+---------------------------------------------------------------+----------+
+---+---------------------------------------------------------------+----------+
| ✓ | Brew install                                                  | 8.13 sec |
+---+---------------------------------------------------------------+----------+
また、この方法だと1つ以上インストールが走った場合に、毎回 brew cleanup が走り時間を使ってしまいます。
これは、HomebrewのGithubリポジトリ内のcleanup.rbを確認すると、 ~/Library/Caches/Homebrew/.cleaned を使って条件を判別しているため、こちらをキャッシュ対象に追加することで回避できます。
Ruby Gems
rbenv
公式ドキュメント -Caching Ruby Gemsでは下記のような方法の記載があります。
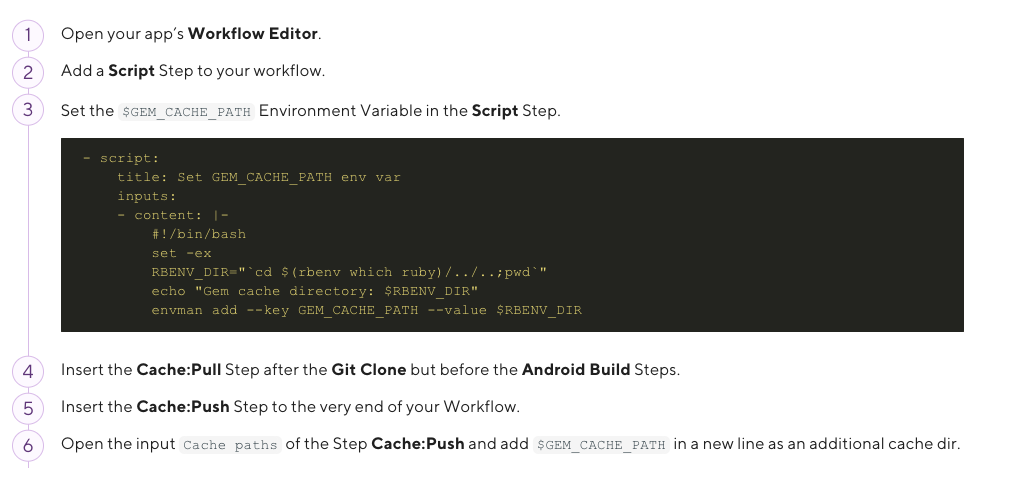
手元の環境だとキャッシュパスが ~/.rbenv/versions/2.6.3 を差しています。これはrbenvのキャッシュ指定ですね。
Bitriseから提供されてるスタックだと ruby 2.6.3 はインストールされていないため、この設定は有効でした。
また、リポジトリ内で .ruby-version を管理している場合は、push時にはここをチェックすれば良さそうです。
gem
さらに、gemのインストール先ディレクトリ(tappleでは ./vendor/bundler)をキャッシュすることで、
bundle install 時のインストールも回避することができます。
こちらはGemfile.lockに変更が反映されるので、push時のチェックに指定します。
- script:
        title: Bundle Install
        inputs:
        - content: |-
            bundle install --path vendor/bundle
- cache-push:
        inputs:
        - cache_paths: |-
           #以下の二つをcache_pathに追加
           $GEM_CACHE_PATH -> ./.ruby-version #公式ドキュメント↑の環境変数
           ./vendor -> ./Gemfile.lock #gemのインストール先ディレクトリを指定
+ bundle install --path vendor/bundle
Using rake 13.0.1
Using CFPropertyList 3.0.1
...
Using xcprofiler 0.6.3
Bundle complete! 9 Gemfile dependencies, 109 gems now installed.
Bundled gems are installed into `./vendor/bundle`
これにより bundle install を90%ほど短縮することができました。
+---+---------------------------------------------------------------+----------+
| ✓ | Bundle Install                                                | 50.90 sec|
+---+---------------------------------------------------------------+----------+
+---+---------------------------------------------------------------+----------+
| ✓ | Bundle Install                                                | 5.07 sec |
+---+---------------------------------------------------------------+----------+
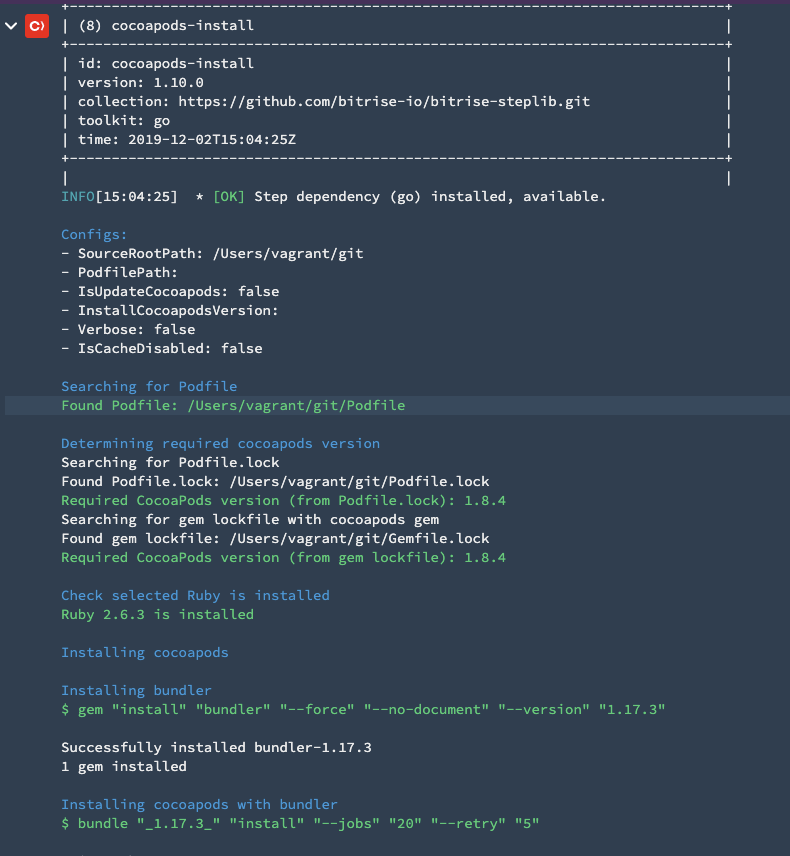
CocoaPods
公式ドキュメント -Caching Ruby Gemsでは下記のような方法の記載があります。
Before you start, make sure you have the latest version of the Cocoapods Install Step in your Workflow.
- Open your app’s Workflow Editor.
- Insert the Cache:Pull Step after the Git Clone but before the Cocoapods Install Steps.
IMPORTANT: Make sure that your Step is version 1.0.0 or newer. With the older versions, you have to manually specify paths for caching. - Insert the Cache:Push step to the very end of your workflow.
Bitrise公式が用意した Cocoapods Install を指定するだけでよしなにやってくれるそうですが、
個人的には公式のステップでは、
ログを確認すると、実行時に
- Check selected Ruby is installed
$ gem install bundler --forcebundle installpod install
と複数の作業をしてくれてるのですが、 前ステップの工程と被っている部分があります。
なので、 bundle exec pod install 単体を利用しています。
正しいbundle, rbenvがステップ以前にインストールされていれば、
Podsファイルをキャッシュパスに指定し、Podfile.lockをチェックするだけで短縮できます。
- script:
        inputs:
        - content: |-
            bundle exec pod install
        title: CocoaPods Install
- cache-push:
        inputs:
        - cache_paths: |-
        ./Pods -> ./Podfile.lock ##キャッシュパスに追加
高速化前のフローでは毎回 --repo-update オプションを指定していましたが、シチュエーションを絞ったり、
常に有効なCocoaPodsのキャッシュがある状態にしておくことで、85%ほど短縮することができました。
+---+---------------------------------------------------------------+----------+
| ✓ | CocoaPods Install                                             | 4.1 min  |
+---+---------------------------------------------------------------+----------+
+---+---------------------------------------------------------------+----------+
| ✓ | CocoaPods Install                                             | 38.11 sec|
+---+---------------------------------------------------------------+----------+
+ bundle exec pod install
Using FBSDKCoreKit
Using FirebaseDynamicLinks
Using Crashlytics
Using FirebaseCoreDiagnosticsInterop
Using FirebaseCore
Using GoogleDataTransport
Using GoogleDataTransportCCTSupport
・・・
さらなる高速化するために
高速化前のサマリーを見たときに一番目につくのが Fastlane Test の部分です。
+---+---------------------------------------------------------------+----------+
| ✓ | Fastlane Test                                                 | 19.0 min |
+---+---------------------------------------------------------------+----------+
このステップには
- アプリのビルド
- テスト
- Danger
- Slackへの通知
が含まれています。
この部分をキャッシュを使って高速化する手段はないのでしょうか?
cocoapods-binary
残念ながら、現在BitriseはXcodeのビルドキャッシュには対応していませんが、
cocoapods-binary を使った CocoaPodsの_Prebuild であればキャッシュすることができます。
参考: https://github.com/leavez/cocoapods-binary
導入方法は省略しますが、
./Pods/_Prebuild (Pods下なので追加のキャッシュパスの指定なし)
をキャッシュすることで、Podsのビルドを毎回する必要がなくなるため、
大幅にCI上でのビルド時間を短縮することができました。
30%の改善ですが、5.4mと短縮できた時間はここが一番大きかったです。
+---+---------------------------------------------------------------+----------+
| ✓ | Fastlane Test                                                 | 19.0 min |
+---+---------------------------------------------------------------+----------+
+---+---------------------------------------------------------------+----------+
| ✓ | Fastlane Test                                                 | 13.6 min |
+---+---------------------------------------------------------------+----------+
最後に
今回はBitriseのキャッシュをできるだけ生かして高速化できるポイントを紹介しました。
しかし、忘れてはならないのは、キャッシュを保管し、利用することは、どこかで不整合が起きるリスクを必ず孕んでいるということです。
Bitriseのキャッシュのログをみると、Pullする前にStackが同一であることを確認してくれてます。
+------------------------------------------------------------------------------+

| (4) cache-pull                                                               |
+------------------------------------------------------------------------------+
| id: cache-pull                                                               |
| version: 2.1.2                                                               |
| collection: https://github.com/bitrise-io/bitrise-steplib.git                |
| toolkit: go                                                                  |
| time: 2019-12-02T15:03:01Z                                                   |
+------------------------------------------------------------------------------+
|                                                                              |
Config:
- CacheAPIURL: [REDACTED]
- DebugMode: false
- StackID: osx-xcode-11.2.x
Downloading remote cache archive
Checking archive and current stacks
current stack id: osx-xcode-11.2.x
archive stack id: osx-xcode-11.2.x
Extracting cache archive
Done
しかし、 ライブラリのアップデート時にキャッシュを破棄する 等のTTLを設ける。
いつでもキャッシュを更新、無効にする方法を用意しておく等の対策は必要です。
今回の実装で、キャッシュに頼りつつも、依存しすぎない関係を築くことが大事だなあと感じました。
参考
- Bitrise 公式ドキュメント
- github.com/onmyway133/blog - How to cache CocoaPods #196
- Qiita - Bitriseで gemとbrewのキャッシュ
- [Sansan Builders Box - Bitrise のキャッシュを利用して、全体のビルド時間を 25% 高速化した話] (https://buildersbox.corp-sansan.com/entry/2019/08/01/105317)
- github.com/leavez/cocoapods-binary