かーねる・う゛いえむにっき
FreeBSD 10.0-RELEASEのBHyVeでUbuntu 13.10をインストールしてみよう
http://d.hatena.ne.jp/syuu1228/20140124/1390556359
にあった、FreeBSDのハイパーバイザBHyVeでubuntu server 13.10を動かしてみました。
嵌ったのは以下の点
有線NICではUbuntuからもLAN環境が使えるのに、無線NICだと使えない。
これは辛いorz
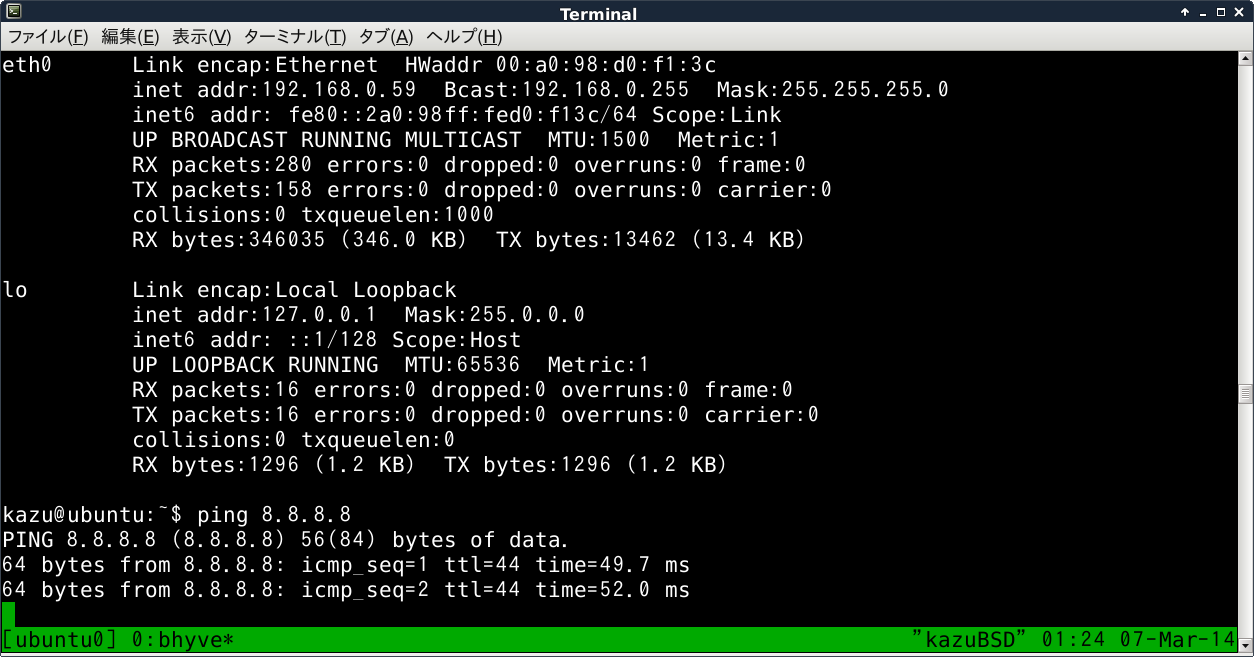
有線NICだとかーねる・う゛いえむにっきで紹介されている通りの手法でインストールから起動まで何の問題もなく使えます。USBとかGUIが使えないってのはBHyVeの開発状況の現時点では仕方ないとして。
ただ、ノートPCにちょっと試そうと思って入れるとwifi環境でネット周りを構築しているのが殆どだと思いますのでこれは辛い。
そこで、調べてみると、wifiだと
http://wiki.openwrt.org/doc/howto/clientmode#solution.using.wds
だったり
https://twitter.com/hirochikasai/status/441611038593908736
という事で、MACアドレスの問題からbridgeではどうも通してくれそうにありません。
そこで、https://twitter.com/syuu1228/status/441549349500092417
の提案を貰ったのでこのさい、tap(仮想NIC)にNATするのであれば、DHCPもDNSも設定して何の手動設定もなくUbuntuをインストールしようと思い以下を実施。
1)rc.confファイルで以下を記載
#NAT settting
firewall_enable="YES"
firewall_type="OPEN"
natd_enable="YES"
natd_interface="wlan0" #ここは自分の環境に合わせて、ルーターに繋がっているデバイスを指定
gateway_enable="YES"
cloned_interfaces="tap0"
ifconfig_tap0="up"
ifconfig_tap0="inet 192.168.0.1/24 up" #ここも自分の環境に合わせてアドレスを指定
dnsmasq_enable="YES"
2)DHCPとDNSをサービスするのにdnsmasqを使う
pkg install dnsmasq にてサービスをインストール。
cd /usr/ports/dns/dnsmasq
make install clean でもOKですが、ビルド面倒だったので、pkgでインストールしています。
3)dnsmasq.conf で必要なDHCPリース関連とDNS関連を設定
$ diff -u /usr/local/etc/dnsmasq.conf.example /usr/local/etc/dnsmasq.conf
変更した場所は以下の4点だけ。
--- /usr/local/etc/dnsmasq.conf.example 2013-12-13 17:22:08.000000000 +0900
+++ /usr/local/etc/dnsmasq.conf 2014-03-07 00:23:32.000000000 +0900
@@ -43,7 +43,7 @@
If you don't want dnsmasq to read /etc/resolv.conf or any other
file, getting its servers from this file instead (see below), then
uncomment this.
-#no-resolv
+no-resolv
Add other name servers here, with domain specs if they are for
non-public domains.
-#server=/localnet/192.168.0.1
+server=8.8.8.8
specified interfaces (and the loopback) give the name of the
interface (eg eth0) here.
Repeat the line for more than one interface.
-#interface=
+interface=tap0
-#dhcp-range=192.168.0.50,192.168.0.150,12h
+dhcp-range=192.168.0.50,192.168.0.150,12h
4)bhyve-scriptフォルダに生成したubuntu0のスクリプトファイルから以下を変更
echo "vmboot: Starting Networking. "File Exists" warnings are okay."
#ifconfig "tap$VMID" down
#ifconfig "tap$VMID" destroy
ifconfig "tap$VMID" create
#ifconfig "bridge$BRIDGE" addm "tap$VMID" addm "$NIC" up
上記のようにコメントアウト(717行目~721行目)
722行目 ifconfig "tap$VMID" up を以下に変更
ifconfig "tap$VMID" inet 192.168.0.1/24 up
このIPアドレスは上記rc.confとdnsmasq.confのアドレスと合わせる。
5)以下をコメントアウト
if [ ! "$( ifconfig -l | grep -o "bridge$BRIDGE" )" = "bridge$BRIDGE" ]; then
echo "if_tap, bridgestp and if_bridge kernel modules are not loaded."
echo "Loading..."
kldload if_tap
kldload bridgestp
kldload if_bridge
echo "Creating the "bridge$BRIDGE" network interface."
ifconfig "bridge$BRIDGE" create
ifconfig "bridge$BRIDGE" up
fi
1148行~1158行
6)一旦reboot
後は、bhyve-scriptフォルダで、sh ubuntu0 start とすればイケると思います。
NATをブリッジに設定するとかの方が良いかも知れません。複数のVMを立ち上げる場合には。現状ではtap0に直接NATしているのと、dnsmasqも直接tap0ですので、複数立ち上げる場合は接続が不可能です。
2週間ほどドハマリしたので、備忘録としてあげときますw