monoというライブラリを使うことで、RaspberryPi上で.NETアプリを実行できるらしい。
なのでMQTTでLチカさせてみました。
Brokerはsango使わせてもらっています。凄いおすすめです。
(1ヶ月前からちまちまやってたので古い内容も混ざっているかもしれません)
RaspberryPiへmonoのインストール
こちらを参考にさせていただきました。
http://blog.shibayan.jp/entry/20150222/1424607212
2015/6/11時点ではMonoのVersionは4.0.1になっているようですね 今はもっと新しいかも
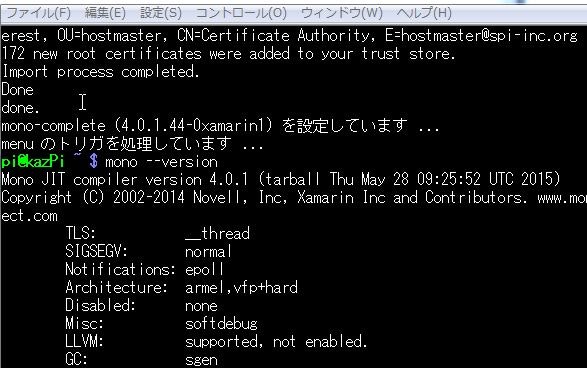
↑インストール後の図(6月11日時点)
RaspberryPi上で実行するアプリケーション作成
VS2015を使って作りました。
GPIOを触るライブラリはあまりイケてないのが多く探すのが大変でしたが、最終的にRaspberryPiDotNetを使うことにしました。
導入に一手間あるので、しっかり説明を読んで導入して下さい。
以下のような感じのコンソールアプリケーション
using System;
using System.Text;
using uPLibrary.Networking.M2Mqtt;
using uPLibrary.Networking.M2Mqtt.Messages;
using RaspberryPiDotNet;

namespace MqttServerPi
{
    class Program
    {
        static GPIOMem led;
        static void Main(string[] args)
        {
            var mqttClient = new MqttClient("lite.mqtt.shiguredo.jp", 1883, false, null);
            string clientId = Guid.NewGuid().ToString();
            mqttClient.Connect(clientId, "your_username" , "your_password" );
            mqttClient.MqttMsgPublishReceived += onReceive;
            mqttClient.Subscribe(new string[] { "your_topic/#" },
                                 new byte[] { MqttMsgBase.QOS_LEVEL_AT_MOST_ONCE });
            led = new GPIOMem(GPIOPins.V2_GPIO_21);
            led.Write(PinState.Low);
            while (!Console.KeyAvailable)
            {
                ;
            }
            Console.ReadKey();
        }
        static private void onReceive(object sender, MqttMsgPublishEventArgs e)
        {
            string[] topic = e.Topic.Split('/');
            string msg = Encoding.UTF8.GetString(e.Message);
            if (topic.Length < 2)
            {
                return;
            }
            if (topic[1].CompareTo("LED") == 0)
            {
                if (msg.CompareTo("ON") == 0)
                {
                    led.Write(PinState.High);
                }
                else if(msg.CompareTo("OFF") == 0)
                {
                    led.Write(PinState.Low);
                }
            }
            Console.WriteLine(e.Topic);
            Console.WriteLine(msg);
        }
    }
}
これをビルドした後、「bin/Debug以下に生成された全てのファイル」をWinSCPなどを用いてRaspberryPiに送ります。
LED ON/OFF指示のためのWindowsアプリケーション作成
VS2015。
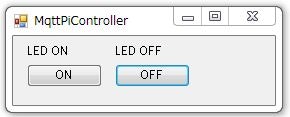
↑こんな感じ。
using System;
using System.Text;
using System.Windows.Forms;
using uPLibrary.Networking.M2Mqtt;
using uPLibrary.Networking.M2Mqtt.Messages;
namespace MqttPiCtrlApp
{
    public partial class Form1 : Form
    {
        MqttClient mqttClient;

        public Form1()
        {
            InitializeComponent();
            mqttClient = new MqttClient("lite.mqtt.shiguredo.jp", 1883, false, null);
            string clientId = Guid.NewGuid().ToString();
            mqttClient.Connect(clientId, "your_username", "your_password");
        }

        private void buttonLEDOn_Click(object sender, EventArgs e)
        {
            mqttClient.Publish("your_username/LED",
                                Encoding.UTF8.GetBytes("ON"),
                                MqttMsgBase.QOS_LEVEL_AT_MOST_ONCE, false);
        }

        private void buttonLEDOff_Click(object sender, EventArgs e)
        {
            mqttClient.Publish("your_username/LED",
                                Encoding.UTF8.GetBytes("OFF"),
                                MqttMsgBase.QOS_LEVEL_AT_MOST_ONCE, false);
        }
    }
}
実行
RaspberryPiでは、SCPなどで送ったアプリケーションの.exeを実行しておきます。
Windowsアプリケーションを起動して、ONやOFFボタンを押してみると、Pi側のアプリケーションが以下のようにイベントを拾います。
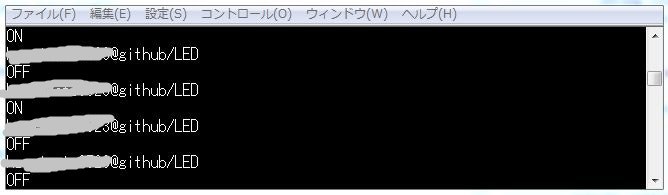
"your_username/LED"のトピックに、"ON"/"OFF"のメッセージが来ると、GPIO21がHigh/Lowします。
GPIO21に220Ω+LEDをつなぐと見事ON/OFFしました。
(一応:PiのGPIOはHigh=3.3Vですので3.3Vで光るLEDを使いましょう)
今回はGPIOまででしたが今後はシリアル出せるようにしたいですね~
帰宅前に家のエアコンつけておきたいんですよねェ