はじめに
こんにちは、株式会社ベーシックの川上です。今回GCPのSecretManagerを使用することがありましたので、SecretManagerの作成と、CloudRun上で実行しているASP.NETCoreアプリケーションからSecretManagerを参照した手順をまとめておこうと思います。
SecretManagerとは
SecretManagerとはAPIキーやパスワードなどの機密情報を管理するためのサービスです。
SecretManagerを利用することで、アプリケーション側で機密情報を保持する必要がなくなるため、セキュリティが高くなります。
Google Cloudで使用する機密データ(API キー、パスワード、証明書)を保存するための安全で便利なストレージシステムです。管理したい値を「シークレット」と呼び、一元的に管理、アクセス、監査することが可能になります。シークレットのデータは不変で、バージョンに対して操作を行います。
アプリケーション側では保持したくない機密情報を、GCP側でセキュアに管理することができるサービスです。
機密情報として扱いたい値が多数ある場合、それらをまとめて管理することができ、アクセス管理にかかる工数を削減できます。
アプリケーション側は機密情報を参照するだけでよくなります。
シークレットの作成
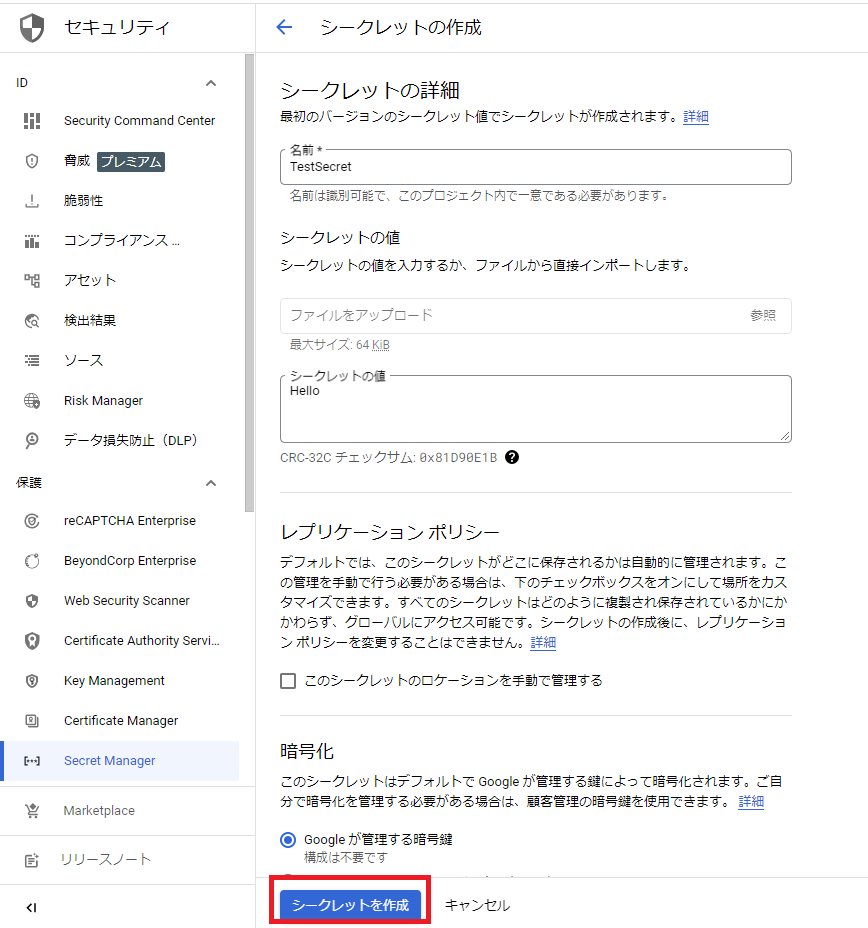
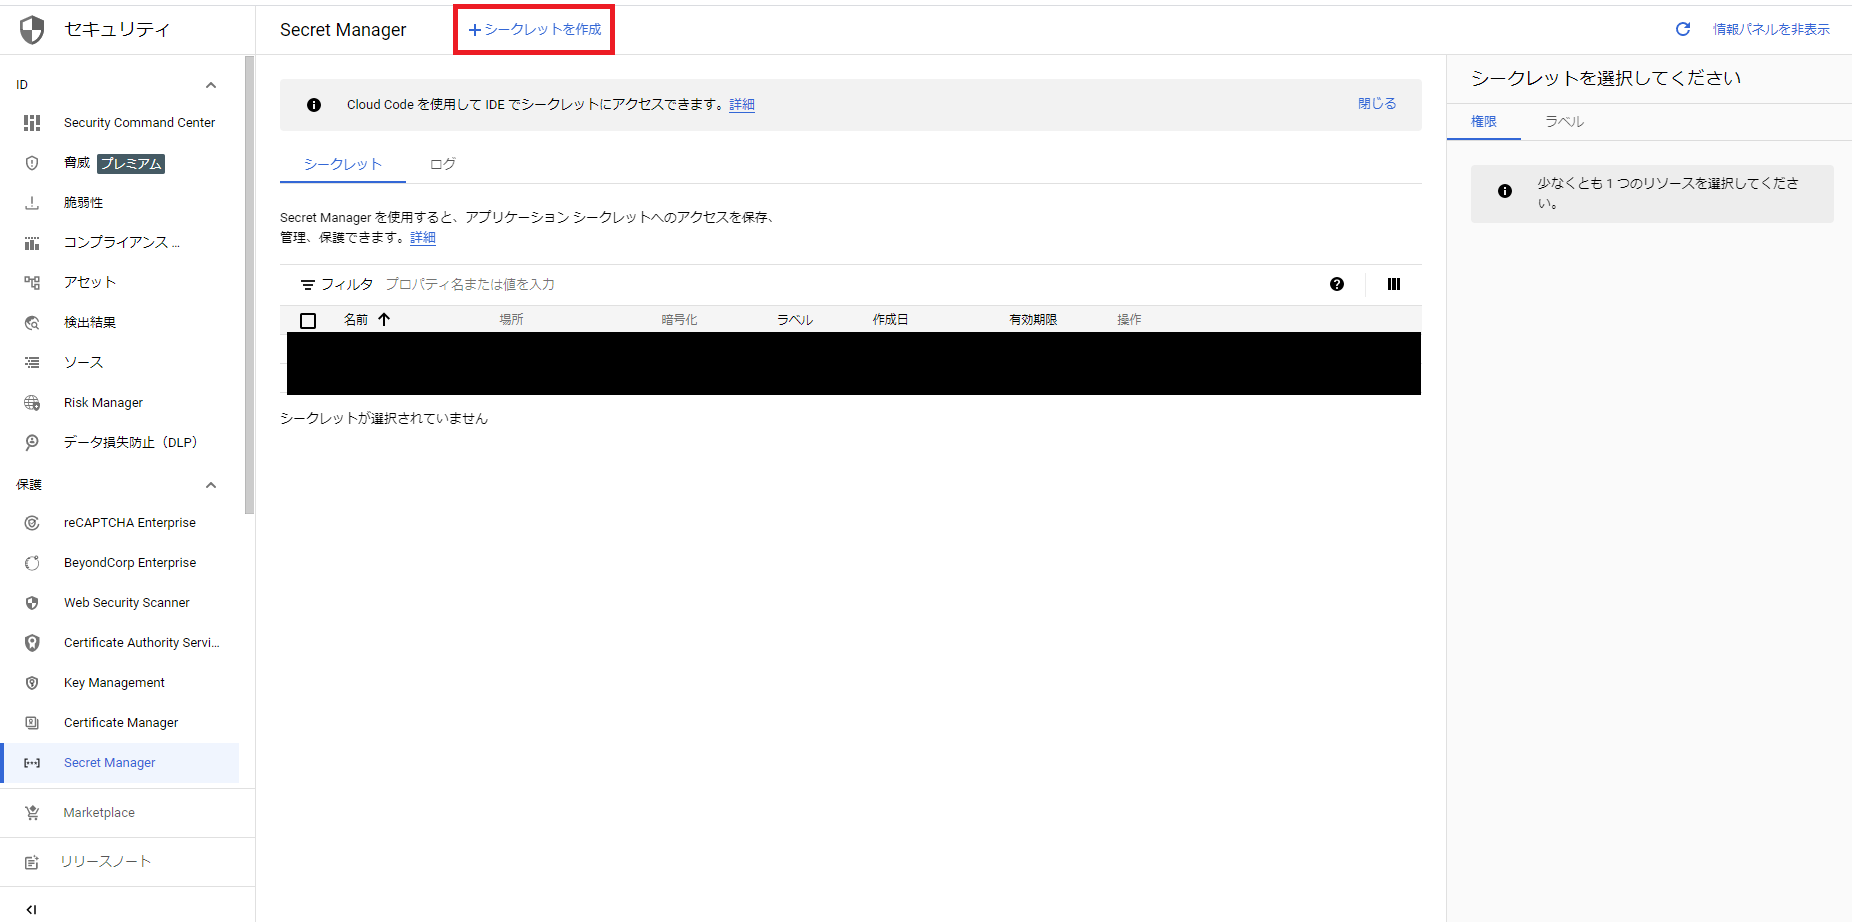
シークレットの作成は、「セキュリティ」=> 「SecretManager」=> 「シークレットの作成」から行います。
シークレットの値は直接入力か、ファイルインポートすることができます。
今回はテスト用の適当な値を入力しておきました。

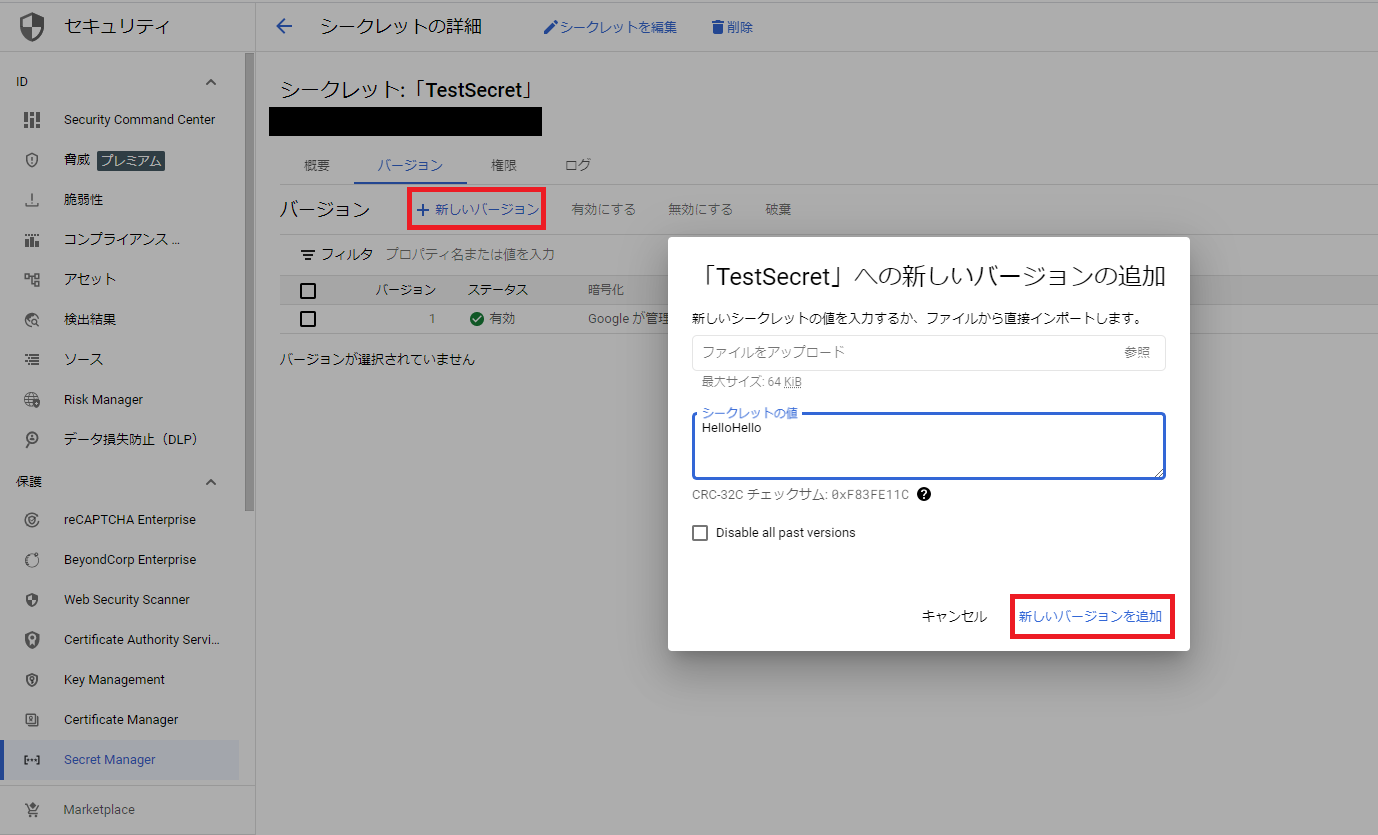
最初に作成したSecretはバージョン1で作成されます。今回はバージョン2のSecretも作成しておきます。
別バージョンのSecretの追加は「新しいバージョン」から値を入力して作成します。
サンプルプログラム
- 単純にSecret名とバージョンを指定して、取得してきたSecretの値を返却するだけのプログラムです。
- Google.Cloud.SecretManager.V1のver2.0.0を使用しています。
using Google.Apis.Auth.OAuth2;
using Google.Cloud.SecretManager.V1;
using System;
using System.Text;

namespace ~~~~~
{
    public class SecretManagerService
    {
        /// <summary>SecretManagerServiceクライアント</summary>
        private SecretManagerServiceClient SecretManagerClient { get; set; }

        private readonly string _projectId;

        public SecretManagerService()
        {
            SecretManagerClient = SecretManagerServiceClient.Create();
            _projectId = Environment.GetEnvironmentVariable("ProjectId");
        }

        public string GetSecret()
        {
            AccessSecretVersionResponse result = null;
            try
            {
                SecretVersionName secretVersionName = new SecretVersionName(_projectId, "TestSecret", "1");
                result = SecretManagerClient.AccessSecretVersion(secretVersionName);
            }
            catch (Exception ex)
            {
                Console.WriteLine($"SecretManagerへのアクセスで例外が発生しました。: {ex}");
            }
            // ペイロードはデフォルトではバイトのため、文字列に変換して返却する
            return result.Payload.Data.ToStringUtf8();
        }
    }
}
より安全に機密情報を管理する
今回は使用していませんが、SecretManagerについて調査しているとより安全な使用方法が記載されていたので、将来的に使用することも考慮してメモしておこうと思います。
Cloud IAMを使用した明示的な権限の付与
SecretManagerへのアクセスは初期状態ではプロジェクトオーナーのみとなっています。Cloud IAMを利用することで、シークレットへのアクセス許可を明示的に付与することができます。
Cloud Loggingとの併用
SecretManagerはCloud Loggingを利用することで、より安全に利用できます。SecretManagerとのやりとりをすべて監査ログに記録することで、異常なアクセスパターンを検知した場合にはアラートを発生させ、指定したユーザーに通知します。
以上のサービスを利用することで、より安全にアプリの機密情報を管理することができます。今回はGCPのSecretManagerに焦点を当てましたが、今後もGCPテーマの記事を投稿する予定です。


