概要
Swiftにおける画面構築の方法として、UICollectionViewを用いた方法があります。UICollectionViewを用いた画面構築では、UICollectionViewLayoutやUICollectionViewCellRegistration、NSDiffableDataSourceなどを駆使して画面のレイアウトや表示するUIViewを登録します。
さて、私は2023年の4月から本格的にUICollectionViewを用いた画面構築を始めたのですが、何度も挫折しそうになりながらも12月まで勉強を続けています。本記事では、私がUICollectionViewによる画面構築を始めてから学んだことをまとめます。また、本記事では記載する内容は基礎の情報のみに留めています。これからUICollectionViewを勉強する方々の助けになればと思います。
目次
1.SectionとItem
2.UICollectionViewLayout
3.UICollectionView.CellRegistration
4.NSDiffableDataSourceSnapshot
1. SectionとItem
UICollectionViewで画面を構築する場合には、まず、SectionとItemについて、考える必要があります。SectionはUICollectionView内での大きなグループ分けを表し、Itemはそれぞれのグループ内における個々の要素を示します。例えば、次のようなユーザ設定画面で考えてみましょう。
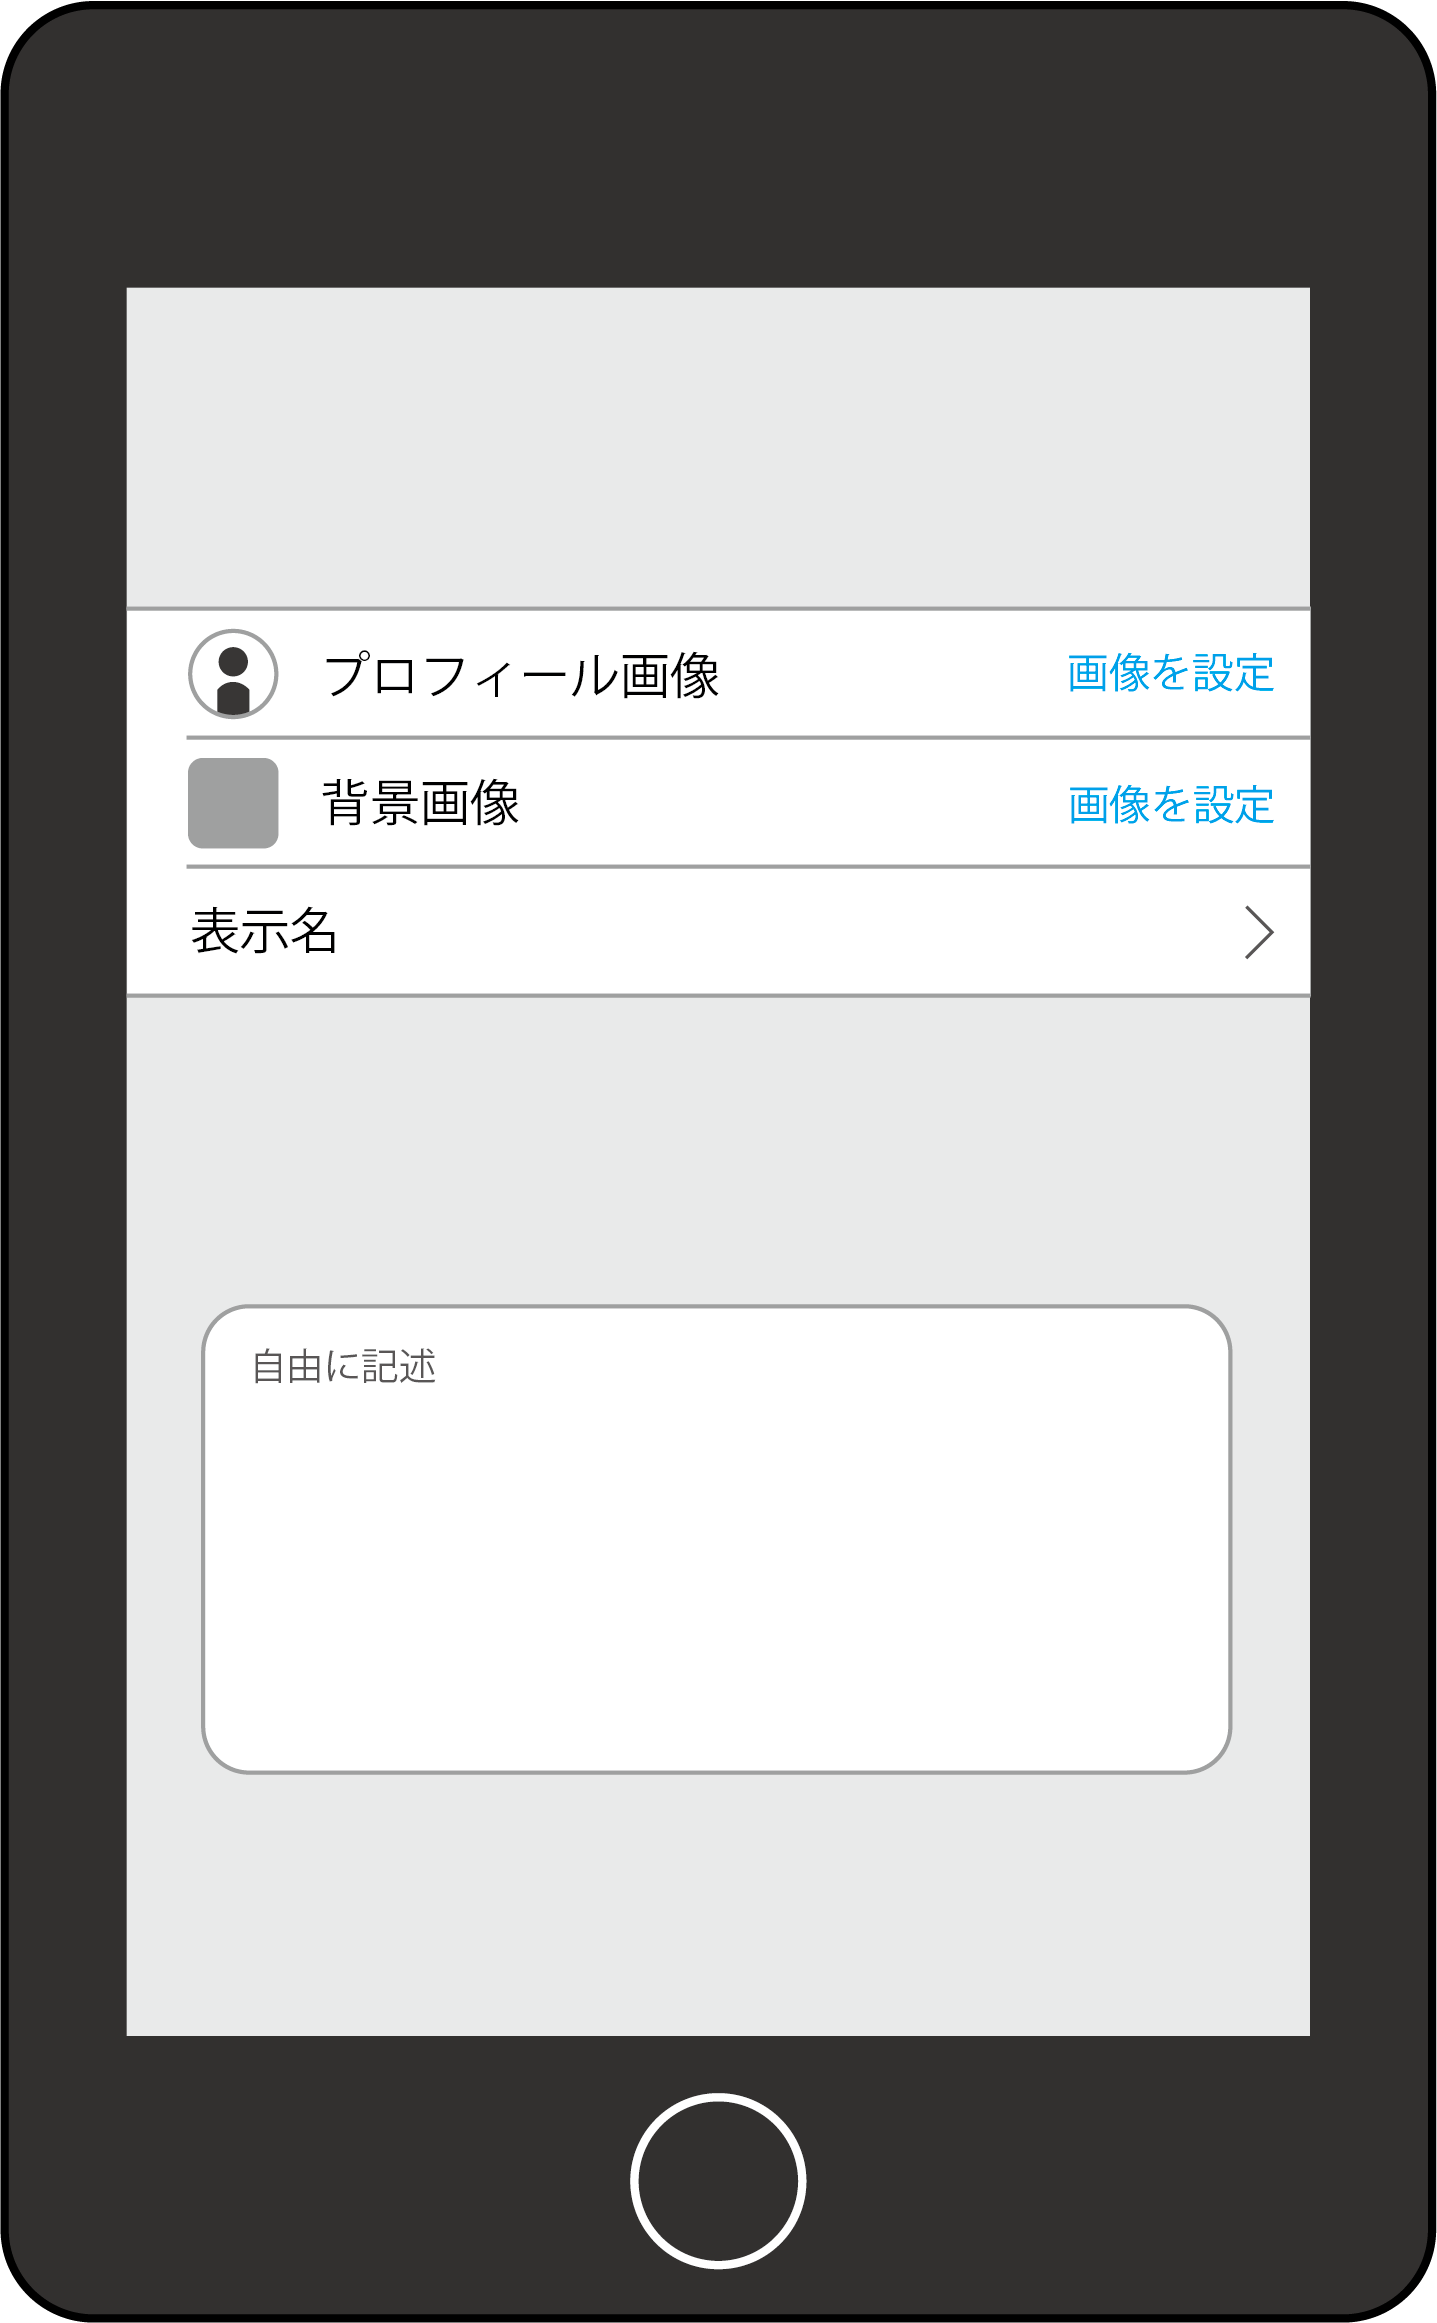
この画面をUICollectionViewで作る場合、SectionとItemは以下のようにするのがいいかと思います。
enum Section: Hashable {
    case profile, userDescription
}

enum Item: Hashable {
    case profileImage, backgroundImage, name, userDescription
}
このSectionとItemは画面を以下の画像のように考えて、定義しました。
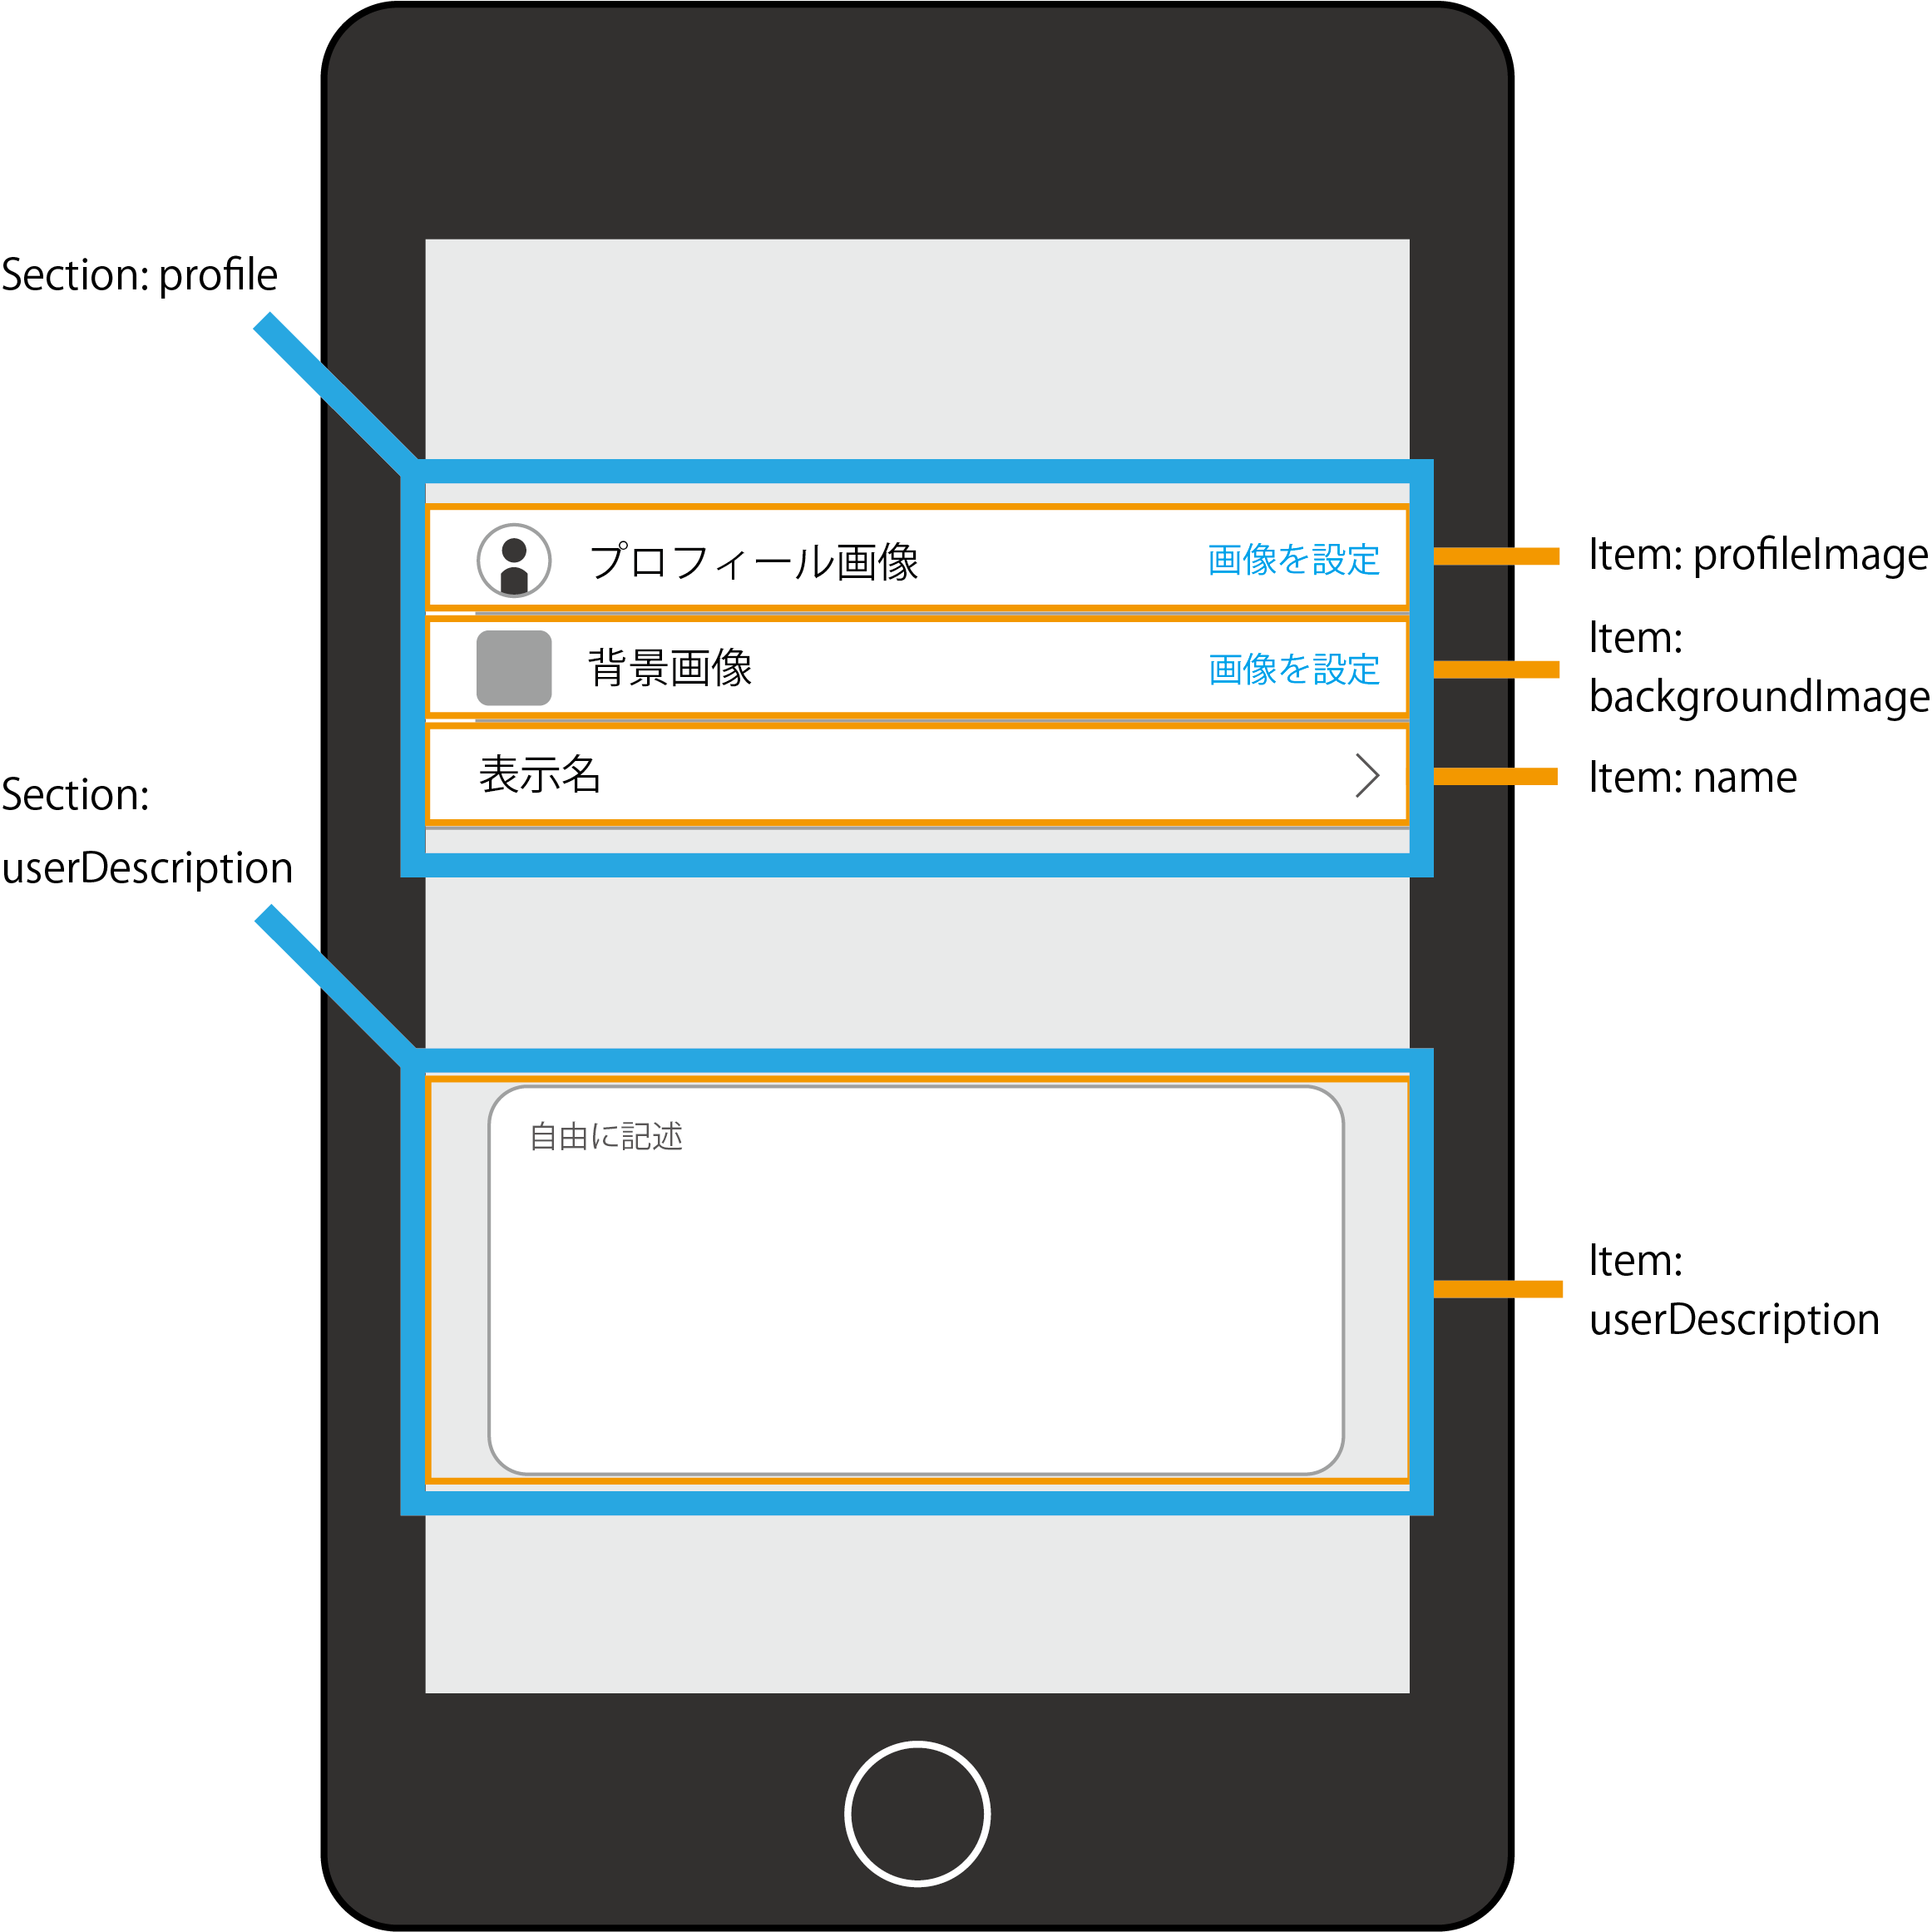
注意する点としては、SectionおよびItemはHashableに準拠する必要があるという点です。上記の例では、Hashableを使用していますが、Intや、CaseIterableも使用できます。また、enumはそもそもHashableなので、何もつけなくても大丈夫です。IntやCaseIterableについては使用する状況に応じて使い分けてください。
2. UICollectionViewLayout
続いて、Sectionに応じたレイアウトを定義します。
private var collectionViewLayout: UICollectionViewLayout {
        UICollectionViewCompositionalLayout { [weak self] sectionIndex, layoutEnvironment in
            guard let self = self else { return nil }
            let sectionType = self.dataSource.snapshot().sectionIdentifiers[sectionIndex]
            switch sectionType {
            case .profile:
                var configuration = UICollectionLayoutListConfiguration(appearance: .grouped)
                configuration.showsSeparators = true
                configuration.backgroundColor = .mainBackground
                let section = NSCollectionLayoutSection.list(
                    using: configuration,
                    layoutEnvironment: layoutEnvironment
                )
                section.contentInsets = .init(top: 0, leading: 0, bottom: 0, trailing: 0)
                return section
            case .userDescription:
                var configuration = UICollectionLayoutListConfiguration(appearance: .grouped)
                configuration.showsSeparators = false
                configuration.backgroundColor = .mainBackground
                configuration.headerMode = .supplementary
                let section = NSCollectionLayoutSection.list(
                    using: configuration,
                    layoutEnvironment: layoutEnvironment
                )
                return section
            }
        }
    }
上記では、.profileと.userDescriptionのそれぞれでレイアウトを定義しています。
上記の例では、UICollectionLayoutListConfigurationとNSCollectionLayoutSectionを使用してレイアウトを定義していますが、NSCollectionLayoutGroupやNSCollectionItemを利用すれば、グループの単位やアイテムの単位で、より細かくレイアウトを設定できます。
3. UICollectionView.CellRegistration
続いて、SectionとItemに応じて、表示するCellを決定します。
// Itemが.profileImage, .backgroundImageの時にProfileImageCellを設定
let profileImageCell = UICollectionView.CellRegistration<ProfileImageCell, Void> { [weak self] (cell, indexPath, _) in
    guard let itemType = self?.dataSource.itemIdentifier(for: indexPath) else { return }
    switch itemType {
    case .profileImage:
        self?.configureProfileImageCell(cell) // ProfileImageCellに表示する画像のリンクなどセルの設定
    case .backgroundImage:
        self?.configureBackgroundImageCell(cell)
    case .name:
        break
    }
}

// Itemが.nameの時にProfileInfoCellを設定
let profileCell = UICollectionView.CellRegistration<ProfileInfoCell, Void> { [weak self] (cell, indexPath, _) in
    guard
        let self = self,
        let itemType = self.dataSource.itemIdentifier(for: indexPath)
    else { return }
    switch itemType {
    case .name:
        self.configureNameCell(cell)
    case .profileImage, .backgroundImage:
        break
    }
}

// ItemがuserDescriptionの時にProfileTextCellを設定
let textCell = UICollectionView.CellRegistration<ProfileTextCell, Void> { [weak self] (cell, indexPath, _) in
    self?.configureTextCell(cell, indexPath: indexPath)
}

// 各Itemのcaseで登録するセルを定義する
self.dataSource = .init(collectionView: collectionView, cellProvider: { collectionView, indexPath, item in
    switch item {
    case .profileImage:
        return collectionView.dequeueConfiguredReusableCell(using: profileImageCell, for: indexPath, item: ())
    case .backgroundImage:
        return collectionView.dequeueConfiguredReusableCell(using: profileImageCell, for: indexPath, item: ())
    case .name:
        return collectionView.dequeueConfiguredReusableCell(using: profileCell, for: indexPath, item: ())
    case .userDescription:
        return collectionView.dequeueConfiguredReusableCell(using: textCell, for: indexPath, item: ())
    }
})
上記のプログラムでは、UICollectionView.CellRegistrationを用いて、使用するセルの定義をします。その後、cellProviderを用いてItemに応じて登録するCellを返しています。上記の例では、Itemが.profileImageと.backgroundImageの時profileImageCellを返しており、.nameのとき、profileCellを返します。また、.userDescriptionの時にはtextCellを返します。ここで、上記の例におけるCellのViewやconfigureProfileImageCellなどのセル設定用の関数は本記事では割愛させていただきます。表示したいViewや内容に応じて作成してみてください。
4. NSDiffableDataSourceSnapshot
最後にNSDiffableDataSourceSnapshotを用いて表示するセルを追加していきます。
var snapshot = NSDiffableDataSourceSnapshot<ProfileSection, ProfileItemType>()
// 以下でアイテム(セル)を追加
snapshot.appendSections([.profile])
snapshot.appendItems([.profileImage], toSection: .profile)
snapshot.appendItems([.backgroundImage], toSection: .profile)
snapshot.appendItems([.name], toSection: .profile)
snapshot.appendSections([.userDescription])
snapshot.appendItems([.userDescription], toSection: .userDescription)
snapshot.reloadSections([.userDescription])

dataSource.apply(snapshot, animatingDifferences: false)
このコードにより、セクションとアイテムがデータソースに追加され、UICollectionViewに表示されるようになりました。
ここまでがUICollectionViewを用いて、画面を構築するまで大まかな流れになります。他にも、UISupplementaryRegistrationでheaderやfooterを利用したり、SectionをCaseIterableとして、Section.allCasesを使用してSectionを一括で追加したりすることもできます。ぜひ、色々調べて試してみてください!
まとめ
本記事では、UICollectionViewを用いて画面構築を行う場合における基本的な流れについて紹介しました。具体的には、SectionとItem, UICollectionViewLayout, UICollectionView.CellRegistration, NSDiffableDataSourceSnapshotについて紹介しました。今後機会があれば、それぞれの機能について、掘り下げた記事を執筆したいと思います。