はじめに
研究室に転がっていた2種類のDymanixel, MX-106とRX-28を使って遊んでみよう。
実行環境
Ubuntu22.04
ハードウェア
以下のように配線します。
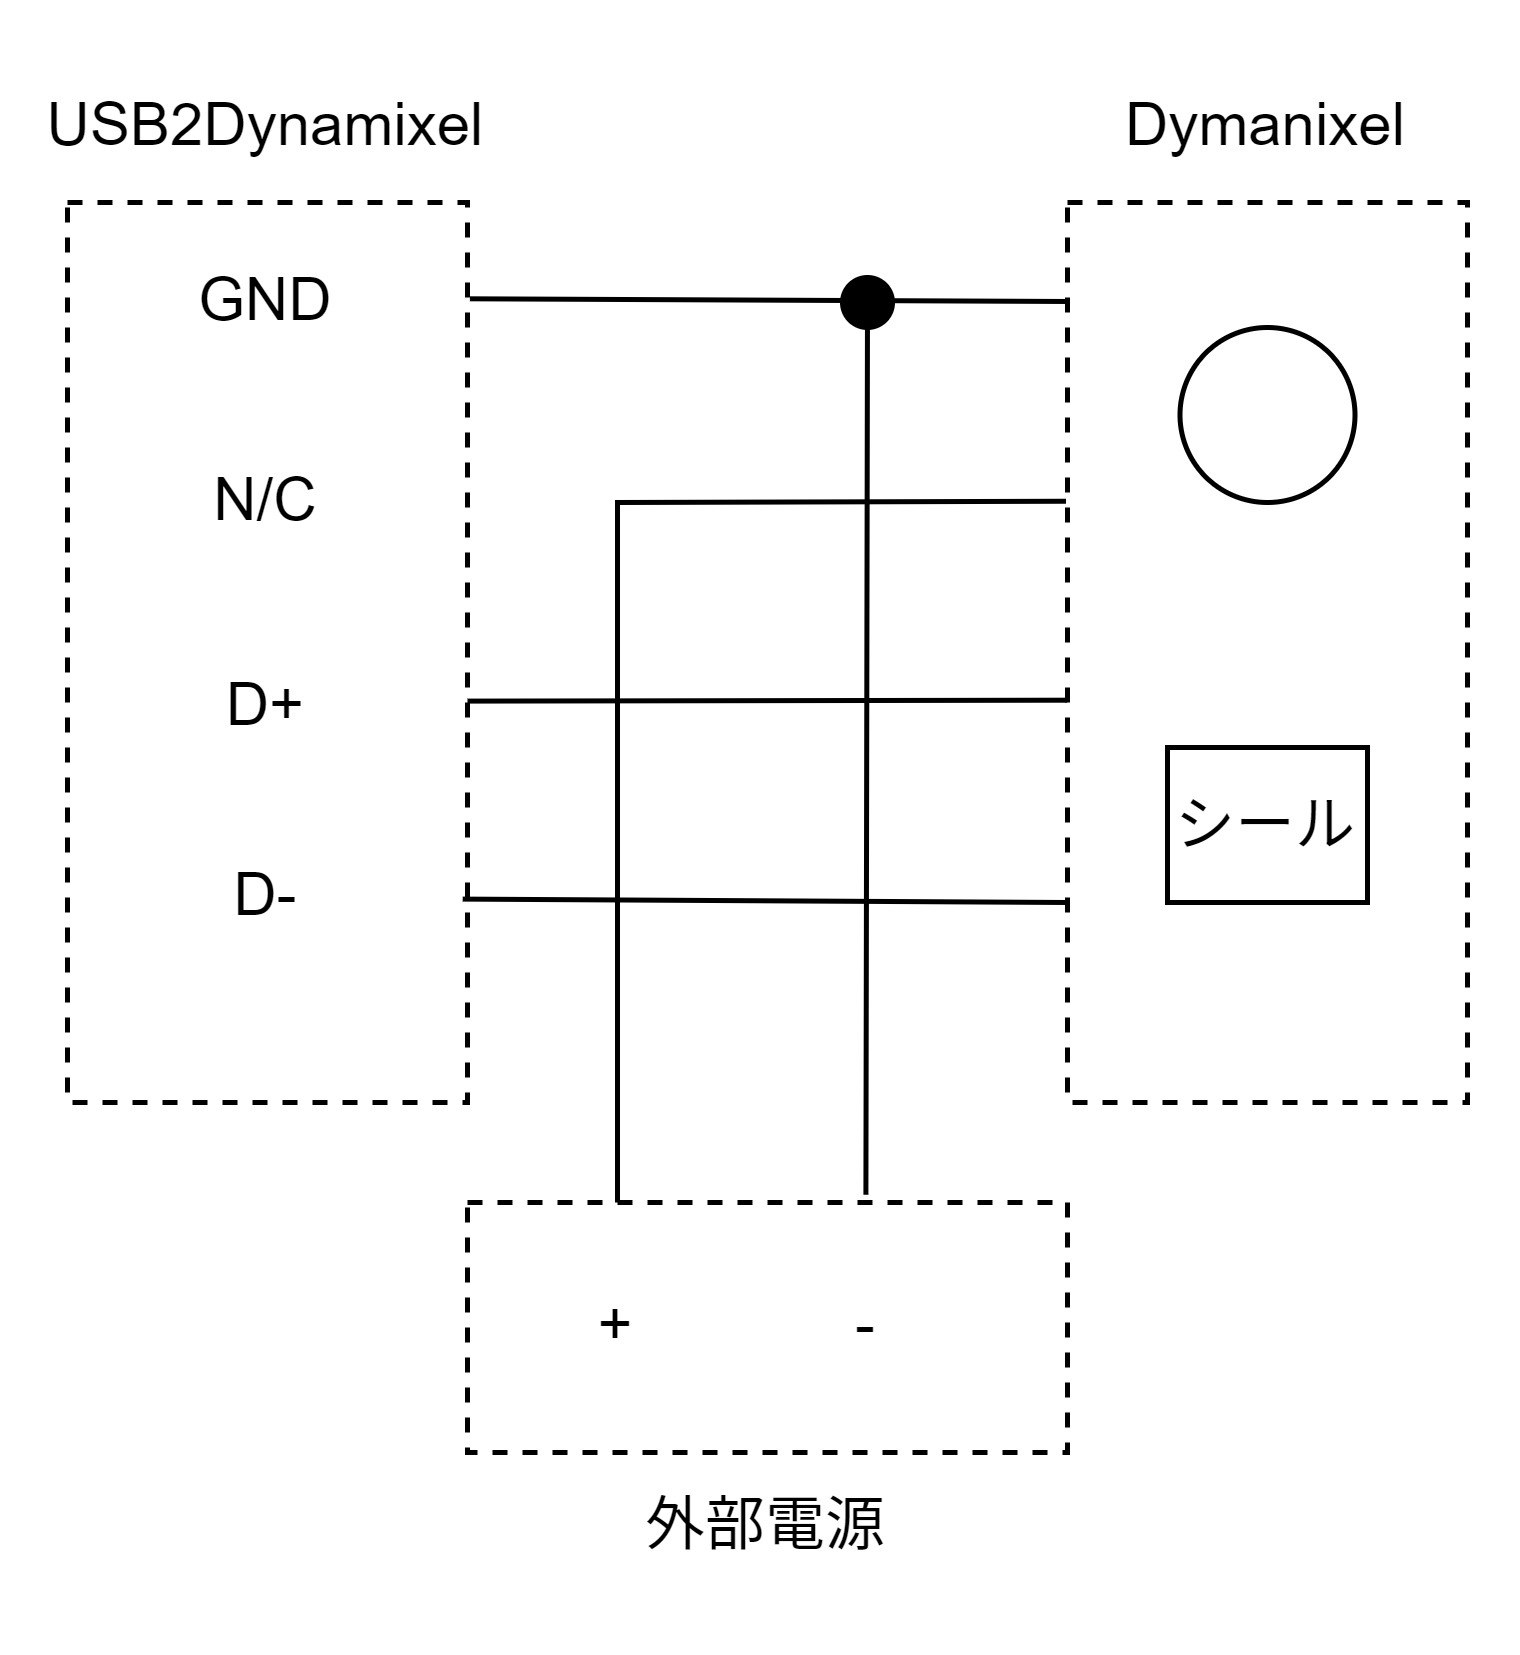
TTL, RS485, RS232からRS485を選択します。
DYNAMIXEL Wizard 2.0
Dynamixelの設定の為にDYNAMIXEL Wizard 2.0をインストールします。<user_name>はユーザ名に変更してください。こちらのページからソフトウェアをダウンロードしてください。
$ sudo chmod 775 DynamixelWizard2Setup_x64
$ ./DynamixelWizard2Setup_x64
$ sudo usermod -aG dialout <user_name>
インストールが終了したら再起動してください。
57600bpsで検索してみましょう。
DYNAMISEL SDK
ではPythonで動かしてみましょう。こちらのGitHubからもってきます。
$ git clone https://github.com/ROBOTIS-GIT/DynamixelSDK.git
$ cd DynamixelSDK/python
$ sudo apt install python3-setuptools -y
$ sudo python3 setup.py install
これでセットアップは完了です。python/tests/protocol*_0/read_write.pyを使ってDynamixelを動かしてみましょう。該当するプロトコルを選んでください。MX-106は1, 2どちらも使えますが、RX-28はプロトコル1しか使えません。DXL_IDをDynamixelのIDに変更してください。今回はMX-106はプロトコル2で動かします。定数を以下のように変更してください。
RX-28について protocol1_0/read_write.py
52 ADDR_MX_TORQUE_ENABLE      = 24
53 ADDR_MX_GOAL_POSITION      = 30
54 ADDR_MX_PRESENT_POSITION   = 36

67 DXL_MINIMUM_POSITION_VALUE  = 0
68 DXL_MAXIMUM_POSITION_VALUE  = 1023
MX-106について protocol2_0/read_write.py
57 # MY_DXL = 'X_SERIES'
58 MY_DXL = 'MX_SERIES'
参考サイト